Since you successfully tested your locally running Fortune Cookie webhook, you are ready to host the webhook on the Microsoft Azure App Service Node.js server:
- Open Command Prompt, type az login, and follow the instructions on the screen.
- Once you've logged in, type az account list to view a list of the accounts that you are managing. If you have multiple accounts, you will need to set the account you want to use using az account set --s put-account-id.
- Create a resource group using az group create --name HenryResourceGroup --location eastus. Resource group is the logical name given to a container that contains multiple services. For example, let's say you created a resource group called myWebApplication, which contains the web server, the database, the file storage, and the virtual network. You can easily view all of the Microsoft Azure resources used by simply going to the myWebApplication resource group. You can also delete all the resources associated with creating myWebApplication.
- Create a Microsoft Azure App Service Plan by using az appservice plan create --name myAppServicePlan --resource-group HenryResourceGroup --sku FREE. Think of an App Service plan as a server cluster that contains the collections of the servers. In your case, you will be creating a collection of Node.js servers that are highly available and redundant.
- Create a Node.js web server using
az webapp create --name henryApp1234 --resource-group HenryResourceGroup --plan myAppServicePlan --runtime"NODE|8.1".
- Create a user that you will use to access the FTP site to deploy the code files with az webapp deployment user set --user-name myusername --password mypassword.
- Let's view all the resources you have created so far. Log in to the Microsoft Azure portal (https://portal.azure.com).
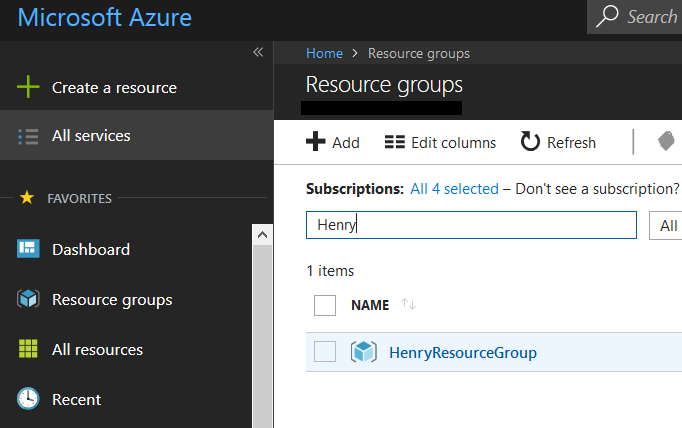
- Click on Resource groups on the right-hand menu and you will be able to see the resource that you just created.
The following image shows the Resource groups:

Resource groups
- Click on the HenryResourceGroup and you will see the henryApp1234 Node.js server created using the Azure CLI.
The following image shows the list of resources under HenryResourceGroup:

List of resources in the resource group
- Click on henryApp1234. henryApp1234 is the Node.js server.
The following screenshot shows the henryApp1234 Node.js server information:

henryApp1234 Node.js server
Take a note of the following properties:
- URL: Dialogflow will use this URL to post requests in order to get fulfillment responses for the Fortune Cookie quotes
- FTP deployment username: The username will be used to log in to the FTP server for the deployment
- FTP hostname: The FTP site address, which you will need to connect to in order to deploy the webhook code
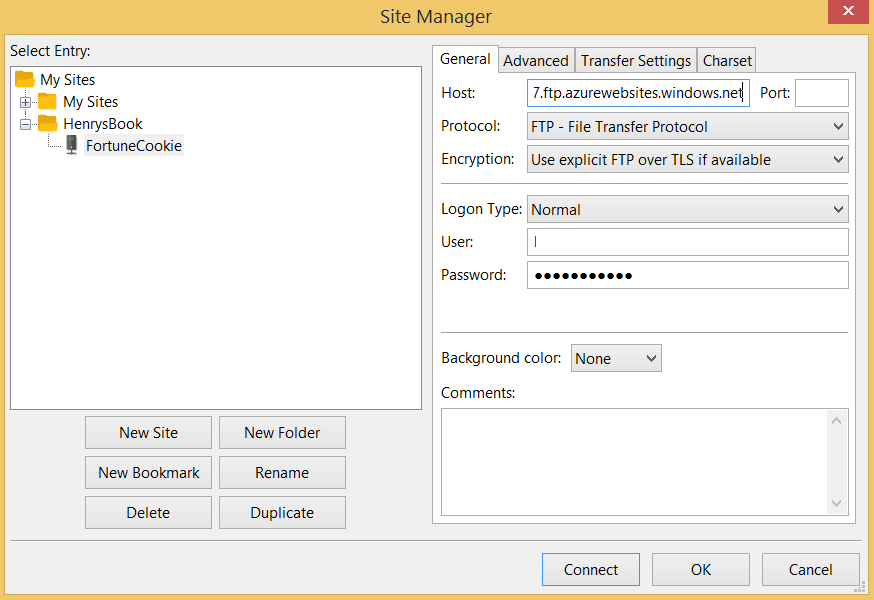
- Open FileZilla and go to File | Site manager.
- Add New Site and enter the Host, the username, the password, and select Use explicit FTP over TLS if available.
The following screenshot shows the FTP configuration for connecting to the Node.js server host in Microsoft Azure:

FTP site configuration connecting to Node.js server in Microsoft Azure
- Click Connect. You will be deploying three files (web.config, server.js, and package.json) to /site/wwwroot.
The following screenshot shows the deployment of three files to the Node.js server via the FTP file manager:

Deploying Node.js files to Microsoft Azure via FTP
- You tested locally by pointing Postman to http://localhost:8000/fortuneCookie. Test with Postman by pointing the URL to https://henryapp1234.azurewebsites.net/fortuneCookie.