This quilt is the largest project you’ll find in this book – but don’t let that put you off. Whether you are a seasoned quilter or yet to dip your toe in the water, this is a beautiful, fun and above all easy project to make.
This single bed-size quilt has many uses – it can be a cape, a tent a landscape, the possibilities are endless. Then again, it could just be something to snuggle up in while sharing your favourite story. You’ll be sewing a timeless, evocative heirloom to be treasured forever.
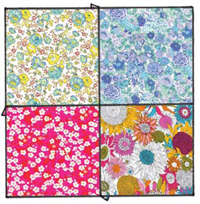
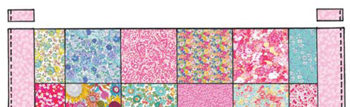
You need 12 of your favourite pink and blue fabrics. By adding some pretty backing fabric this quilt becomes reversible, too!
Wadding (batting): single quilt size or 150 x 240cm (58 x 94in)
Patchwork squares: a fat quarter, 0.25m (1⁄4yd), of each of 12 different fabrics
Backing fabric: 3m (31⁄4yd)
Inner border fabric: 0.5m (1⁄2yd)
Outer border fabric: 1m (1yd)
Binding fabric: 0.25m (1⁄4yd), or 8m (9yd) of ready-made 1.5cm (5⁄8in) or 2cm (3⁄4in) wide bias binding
Patchwork squares: a fat quarter, 0.25m (1⁄4yd), of each of 12 different fabrics
Backing fabric: 4.5m (5yd)
Inner border fabric: 0.75m (3⁄4yd)
Outer border fabric: 1.25m (11⁄2yd)
Binding fabric: 0.32m (1⁄3yd), or 8m (9yd) of ready-made 1.5cm (5⁄8in) or 2cm (3⁄4in) wide bias binding
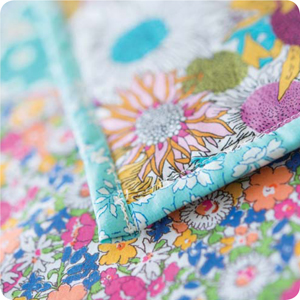
I chose predominantly pink and turquoise fabrics, adding a further couple of fabrics that included these colour plus more colours, such as yellow, green and slightly darker blue. I used four turquoise, six pink and two multicoloured prints. Or you could start by choosing your favourite multicoloured fabric and pick another 11 fabrics based on the colours in that fabric.


If the bed you are making the quilt for has a foot board, you may wish to make a shorter quilt. Leave out 12 squares, that is to say one of the blocks described in step 5, below. This will give a finished quilt size of 137 x 198cm (54 x 78in).
All seam allowances are 5mm (1⁄4in) unless otherwise stated.
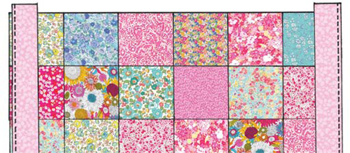
1 With right sides together, sew two squares of different fabric together down one edge.

For speed, use the chain piecing method described in the Techniques section.
2 Open out and press the seam to one side, pressing it towards the darkest fabric. Repeat steps 1 and 2 with all the remaining squares, until you have all 36 sets of squares sewn together.

3 With right sides together, sew two pairs of squares together. Make sure that you always sew two different fabrics together to create a good mix.

4 Open out and press the seam to one side. Repeat with all remaining pairs from step 2. Now you will have 18 sets of four squares joined together. Again, you should aim to have four different fabrics per block.
5 Place a block of four squares on top of another block of four squares, with right sides together, and sew down one edge to make a block of eight squares. Open out and press the seam to one side. Place another block of four squares on top of the four you have just added, with right sides together, and align the short edge. Sew along the short edge. Open out to give a block of two by six squares. Press the seam to one side. Repeat with remaining blocks of four squares. You will now have six lots of blocks of two by six squares.

6 Lay out your six blocks on the floor and arrange as well as you can to achieve a fairly random distribution of different fabrics. Try to avoid having two of the same fabrics next to each other.
Take a photograph, or label each block 1, 2, 3 etc, to help you remember the order before you sew the blocks together.
7 Take one block of two by six squares and place another on top with right sides together. Sew together along the long edge. Open out and press the seam to one side. Sew the next block from step 5 to this new block.

8 Repeat step 7 until all the blocks from step 5 have been sewn together giving you a quilt top of six by 12 squares.

9 Next prepare the inner border. Sew your 9cm (31⁄2in) strips together, short end to short end, placing them right sides together one at a time, to make one very long strip. From this long strip cut off two strips each 120cm (47in) long and two strips each 193cm (76in) long.
10 Lay one of the 193cm (76in) strips on top of your quilt top, right sides together, aligning the long edges and allowing the border to overhang the quilt by about 5cm (2in) at either end. Stitch together. Repeat with the other long inner border strip on the opposite side of the quilt.
This project can be scaled down to make a cot quilt measuring 91.5 x 122cm (36 x 48in). Take 12 different fabrics – you need a 33cm (13in) square of each. Cut four 15.5cm (61⁄2in) squares each to give you a total of 48 squares. Sew them together to give a finished quilt top of six by eight squares. Don’t add a border, just continue from the Layer and Quilt instructions for the Sophie quilt. You’ll need a backing fabric cut to 101.5 x 132cm (40 x 52in) and 4.75m (5yd) of binding.
11 Trim the excess length of border fabric level with the top of the quilt. Open out the border and press the seams to one side. Then trim the excess at bottom of the quilt in the same way.
12 To add the inner border to the top and bottom edges, lay one of your 120cm (47in) strips on top of the quilt, with right sides together, aligning the top edges and stitch together. Repeat at the bottom of quilt. Open out, press the seams to one side. Trim as you did in step 11.

13 Next prepare the outer border. Sew your 15.5cm (61⁄2in) strips, with right sides together, end to end (short ends together) to make one very long strip. From this long strip, cut off two 152.5cm (60in) long strips and two 211cm (83in) long strips.
14 To add the outer border, lay one of the 211cm (83in) strips on top of your quilt, right sides together, aligning the long edges and allowing the border to overhang the quilt by about 5cm (2in) at either end. Stitch together. Repeat with the other long border at the opposite side of the quilt. Open out and press the seam to one side. Trim as in step 11.

15 Next lay one of your 152.5cm (60in) outer border strips on top of your quilt, with right sides together, aligning the edges and stitch together. Repeat at the bottom of the quilt. Open out and press the seams to one side, trim as you did in step 11.

16 Now prepare your quilt backing by joining your backing fabric pieces together. If you are using regular fabric, take two pieces of the backing fabric and place one on top of the other, right sides together, and stitch together along the selvedges (the longest edge). Open out and add the third piece, right sides facing and stitch along the selvedges to make one large piece. Open the seams and press. Trim so that your backing piece measures 150 x 240cm (58 x 94in). If you are using Liberty fabric, stitch your two pieces of backing fabric together, right sides together, along the selvedge using a 1cm (3⁄8in) seam. Press the seam open. Trim so your backing piece measures 150 x 240cm (58 x 94in).
1 Place your quilt backing, right side down, on a flat surface. Place the wadding (batting) on top, smoothing out any bumps, and place your pieced quilt top on top, right side up.
Pull the edges of the quilt backing gently at opposite sides to remove any wrinkles.
2 Smooth all over the top of the quilt with your hands to ensure all layers are flat. Tack (baste) the layers together – see Hand Sewing Stitches: Running Stitch in Techniques (you will remove these stitches later). Alternatively, use washable adhesive to stick the layers together, or pin them together with safety pins (place one pin in the centre of each square and every 15cm (6in) or so along the borders).
3 Stitch whatever pattern you like all over the top of the quilt. I kept it simple and stitched ‘in the ditch’, which means along the seams between the patchwork squares.
Start sewing in the centre of the quilt and work out towards the edges to reduce puckering.


1 Trim the edges of all the layers of the quilt so they are straight and the corners are right angles.
2 Prepare the binding. If you are using ready-made bias binding, just open out one side and press. If you are making your own binding, sew your 4cm (11⁄2in) strips together, end to end (short ends together), to make one really long strip. Fold over 5mm (1⁄4in) all along one long edge and press. Cut the binding into four pieces: two 150cm (58in) long and two 240cm (94in) long.
3 Take one piece of 240cm (94in) long binding and align it with one of the longer edges of the reverse of the quilt, with right sides together. Sew the binding to the reverse of the quilt, stitching through all the quilt layers, 5mm (1⁄4in) from the edge.

4 Fold the binding around the raw edge of the quilt to the front of the quilt.

5 Turn the quilt over and, ensuring that the binding covers up the stitches from step 3, topstitch the folded edge of the binding to the quilt top, stitching through all the layers. (On the back of the quilt, your stitches should lie next to the binding.) Trim the ends of the binding level with the top and bottom quilt edges. Repeat steps 3 to 5 for the other long side of the quilt.
6 Repeat step 3 along the top edge of the quilt using one of the 150cm (58in) strips of binding and leaving an excess of about 2.5cm (1in) at the beginning and end of the quilt edge. Trim this binding overhang to 1cm (3⁄8in) beyond the quilt edge at both ends.
7 Bring the overhanging end of the binding round the edge of the quilt to the front, then fold the rest of the binding strip over the top edge of the quilt and topstitch (as you did in step 5). Repeat to finish off the overhang of the binding at the other end.

8 Repeat steps 6 and 7 at the bottom edge of the quilt. Your quilt is now finished!
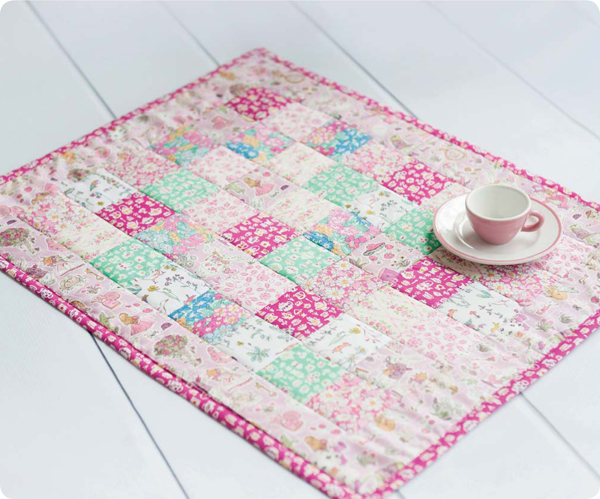
This doll quilt is just waiting to wrap up a favourite doll – the Mia doll would certainly be happy with such a lovely coverlet! Its cute patchwork surface can double as a playmat for a teddy bears’ tea party, and it’s lovely on the reverse too. I chose fabrics with a storybook theme, in this case Alice in Wonderland, for extra playtime fun.