
Whatever your level of sewing experience, you can create this bright and snuggly focus for a bedroom. The lucky little girl you’re making this for will drift off to sleep wrapped up in super-soft cotton. Reversible, long-lasting, versatile and, if you choose, covered in flying merry-go-round carnival ponies! This will be a big hit.
I have to share with you an amazing invention that I have discovered – popper tape. This means that there is no fiddly sewing-on of individual poppers or buttons, making this bedding set a much speedier job than you might think. Enjoy!
2.5m (23⁄4yd) each of two co-ordinating fabrics at least 137cm (54in) wide (Liberty or sheeting fabric)
86cm (34in) popper tape or eight poppers
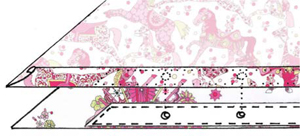
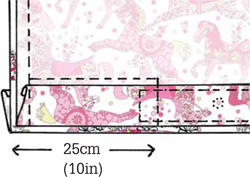
I chose two different fabrics here with the same theme – pink ponies! The print on one is densely patterned with lots of similar sized ponies, so at a distance it is more intensely coloured. The other fabric follows the same theme but with a more expanded print. It features larger and more varying sized ponies, in the same colourway, but the bigger motifs have more space between them on a white background, giving the design an overall less intense colour.
You can make a 40cm (16in) cushion cover with the two leftover pieces of fabric. Stitch them together (right sides together) along one edge with a 1cm (3⁄8 in) seam and follow the instructions for the Holly scatter cushions.
All seam allowances are 1cm (3⁄8in) unless otherwise stated.
1 Begin by making a hem on one short edge of one 2m (21⁄4yd) piece of fabric. Fold up 1cm (3⁄8in) of fabric to the wrong side and press. Fold up another 4cm (11⁄2in) and press. Stitch close to the fold through all the layers and press again. Repeat with the other 2m (21⁄4yd) fabric piece.
2 Un-pop the two halves of the popper tape, then machine zigzag stitch to finish the ends of the tape neatly. With the fabric for the duvet cover right side up, centre one of the halves of the popper tape across the width of the duvet cover along bottom edge, within the hem, and pin. Stitch around all the edges of the popper tape to secure it. Alternatively, apply individual poppers according to the manufacturer’s instructions.

3 Repeat step 2 with the other 2m (21⁄4yd) fabric piece and the other half of the popper tape. Make sure that the poppers align with their other halves on the opposite side of the duvet cover.
4 Lay one duvet cover piece on top of the other, right sides together. Pin all around the edges. Starting at one bottom corner, stitch the layers together all along one long edge, across the top and down the other side. Finish the seam (see Techniques section).

If you’re not using popper tape, apply individual poppers about every 13cm (5in), remembering to align the poppers with their other halves on the opposite side of the duvet cover.
5 Starting from one edge, stitch across the bottom of the duvet cover, just above the hem to 1cm (3⁄8in) past the start of the popper tape. Then stitch across the end of the tape to the bottom of the duvet cover.
6 Turn right side out and press the seams. Your duvet cover is complete; slip it over your duvet and popper it up.

1 Take the pillowcase top fabric piece and with the wrong side facing up, at the right-hand end, fold 1cm (3⁄8in) over, press, then fold over another 1cm (3⁄8in) and press again. Make a line of stitching, close to this fold, through all the layers.

Calling the fabric pieces ‘top’ and ‘bottom’ is only really relevant if you are using different patterned fabrics and want one to be the one that ends up on top.
2 Take the bottom pillowcase fabric piece and with the wrong side facing up, at the left-hand end, fold 1cm (3⁄8in) over, press, then fold another 5cm (2in) over, and press again. Stitch through all the layers close to the fold.

3 Place the top pillowcase piece right side up on a flat surface, folded edge at the left. Place the bottom pillow piece, folded edge also at the left, right side down on top. Align the right-hand edges. Fold about 18cm (7in) of your top pillowcase piece over on top of the bottom piece, and pin the edges together. Stitch through all the layers, around three sides but not along the folded edge.

4 Finish the seam (see the Techniques section). Turn the right side out and press. Slip your pillow inside the finished pillowcase.

