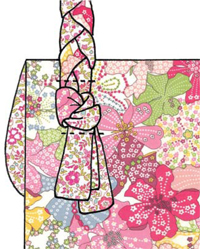
This mini version of a grown-up classic quilted bag is just too cool for school. Definitely the thing for an outing, a party or a trip to town. It looks special but is deceptively practical. It is roomy enough to hold lots of bits and bobs, and the lucky owner won’t lose it thanks to the pretty plaited cross-body strap. The button detail keeps everything secure.
Ponies, flowers or whatever she loves – use your fabric choice to reflect her personality, and you’ll have a hit on your hands.
Outer fabric, one fat quarter or 46 x 55cm (18 x 22in)
Lining fabric, one fat quarter or 46 x 55cm (18 x 22in)
Wadding (batting), 28 x 43cm (11 x 17in) (optionally fusible and with printed grid)
Self-cover button, 2.5cm (1in) diameter
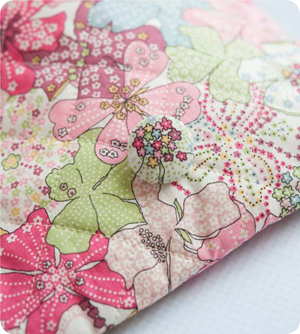
I chose a pretty, more graphic floral print with quite a few colours so that it would go with lots of different outfits!
1 First, prepare the quilted fabric for the purse outer. If you are using fusible wadding (batting) with a printed grid, fuse to the wrong side of the outer fabric. If you have non-fusible wadding (batting), tack (baste) it or use fabric adhesive to secure the wadding (batting) to the wrong side of the outer fabric. Draw lines (using pencil or washable fabric pen) 3cm (11⁄4in) apart at 45 degrees across the fabric. At right angles to these lines, draw lines 3cm (11⁄4in) apart to make a diamond-like grid. Now quilt the wadding (batting) to the fabric: stitch using straight stitch, following the marked grid lines, all over the fabric.

2 Using the purse template (see Templates), cut one Molly purse pattern piece out of the quilted fabric you prepared in step 1, and another one from the lining fabric.
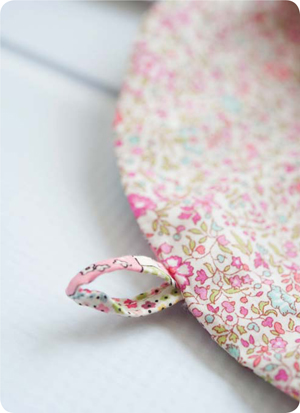
3 Take the button loop fabric, fold it in half along the length, right sides together, and sew with a 5mm (1⁄4in) seam along the long edge to make a tube.

4 Turn the button loop fabric right side out, (see instructions in the Techniques section). Press, then fold the button loop fabric in half and align the ends at the top centre of the purse outer on right side of the fabric, with the loop pointing in towards purse. Secure in place, stitching 5mm (1⁄4in) from the top edge.

5 Place the quilted purse piece from step 2, right side up, on a flat surface. Place the lining on top, right sides together. Pin around the edges and stitch together with a 1cm (3⁄8in) seam, leaving a 7.5cm (3in) gap open at the bottom.


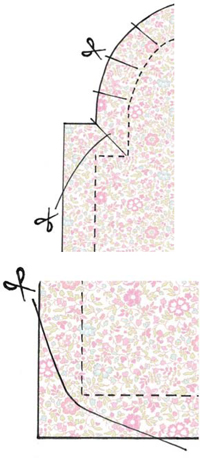
6 Clip the curves and trim the corners of any excess fabric as shown.
7 Turn right side out and press. Turn the seam allowance in and close the gap with slip stitch (see Hand sewing stitches in the Techniques section).

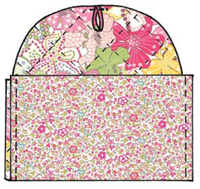
8 With the outer sides together, fold up the bottom of the purse along the fold line (shown on the template). Stitch together along the side seams, with a 1cm (3⁄8in) seam. Turn right sides out and press.
9 Sew the button in place on the front side, where the loop meets the front of the purse.
Self-cover buttons are available in plastic and metal in a range of different sizes, and they enable you to make a button to perfectly match your project.
10 For the plaited handle, stitch three of the lining fabric strips together at the short ends, right sides together, with a 1cm (3⁄8in) seam, to make one long piece measuring of 134cm (53in). Trim the seams to reduce bulk and press them open.
11 Follow steps 3 and 4 to make a thin tube or fabric ribbon. Slip stitch (or machine stitch) closed at both ends.
12 Repeat steps 10 and 11 with the remaining three pieces of lining fabric and the three pieces of outer fabric to give you three long fabric ribbons.

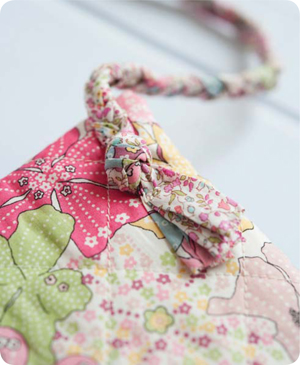
13 Tie the ribbons together with an overhand knot about 2.5cm (1in) from the ends. Plait the three ribbons together, then tie a knot at the other end of the plait, leaving 2.5cm (1in) tails.
Pin a safety pin through the first knot of your ribbons and, so you have something to pull against while you’re plaiting, then attach it another surface, for example, the cover on your ironing board or the arm of your sofa.
14 Finally, attach the strap: on the back of the purse pin the strap in place, placing the knot in the top left corner, 1.25cm (1⁄2in) from the side and 1.25cm (1⁄2in) from folded top edge. Place the other end of the strap at the opposite top corner of the purse, ensuring there are no twists. Secure in place with three rows of stitching on top of each other, just above the knot. Repeat with three rows of stitching below the knot. Your bag is finished.