This might just be the most versatile project in this book – and of course it’s easy too. A multi-use stash bag or travel bag, toy bag or shoe bag, personalized with her own monogram. Packing her favourite toys to go stay with Granny never felt such fun!
Use complementary shades as I have done here, or mix it up with contrasting brights. Mums may find themselves borrowing this bag a little too often, so you might like to make a few extra for yourself in different prints. It’s also a great, practical gift project.
Outer fabric, one fat quarter or 46 x 55cm (18 x 22in)
Fabric scrap for monogram, about 13 x 15cm (5 x 6in)
Lightweight fusible interfacing, two pieces each 13 x 15cm (5 x 6in)
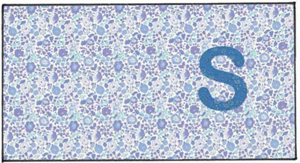
If this bag is a present, pick the recipient’s favourite colour. The letter fabric needs to be several shades darker than that used for the bag, so try out a strip of your intended letter fabric against the bag fabric to check that it will show up. I chose the fabric to be the same colour as the letter, for a matching look.
1 To make the drawstring, stitch both of your 4cm (11⁄2in) wide pieces together, right sides together, at the short ends, with a 1.25cm (1⁄2in) seam, to make one long piece (there’s no need to do this if you’re using Liberty fabric). Trim the seams and press open. Cut to 66cm (261⁄2in) long.
2 Fold the strip in half along the length, right sides together, and sew with a 5mm (1⁄4in) seam along the long edge to make a tube. Turn the drawstring fabric tube right side out, (see the instructions in the Techniques section). Press the drawstring flat with the seam running in the centre of one flat side. At the ends of your drawstring, fold in 5mm (1⁄4in) to the inside of the fabric tube and press. Slip stitch (or machine stitch) closed at both ends.
3 To prepare the monogram, iron one piece of fusible interfacing to the wrong side of your scrap of fabric. Print and cut out your chosen letter or monogram. Pin your paper letter to your fabric scrap, draw round in pencil and cut it out. Cut your other piece of interfacing so it is about 1.25cm (1⁄2in) bigger all round than your letter.
Pick a font on your computer and print out your letter to use as a template. I used the font Arial Rounded MT Bold, size 500.
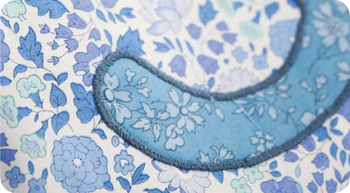
4 Fold your bag fabric in half, wrong sides together, and position your letter in the centre of one side of your bag, on the right side. Use washable glue or tack (baste) in place. Open the bag fabric out and fuse the other piece of interfacing behind the letter on the wrong side of your bag fabric. On the right side sew all around the monogram with satin stitch or blanket stitch (see Hand sewing stitches in the Techniques section) or use your sewing machine.
5 Finish the raw edges using zigzag stitch (see Finishing a seam in the Techniques section) all around the fabric. Fold over 5mm (1⁄4in) at the top edge, and press. Fold over another 2.5cm (1in) and press again. Open out the folds. (It is easier to iron at this stage before making the bag.)
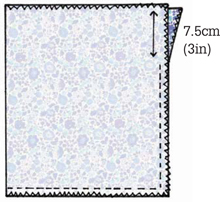
6 Fold your bag fabric in half lengthways, right sides together. Using a 1.25cm (1⁄2in) seam, stitch the bottom and side edges together, stopping 7.5cm (3in) from the top edge. Back stitch to secure the end of the seam.
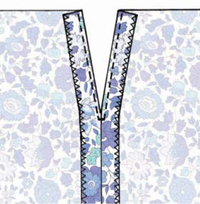
7 Fold the seam allowance back on each side, above where you stopped stitching in step 6, and press. Stitch 2mm (1⁄16in) from the fold.
8 Fold 5mm (1⁄4in) over at the top edge and fold over another 2.5cm (1in). Stitch 2mm (1⁄16in) from the fold, through all the layers, all around the bag to make the casing for the drawstring.

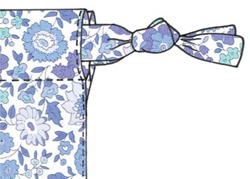
9 Turn the bag right side out. Attach a safety pin to one end of your drawstring and feed it through the casing at the top of your bag. Bring the ends of the drawstring together and tie in an overhand knot. You’ve finished!