Chapter 2
War and Peace
The intervening war years unquestionably put a hold on ‘official’ display flying. However, it must be acknowledged that the honing of flying skills, standards and procedures that had been developed before, through the official encouragement of RAF aerobatics teams, proved demonstrably invaluable in the years to come. Furthermore, the success of and dependence upon the RAF ensured that there would never again be any serious suggestion that air power in military terms could not justify the existence of an independent service arm. As anyone knows, the RAF’s greatest moment during the war, indeed, the nation’s greatest moment, was undoubtedly the Battle of Britain.
The Battle of Britain is the campaign which unquestionably bridged the weakest point of not just Britain’s position in the war but also that of all her allies, following the allied withdrawal from the continent in face of the German advance across France and the Low Countries. The Battle of Britain is officially observed as having been fought in four phases from 10th July to 31st October 1940. This followed a lull, which had begun after the last of the troop evacuations from Dunkirk on 31st May.
Allied air action, nevertheless, continued against German positions on the continent until the middle of June, after which the period of consolidation and preparation for the air siege, which would be a necessary prelude to invasion, began. The first phase of the Battle of Britain involved the launch of large formations of Luftwaffe bombers escorted by fighters, to carry out raids against British shipping, coastal positions and fighter airfields. Throughout this period, with the availability of radar, RAF Fighter Command squadrons were able to maintain a round-the-clock readiness. Also during this period, night fighter operations began in response to the growing number of enemy night raids. The start of August began another lull period while the Luftwaffe regrouped in preparation for a major offensive.
The second phase of the battle began on 19th August. However, bad weather from this day lasting through to the 23rd reduced the intensity of the German raids. On 20th August, Winston Churchill made his famous tribute to the Royal Air Force in a speech to the House of Commons, which contained the immortal words, ‘Never in the field of human conflict has so much been owed by so many, to so few.’
The German raids now reached further inland and started to include industrial targets as well as airfields and radar sites. Fighting intensified every day and so did the German night raids. The 30th August saw the start of the most intense phase of fighting. The Luftwaffe launched 800 aircraft during this day and the next against the majority of 11 Group airfields including Kenley, North Weald, Hornchurch, Debden, Lympne, Detling, Duxford, Northolt and Biggin Hill.
During this increasingly bleak stand-off period, the RAF was relying on its two principal native fighter aircraft to meet the incoming assault: the Supermarine Spitfire and the Hawker Hurricane. These two fighters were already household names and would become legendary after the battle’s end. The primary Luftwaffe fighter, the Messerschmitt Bf 109, flew as a fighter escort together with the Bf 110 to the raid formations of Heinkel He 111, Ju 88 and Do 17 twin-engined bombers. While the Bf 109, Spitfire and Hurricane were largely comparable (the Hurricane was noticeably slower than its two contemporaries, but was easily their equal in other performance yardsticks) in terms of airframe and engine performance, the German fighter was fitted with heavier destructive armament. The Spitfires and Hurricanes were armed with eight Browning .303-inch machine guns in the wing chord, a grouped arrangement of the guns in the Hurricane’s wing gave it a slightly weightier punch through better harmonisation. The German Bf 109 was fitted with two 20mm HE cannons in the wing chord with two 7.92mm machine guns firing from positions inside the engine cowling through the path of the spinner blades. While the skill of the Spitfire and Hurricane pilots against that of the 109 pilots would decide the balance of fate, a notable advantage for the RAF was reliance on radar, the opportunity to have sufficient early warning and scramble when required, full of fuel, to meet the 109s at the end of their range. Truth be known, the skill of the RAF pilots varied considerably from the aces and legends at one end to those unfairly thrust into the deep end at the other. Perilously, the latter increased at a faster rate owing to the demand for more pilots. The RAF fighter pilots’ ability to down the bombers flying at the end of their range was what was ultimately crucial to the outcome of the battle. The talisman of radar ensured that even more crucially the British fighters were able to engage the German fighter escorts even closer to the end of their range.
The early days of September showed no significant fall in the strength of the enemy raids. There were three heavy raids on 1st September, five on the 2nd, one on the 3rd and two each on the 4th and 5th. One of these raids, on the 2nd, got to within 10 miles of London, but the majority were again directed against the fighter airfields.
The Luftwaffe hammered away throughout 6th September from dawn to evening at the RAF’s inland fighter airfields. The following day marked the start of phase three. On this day the Luftwaffe made a tremendous effort to reach London and destroy the Docks. Three hundred and fifty bombers and fighters flew in two waves from the south-east to the Thames Estuary; some aircraft flew on as far as Cambridge, but the majority of the enemy aircraft were engaged over Kent and East Surrey. A number broke through and were intercepted over the capital. Damage was inflicted on dock buildings, factories, railway communications, and gas and electricity plants. The action exacted a high toll on the Luftwaffe with 103 German aircraft destroyed. The Germans continued to press home attacks with ferocious intensity. However, it was now becoming evident that all was not going as well as was hoped. Further heavy air raids were launched against the capital on 9th, 11th, 13th and 15th September. During this period bombs fell on Buckingham Palace, although those German aircraft that got through to the capital on the 11th met with such resistance that as many as 250 German aircrew were lost.
The climax came on 15th September 1940; on this day 500 German aircraft flew against Britain, 250 in the morning and 250 in the afternoon. A running battle was fought with Fighter Command’s Spitfires and Hurricanes from Dungeness to the coast of France. It is recorded that the Luftwaffe lost 185 aircraft during this day. The 15th September 1940 was seen as the turning point in the Luftwaffe offensive and the Battle of Britain. Three more major assaults, therefore, would be delivered, on 27th September, 30th September and 5th October. The 6th October marked the fourth and final phase of the campaign. The strategy and tactics of the Luftwaffe now changed completely, with greater reliance on fighter aircraft to draw Fighter Command during the day, and using the bomber force now to carry out raids on industrial targets during the night. The new tactics by the Luftwaffe were the result of being forced to avoid the kind of heavy losses experienced during the period 7th September to 5th October. This also meant that far fewer bombs would be dropped on airfields and factories. Instead, large formations of fighters were sent across the Channel during daylight hours at high altitude, flying at 30,000 feet or higher, seemingly to attack London. These tactics resulted, not surprisingly, in far less damage than was inflicted in the earlier stages of the battle, as very few of the lightly bombed-up fighters managed to get through the still-largely intact and now recovering British air defences. As the month of October drew to a close, the likelihood of a successful outcome to the Luftwaffe’s campaign against Britain’s air defences slipped away.
There was no clear end to the battle; indeed, the German air offensive continued at various lower levels of intensity throughout the rest of the war, but the concerted effort to destroy the RAF by laying siege from the air had been checked.
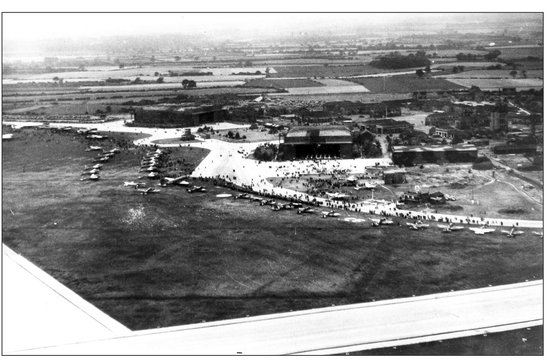
Aerial view of RAF Church Fenton during the first Battle of Britain “At Home” Day on Saturday 15th September 1945. (National Archive)
The war was yet to reach its own peak of intensive action, with the vast majority of mayhem and destruction attributable to the Second World War yet to come to pass.
However, the success of the battle allowed Britain and the growing number of allied nations to stay in the war, continue to resist and prepare to launch their own offensive in the coming years. As the war continued, aviation technology developed and innovative designs appeared, one of the more remarkable being the de Havilland Mosquito, an aircraft which possessed world-beating performance and yet had a fuselage constructed from wood in an era of stressed-metal-skin construction.
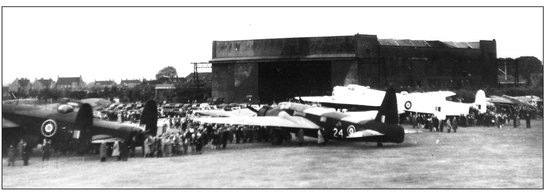
Church Fenton static park on 15th September 1945, evident are the two Lancasters (the white one appears to belong to Coastal Command), a Wellington and at the right of the picture can be seen a Barracuda. (National Archive)
The last year of the war saw the arrival of the Gloster Meteor, the RAF’s first jet fighter to be delivered to an operational squadron. I could continue to write without end about the actions involving the RAF in various theatres of operations throughout the war, but this is well-charted water and to do so would be to miss the point of this book. I have contributed this brief overview of the Battle of Britain, because of the significance of the battle’s commemoration in relation to the RAF’s post-war air display policy.
The Second World War officially came to a close on 2nd September 1945, with the signing of the Japanese surrender on board the USS Missouri. That same month, also marked the 5th anniversary of the campaign, the outcome of which was so crucial to the eventual success of the allies, and so on Saturday 15th September 1945, the Royal Air Force publicly remembered the fallen of its most historically significant contribution to the war and celebrated its victory, with the first Battle of Britain ‘At Home’ Day. On this day 100 RAF stations across the country opened their gates to the public, the centre-piece event was a mass flypast over London of current fighters lead by one of the most celebrated heroes of the battle, Group Captain Douglas Bader.
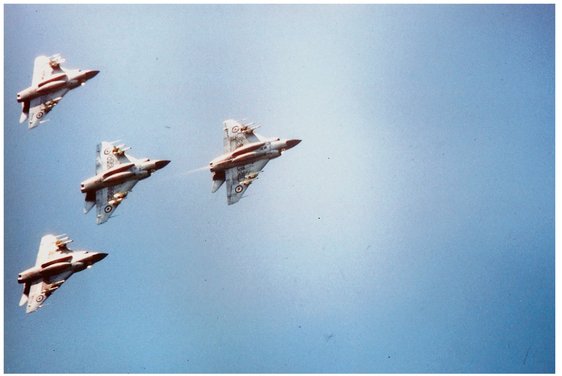
A formation of Javelin FAW8s of No. 41 Squadron taken in July 1963. On 14 September that year, four of 41’s Javelins displayed at Biggin Hill, Abingdon, Tangmere, St Athan and Colerne between a single take off and landing. (John Wharam)
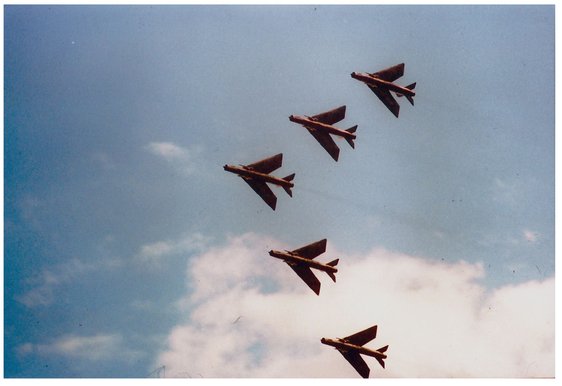
Lightning F3s of 92 Squadron display team in ‘big five’ over Finningley on 19 September 1964. (John Wharam)
Four USAF F100 Super Sabres fly past at Finningley on 19 September 1964. (John Wharam)
18 September 1965 saw the first flying displays by F104s in the UK. Four from 331 Squadron Royal Norwegian Air Force are seen here during their display over Finningley. They also displayed at Ternhill and Waddington. (John Wharam)

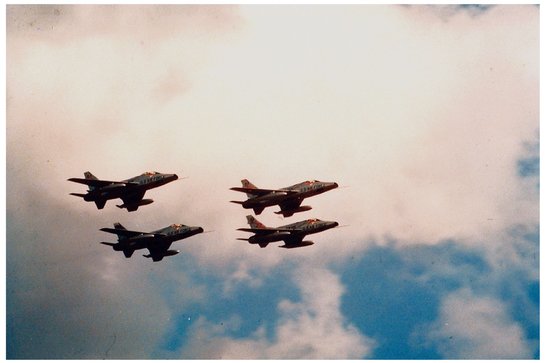
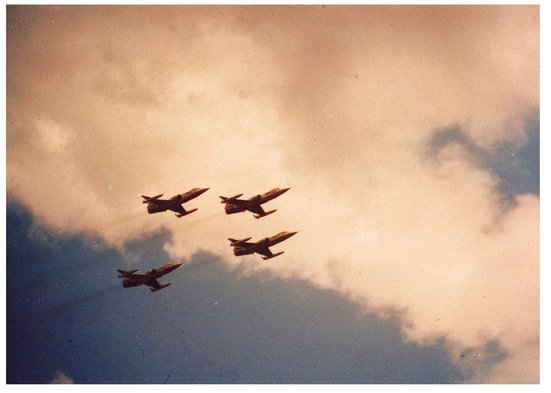
Easily confused with the Red Arrows in their Gnat era. The following generation of Alpha jets of the French Patrouille de France are seen here over Mildenhall in May 1990, 50th anniversary of the Battle of Britain. (Author’s Collection)
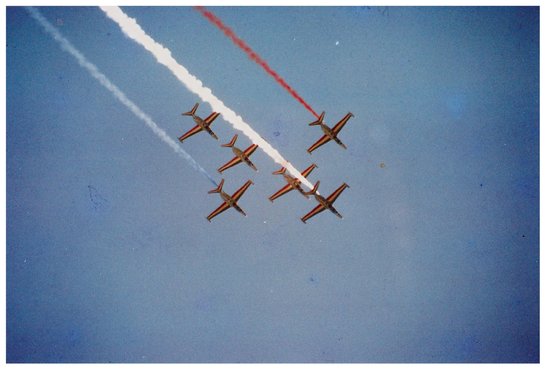
The 1966 French Air Force Aerobatics team La Patrouille de France streaming red, white and blue smoke over Church Fenton. (John Wharam)
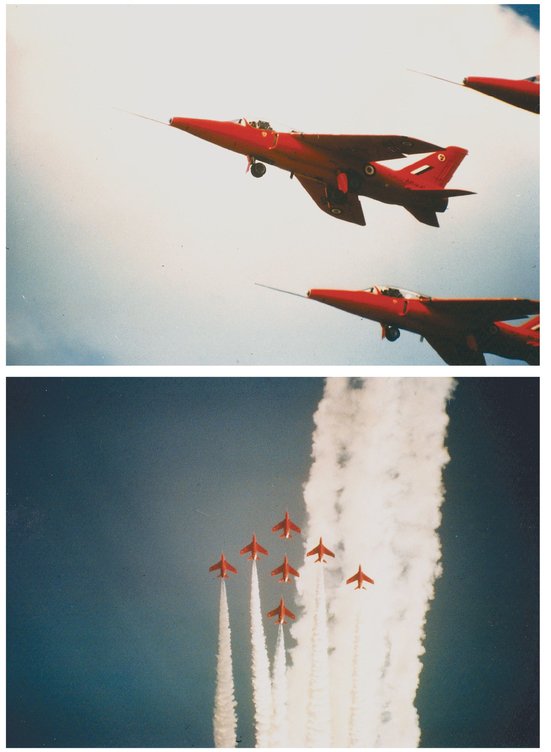
The very first Red Arrows with their Folland Gnats in June 1965 and as a seven-strong formation over Church Fenton in June 1965. (John Wharam)
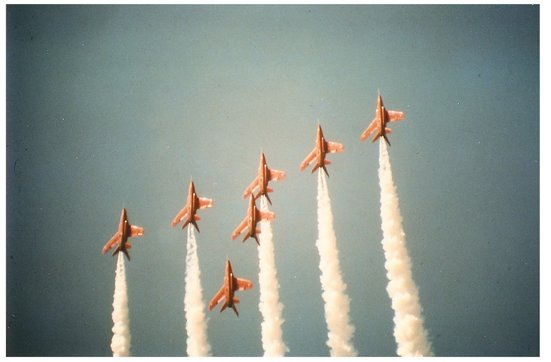
The Red Arrows in 1965, their debut season, over Church Fenton at the SSAFA air display.
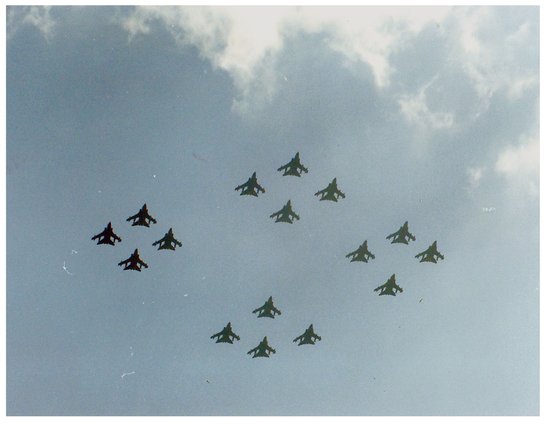
Diamond 16 Tornado formation overhead Abingdon on 15 September 1990. (Author’s Collection)

A Javelin from 228 OCU seen here being put through its paces over Finningley on 18 September 1965. (John Wharam)
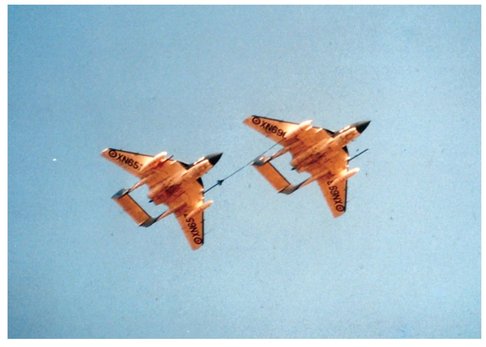
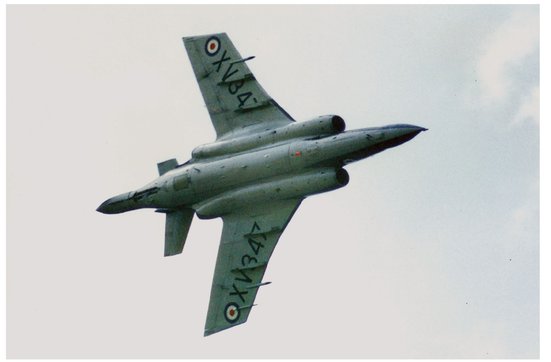
Sea Vixen pair demonstrating air-to-air refuelling over Finningley on 19 September 1964. (John Wharam)
Three Voodoo F101Cs fly by at Finningley on 19 September 1964. (John Wharam)
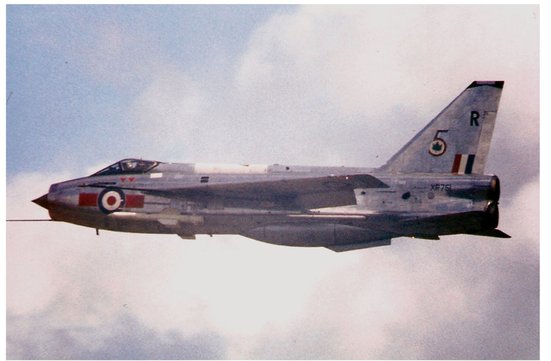
Lightning F3, XR751 of No. 5 Squadron which provided the only solo display of the type for 1975 and seen here overhead Biggin Hill on 20 September of that year. (Keith Butcher)
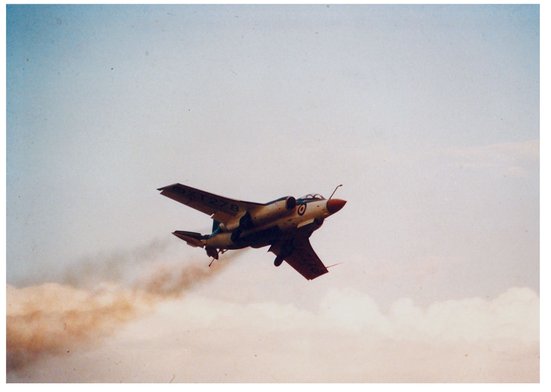
Buccaneer Mk 2 in Royal Navy markings but operated by the Hawker Siddley Company seen here during its aerobatics display at Finningley on 18 September 1965. (John Wharam)
An early Mk2 RAF Buccaneer circa 1971. (Keith Butcher)
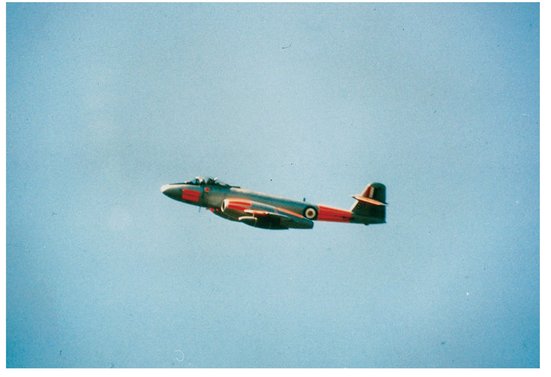
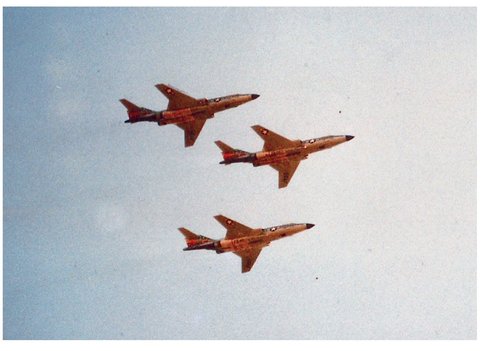
This Meteor F8 was photographed displaying over Church Fenton in June 1966 and is almost certainly from the College of Air Warfare, which up until 1964 flew an aerobatics team comprising four of these aircraft as seen here in the Day Glow orange bar scheme used by Training Command during the 1960s. (John Wharam)
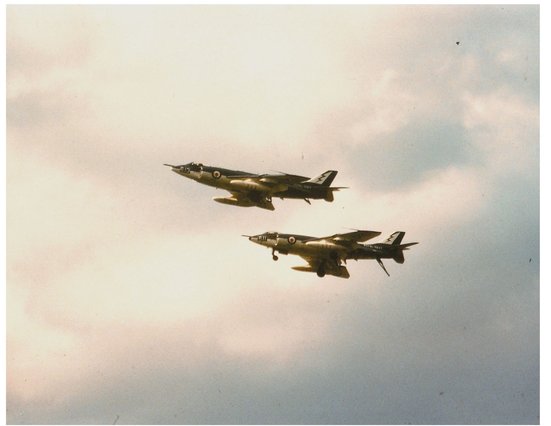
Two Scimitars making a low approach to Church Fenton in June 1965. (John Wharam)
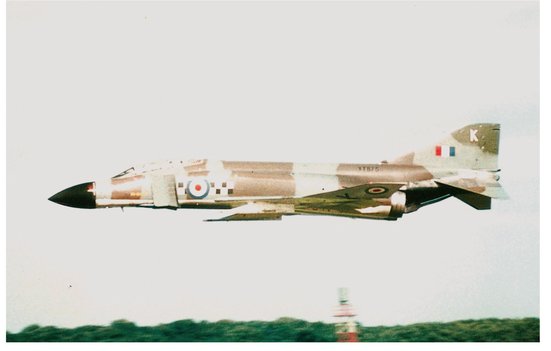
An RAF Phantom makes a low pass at Alconbury on 5 September 1970. (Keith Butcher)
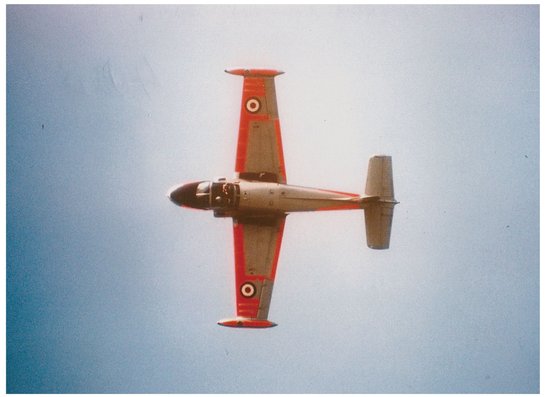
A solo Jet Provost taken in June 1966 at Church Fenton. (John Wharam)
Royal Navy Sea Harrier FRS1 demonstrating its VTOL capability over Abingdon on 13 September 1980. (Keith Butcher)
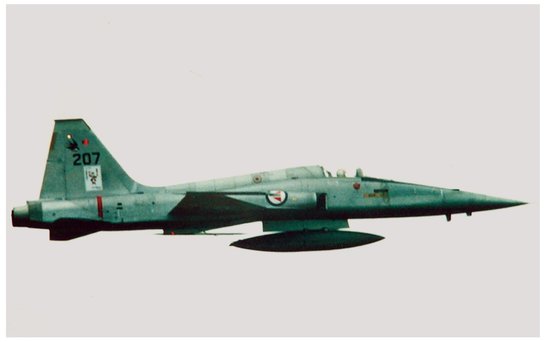
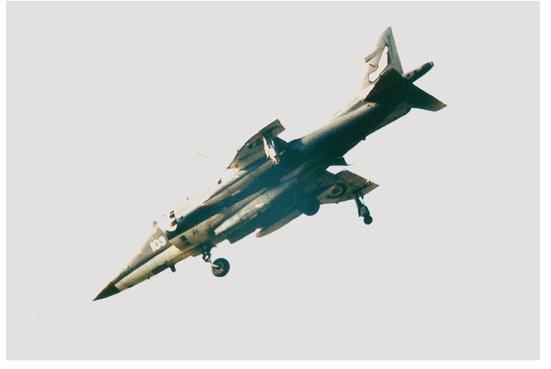
This single F5A Freedom Fighter belongs to the Flying Jokers Aerobatics Team, Royal Norwegian Air Force was photographed at the Greenham Common International Air Tattoo on 25 June 1977. (Keith Butcher)
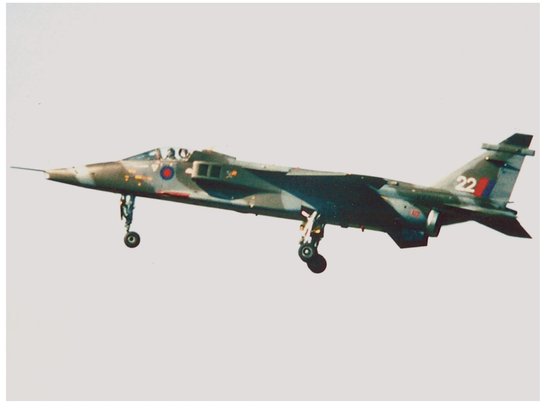
Jaguar GR1 during display at Abingdon on 16 September 1978 from 226 OCU. (Keith Butcher)

Tornados GR1 (top) and F3 (bottom) seen over Abbingdon respectively on 15 September 1990 and 12 September 1987. The F3 is seen here during the mark’s debut display season. (Author’s Collection)
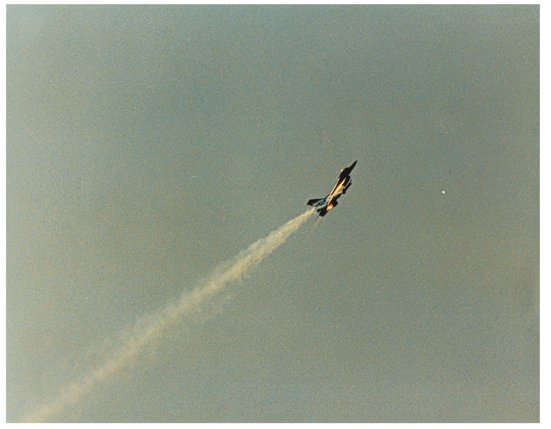
F16 of the Dutch Air Force in transition from high alpha pass to steep climb. (Author’s Collection)
Avro Lincoln in the static park at Tangmere on 17 September 1960. (Keith Butcher)

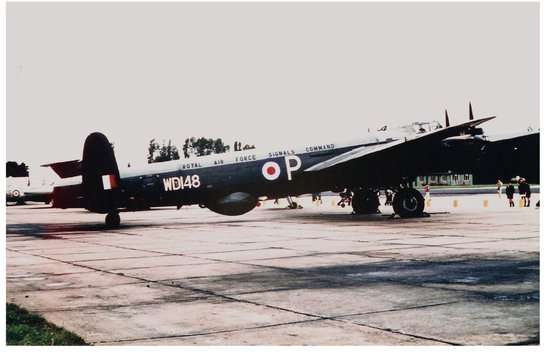
This Shackleton MR3 was photographed during a slow run over Church Fenton in June 1965. The number on the side indicates that it belongs to 203 Squadron. (John Wharam)
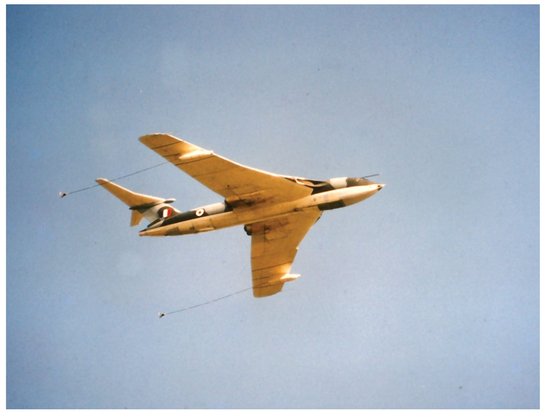
One of the first Victor Tanker conversions, seen here over Finningley on 18 September 1965, during a touring display. (John Wharam)
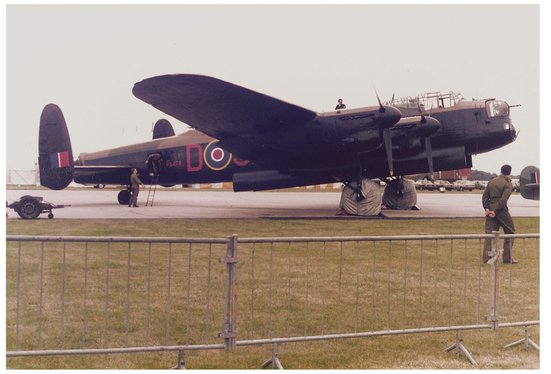
Lancaster PA474 seen on the flight line at Finningly circa September 1981. (John Fisher)
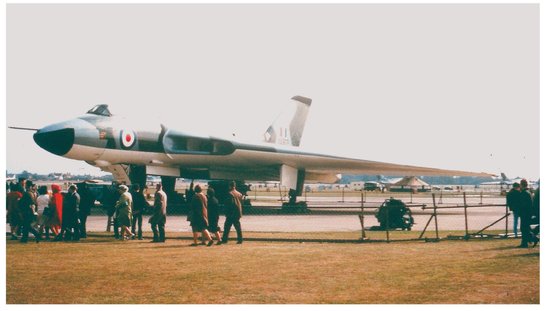
Vulcan B1A from the little-known Bomber Command Development Unit (BCDU) in the static park at Finningley on 19 September 1964. In the background can be seen four B2s of Nos 9 and 35 Squadrons awaiting the scramble order, a most popular display item at V-Bomber bases for many years. (John Wharam)
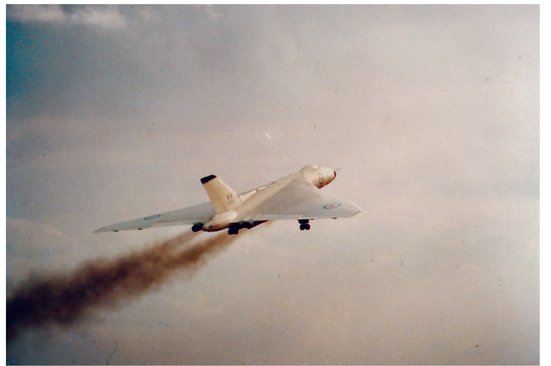
Vulcan B2 taking off from Finningley for it’s part in a set piece on 19 September 1964. (John Wharam)
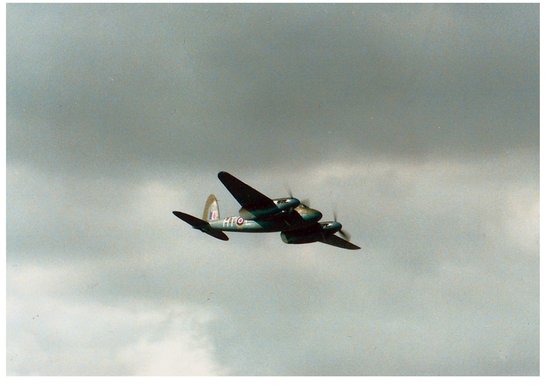
Until it was lost in a tragic accident at Manchester in 1996, de Havilland Mosquito T3, HT-E was the sole airworthy example of this type and is seen here during the display at Finningley on 17 September 1988. (Author’s Collection)