On most forensic projects, you will work from an image, so first let's get an image to work with. Guymager is a forensic imager for media acquisition. It has a nice GUI and saves images out in several formats used in forensic imaging. The application will also make a clone of a drive. You can find Guymager in the Usual applications | System Tools menu:

Guymager has two modes of saving files:
- The acquire mode, where you might want an image for digital evidence.
- The clone mode, in case you need the entire partition duplicated.
The difference is, in acquire mode the image is digitally signed with a checksum and other information to prove no tampering of the evidence has been done to the image. In a legal case, you would pull two images. You would acquire one and digitally sign it for evidence and clone another to investigate. Since you really never know whether your case could become part of a legal proceeding, you might want to always pull two copies of the partitions you are cloning. It could be a disaster if you don't.
In order to pull these images, you will need two drives of the same size or larger than your evidence to save these out to. One will be your evidence drive and one will be your working copy. Following, you will notice we have a /dev/sdb connected. This will be our USB drive that we will save our cloned images to.
There are several ways you might get the content of a disk for testing:
- You might have a computer with the drive in situ, where you would use a live-to bring Kali up on the machine.
- You might get a drive sent to you, separate from the machine to which it used to be attached.
- You might get an image file on a removable drive. Hard drive images contain all the blocks of the original hard drive, even the blank spaces, so an image file can be Terabytes of data.
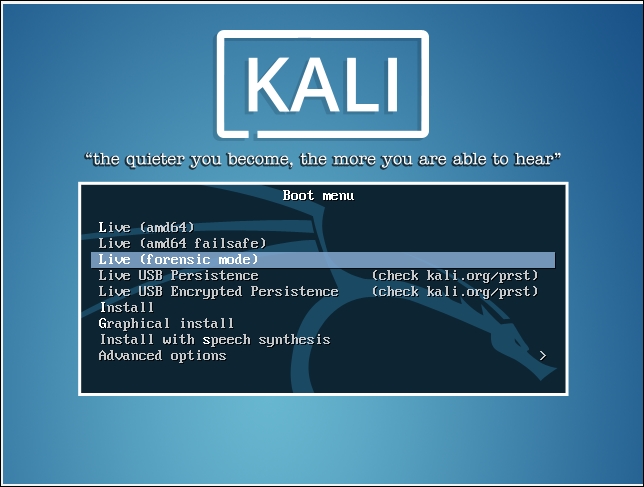
Since this task involves preserving the content of the hard drive partition as it is, you do not want to start Kali in the usual Live-Disk way. The Live-Disk mode writes to the host hard drive from time to time. If you are presented with a system unit (host machine) that has either got files that were deleted accidentally or on purpose, the files may be left entirely or partially intact on the drive. You certainly would not want to install Kali, which would partially or completely overwrite the drive under test. For this set of tasks, Kali has a Live Forensic mode that uses the RAM on the test machine, but does not write to the hard disk. It is important not to write anything to the hard drive, whether it is going to become evidence in a court case or not. You cannot recover file fragments you have written over them with other files:
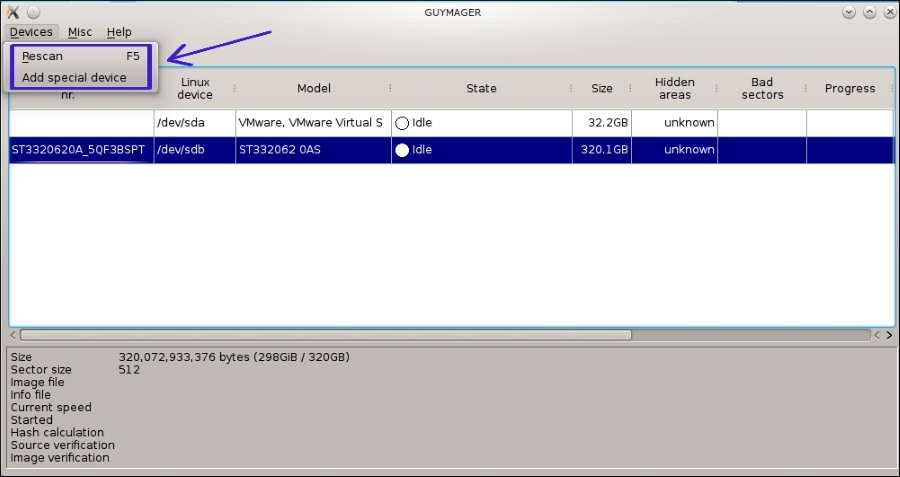
For this demo, we will be working from a Vmware image of a machine. The method will be the same if you are working with a normal physical drive. If you are working with a hard drive, connect the hard drive to the Kali imaging machine and click the Rescan button. This will rescan all drives and your newly connected drive will appear in the interface. For a Vmware image, pick Add special device. This will give you a file menu so you can pick the image file. You would use this command also for other image types, like backing up images of images made with dd copy that are on your already-attached drive:
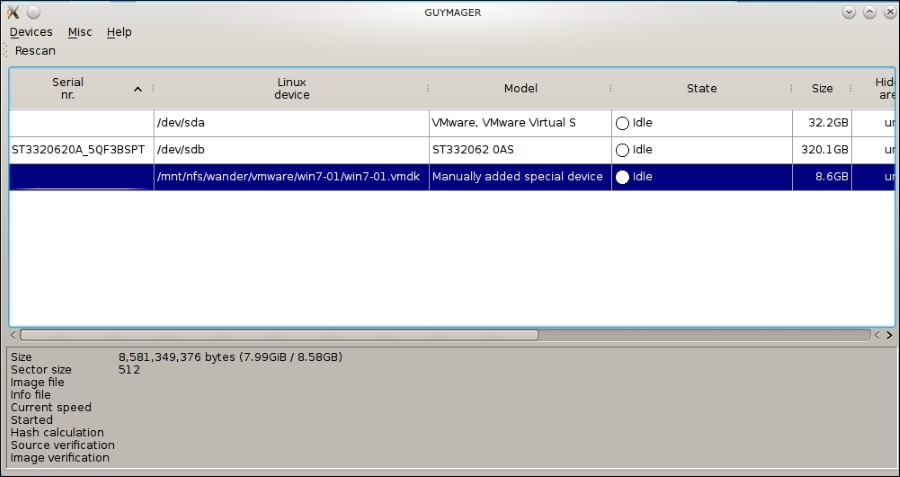
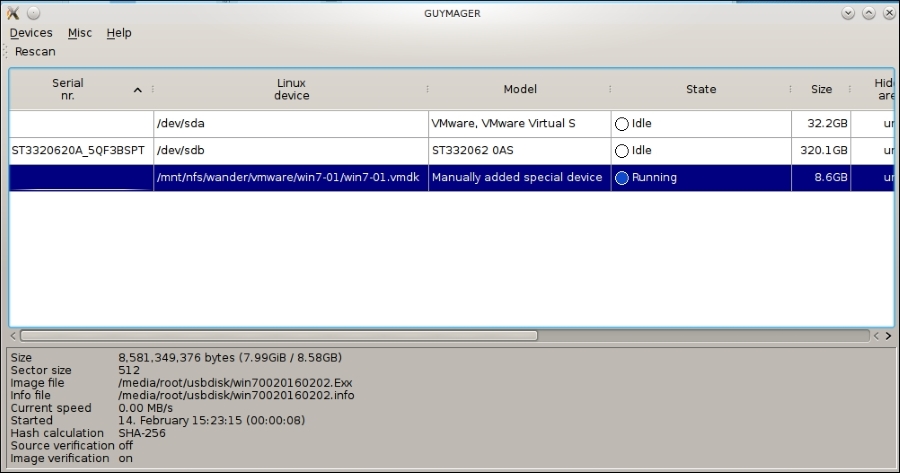
Following, you will see we have attached a Vmware hard drive image. We also have showing /dev/sda, which is our operating system's drive, and /dev/sdb, which is the USB drive to which we are writing our images:
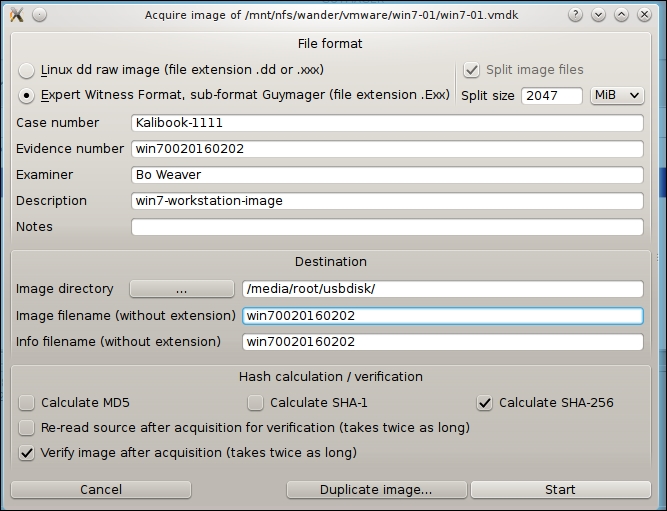
First, let's acquire an image for evidence:
- Right-click on the Vmware image.
- Click on Acquire. You are given an information block for information to be embedded within the image and also a method to checksum the copy to prevent tampering.
- Since this is an evidence file, we have picked Expert Witness Format. This format can be read with the other forensic tools we will be using later. This is a standard open format, developed by the industry for this type of work. For the Evidence Number, let's use the machine name, two 0s as a separator, and the date. Here, you cannot use special characters or you will get an error later. Of course, Bo is the Examiner and we add a description.
- Set up the destination. We are saving this to the mounted USB drive that is mounted at
/media/root/usbdisk. - Give the image file name. When you give the image a file name it will also fill in the Info File Name field.
- The default Hash calculation is set to
MD5.MD5is considered defunct by its inventor, so let's use something else. Personally we prefer the highest level, so let's choose SHA-256, as follows. This will increase the imaging time, but it is worth it. - (Optional step) In a legal situation you will want to also verify the results. As stated, this will take twice as long.
- Click the Start button to run:
In the following screenshot, Guymager is running:
Once Guymager has finished its run, you will see the following screen. The bottom section will give you the information on the image and the run time:

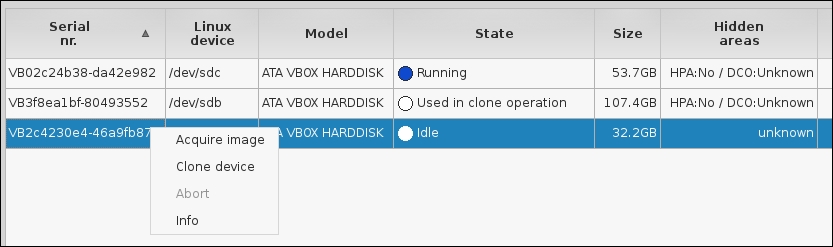
If you are just using Guymager to clone the partition, the task is much easier. This is a second Kali setup, so the drive names are different. Right-click on the partition you want to clone, as shown in the following:
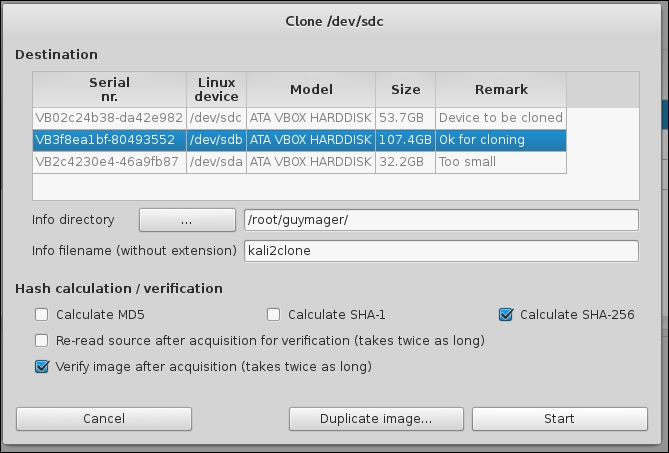
You will then get the following window:
- Highlight the partition the clone is going into.
- Set the Info Directory.
- Set the destination file name. Again, you will not be able to use special characters here
-,_or+. - Set the checksum hash type.
- (Optional Step) Check the box to verify the file. This is just best practice to do with any imaging you do. You wouldn't want to waste your time doing analysis on a corrupted drive image.
- Click the Start button to run.
The following screenshot is the very helpful dialog that shows the drives attached to the Kali box. The only drive big enough to take the entire content of the device being cloned is the second drive, with 107.4GB total. The sizes here are the full size of the device. If you already had something taking up half of the 107.4GB, your cloning would either fail or overwrite the existing data:
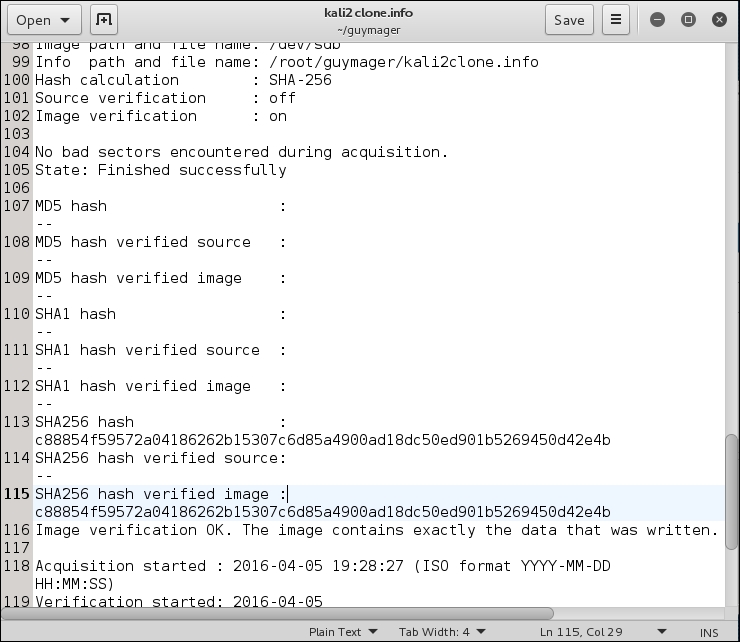
When the cloning procedure is complete, you can mount the receiver partition and your cloned partition will be available under the name you gave it. Following is part of the info file for this cloning, showing the SHA-256 hash and verification. The Cloning and Verification process took about 19 minutes: