
Visually striking KOHLRABI is hard to overlook, with round, pale green or lavender bulbs anchoring antenna-like stalks and leafy greens. It looks a bit like an alien life form, but rest assured, kohlrabi has a firmly earthbound culinary tradition, particularly in Eastern Europe. Although kohlrabi may not be a staple in American kitchens, its delicate, slightly sweet flavor and versatility should make it a household favorite. Raw kohlrabi has a refreshing, crisp texture and flavor similar to jícama or even apple; it’s a marvelous addition to salads, as highlighted in our Kohlrabi, Radicchio, and Apple Slaw. It’s also great quickly roasted with seasonings and makes a decadent yet healthful soup.
RUTABAGAS, often labeled “yellow turnips” (or sometimes “Swedes”) in the market, are related to turnips, and preparation and cooking methods are often the same. Yet they are definitely a different vegetable, thought to be a cross between wild cabbages and turnips. Rutabagas are large, starchy, dense, and creamy. They can be cut into matchsticks and used raw in salads, but their true strength is their mellow sweetness when cooked. They’re a highlight in our Root Vegetable Gratin as well as Cornish Pasties, a traditional use for this vegetable.
TURNIPS are smaller than rutabagas and have a more peppery bite. They have the ability to absorb added flavors well while still retaining their own character, which makes them versatile. Raw and sliced thin, turnips add crunch to salads, and they make a great pickle, as in our Pink Pickled Turnips. Cooked, they have a mildly spicy flavor and a dense, creamy flesh similar to potatoes, but with less starch. Turnips transform wonderfully into smooth, light purees, as in our Simple Glazed Pork Tenderloins with Creamy Turnip Puree.
shopping and storage
KOHLRABI is generally available from summer through early fall. Look for smaller bulbs, about the size of an orange; grapefruit-size kohlrabi is likely to be spongy or woody. Whether green or purple, the color should be pale but vibrant and free of blemishes. If you purchase kohlrabi with the stalks and leaves attached, separate them before storing them both in loosely closed plastic produce bags in the refrigerator. Bulbs will stay fresh for a week or longer; the greens will keep for several days.
RUTABAGAS are found in the market from fall through spring. They are usually yellowish, with purple coloring near the stem end, and very large, a pound or heavier. They are typically covered with a wax coating to prevent loss of moisture. If you do find ones without wax, choose those. Avoid rutabagas with cracks or any shriveling. Store them in the refrigerator in a loosely closed plastic bag for a couple of weeks (for waxed rutabagas) or a week (for unwaxed).
TURNIPS taste best when sweet and young, which is generally between November and February. As they mature, their texture gets more fibrous and woodier, and they lose their sweetness. In general, smaller turnips will be sweeter and more tender than larger ones. The greens are also edible and can be sautéed just like any other hearty greens. Turnips should be white, with purple coloring near the stem end, with unblemished skins; if the greens are attached, they should look crisp and fresh. Store turnips and their greens (separately) in the refrigerator in a loosely closed plastic produce bag for a week or longer.
vegetable prep
After trimming the stalks and leaves, peel the thick skin from the bulbs. A paring knife (rather than a vegetable peeler) is the best tool for this task. Make sure to remove the outer ⅛ inch of the vegetable, so that both the skin and the fibrous green parts underneath the skin are removed and only the white flesh remains.
Peeling Rutabagas
Peel the thick, waxy skin using a paring knife. Also peel away the thin layer of greenish-white flesh right under the skin to expose the yellowish-orange flesh beneath.
Peeling Turnips
Most turnips have thin enough skin that it can be removed with a vegetable peeler. For very large turnips, you may need to use a paring knife. There may also be some fibrous parts right under the skin, which you can trim away with a knife.
Slicing Kohlrabi, Rutabagas, and Turnips

A mandoline or V-slicer is a good way to get uniform, thin slices of kohlrabi, rutabagas, and turnips, as is needed in our recipe for Root Vegetable Gratin.
Cutting Turnips into Long Pieces
Our recipe for Pink Pickled Turnips calls for cutting turnips into 2 by ½-inch pieces.

1. Cut peeled turnips into slabs.

2. Cut slabs into ½-inch batons.
ROASTED KOHLRABI WITH CRUNCHY SEEDS
Serves 4
Total time: 35 minutes
WHY THIS RECIPE WORKS A simple, quick roast with a trio of flavorful seeds is an excellent and crowd-pleasing way to bring mild-tasting kohlrabi to the dinner table. A hot oven (450 degrees) browned the kohlrabi beautifully, and the ¾-inch pieces cooked in just 20 minutes. Usually seeds are toasted before being included in a dish, but here the high heat of the oven rendered that extra step unnecessary. Lining the baking sheet with foil prevented the kohlrabi from sticking to the pan. (We initially tried using more oil, rather than foil, but that just made the kohlrabi greasy.) As the kohlrabi roasts, make sure to shake the pan once or twice to encourage even browning.
2 tablespoons extra-virgin olive oil
2 teaspoons sesame seeds
1 teaspoon poppy seeds
½ teaspoon fennel seeds, cracked
Salt and pepper
2 pounds kohlrabi, trimmed, peeled, and cut into ¾-inch pieces
1. Adjust oven rack to middle position and heat oven to 450 degrees. Combine oil, sesame seeds, poppy seeds, fennel seeds, ½ teaspoon salt, and ¼ teaspoon pepper in large bowl. Add kohlrabi and toss to coat.
2. Spread kohlrabi onto foil-lined rimmed baking sheet and roast, stirring occasionally, until browned and tender, about 20 minutes. Season with salt and pepper to taste. Serve.
SPICY TURNIPS WITH CHICKPEAS
Serves 4 to 6
Total time: 50 minutes
WHY THIS RECIPE WORKS This spicy dish featuring turnips and chickpeas can be enjoyed as a side dish but is also hearty enough to serve on its own, as an entrée. It hails from Tunisia, in North Africa, where turnips are often incorporated into dishes. Tunisian food is also known for being quite hot and spicy. In Tunisia, fresh Baklouti chiles are the main source of heat, but here we opted for the readily available jalapeño pepper, which has a similar heat level. We added some extra punch with cayenne pepper. Once the aromatic foundation for this dish was in place, we added the turnips (cut into bite-size pieces so they would cook quickly and evenly) and chickpeas (canned, for streamlined convenience). Including the starchy chickpea liquid from the cans gave our sauce good flavor and body. A final touch of lemon juice was all this zesty dish needed before serving.
2 tablespoons extra-virgin olive oil
2 onions, chopped
2 red bell peppers, stemmed, seeded, and chopped
Salt and pepper
¼ cup tomato paste
1 jalapeño chile, stemmed, seeded, and minced
5 garlic cloves, minced
¾ teaspoon ground cumin
¼ teaspoon cayenne pepper
2 (15-ounce) cans chickpeas
12 ounces turnips, peeled and cut into ½-inch pieces
¾ cup water, plus extra as needed
¼ cup chopped fresh parsley
2 tablespoons lemon juice, plus extra for seasoning
1. Heat oil in Dutch oven over medium heat until shimmering. Add onions, bell peppers, ½ teaspoon salt, and ¼ teaspoon pepper and cook until softened and lightly browned, 5 to 7 minutes. Stir in tomato paste, jalapeño, garlic, cumin, and cayenne and cook until fragrant, about 30 seconds.
2. Stir in chickpeas and their liquid, turnips, and water. Bring to simmer and cook until turnips are tender and sauce has thickened, 25 to 35 minutes.
3. Stir in parsley and lemon juice. Season with salt, pepper, and extra lemon juice to taste. Adjust consistency with extra hot water as needed. Serve.

PINK PICKLED TURNIPS
Makes 4 cups
Total time: 30 minutes (plus 2 days refrigeration time)
WHY THIS RECIPE WORKS Refreshing and crunchy, pink pickled turnips are a staple in Middle Eastern cuisine. Because they are traditionally served with robust foods like falafel and shawarma, we chose to keep them mild, with just a bit of garlic, allspice, and black peppercorns. Pink pickled turnips get their whimsically fuchsia color from beets. Betacyanin, the pigment responsible for beetroot’s deep red color, brightens into a vibrant pink when in contact with acid, so our vinegar brine was the perfect medium. We tried boiling pieces of raw peeled beet in the brine along with the aromatics, but this made for a dull pinkish-brown brine and pickles that took on an overwhelming beet flavor. So instead, we mixed pieces of beets with the turnips in the jar and poured the hot brine over them. This coaxed a beautiful hot-pink color from the beets, and the turnips kept their flavor. The turnips need to be refrigerated for two days before serving. The beets will eventually become pickled and make for a tasty treat. If using a glass storage container, be sure to fill it with hot water to warm, then drain it before packing with the vegetables.
1 pound turnips, peeled and cut into 2 by ½-inch pieces
1 small beet, peeled and cut into 1-inch pieces
1¼ cups white wine vinegar
1¼ cups water
2½ tablespoons sugar
1½ tablespoons kosher salt
3 garlic cloves, smashed and peeled
¾ teaspoon whole allspice berries
¾ teaspoon black peppercorns
1. Pack turnips and beet into 1-quart airtight container, leaving ½ inch headspace. Bring vinegar, water, sugar, salt, garlic, allspice, and peppercorns to boil in medium saucepan. Cover, remove from heat, and let steep for 10 minutes.
2. Strain hot brine over vegetables and let cool to room temperature. Cover and refrigerate for at least 2 days before serving. (Pickled turnips can be refrigerated for up to 1 month; turnips will soften over time.)
VEGETABLES REIMAGINED
CREAMY KOHLRABI SOUP
This comforting, nourishing, and deeply satisfying soup uses just about every part of the vegetable, for a harmonious blend of flavors and textures. Because kohlrabi is low in fiber, it blends up easily with the added milk into a creamy, velvet-textured soup. The kohlrabi greens bring a pop of bright color and a fresh flavor to the sweet earthiness of the cooked kohlrabi bulb.

1. Trim and peel the kohlrabi bulbs and cut them into ½-inch pieces. Trim the tough stems from the leaves and cut the leaves into 1-inch pieces.
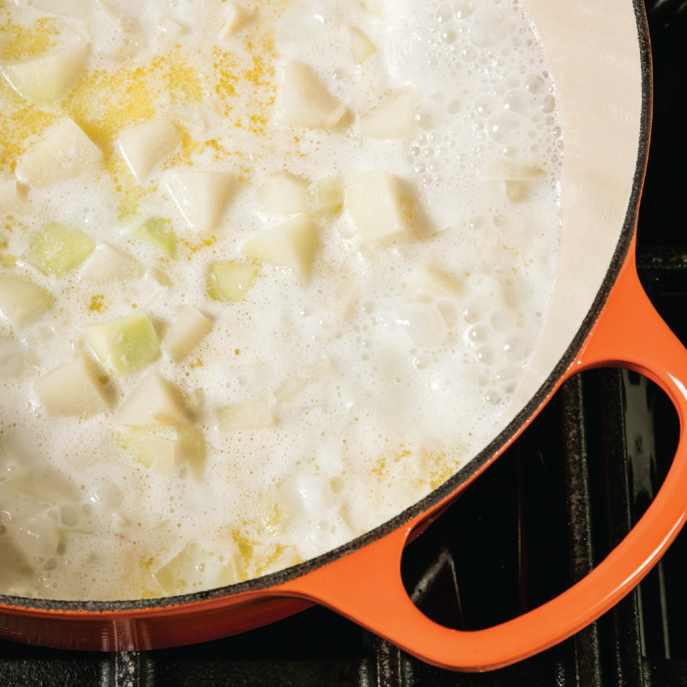
2. Cook the onions in the butter until softened and then stir in the kohlrabi pieces, water, and milk. Simmer until the kohlrabi is tender, 10 to 12 minutes.

3. Remove and set aside 1½ cups of the kohlrabi pieces to add back to the finished soup. Continue to cook the soup until the remaining kohlrabi in the pot easily breaks apart when poked with a paring knife. Then stir in the dry mustard.
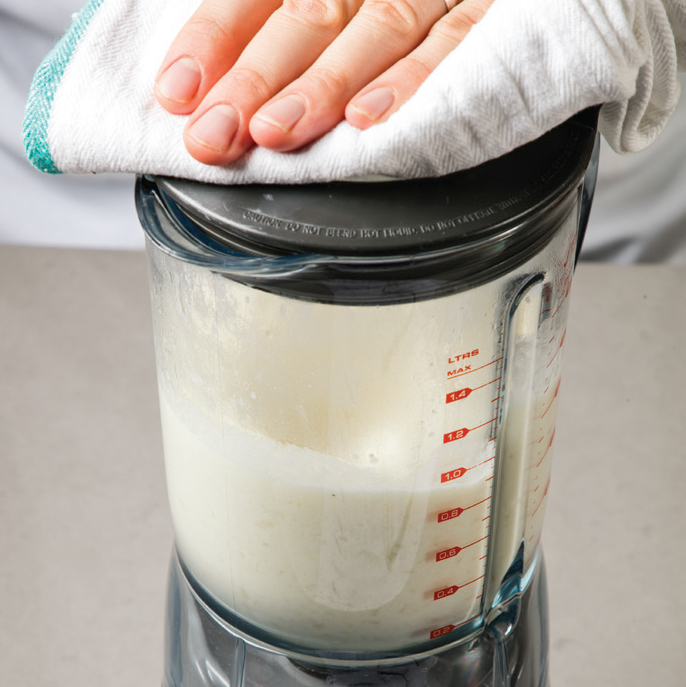
4. Working in batches, process the soup in the blender until smooth, about 1 minute. Return the soup to the pot and bring back to a simmer.

5. Add the sliced kohlrabi leaves and cook until they are tender and vibrant green in color, about 5 minutes. Remove the soup from the heat and stir in the reserved cooked kohlrabi pieces.

6. Sprinkle individual servings with the macadamia nuts and chives.
KOHLRABI, RADICCHIO, AND APPLE SLAW
Serves 4 to 6
Total time: 30 minutes
WHY THIS RECIPE WORKS For a fresh and flavorful take on coleslaw, we traded out everyday cabbage for crisp, juicy kohlrabi, supplementing it with sliced Granny Smith apples and radicchio to lend contrasting sweet, tart, assertive flavor and texture and bright color to this year-round side dish. We used a box grater (or you could use the shredding disk attachment of a food processor) to quickly turn the hard kohlrabi into tender shreds. To avoid a waterlogged slaw, we tossed the shredded kohlrabi with salt and sugar to soften it slightly and draw out moisture, and then spun it in a salad spinner to dry before combining it with the other ingredients. A generous amount of fresh mint and a bright Dijon mustard–based vinaigrette tied everything together.
1½ pounds kohlrabi, trimmed, peeled, and shredded
¼ cup sugar, plus extra for seasoning
Salt and pepper
½ cup extra-virgin olive oil
3 tablespoons white wine vinegar, plus extra for seasoning
2 tablespoons Dijon mustard
2 Granny Smith apples, peeled , cored, and cut into matchsticks
1 small head radicchio (6 ounces), halved, cored, and sliced ½ inch thick
½ cup fresh mint, chopped
1. Toss kohlrabi with sugar and 1 teaspoon salt in large bowl and let sit until partially wilted and reduced in volume by one-third, about 15 minutes. Transfer kohlrabi to salad spinner and spin until excess water is removed, 10 to 20 seconds.
2. Whisk oil, vinegar, mustard, ½ teaspoon salt, and ½ teaspoon pepper in large bowl until combined. Add kohlrabi, apples, radicchio, and mint and toss to combine. Season with salt, pepper, extra sugar, and extra vinegar to taste. Serve immediately.
CREAMY KOHLRABI SOUP
Serves 4 to 6
Total time: 1 hour
WHY THIS RECIPE WORKS Here’s a simple, deeply satisfying soup that utilizes nearly every part of the vegetable—root to leaf, so to speak. Similar to cauliflower, kohlrabi is particularly low in overall fiber, so it tends to blend up perfectly into smooth soups and purees. Here we wanted to highlight the delicate flavor of this brassica in a creamy, velvety soup. We started by cooking kohlrabi in an aromatic base of butter, onions, and vegetable stock and then blending it all up. Tasters loved the smooth texture of this soup, but wanted more kohlrabi flavor. Switching from broth to water helped to highlight the delicate flavor of the vegetable, but to really amplify the brassica flavor, we added a bit of dry mustard. (Brassicas like kohlrabi belong to the mustard family and share the same aromatic compounds that give mustard its characteristic zing.) To give more richness and body to the soup, we added a bit of milk to this base. For textural variation, we even cooked the kohlrabi greens in the soup at the end, which added a welcome element of contrast. Macadamia nuts and chives sprinkled on top made a crunchy garnish. You can substitute 4 ounces kale, stemmed and cut into 1-inch pieces, for the kohlrabi leaves.
4 tablespoons unsalted butter
1 onion, chopped
Salt
4 pounds kohlrabi with their leaves, kohlrabi trimmed, peeled, and cut into ½-inch pieces (6 cups), leaves stemmed and cut into 1-inch pieces (2 cups)
2 cups water, plus extra as needed
1 cup whole milk
1½ teaspoons dry mustard
⅓ cup salted dry-roasted macadamia nuts, chopped coarse
1 tablespoon minced fresh chives
1. Melt butter in Dutch oven over medium heat. Add onions and 1¼ teaspoons salt and cook, stirring occasionally, until softened, about 5 minutes. Stir in kohlrabi pieces, water, and milk, and bring to simmer. Cover, reduce heat to medium-low, and cook, stirring occasionally, until kohlrabi is tender (paring knife should slip easily in and out of pieces), 10 to 12 minutes.
2. Using slotted spoon, transfer 1½ cups kohlrabi to bowl. Continue to cook soup, covered, until remaining kohlrabi is very tender and easily breaks apart when poked with paring knife, 6 to 8 minutes. Stir in mustard.
3. Working in batches, process soup in blender until smooth, about 1 minute. Return soup to now-empty pot and bring to simmer over medium-low heat. Add kohlrabi leaves and cook, stirring occasionally, until tender and vibrant green, about 5 minutes. Off heat, stir in reserved cooked kohlrabi. Adjust consistency with extra hot water as needed. Season with salt to taste. Sprinkle individual portions with macadamia nuts and chives before serving.
IRISH STEW WITH TURNIPS AND CARROTS
Serves 6
Total time: 2 hours 45 minutes
WHY THIS RECIPE WORKS Hearty Irish stew is made from meat and root vegetables in a richly flavored base. The recipe can vary from town to town and household to household, though the traditional meat is lamb. Some versions use only potatoes for the vegetable component, but we think that’s a shame and prefer our Irish stew to also incorporate peppery turnips, pungent onions, and sweet carrots. We chose lamb shoulder chops for the meat, because we found that slicing the meat off the bone from a lamb shoulder chop, browning it, and adding the bones and meat to the stewing liquid gave us a great stew with a rich-tasting broth and the velvety texture that only marrow-rich bones can contribute. If possible, try to buy the shoulder chops from a butcher. In most supermarkets, lamb shoulder chops are sold too thin, often only about ½ inch thick. Though we prefer chops cut 1½ inches thick, 1-inch-thick chops will suffice.
4½ pounds lamb shoulder chops (blade or round bone), 1 to 1½ inches thick, trimmed, meat removed from bones and cut into 1½-inch pieces, bones reserved
Salt and pepper
3 tablespoons vegetable oil
2½ pounds onions, chopped
¼ cup all-purpose flour
3 cups water, plus extra as needed
1 teaspoon dried thyme
3 carrots, peeled and sliced ¼ inch thick
8 ounces turnips, peeled and cut into 1-inch pieces
¼ cup minced fresh parsley
1. Adjust oven rack to lower-middle position and heat oven to 300 degrees. Pat lamb dry with paper towels and season with salt and pepper. Heat 1 tablespoon oil in Dutch oven over medium-high heat until just smoking. Brown half of lamb on all sides, about 8 minutes; transfer to bowl. Repeat with 1 tablespoon oil and remaining lamb; transfer to bowl.
2. Add remaining 1 tablespoon oil, onions, and ¼ teaspoon salt to fat left in pot and cook over medium heat until onions are softened and lightly browned, about 8 minutes. Stir in flour and cook until onions are evenly coated, about 1 minute.
3. Stir in 1½ cups water, scraping up any browned bits and smoothing out any lumps. Gradually add remaining 1½ cups water, stirring constantly. Stir in thyme and 1 teaspoon salt and bring to simmer. Add reserved bones and lamb along with any accumulated juices and return to simmer. Cover, transfer pot to oven, and cook for 1 hour.
4. Remove pot from oven and place carrots and turnips on top of lamb and bones. Cover, return pot to oven, and cook until lamb is tender, about 1 hour.
5. Remove pot from oven and discard bones. Stir carrots and turnips into stew. Using large spoon, skim excess fat from surface of stew. Adjust consistency with extra hot water as needed. Stir in parsley and season with salt and pepper to taste. Serve.
VEGETABLE POT PIE
Serves 4 to 6
Total time: 1 hour 30 minutes (plus 1 hour chilling time)
WHY THIS RECIPE WORKS The best vegetable pot pie should feature a rich, flavorful gravy; a flaky, golden crust; and a hearty combination of sturdy vegetables that can handle the baking time without turning to mush. We chose a combination of mushrooms, sweet potatoes, turnips, and Swiss chard. So that each vegetable came out cooked just right, we sautéed the mushrooms, sweet potato, and turnip before stirring in the chard. Since those vegetables left behind a good amount of fond in the pot, this also helped us to create a flavorful gravy. When we whisked in the broth, the fond was incorporated into the gravy, lending it deep, complex flavor. We prefer our homemade pie dough, but you can substitute store-bought pie dough in this recipe. If using store-bought dough, you will still need to roll the dough into a 10-inch circle.
PIE DOUGH
1¼ cups (6¼ ounces) all-purpose flour
1 tablespoon sugar
½ teaspoon salt
4 tablespoons vegetable shortening, cut into ¼-inch pieces and chilled
6 tablespoons unsalted butter, cut into ¼-inch pieces and chilled
3–4 tablespoons ice water
POT PIE
4 tablespoons unsalted butter
1 onion, chopped fine
8 ounces cremini mushrooms, trimmed and quartered if large or halved if small
Salt and pepper
1 sweet potato (12 ounces), peeled and cut into ½-inch pieces
8 ounces turnips, peeled and cut into ½-inch pieces
3 garlic cloves, minced
½ teaspoon grated lemon zest plus 1 tablespoon juice
8 ounces Swiss chard, stemmed and cut into 1-inch pieces
2 tablespoons all-purpose flour
2 cups vegetable broth
1 ounce Parmesan cheese, grated (½ cup)
2 tablespoons minced fresh parsley
1 large egg
1 teaspoon water
1. For the pie dough Process flour, sugar, and salt in food processor until combined, about 5 seconds. Scatter shortening over top and process until mixture resembles coarse cornmeal, about 10 seconds. Scatter butter over top and pulse until mixture resembles coarse crumbs, about 10 pulses. Transfer to bowl.
2. Sprinkle 3 tablespoons water over flour mixture. Using rubber spatula, stir and press dough until it sticks together. If dough does not come together, add remaining 1 tablespoon water. Form dough into 4-inch disk, wrap tightly in plastic wrap, and refrigerate for 1 hour. (Dough can be refrigerated for up to 2 days or frozen for up to 1 month; if frozen, thaw completely at room temperature before rolling.)
3. Let chilled dough soften slightly on counter for 10 minutes. Roll dough between 2 large sheets parchment paper into 10-inch circle, flouring as needed. Remove parchment on top of dough. Fold over outer ½-inch edge of dough, then crimp into tidy fluted edge using your fingers. Using paring knife, cut four 2-inch oval-shaped vents in center. Slide parchment paper with crust onto baking sheet and refrigerate until needed.
4. For the pot pie Adjust oven rack to middle position and heat oven to 400 degrees. Melt 2 tablespoons butter in Dutch oven over medium heat. Stir in onion, mushrooms, and ½ teaspoon salt and cook until mushrooms have released their liquid, about 5 minutes.
5. Stir in sweet potato and turnips. Reduce heat to medium-low, cover, and cook, stirring occasionally, until potato and turnips begin to soften around edges, 7 to 9 minutes. Stir in garlic and lemon zest and cook until fragrant, about 30 seconds. Stir in chard and cook until wilted, about 2 minutes, and transfer to bowl.
6. Melt remaining 2 tablespoons butter in now-empty pot over medium-high heat. Stir in flour and cook for 1 minute. Gradually whisk in broth, scraping up any browned bits and smoothing out any lumps. Bring to simmer and cook until sauce thickens slightly, about 1 minute. Off heat, whisk in Parmesan, parsley, lemon juice, and ½ teaspoon salt. Stir in cooked vegetables, along with any accumulated juices, and season with salt and pepper to taste.
7. Transfer filling to 9½-inch deep-dish pie plate set on aluminum foil–lined rimmed baking sheet. Place chilled crust on top. Lightly beat egg, water, and pinch salt together in bowl, then brush over crust. Bake until crust is golden brown and filling is bubbling, about 30 minutes. Let cool for 10 minutes before serving.
ROOT VEGETABLE GRATIN
Serves 6 to 8
Total time: 1 hour 45 minutes (plus 25 minutes resting time)
WHY THIS RECIPE WORKS Sweet rutabaga and herbal celery root complement the earthiness of potatoes in our root vegetable gratin. We allowed all these flavors to come to the forefront by adding just a few aromatics: onion, garlic, thyme, and Dijon mustard. We added white wine to the gratin mixture because the wine’s acidity strengthens the pectin in the potatoes, ensuring they remain intact while the denser, less-starchy rutabaga and celery root cook through; the wine also brightens the flavor of the vegetables. To help the top layers of the gratin cook through at the same rate as the bottom layers, we covered the dish for the first portion of the cooking time. A layer of Parmesan-enhanced panko bread crumbs, added after removing the foil, toasted to a golden brown while the gratin finished cooking, resulting in a crispy, nutty, cheesy crust. Uniform thin slices of rutabaga, celery root, and potatoes are key to even cooking—use a mandoline, a V-slicer, or the slicing disk on a food processor.
1 tablespoon plus 1½ cups water
2 teaspoons all-purpose flour
1½ teaspoons Dijon mustard
Salt and pepper
⅔ cup dry white wine
½ cup heavy cream
½ onion, chopped fine
1¼ teaspoons minced fresh thyme
1 garlic clove, minced
2 pounds large Yukon Gold potatoes, peeled and sliced ⅛ inch thick
1 pound rutabaga, trimmed, peeled, quartered, and sliced ⅛ inch thick
1 pound celery root, trimmed, peeled, quartered, and sliced ⅛ inch thick
¾ cup panko bread crumbs
1½ ounces Parmesan cheese, grated (¾ cup)
4 tablespoons unsalted butter, melted and cooled
1. Adjust oven rack to middle position and heat oven to 375 degrees. Grease 13 by 9-inch baking dish. Whisk 1 tablespoon water, flour, mustard, and 1½ teaspoons salt in bowl until smooth. Add wine, cream, and remaining 1½ cups water, whisking to combine. Combine onion, thyme, garlic, and ¼ teaspoon pepper in separate bowl.
2. Layer half of potatoes in prepared dish, arranging so they form even thickness. Sprinkle half of onion mixture evenly over potatoes. Arrange rutabaga and celery root slices in even layer over onions. Sprinkle remaining onion mixture over rutabaga and celery root. Layer remaining potatoes over onions. Slowly pour water mixture over —vegetables. Using rubber spatula, gently press down on vegetables to create even, compact layer. Cover tightly with aluminum foil and bake for 50 minutes. Remove foil and continue to bake until knife inserted into center of gratin meets no resistance, 20 to 25 minutes.
3. Meanwhile, combine panko, Parmesan, and butter in bowl and season with salt and pepper. Remove gratin from oven and sprinkle evenly with panko mixture. Continue to bake until panko is golden brown, 15 to 20 minutes. Remove gratin from oven and let sit for 25 minutes. Serve.
SIMPLE GLAZED PORK TENDERLOINS WITH CREAMY TURNIP PUREE
Serves 4 to 6
Total time: 45 minutes
WHY THIS RECIPE WORKS A creamy, buttery turnip puree elevates quick-cooking pork tenderloins to make a satisfying winter meal that’s as great for company as it is for a family weeknight. Making the puree couldn’t be easier: After microwaving the turnip pieces, we pureed them in the food processor with butter and cream while the pork cooked on the stovetop. For the mild tenderloins, we opted for a sweet-tart glaze with the bright flavor of cherries and the warmth of port, with rosemary to add just the right herbal depth. By adding the glaze ingredients to the pan after browning the pork, we thickened the glaze, plumped the cherries, and gently cooked the pork through all at once.
2 pounds turnips, trimmed, peeled, and cut into ½-inch pieces
½ cup heavy cream
4 tablespoons unsalted butter
Salt and pepper
2 (12- to 16-ounce) pork tenderloins, trimmed
1 tablespoon vegetable oil
1 cup ruby port
1 cup chicken broth
1 cup dried cherries
1 sprig fresh rosemary
1. Place turnips in bowl and microwave, covered, until tender, 7 to 9 minutes, stirring halfway through microwaving. Bring cream and butter to simmer in small saucepan over medium heat. Process turnips and butter mixture in food processor until smooth and creamy, about 30 seconds. Transfer puree to bowl and season with salt and pepper to taste. Cover to keep warm.
2. Pat pork dry with paper towels and season with salt and pepper. Heat oil in 12-inch skillet over medium-high heat until just smoking. Cook tenderloins until well browned on all sides, 5 to 8 minutes. Add port, broth, cherries, and rosemary and cook, turning pork occasionally, until mixture is slightly thickened and pork registers 145 degrees, about 10 minutes. Transfer pork to carving board, tent with aluminum foil, and let rest for 5 minutes.
3. Continue to cook sauce mixture over medium-high heat until thick and syrupy, about 3 minutes. Discard rosemary and season with salt and pepper to taste. Slice pork ½ inch thick and serve with sauce and turnip puree.
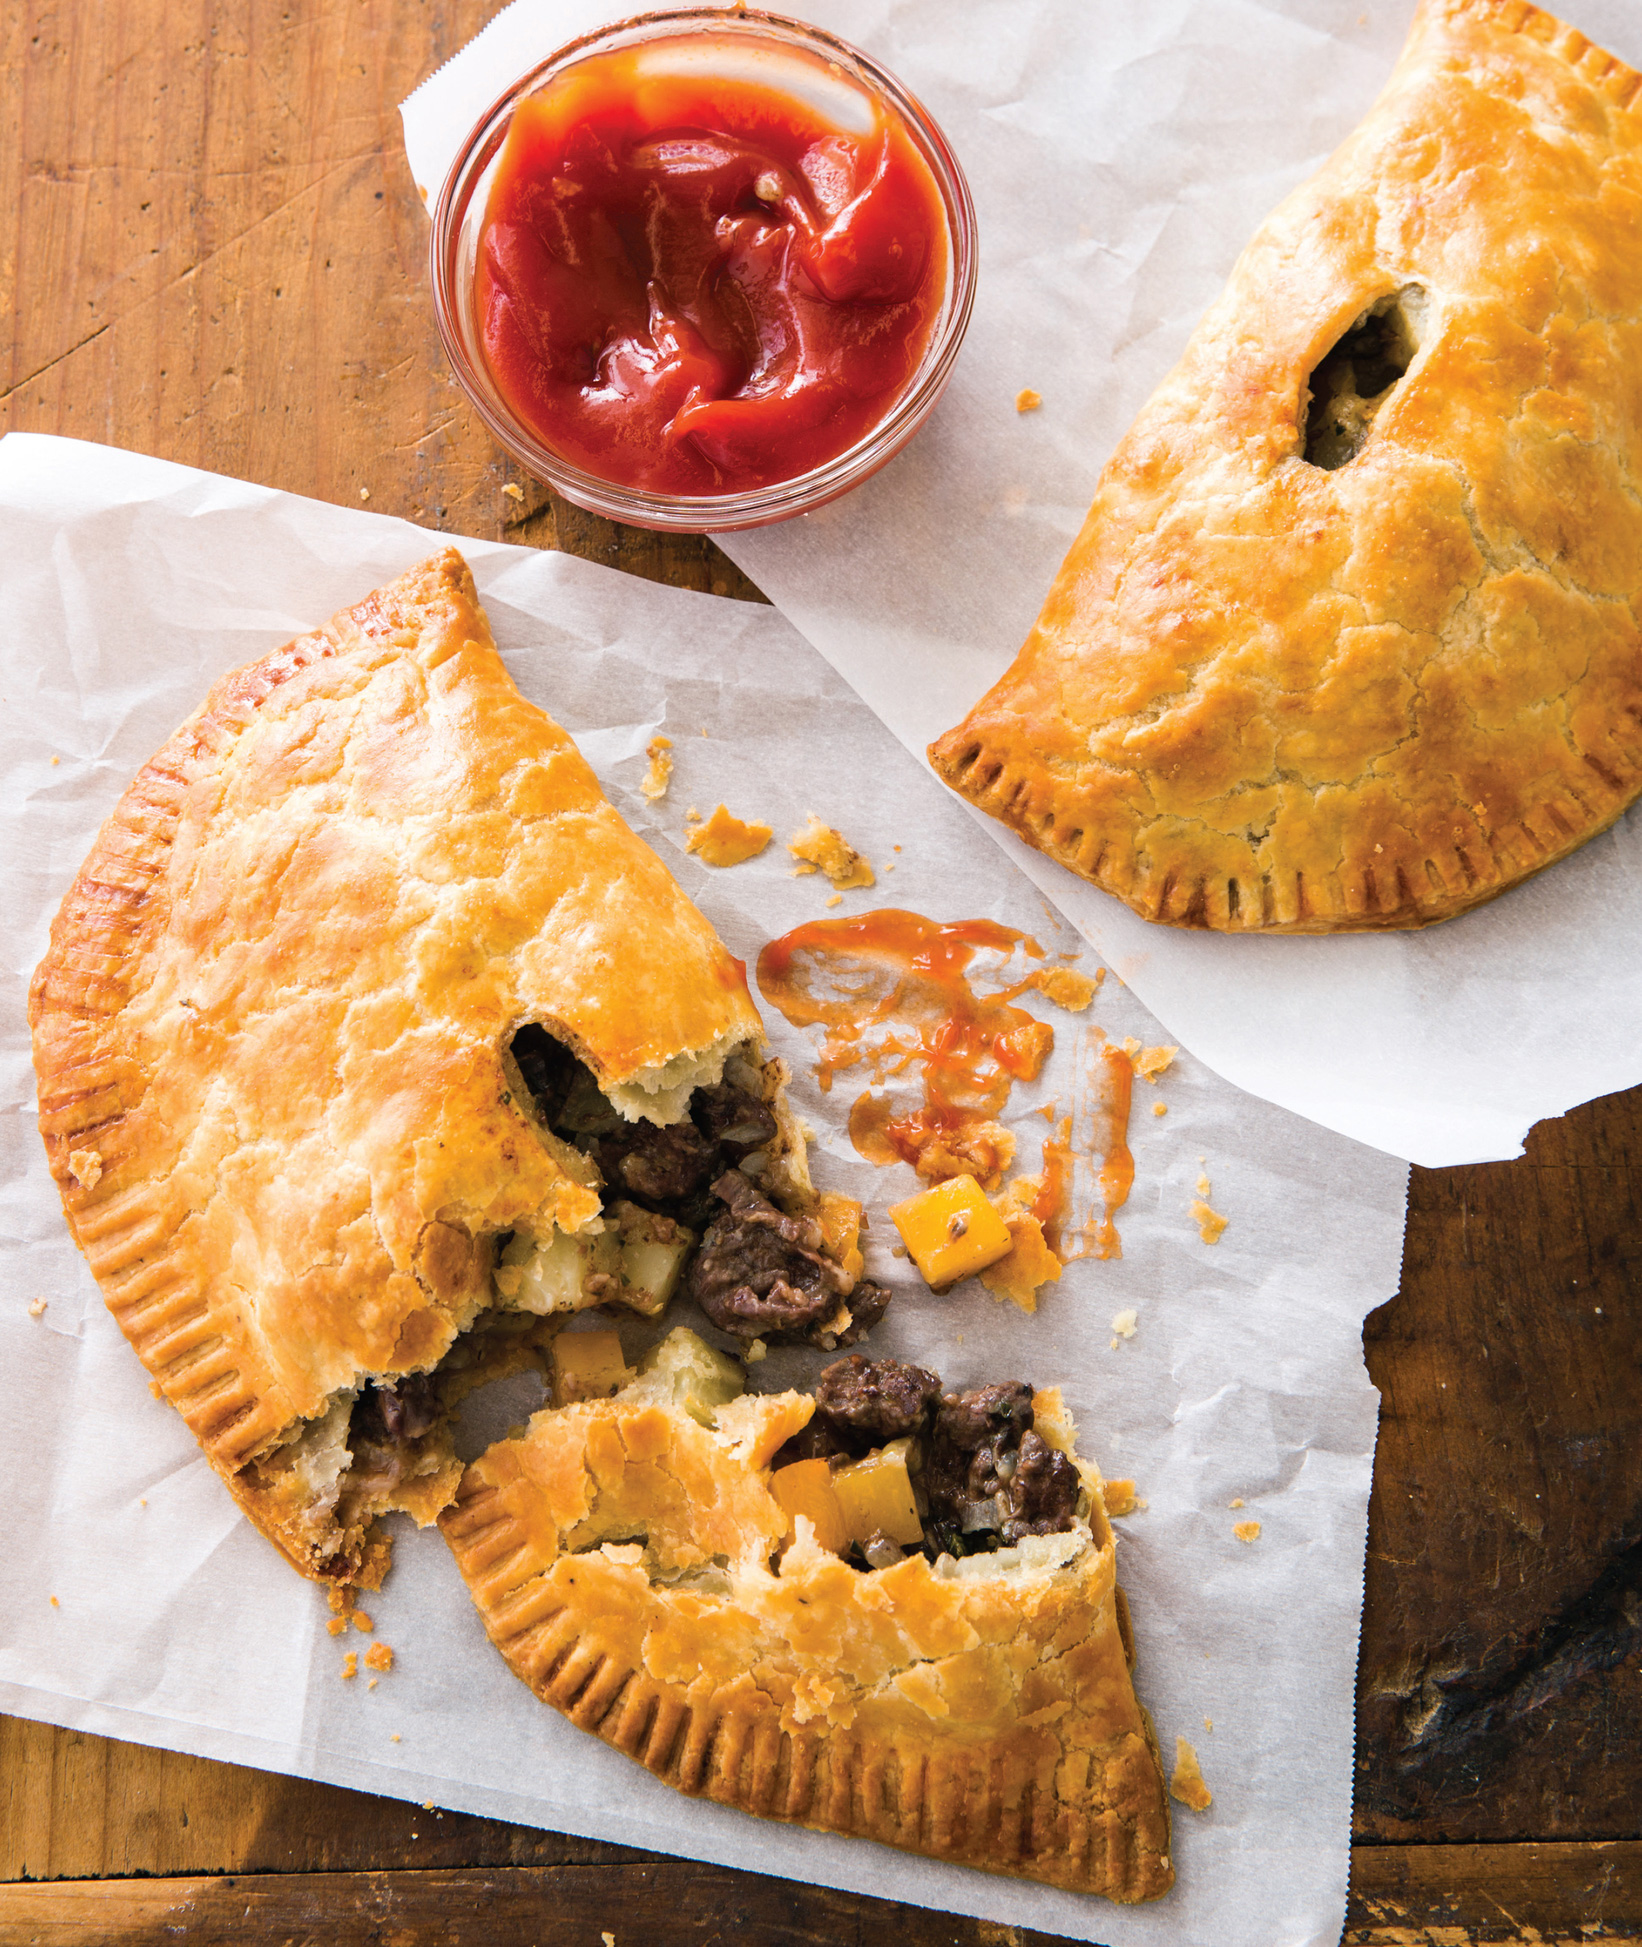
CORNISH PASTIES
Serves 6
Total time: 2 hours
WHY THIS RECIPE WORKS These handheld savory turnovers, traditionally eaten as quick but hearty lunches in England, should be rich, flaky, and moist. They can vary a bit in their filling components, but they nearly always include rutabagas or turnips. For the best version, we tossed the uncooked meat (skirt steak) and vegetables (onion, rutabaga, and potato) with a little flour before wrapping the filling tightly in our dough rounds. The flour combined with the filling’s exuded juices as the pasties baked to create the flavorful gravy right inside the crust. We didn’t want to stray very far from the pasties’ roots, but we did add some garlic and fresh thyme to punch up the flavor of the filling. To ensure easy dough assembly, we used sour cream to make it both pliable and rip-resistant. If you can’t find skirt steak, you can use 1½ pounds of blade steak; the extra ¼ pound accounts for the trimming required with the blade cut. The pasties fit best on the baking sheet when placed crosswise in two rows of three.
CRUST
⅔ cup sour cream, chilled
1 large egg, lightly beaten
3 cups (15 ounces) all-purpose flour
1¾ teaspoons salt
16 tablespoons unsalted butter, cut into ½-inch pieces and chilled
FILLING
1 tablespoon unsalted butter
1 onion, chopped fine
Salt and pepper
1 tablespoon minced fresh thyme
2 garlic cloves, minced
1¼ pounds skirt steak, trimmed and cut into ½-inch pieces
10 ounces rutabaga, trimmed, peeled, and cut into ½-inch pieces
10 ounces russet potatoes, peeled and cut into ½-inch pieces
¼ cup all-purpose flour
1 large egg
1. For the crust Whisk sour cream and egg together in small bowl. Process flour and salt in food processor until combined, about 3 seconds. Add butter and pulse until only pea-size pieces remain, about 10 pulses. Add half of sour cream mixture and pulse until combined, about 5 pulses. Add remaining sour cream mixture and pulse until dough begins to form, about 15 pulses.
2. Transfer mixture to lightly floured counter and knead briefly until dough comes together. Form dough into 6-inch disk, wrap tightly in plastic wrap, and refrigerate for 30 minutes. (Dough can be refrigerated for up to 24 hours; let chilled dough sit on counter for 15 minutes to soften before rolling.)
3. For the filling Melt butter in 10-inch skillet over medium heat. Add onion and ¼ teaspoon salt and cook until softened, about 5 minutes. Stir in thyme and garlic and cook until fragrant, about 30 seconds. Let cool slightly, about 5 minutes. Combine cooled onion mixture, steak, rutabaga, potatoes, 2 teaspoons salt, and ¾ teaspoon pepper in bowl. Add flour and toss to coat.
4. Adjust oven rack to upper-middle position and heat oven to 375 degrees. Line rimmed baking sheet with parchment paper. Remove dough from refrigerator, cut into 6 equal pieces (about 5 ounces each), and cover with plastic wrap. Divide filling into 6 equal portions, about 1 heaping cup each.
5. Working with 1 piece of dough at a time, roll into 10 by 8-inch oval (about ⅛ inch thick) on lightly floured counter. Place 1 portion filling in center of dough. Moisten edges of dough with water, then fold narrow end of oval over filling to form half-moon shape. Press dough around filling to adhere.
6. Trim any ragged edges, then crimp edges with fork to seal and transfer to prepared sheet. (For more decorative edge, trim any ragged edges and, starting at 1 end, pinch and slightly twist dough diagonally across seam between your thumb and index finger. Continue pinching and twisting dough around seam.) Repeat with remaining dough and filling.
7. Using paring knife, cut 1-inch vent hole on top of each pasty. Whisk egg and 2 teaspoons water together in bowl. Brush pasties with egg wash. Bake until crust is golden brown and filling is bubbling up through vent hole, about 45 minutes, rotating sheet halfway through baking. Transfer pasties to wire rack and let cool for 10 minutes before serving.