Figure 901: Virtual Device Configuration, Showing “Use Host GPU” Checkbox
The Android emulator, at its core, is not that complex. Once you have one or more Android virtual devices (AVDs) defined, using them is a matter of launching the emulator and installing your app upon it. With Android Studio, those two steps can even be combined — the IDE will automatically start an emulator instance if one is needed.
However, there is much more to the Android emulator. This chapter will explore various advanced features of the emulator and how you can use them.
Understanding this chapter requires that you have read the core chapters of this book.
When defining an AVD, or editing an existing AVD definition, there are many other configuration options at your disposal.
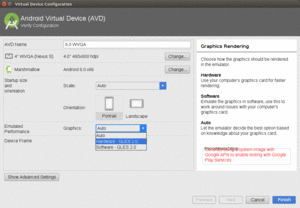
Another way to speed up the emulator is to have it use the graphic card or GPU of your development machine to accelerate the graphics rendering of the emulator window. By default, the emulator will use software-based rendering, without the GPU, which is slow in general and worse when running an ARM-based image.
Whether this will work or not for you will depend in part upon your graphics drivers of your development machine. Also, their use might conflict with other things you might want to do — on Linux, using hardware GPU mode might break your ability to take screenshots, for example.
This setting is toggled within the AVD Manager, for new and existing AVDs, via the “Graphics” drop-down list in the “Emulated Performance” group:
Figure 901: Virtual Device Configuration, Showing “Use Host GPU” Checkbox
There are three options:
The Android emulator can emulate devices that have, or do not have, a physical keyboard.
Most Android devices do not have a physical keyboard, and so the emulator is set up
to behave the same. However, this means that typing on your development machine’s keyboard
will not work in EditText widgets and the like — you have to tap out what you want
to type on the on-screen keyboard.
If you wish to switch your emulator to emulate a device with a physical keyboard – either “for realz” or just to simplify working with the emulator on your development machine — you can do so.
In the Android Studio AVD Manager, in the “Advanced Settings” area, there is an “Enable keyboard input” checkbox that determines whether hardware keyboard input is honored in the AVD or not:
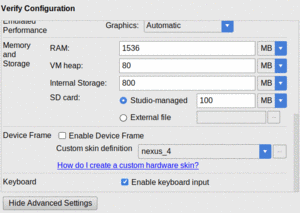
Figure 902: Virtual Device Configuration, Showing “Enable keyboard input” Checkbox
You can also control whether the device starts up in portrait or landscape mode at the outside, by the toggle buttons labeled “Startup orientation”:
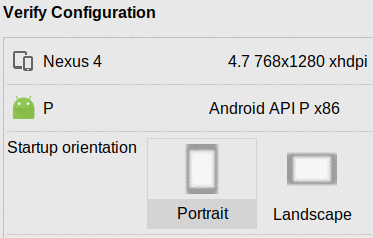
Figure 903: Virtual Device Configuration, Showing “Startup orientation” Options
In the “Advanced Settings” area, you can control whether or not the emulator emulates a device with a camera:
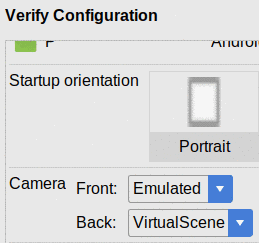
Figure 904: Virtual Device Configuration, Showing Camera Options
Whether you can configure both front and back cameras, or just one, is indeterminate. If you can configure a camera, your options are:
The back camera also will have a “VirtualScene” option, where the camera will appear to be looking at the interior of a home, in the form of a 3D rendering of that interior.
However, the emulator’s ability to truly emulate the way Android cameras behave is very limited. Serious camera testing needs to be done using Android hardware, not the emulator.
In the “Advanced Settings” area, you can control how much RAM and storage is used by the emulator:
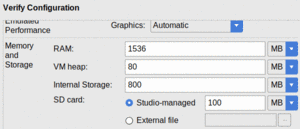
Figure 905: Virtual Device Configuration, Showing Memory and Storage Options
Specifically:
mksdcard to create your own disk image that you attach
to the emulator.Usually, the defaults are fine.
By default, the emulator appears in a bare window, showing the contents of the “touchscreen”. Of course, an actual Android device will have more around it, such as bezels, optional hardware buttons, and so on.
In the “Device Frame” group in the “Advanced Settings” area, you can check “Enable Device Frame” and choose a skin to wrap around the touchscreen and make your emulator look a bit more like a real device:
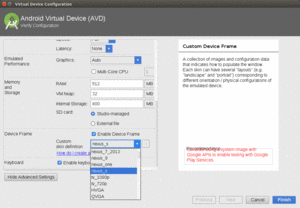
Figure 906: Virtual Device Configuration, Showing Device Frame Options
Starting with Android Studio 2.0, the emulator sports a “sidebar” that runs alongside the main emulator window:
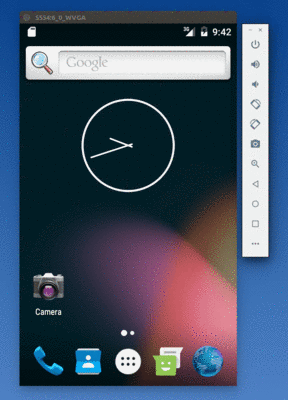
Figure 907: Android Emulator, with Sidebar on the Right
This provides you with rapid access to a number of emulator features and controls. Some of those are hidden behind the “More” button, at the bottom of the sidebar (looks like an ellipsis, “…”).
Note that the sidebar buttons have tooltips that will tell both the button’s purpose and the keyboard shortcut, if any, for that button.
The top icon in the sidebar is a power button. A quick click on it will close your emulator. A long-click will behave like the POWER button on an Android device, bringing up the power menu:
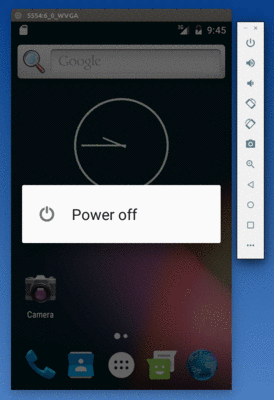
Figure 908: Android Emulator, Showing Power Menu
Towards the bottom of the sidebar are BACK, HOME, and RECENTS buttons for navigation:

Figure 909: Android Emulator Sidebar Navigation Buttons
If you click the “More” button, you will open up the “Extended Controls” window:
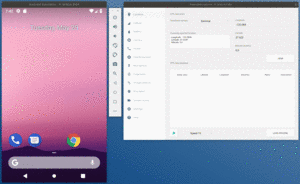
Figure 910: Android Emulator with Extended Controls
Clicking the “Directional pad” category on the left of the “Extended Controls” gives you D-pad and media buttons for in-app navigation:

Figure 911: Emulator Extended Controls, Showing Directional Pad
Two buttons on the sidebar allow you to rotate the device clockwise or counter-clockwise:

Figure 912: Android Emulator Sidebar Rotation Buttons
The magnifying glass icon allows you to zoom and out of the emulator screen contents:

Figure 913: Android Emulator Sidebar Zoom Button
When in zoom mode, the mouse cursor changes to a magnifying class, and left-mouse clicks will zoom in at the clicked-upon point. Right-mouse clicks will zoom out. To return the mouse to normal behavior, tap the zoom sidebar button again. However, note that you will remain zoomed in on the last-selected zoom state; to return the emulator fully to normal, zoom out all the way first.
The camera button on the sidebar allows you to rapidly take screenshots of the emulator window:

Figure 914: Android Emulator Sidebar Screenshot Button
These will be stored in a directory controlled by the “Settings” category in the “Extended controls” window:
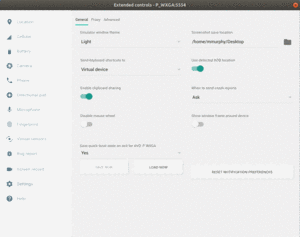
Figure 915: Emulator Extended Controls, Showing Settings
The “Extended controls” panel also allows you to fake real world behavior in your emulator.
The “Location” category lets you fake GPS fixes:
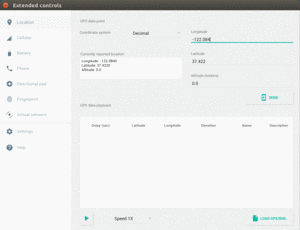
Figure 916: Emulator Extended Controls, Showing Location
The upper half allows you to specify a single GPS fix and “send” that to the emulator, which should respond the same way as if an actual Android device received a GPS fix.
The bottom half allows you to load a GPX or KML file containing a series of waypoints and the time between them, then play those back, either at normal speed or at an accelerated pace (if you get bored easily).
The “Cellular” category controls how the emulator emulates its cellular network connection:
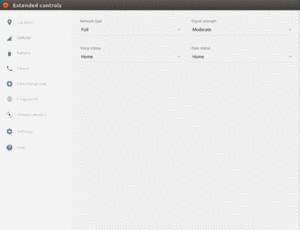
Figure 917: Emulator Extended Controls, Showing Cellular
The “Battery” category allows you to simulate changes in the power status of the emulator:
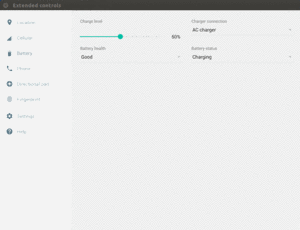
Figure 918: Emulator Extended Controls, Showing Battery
Not only will your code be able to receive events like ACTION_BATTERY_CHANGED,
but you can see the changes in the status bar of the emulator, such
as the battery icon showing charging status and current charge level.
The “Phone” category allows you to simulate incoming phone calls and text messages:
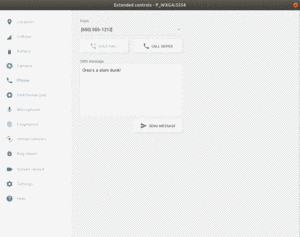
Figure 919: Emulator Extended Controls, Showing Phone
Dragging a window edge of the emulator window will change the scale used by the emulator. The entire emulator window is still there, just smaller or larger than before. The resulting window will have the proper aspect ratio, so if you drag the left or right side and shrink the window, it will shrink both vertically and horizontally.
Using your development machine’s native file manager (e.g., Nautilus
on Ubuntu Linux), you can drag-and-drop files into the emulator window.
If the file is an APK, it will be installed automatically, as if you had
installed it through the adb install command. If the file is
anything else, it will be uploaded into the emulator’s Download/
directory on external storage. If your app has permission to work with
external storage, it can read the file from there.
Sometimes, you want an emulator without a GUI. Typically, this is used for continuous integration or some other server-based testing solution — you use the “headless” emulator to run tests, even on a machine that lacks any GUI capability.
To do this, you will need to run the emulator from the command-line. Run
emulator -no-window -avd ..., where ... is the name of your AVD (e.g., the value in
the left column of the list of AVDs in the AVD Manager). To test this first in normal
mode, run the command without the -no-window switch.
The simplest solution to get rid of the emulator instance is to kill its process.
There are many other command-line switches for the emulator that you may wish to investigate. While most of these have UI analogues in the AVD Manager, the switches would be necessary to replicate some of those for headless operation.