Congratulations! Not only have you almost made it through this book, but it’s here. That special moment you’ve been waiting for. Harvest day.
You’ve managed to create your grow space and care for your plants throughout their entire existence. You’re excited to reap the rewards. The cultivation process can seem long and will often test a grower’s patience, especially first-timers. Before you go hacking away at your plants like some pot-crazed lunatic, make sure the time is right for harvest. In this final step, we’ll talk about when and how to harvest and how to cure, trim, and store your crop properly.
Is the Time Right?
THC, the psychoactive chemical in marijuana, degrades into CBN, or cannabinol. CBN is a sedative-type cannabinoid with fewer psychoactive properties than THC. How you time your harvest will determine whether you have the highest-possible THC levels, the highest-possible CBN levels, or a balance of the two cannabinoids.
There are three factors that dictate when the best time to harvest is: the flowering time, the color of the stigmas, and the appearance of the trichomes. Flowering time is a baseline set by the grower after observing the strain’s growing habits. Stigmas are the white, hairlike structures that are the visible part of pistils, and they typically turn red or brown when THC levels are at their highest. Trichomes are those resinous, mushroom-shaped structures on bud and bud leaves that produce terpenes and cannabinoids like THC, CBD, and CBN.
Stigmas and trichomes are key in determining the level of marijuana potency, aroma, and flavor and thus your crop’s readiness for harvest. Keep in mind that the amount of marijuana you are able to harvest and the potency, aroma, and flavor all peak at about the same point toward the end of the flowering stage. The goal of most home growers is to hit this sweet spot in yield before potency starts to drop off.
Equipment Required
Stigmas are large enough to be viewed with the naked eye, but trichomes are rather small and require magnification to get a proper view. You can use a magnifying glass, a jeweler’s loupe, a digital microscope (which can cost as little as $30), or even your smartphone’s camera. No matter what magnification tool you choose, the key is to be able to see in color and high enough resolution to evaluate trichome development for color and clarity.
Reading Stigmas
Changing stigmas will be the first sign that harvest is approaching. Stigmas start out white, sticking straight out from the bud, but as they develop, they darken in color, often to a red or brown hue, and start to curl. Once a majority of stigmas have started to change color and curl, you can evaluate the trichomes. For maximum THC levels, wait until 75 to 85 percent of stigmas have changed color. If you want to let some of that THC convert into CBN to create a sleep aid with little to no psychoactive properties, wait until 90 to 95 percent of stigmas have changed color. By the way, you will typically always have a few fresh, white pistils. This is expected, as the plant is actively flowering. Base your decision to harvest on when the vast majority of stigmas have changed and disregard random new ones.
Reading Trichomes
Trichomes are those resinous glands that are workhorses of terpene and cannabinoid production. The ones we’re focusing on look like small, long-stalked mushrooms. Like stigmas, trichomes change in color as they develop and mature through three basic phases during the flowering stage. In the first phase, the trichomes are young and undeveloped and have produced few terpenes or cannabinoids; this phase is characterized by clear, glossy trichomes. If your trichomes are still clear, it is most likely too soon to harvest. The next phase represents maximum THC potency and is characterized by cloudy or opaque trichomes. This is the ideal harvest state for many indoor growers looking to garner the largest amount of THC and CBD from their plants. The final phase is characterized by a majority of trichomes turning brown or amber, indicating oxidation and the creation of degradation products like CBN. This would be considered late to harvest unless you were seeking a lower THC/higher CBN product.

Different Bud Sites
The cola bud and upper-level buds will make up the bulk of your harvest and contain the highest-quality, most potent parts of your plant. It’s for this reason you want to base your decision to harvest on the development level of the colas and higher-positioned buds. It’s completely normal to have buds that are lower down on the plant or blocked by dense foliage be less developed than the colas and upper-level buds. You can only cut the plant down once, so you want to get the best overall bang for your buck. If you wait for the lower buds to develop before harvesting, you might miss the high-potency window for the colas and more developed buds. Less-mature buds can be used for butter or other concentrates. Some growers harvest in stages in order to allow their immature buds to develop. For example, you could harvest only the top half of a plant and allow the buds below to mature for another week to 10 days prior to harvesting them.
CBD
Cannabinoids are substances found in cannabis such as THC, CBD, and CBN. Over 110 different cannabinoids have been isolated from cannabis plants to date. Arguably, THC and CBD are the most popular cannabinoids today, with CBN and CBG becoming more popular. CBD, or cannabidiol, has proven therapeutic effects and is the active ingredient in the FDA-approved drug Epidiolex, which is the only FDA-approved, cannabis-derived medicine on the market. CBD lacks any psychoactive properties and is said to give the consumer a “body high” versus the “mental high” associated with THC. CBD is said to offer relief from a variety of ailments, from digestive issues to arthritis.
Most CBD produced and sold in the form of topicals, tinctures, and edibles is sourced from high-CBD hemp strains that contain little to no THC. Marijuana and hemp are both cannabis plants. Because it’s a type of cannabis, hemp can be grown indoors in a similar way to marijuana, but hemp strains are often optimized for outdoor cultivation and tend to be much taller than indoor grows will allow. If CBD is what you seek, try a high-CBD strain of marijuana, such as Pennywise or Deadlights. These will yield high CBD while maintaining a smaller size and profile.
How to Harvest
So, you’ve decided your plants have been in the flowering stage for long enough. A high percentage of the stigmas have darkened and curled, and most of the trichomes are milky white, with a few amber heads here and there. And you flushed your plants with plain water as early as one to two weeks ago to produce a cleaner product with better flavor and aroma.
Your hard work is about to pay off. Take a deep breath and follow these steps to ensure your harvest session is clean and efficient and your buds are treated with care.
Prep
Before you jump into harvesting, make sure you and your area are ready. The cleaner you work, the less chance of the product becoming damaged or contaminated. You should have the following on hand for your harvest:
Drying rack or equivalent
Isopropyl alcohol (70 percent)
Manicuring tray or tub
Paper towels
Sharp pruning shears
Small brush and dustpan
Trash bags
We recommend having a large table or other work surface to break down the plant on once you’ve cut it. Line the table with plastic or trash bags for easy cleanup. Try to clean as you go, and only start what you know you can finish processing. Dispose of leaves and unwanted plant matter as soon as practical so they don’t become an attractant for pests and to help reduce contamination.
Light
Hand trimming, unless you’re attempting to manicure to perfection, doesn’t require any special lighting. Natural light or standard fluorescent home lighting works nicely. Don’t try to use your grow lights, as they’ll be too bright. Keep in mind that trichomes degrade in response to light and oxygen, so you want to avoid any high-intensity light like the light used during the vegetative and flowering stages. Once your bud is separated from the plant, it can’t continue to develop or grow, so light is no longer beneficial.
Climate
You can harvest at room temperature or a little cooler with relatively low RH, ideally 60 percent or less. The harvesting and preliminary breakdown of your bud can take a few hours, depending on the number of plants and yield. The next phase after harvest is drying, during which the optimal temperature is around 68°F with low relative humidity, about 50 percent. The sooner you can get your buds into these conditions, the better. However, a couple of hours spent around room temperature with slightly higher RH shouldn’t be detrimental as long as the buds move through the process and are cooled down and dried quickly.
Time
Though the cut to the main stalk only takes a few moments, breaking down, trimming, and preparing your cannabis for drying can take considerably longer, often up to 30 minutes per plant. You want all the plants you cut down to begin drying immediately. Sitting for several hours or overnight can allow moisture to start breaking down the bud and encourage mold growth. If you have many plants, consider breaking your harvest up so you can harvest, trim, and set to dry only two or three plants at a time. Be careful not to cut down more plants than you can process in two or three hours.
Allow ample time for cleanup and reorganization of the grow area as well. Cleaning and sanitizing the grow area after harvest eliminates pathogens and fungi and gives you a clean starting point for your next batch of plants.
How to Trim Properly
Harvesting and trimming can be intimidating, but they don’t need to be. The goal is to get all the flower, including the cola, separated from the plant and pre-trimmed to facilitate drying. After drying, individual nuggets are cut from the larger stem and manicured to your preference prior to curing and storage.
Remember to wear protective eyewear and clothing as well as gloves during the harvest, trimming, and curing stages because many individuals, even chronic users, can develop skin sensitivities, rashes, and other allergic-type reactions.
Cutting the Cola
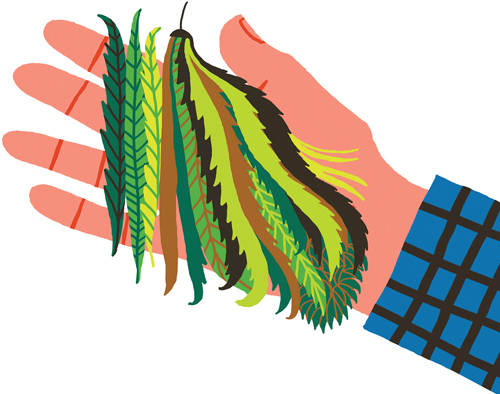
Start by removing the top cola from the plant with your pruning shears, cutting an inch or two below the bottom of the cola. If the shears get sticky with resin, use isopropyl alcohol to dissolve the residue and get them moving again. The cola often contains 50 percent or more of the total useable material from a plant, so you want to be careful when handling it and breaking it down. If the colas are very dense, consider cutting them into three or four pieces to improve airflow during the drying phase. You want your buds to be of relatively similar density and volume so they dry at the same rate.
Top-Down or Bottom-Up Harvest Method
If you’re limited on space, consider processing one plant at a time, starting with the cola and working your way down in a top-down fashion, removing bud stems as you go. If you invert and hang your plant while working on it, you will most likely work in a top-down fashion as well, even though this corresponds to working bottom-up for the plant. It doesn’t matter which direction you go in. Whatever method works for you and doesn’t leave behind any usable bud is a good one.
Removing the Leaves
Your buds need some cleanup before they can be dried. This step can be considered “pre-trimming.” Your goal is to clean up the buds so they dry as evenly and consistently as possible. Remove any remaining fan leaves or yellow leaves while wet. These will dry and start to hug the buds, making them difficult to trim away later. The sugar leaves, which are the small resinous leaves embedded in and around the bud, should be left on at this stage. They are soft and sticky due to the trichomes that are present. If desired, you can manicure the finished buds more and remove some sugar leaves in a later step. Removing the fan and yellowing leaves will allow the cola to dry out nicely.
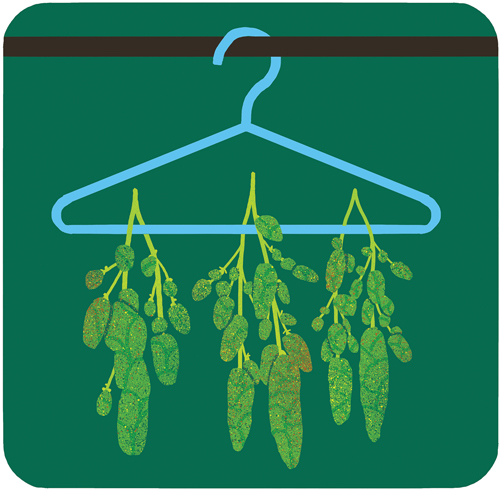
Hanging to Dry
Now that your plants are broken down into stems with several buds, you can move to the drying step. Most growers hang their plants upside down by attaching them to hangers or a clothesline. The area you use for drying should be clean to prevent mold and fungal infections. Temperature should be set to 68°F with RH around 50 percent. The more airflow you have, the better and faster your buds will dry out. Fans can help circulate the air, but make sure there is adequate air exchange because the air contains all the water being sucked out of the buds. High humidity levels during drying lead to the risk of introducing molds and pathogens. Small buds that can’t be hung directly can be left on a mesh drying rack suspended in the air. Drying usually takes one to two weeks.
You can check the humidity of the bud as an indicator of the progress of the drying process by placing some bud in a mason jar with a humidistat. Your bud is dried enough once its humidity falls to 65 percent. You can also test dryness by breaking off a small bud with your fingers. If the stem snaps off, your bud is at a good dryness level. If the stem tears and splinters without breaking, you probably need some more time. Drying is best performed in the dark so as not to degrade precious cannabinoids and terpenes.
Cutting the Bud
After the drying process is complete, your buds should be cut down to manageable nuggets to cure properly and for long-term storage. Your finished buds might be anywhere from one to four grams in weight depending on your preference and how the plant breaks down naturally. If your goal is perfectly manicured buds, this is the point at which you should spend that extra time to trim, shape, and remove sugar leaves. We suggest doing this as little as possible because your trimmings will contain a significant level of cannabinoids. You can always put them into butter, concentrate, or some other product, but why not leave them on the bud? Be sure your curing/storage container is the right size and provides an airtight seal like a mason jar or a container with a gasketed lid.
Curing
Curing is a critical step for giving you the potency, aroma, flavor, and shelf life you’ve worked so hard for. Curing involves keeping your buds in climate-controlled storage while frequently “burping” them—releasing built-up gases and allowing fresh air into the storage container. Once your buds are transferred to airtight containers, place them in a cool, dark area. To burp them, open the container, leave the buds exposed for several minutes, and reseal at least once per day. The curing process can last 3 to 12 weeks. Just as with drying, you can check for the curing process endpoint with a humidistat. Your ideal long-term storage humidity for bud is between 62 and 65 percent RH. Once your bud falls to this level, you can officially end the curing process and transfer your product to storage.
Storage
The best way to store your stuff is in airtight glass or food-grade plastic containers. You can use glass mason jars, food-grade plastic bags, or food-grade plastic tubs. Store the containers in a cool, dry place, and keep them sealed and out of the light. Remember that oxygen and light are the enemies of terpenes and cannabinoids. If cured and stored properly, your finished marijuana can last for up to one year with little degradation of THC, CBD, terpenes, or flavonoids.
Shopping List for the Harvest:
Drying rack or equivalent
Humidistat
Isopropyl alcohol (70 percent)
Magnifying glass, loupe, or digital microscope
Manicuring tray or tub
Sharp pruning shears
Storage containers
Enjoying Your Hard Work
Finished marijuana buds are often referred to as “flower” to distinguish them from the other value-added forms of cannabis, such as concentrates, tinctures, creams, and edibles. These other products often include extracted distillates from marijuana or hemp as ingredients.
Concentrates
Concentrates include wax, shatter, budder, vape oil, distillate, and other products. They have high cannabinoid content, often approaching 90 percent. Distillates are very pure and typically impart no color, flavor, or aroma to the products they’re utilized in. Industrially, distillates are often used to introduce cannabinoids into tinctures, topical creams, and edibles. If you are looking to extract at home, do some research and start out with a basic alcohol extraction. This involves heating your weed with 190-proof grain alcohol and reducing the mixture containing the stripped cannabinoids to a gel.
Tinctures
Tinctures in general are pure extracts of various plant compounds. In the world of cannabis, tinctures are mixtures of cannabinoids, often with carrier substances such as medium-chain triglycerides (MCT) or olive oil. There are tinctures with single cannabinoids, such as CBD, and tinctures with blends of cannabinoids, such as THC and CBN. Tinctures offer a way to ingest concentrated cannabinoids without vaping, smoking, or eating. They have grown quickly in popularity, with CBD tinctures being the most common.
Creams
A plethora of creams are sold today that include THC, CBD, or a combination of the two cannabinoids. In the United States, creams containing THC must be sold in a state-licensed dispensary, whereas CBD-based creams abound at your local pharmacy. Many consumers swear by these products. THC-based creams often cause the area where the cream was applied to warm up, which lends to the soothing effect of the THC.
Edibles
The classic “pot brownie,” alongside cannabis cookies and other treats, has been around for decades as a staple of the ganja community. More recently, culinary trends featuring the use of marijuana in cooking have produced some exotic and aggressive dishes. Edibles now include gummy bears, gummy worms, and high-quality chocolates infused with cannabinoids. If you venture into the world of making edibles, make sure your weed is always decarboxylated. Decarboxylation converts THCa into THC, allowing your edibles to have an effect. Without decarboxylation, your edibles won’t pack much of a punch.
Can’t smoke all that weed? Try making cannabutter. It can be used in any recipe that calls for butter but is most popular in baked goods. The key to making cannabutter is keeping the butter on low heat—burn it and you’ll ruin the flavor and potency.
Ingredients
2 cups fresh marijuana shake and trim
2 cups unsalted butter
Procedure
1.
Preheat the oven to 250°F.
2.
Bake the marijuana in the preheated oven for 30 minutes.
3.
While the marijuana bakes, melt the butter in a saucepan or a skillet on low heat until foamy.
4.
Grind the marijuana and add it to the butter.
5.
Cook over low heat for 2 to 3 hours, stirring occasionally. Strain the mixture into a bowl using a wire-mesh strainer, cheesecloth, or paper coffee filter. Cool until solid.
6.
Transfer to an airtight container. Label: “CONTAINS MARIJUANA. KEEP OUT OF REACH OF CHILDREN.”
Store for up to 6 months in the refrigerator.
Tip:
Grab your favorite box of brownie mix, substitute cannabutter for the vegetable oil, and you’ll have a batch of yummy edibles in no time!