Making a call with the dialer is straightforward: Tap the virtual buttons, and then tap the green phone icon to place the call. You’ll find the dialpad easier to use than a normal cellphone keypad because its buttons are larger.

The dialer comes with three useful buttons across the bottom of the screen. Here they are, from left to right:
Voicemail. Tap this icon to see if you have any voicemail messages; if you do, you’ll be able to check them.
Dial. After you’ve tapped in the number, tap here to make your call.
Voice dial. Look, Ma, no fingers! Tap this button, and you can make a call by speaking into the Droid 2. Say either the name of the person or the number you want to dial, and up pops the number and name, or a list of potential matches. Tap the one you want to call, or if there are multiple numbers for a single person, say which number you want to call—for example, “work” or “home.” If none of the numbers are what you intended to call, say the word “No,” and then speak again.
(For a faster way to voice dial, outside the Phone app, hold down the Home key, and a list of commonly used apps appears, including a Voice Commands button. Tap it, and then speak the name or number you want to call.)

Note
The Droid 2’s voice dialing feature is only one small part of the Droid 2’s Voice Commands app, which lets you perform many tasks, such as sending a text message, opening an email, looking up a contact, and more. To use it, tap Voice Commands on the Application Tray.
When you make a call, the useful Dialing screen pops up showing you the phone number you’re dialing, and a picture of the person you’re calling (if the person is in your Contact list and you have a photo there). A timer begins, showing you the elapsed time of the call. There are also buttons for putting the call on the Droid 2’s built-in speaker, muting the call, and connecting to a Bluetooth headset. And, of course, to end the call, click the “End call” button.

Next to the “End call” button is another button whose purpose seems baffling at first—Dialpad. Why would you need a dialpad when you’re already on a call? For that most annoying means of modern communications, the phone tree. Press the Dialpad button, and you’ll be able to experience all the joys of having to “Press 1 for more options.”
You’ll also be able to use some Droid 2 phone magic from the Dialing screen, and create your own conference calls. For details, check out Ignoring the Call.
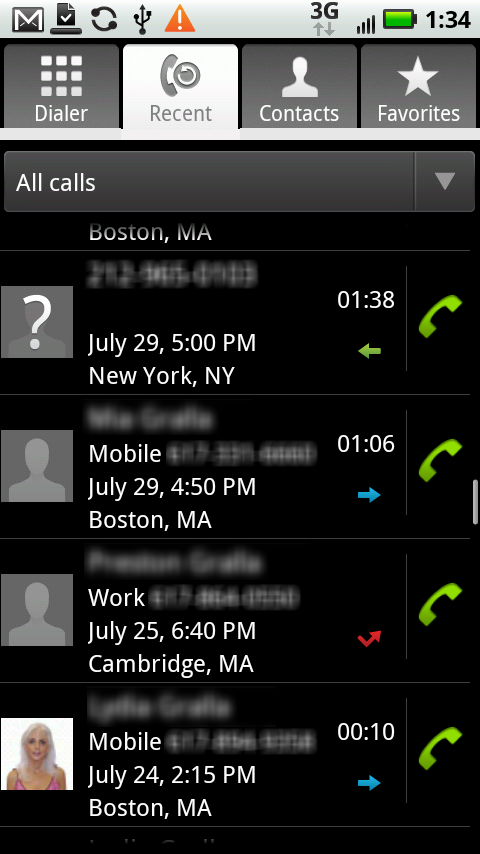
Recent serves two purposes: to show you a history of every call you’ve made or that was made to you, and to let you make phone calls. Tap the Recent button, and you see a neat list, in chronological order, of your call history. It displays the name and phone number for each call (and if the call was that day, how long ago it was made). Icons next to each call provide further details:


Note
The Recent log doesn’t differentiate between calls that you made that were answered and calls that you made that weren’t answered.
You can also get more information about each call in the Call Log, by tapping anywhere in the log entry, except on the phone icon or on the contact’s picture, or if there’s no picture, the outline of a person. A screen then appears, with more details about the call, including the exact date and time it was made, and the length of the call. From here you’ll also be able to call the person (by tapping the green phone icon), send a text message, add the person to your Contacts list, or view an existing entry.
Back on the Call Log, if you tap the contact’s picture, a small toolbar appears. Tap any of the icons on it to contact the person in these ways:


The Phone app taps into your main Contacts list. The Droid 2 gets these contacts from multiple places. For example, if you use Gmail, the Droid 2 automatically imports these contacts into the list. And if you use Droid 2 along with Facebook, your Facebook friends are also included in the Contacts list. You can also add contacts directly to the Droid 2, as you’ll see later in this section.
The Droid 2’s Phone, Messaging, and IM apps all use the same master Contacts list. In fact, you can go directly to the list by tapping the Contacts icon on the Home screen or Application Tray. The contacts you see in the Phone app are only those for which you have a phone number.
Note
The Contacts list in the Phone app and the Contacts list in the Contacts app work almost the same, but there are some minor differences between the two, as you’ll see in this section.
Your contacts come from multiple places. For example, if you use Gmail, the Droid 2 automatically imports those contacts into the list. You can also add contacts directly on the Droid 2 itself. And if you use Droid 2 along with Facebook, your Facebook friends are included in your Contacts.
Note
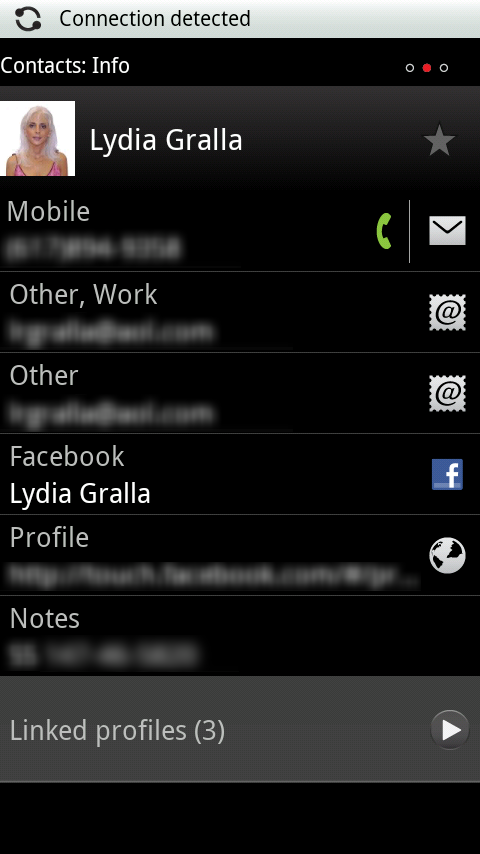
You may notice that on your Contacts list, many people have pictures next to their names, even though you never took their pictures. Is the Droid 2 pulling hidden camera tricks? Of course not. If you use Facebook on your Droid 2, it pulls in pictures from Facebook for any of your contacts who have them.
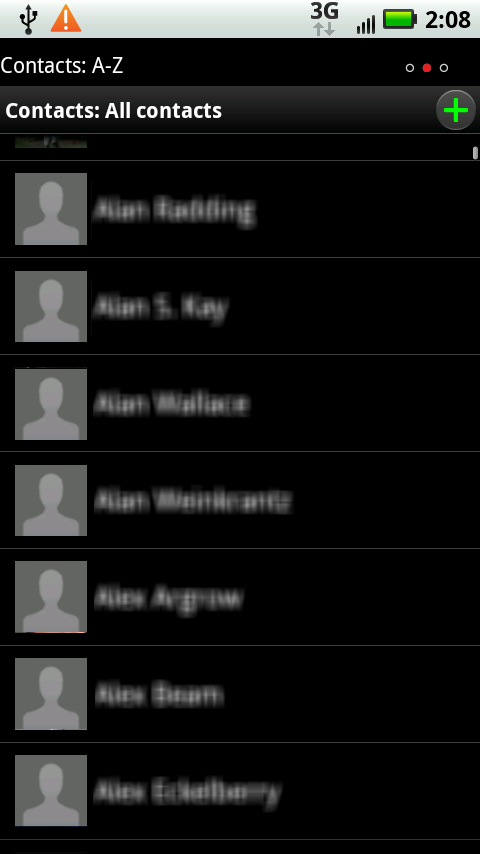
When you first load Contacts, you’ll notice something odd and potentially annoying—the Droid 2 arranges your contacts alphabetically by first name, not last name. So if you know a lot of Joes and Marys, you’re going to possibly spend a little more time than you’d like scrolling.
Note
Why does the Droid 2 alphabetize by first name, rather than by last name? It’s a Google thing. Google wrote the Android operating system that powers the Droid 2, and Gmail also alphabetizes its contact list by first name. As Gmail does, so does the Droid 2.
Most likely, you know more than a screenful of people, and you can navigate through the list in two ways.
First, you can flick through the list. In addition to the normal way you flick through lists, the Contacts list adds a little something extra. When you move your finger up or down the screen, a white icon of a Rolodex card  appears on the right-hand side. Put your finger on that icon and drag it, and you can scroll through your Contacts list more precisely and at your own speed. As you drag it, a large letter appears, telling you where you are alphabetically in your Contacts list.
Tip
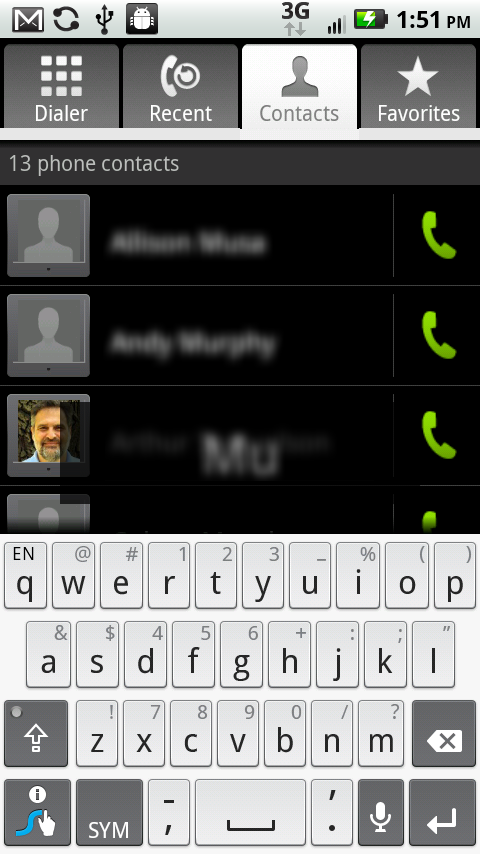
Wonder how big your Contacts list is? Scroll up to the top of the list, and it will tell you your total number of contacts.
You can also search through the list. Press the menu key and select Search. A Search box and the onscreen keyboard appear. As you type letters, the list gets pared down, hiding everyone whose first name, last name, company name, or title doesn’t match what you’ve typed. It’s a great timesaver for quickly paring down a big list. You also see the words you’re typing, just above the keyboard, so you can more easily track what you type. (In the Contacts app, the Droid 2 doesn’t display the words.)
Tip
How do you find a contact whose name you can’t recall? If you know someone’s place of work, type that in, and you’ll see a list of all of your contacts who work at that company.
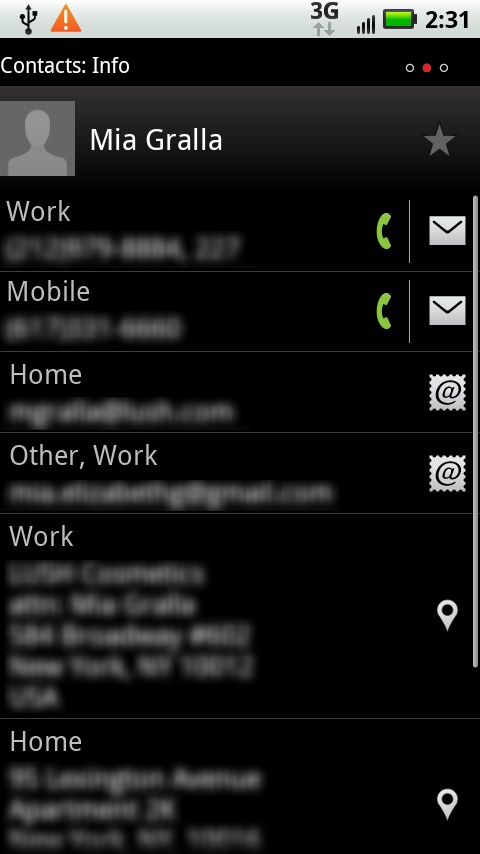
When you’ve gotten to the person you want to call, tap the person’s contact listing. You’ll see all the information you have about the person—phone numbers, email addresses, home and work addresses, and any notes you’ve written about the person. Here’s what you can do from this screen: