The Droid 2 can do more than just connect you to a hotspot. It can create its own hotspot, so that other computers, cellphones, and devices can connect to the Internet through it. That means, for example, that if you’ve got a computer that you want to connect to the Internet, but there’s no Wi-Fi hotspot or Internet service nearby, you can still connect to the Internet using your Droid 2. So from now on, wherever you are, you’ve got Internet access as long as you’ve got your Droid 2 with you. The Droid 2 calls this setting up a 3G Mobile Hotspot.
By doing this, you can provide Internet access not just for one PC, but for up to five—that’s right, count ’em, five—devices.
Note
If you don’t have a 3G connection, you won’t be able to set up a mobile hotspot. So try doing this only when you see the 3G signal in the status bar.
To perform this magic, the Droid 2 connects to a 3G network as it normally does, using its 3G radio. Then it uses its Wi-Fi radio to set up a Wi-Fi hotspot, and lets up to five computers, phones, and other devices connect to it as well. They connect to it as they would connect to any other hotspot, and share its single 3G connection. So don’t expect blazing speed if several people use it simultaneously. Still, it’s a high-speed connection.
Be aware that this does come at a price. As of this writing, you’ll have to pay an extra $20 per month in addition to your normal data fee to be able to use this feature. And there may be maximum data limits imposed as well. At this writing, the limit was 2 GB, but that applies only to data sent and received via the 3G hotspot, not toward your normal data plan.
Okay, enough introduction. Here’s how to do it: First, make sure Wi-Fi is turned on and you’ve got a 3G connection. Once you’ve done that, go to the Application Tray and tap 3G Mobile Hotspot, or else slide over to the Settings pane and tap 3G Mobile. From the screen that appears, tap 3G Mobile Hotspot, and you get a warning screen telling you that the hotspot uses a lot of battery power, so you might want to plug in your Droid 2. Click OK, and the AP Settings screen appears (AP stands for access point). It looks techie at this point, but don’t be scared. The next steps are actually easy.
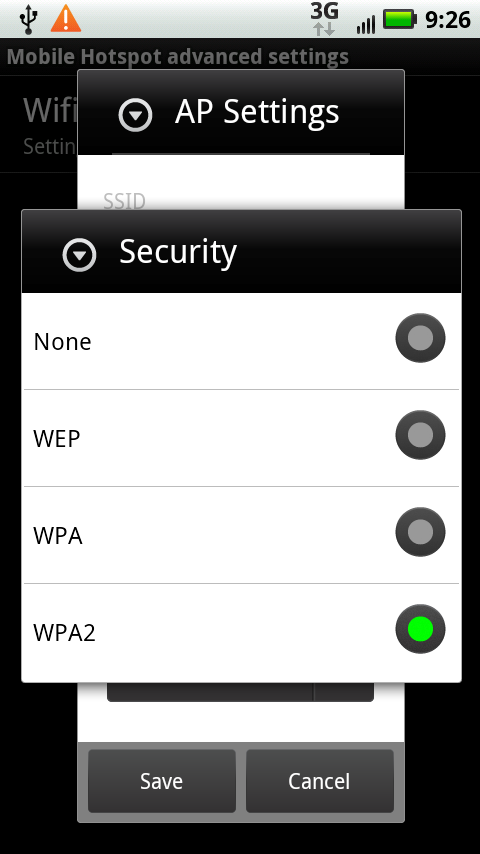
At the top of the screen, type a name for your hotspot. Below that, there’s a drop-down box that lets you choose the kind of security you want to use. Your best bet is WPA2, because that’s the most secure. (If WPA2 isn’t already visible, tap the drop-down box and select WPA2.)
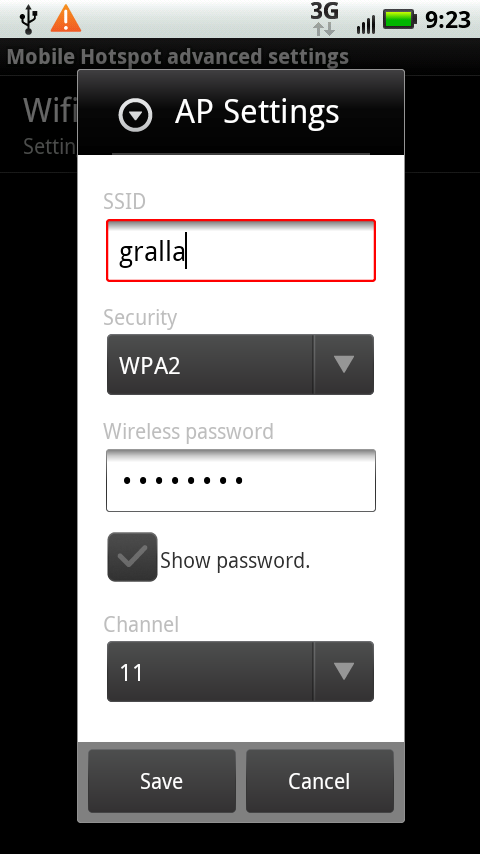
Next, type a password, and make sure to remember it. You need it to connect to the hotspot. Finally, at the bottom of the screen, you’ll notice a number, most likely the number 11. That’s the channel number. Your hotspot can use any one of 11 channels. Most of the time, you’ll just leave this number as is. But if you’re having problems with staying connected to the hotspot you create, you may want to change the channel number.
The problem may be that there’s another Wi-Fi network nearby that communicates on the same channel, causing some interference. If you happen to know the channel number of the interfering network, choose a channel that’s numerically far away from it. But if you don’t know the channel number, simply pick another number.
Note
Because the Mobile Hotspot service uses a good deal of battery power, the Droid 2 includes a built-in battery-saving feature. If you turn on the service, and no device connects to it within 10 minutes, the Droid 2 turns it off (and tells you that it’s turned it off via a notification).
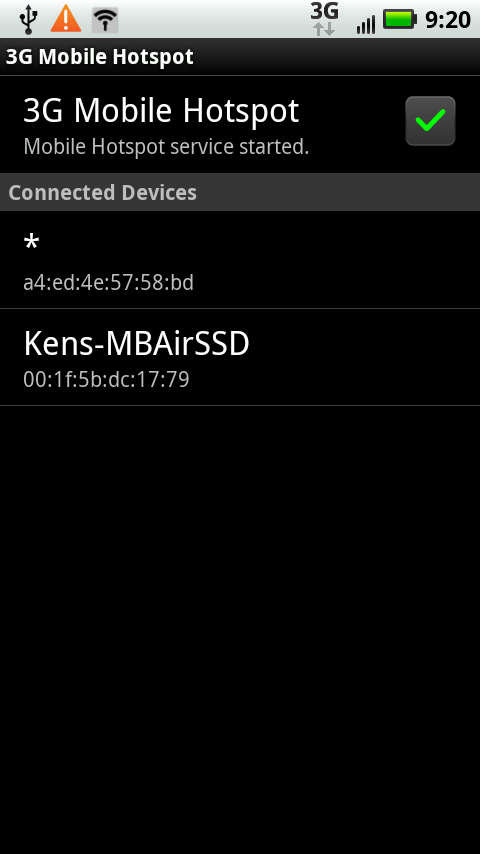
That’s all there is to it. Click Save, and your hotspot springs into action. Now you can connect to it with your computer or other devices. You can see which computers and devices are connected to it by going to the 3G Mobile Hotspot screen. Most of the time, you see the computer name or device name, but sometimes they don’t have names, and in those instances you see an asterisk. Underneath the name, you also see a string of numbers and letters, something like this: 00:1f:5b:dc:17:79. As you might guess, those are numbers that only a geek could love. Every device that can connect to the Internet gets a unique MAC address number, and that’s what this is.
Tip
What if you want to create a mobile hotspot, and you’re a bit low on battery life, but there’s no electrical source for your Droid 2 nearby? Assuming that you’ve got a computer you want to provide a connection to, plug your Droid 2 into your computer with a USB cable, and the PC will provide power for your Droid 2. Your Droid 2 can then provide Wi-Fi for your computer—a perfect symbiotic relationship.
Once you’ve set up your mobile hotspot the first time, each time you start it after that, it will have the same name, password, encryption level, and channel number. Unless you change it. To do so, tap the 3G Mobile Hotspot app. Don’t actually turn on the hotspot, though. (And if it’s on, turn it off by tapping on it.)
Once you do that, with the app running, press the Menu key and select Advanced from the screen that appears at the bottom of the screen. You see a screen that reads “WiFi AP mode”. Tap it, and you see the same setup screen that greeted you when you first set up the hotspot. Make any changes, tap Save, and you’re ready to go.
Note
Some people have reported problems with devices getting disconnected from their 3G Mobile Hotspots for no apparent reason. If that happens to you, try changing the hotspot’s security method and the channel over which it transmits. Also, remember that if no one uses the hotspot for 10 consecutive minutes, it will turn off as well.