There’s a much better way to transfer media files from your PC to your Droid 2 than using Windows Explorer: Windows Media Player. Not only is Windows Media Player more automated, but it also lets you preview and play the files before syncing them over.
Note
Even though there’s a version of Windows Media Player for the Mac, you can’t use it to transfer and sync files to your Droid 2. To move files between your Droid 2 and Mac, you’ll have to use Finder.
After you’ve connected your Droid 2 to your computer, you can transfer music, video, and pictures to it using Windows Media Player:
When you connect your Droid 2, select USB Mass Storage, Windows Media Sync, or PC mode from the USB notification.
Note
If you have DRM-protected music or media on your PC, when you transfer that music to your Droid 2, the Droid 2 won’t be able to play it. DRM stands for digital rights management, and it limits the distribution of music files that have been paid for, making it difficult for them to be played on devices other than the one the music was purchased on.
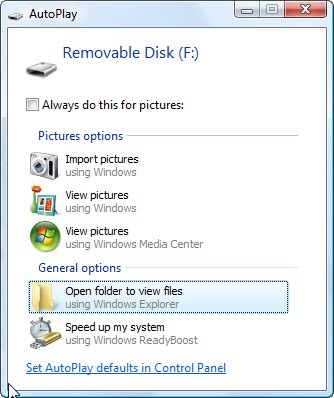
If you’ve chosen USB Mass Storage or PC mode, when the AutoPlay notification screen appears on your PC, select “Open folder to view files”. On your PC, run Windows Media Player.
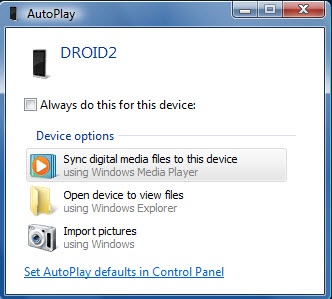
If you’ve chosen Windows Media Sync, select “Sync digital media files to this device using Windows Media Player”.
Windows Media Player starts.
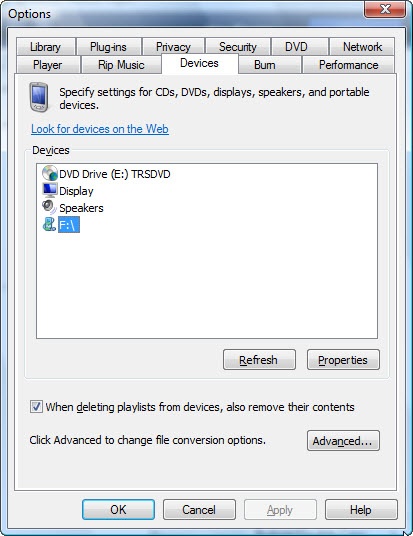
Hover your mouse over the Sync button at the top of Windows Media Player until a small down arrow appears just underneath the button. Click the arrow, and then select More Options→Devices.
Among the devices you see listed is a new drive that wasn’t on your PC previously—that’s your Droid 2. Highlight it and click Properties.
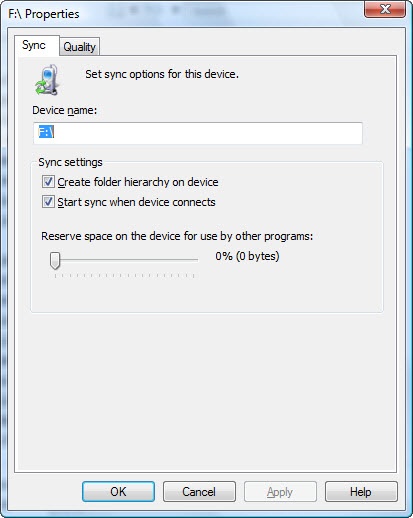
The Properties screen appears. You’ll set three important options here:
Create folder hierarchy on device. This means that when you sync your music files to your Droid 2, it creates folders on the Droid 2’s SD card that are the same as on your PC. Make sure you leave this turned on.
Start Sync when device connects. If you select this option, it means that as soon as you connect your Droid 2 to your PC, the sync starts, without you having to take any action. Select this only if you’re absolutely sure that you want all music on your PC to be transferred to your Droid 2, and vice versa. If you don’t want all your music transferred, make sure this box is unchecked. To be on the safe side, turn off this option, at least the first several times you sync your Droid 2 and PC. You can always turn it back on later.
Reserve space on the device for use by other programs. If you’re worried that the music library from your PC will take up all the space on your Droid 2, choose the amount of space you want to keep for other files on your Droid 2’s SD card. If you ever come up against the limit of the amount of music you can transfer from your PC to your Droid 2, you can delete music on your Droid 2 to make room for new tunes—or come back to this screen and decrease the amount of space given to other files and applications.
When you’re done making your choices, click OK and then click OK again when you get back to the Devices tab.
Click the down arrow underneath the Sync button, and hover your mouse over the drive assigned to your Droid 2. From the menu that appears, select Set Up Sync.
The Device Setup screen appears. Make sure that the box next to “Sync this device automatically” is turned off if you don’t want the Droid 2 to always automatically sync whenever you connect it to your PC and run Windows Media Player. If you want to customize the general types of music to sync—such as only five stars, only music played in the past month, and so on, make your selection here. You can also have your playlists synced to your Droid 2, if you have any.
When you finish making your choices, click Finish to go back to the main screen of Windows Media Player.
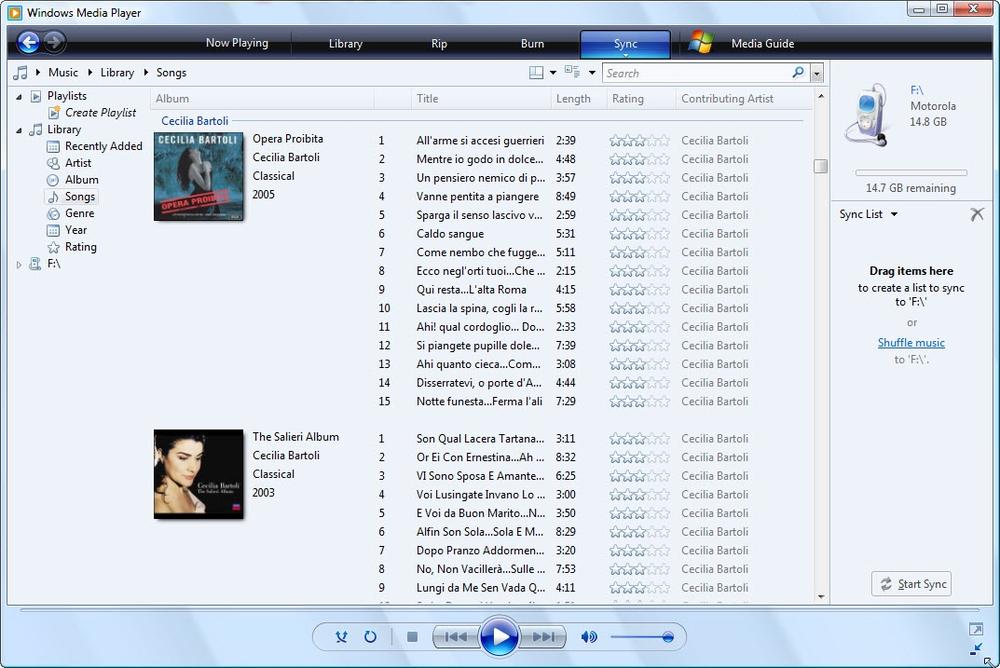
At top right, there’s an icon representing your Droid 2, listing it as a removable drive, showing its drive letter, and showing you how much storage space is available on its SD card.
Drag all the albums and tracks you want to synchronize to your Droid 2 from the list of music on your PC on the left side to the Sync List area just beneath the icon representing the Droid 2.
After you drag each album or track, it appears on the Sync List. Review the list, and remove any files you don’t want to sync.
If you have other media, such as pictures, video, or recorded TV shows that you want to sync to your Droid 2, go to those areas in the Windows Media Player.
Drag the files you want to sync to the Sync List area, just as you did for music.
Click Start Sync.
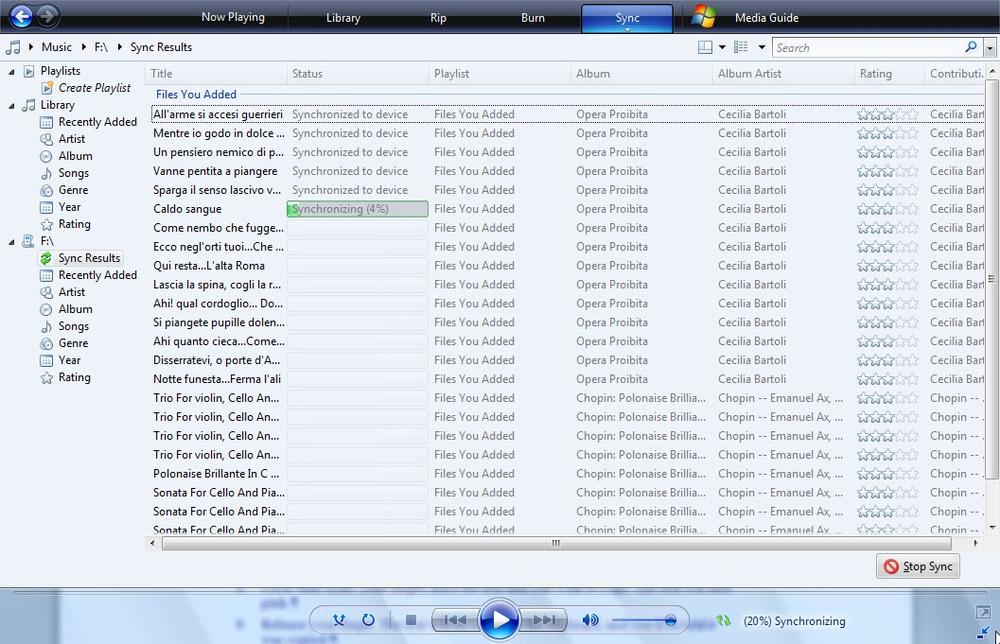
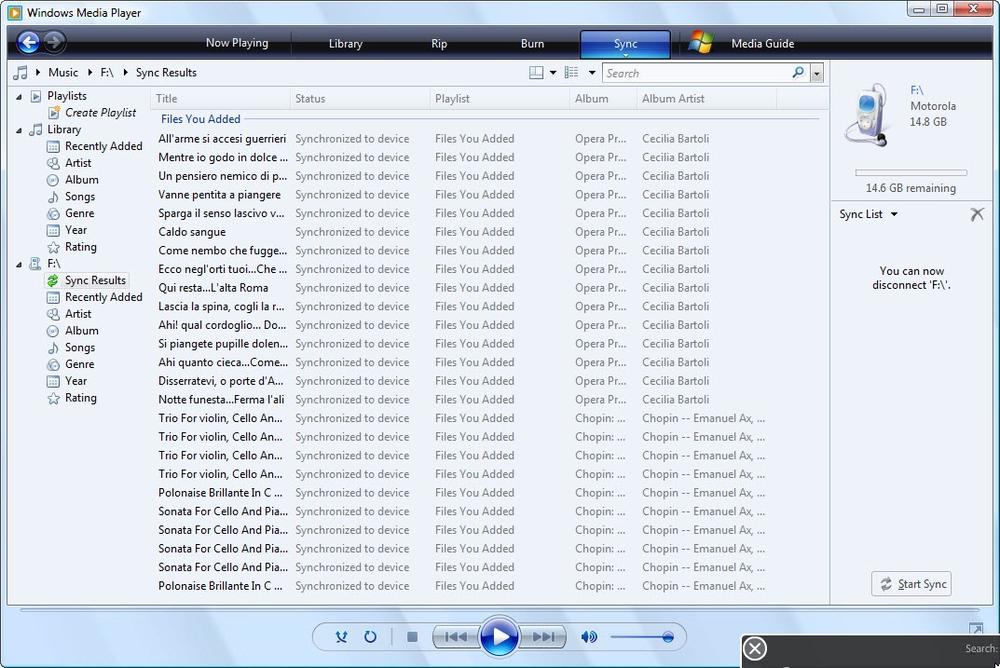
A screen appears showing you the full list of files that are syncing. You see the progress of each file as it syncs. After each file syncs, the file turns gray, and the status line next to it reads “Synchronized to device”. When all the files have synced, on the right side of the screen you see a notification saying that you can now disconnect your Droid 2.
Note
If you want all your files to be synced every time automatically, and you made the “Start sync when device connects” choice, you won’t have to drag files to the Sync List area, or click Start Sync. Synchronization begins automatically.
Your music, video, and pictures will now be available on your Droid 2. Tap the Music app in the Application Tray, and you’ll be able to play and manage your music. (For more information about playing music, see Chapter 4.)
