A camera connector and a camera is required for testing our next example. One source to buy the camera and the adapter is provided here:
| Name | Source |
| Raspberry Pi Zero camera adapter | https://thepihut.com/products/raspberry-pi-zero-camera-adapter |
| Raspberry Pi camera | https://thepihut.com/products/raspberry-pi-camera-module |
Perform the following steps to install a camera to the Raspberry Pi Zero:
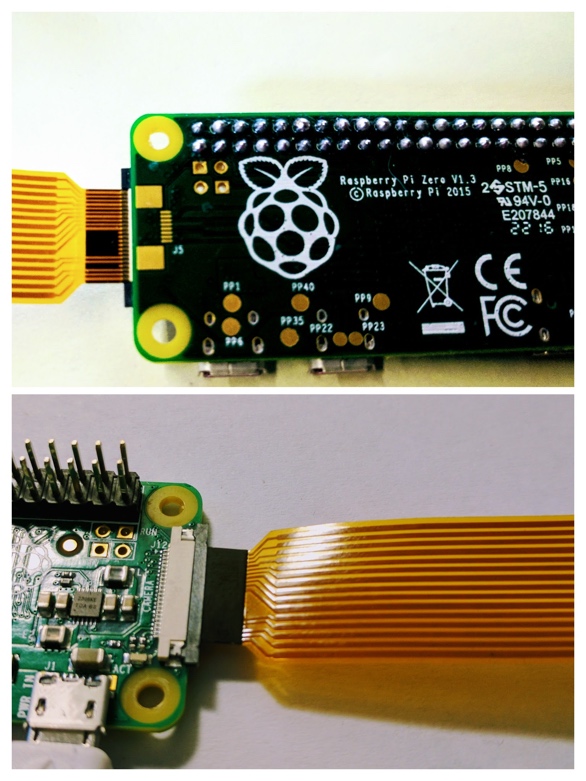
- The first step is interfacing the camera to the Raspberry Pi Zero. The camera adapter can be installed as shown in the following figure. Lift the connector tab and slide the camera adapter and press the connector gently:
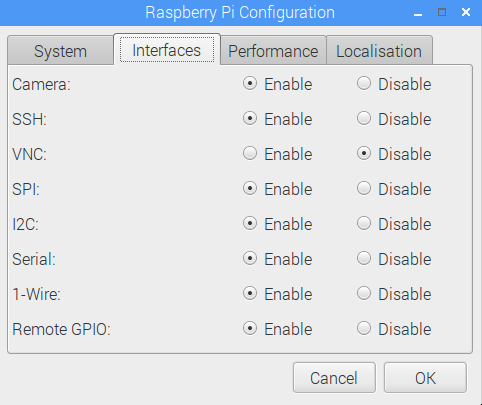
- We need to enable the camera interface on the Raspberry Pi Zero. On your desktop, go to Preferences and launch Raspberry Pi Configuration. Under the Interfaces tab of the Raspberry Pi configuration, enable the camera, and save the configuration:
- Let's test the camera by taking a picture by running the following command from the command-line terminal:
raspistill -o /home/pi/Desktop/test.jpg
- It should take a picture and save it to your Raspberry Pi's desktop. Verify that the camera is functioning correctly. If you are not able to get the camera working, we recommend the troubleshooting guide published by the Raspberry Pi Foundation: https://www.raspberrypi.org/documentation/raspbian/applications/camera.md.
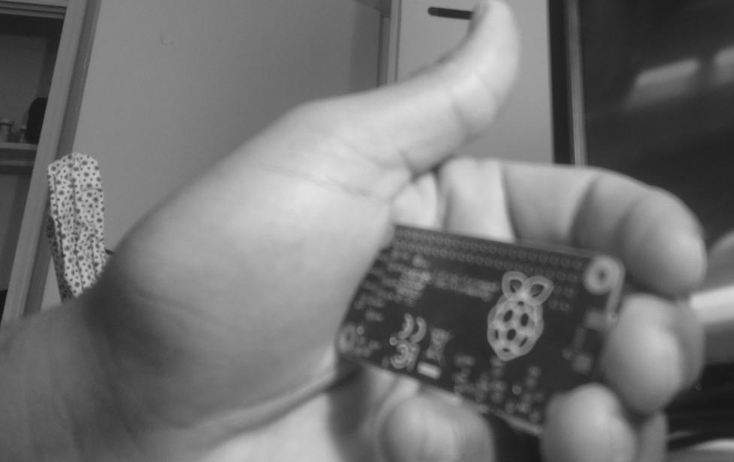
The camera cable is a bit unwieldy, and it can make things difficult while trying to take a picture. We recommend using a camera mount. We found this one to be useful (shown in the following image) at http://a.co/hQolR7O:

Let's take the camera for a spin and use it alongside OpenCV libraries:
- We are going to take a picture using the camera and display it using the OpenCV framework. In order to access the camera in Python, we need the picamera package. This can be installed as follows:
pip3 install picamera
- Let's make sure that the package works as intended with a simple program. The documentation for the picamera package is available at https://picamera.readthedocs.io/en/release-1.12/api_camera.html.
- The first step is initializing the PiCamera class. This is followed by flipping the image across the vertical axis. This is only required because the camera is mounted upside down on the mount. This may not be necessary with other mounts:
       with PiCamera() as camera:
       camera.vflip = True
- Before taking a picture, we can preview the picture that is going to be captured using the start_preview() method:
camera.start_preview()
- Let's preview for 10 seconds before we take a picture. We can take a picture using the capture() method:
       sleep(10)
       camera.capture("/home/pi/Desktop/desktop_shot.jpg")
       camera.stop_preview()
- The capture() method requires the file location as an argument (as shown in the preceding snippet). Once we are done, we can close the camera preview using stop_preview().
- Putting it altogether, we have this:
       from picamera import PiCamera
       from time import sleep

       if __name__ == "__main__":
         with PiCamera() as camera:
           camera.vflip = True
           camera.start_preview()
           sleep(10)
           camera.capture("/home/pi/Desktop/desktop_shot.jpg")
           camera.stop_preview()
The preceding code sample is available for download along with this chapter as picamera_test.py. A snapshot taken using the camera is shown in the following figure:

- Let's combine this example with the previous one—convert this image to grayscale and display it until a key is pressed. Ensure that you are still within the cv virtual environment workspace.
- Let's convert the captured image to grayscale as follows:
       img = cv2.imread("/home/pi/Desktop/desktop_shot.jpg",
       cv2.IMREAD_GRAYSCALE)
The following is the image converted upon capture:
- Now we can display the grayscale image as follows:
       cv2.imshow("image", img)
       cv2.waitKey(0)
       cv2.destroyAllWindows()
The modified example is available for download as picamera_opencvtest.py.
So far, we have demonstrated developing image processing applications in Python. We also recommend checking out examples available with the OpenCV Python binding documentation (link provided in the introduction part of this section).