Now is the time to go ahead and make the robotic vehicle a reality. So let's unbox the vehicle chassis and screw every part together. The assembly manual generally comes along with the kit, so it won't take long for you to complete it.
Once you have completed building the kit, go ahead and segregate the wires for each of the motors. This is going to be a very important part of making the vehicle ready. So, once you have all the wires coming out of the vehicle, take a cell and power up each of the wheels. Notice the polarity of connection in which the wheels spin in the forward direction. All you have to do is to take a permanent marker or perhaps a nail paint and mark the wire which goes to the positive terminal when the motor is spinning in the forward direction. As all of these motors are entirely dependent on polarity for the direction, this step is key to ensure that whenever we power them up they always spin in the same direction. Trust me, this will save you a lot of headaches.
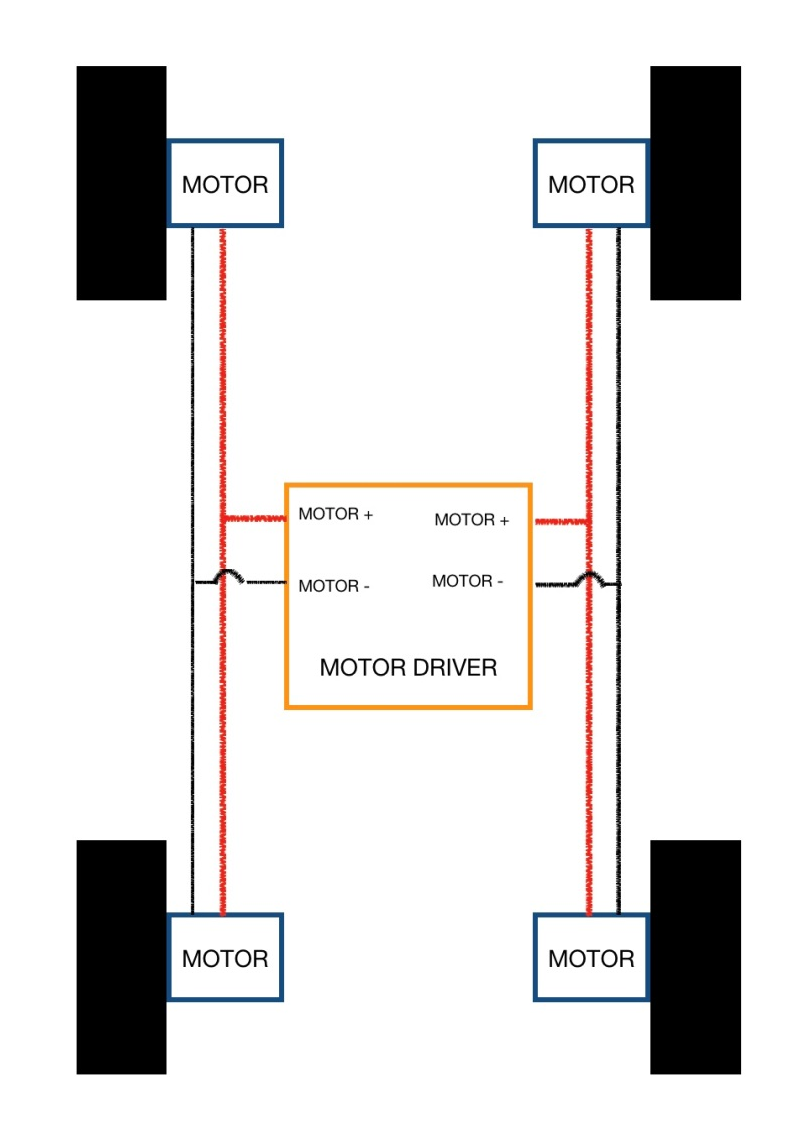
Now, once this is all done, connect the wires to the motor driver as shown in the following diagram (the wire marked by red is the wire that you marked earlier):
Perfect! Now everything seems sorted, except for the connection of the motor driver with the power source and Raspberry Pi. So let's see how we are going to do it:

All right then! Time for the real deal! So the first thing we want to make sure is that all the connections are working exactly the way we planned them to. For this, we will start off with a dummy code which will simply switch all the motors on and in forward direction. So here is the code:
import RPi.GPIO as GPIO
import time
GPIO.setmode(GPIO.BCM)
Motor1a = 20
Motor1b = 21
Motor2a = 2
Motor2b = 3
GPIO.setup(Motor1a,GPIO.OUT)
GPIO.setup(Motor1b,GPIO.OUT)
GPIO.setup(Motor2a,GPIO.OUT)
GPIO.setup(Motor2b,GPIO.OUT)
GPIO.output(Motor1a,1)
GPIO.output(Motor1b,0)
GPIO.output(Motor2a,1)
GPIO.output(Motor2b,0)
time.sleep(10)
GPIO.cleanup()
The program can't be more simple than this; all we are doing here is giving the motor driver the command to spin the motor in one single direction. There might be a chance that a set of motors will be rotating in the reverse direction, in which case you should change the polarity of connections on the motor driver. This should solve the problem. Some people might think that we can make a change to the code as well to do this, but as per my experience it starts getting complicated from there and would cause you trouble if you chose the other path.
All right then, everything is set and all is working well. Go ahead, try some other output permutations and combinations and see what happens to the car. Don't worry, whatever you do, you won't be able to damage the car unless it runs off the roof!