The I2C bus is not enabled in all Raspberry Pi images; therefore, we need to enable the module and install some supporting tools. Newer versions of Raspbian use device trees to handle hardware peripherals and drivers.
In order to make use of the I2C bus, we need to enable the ARM I2C in the bootconfig.txt file.
You can do this automatically using the following command:
sudo raspi-config
Select Advanced Options from the menu and then select I2C, as shown in the following screenshot. When asked, select Yes to enable the interface and then click Yes to load the module by default:
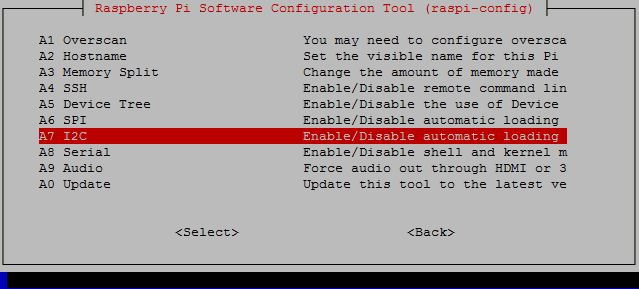
From the menu, select I2C and select Yes to enable the interface and to load the module by default.
If you wish, you can also enable the SPI using the raspi-config list, which is another type of bus.
Next, we should include the I2C module to be loaded upon turning the Raspberry Pi on, as follows:
sudo nano /etc/modules
Add the following on separate lines and save (Ctrl + X, Y, Enter):
i2c-dev
i2c-bcm2708
Similarly, we can also enable the SPI module by adding spi-bcm2708.
Next, we will install some tools to use I2C devices directly from the command line, as follows:
sudo apt-get update
sudo apt-get install i2c-tools
Finally, shut down the Raspberry Pi before attaching the hardware in order to allow the changes to be applied, as follows:
sudo halt
You will need a PCF8591 module (retailers of these are listed in the Appendix, Hardware and Software List) or you can obtain the PCF8591 chip separately and build your own circuit (see the There's more... section for details on the circuit):

Connect the GND, VCC, SDA, and SCL pins to the Raspberry Pi GPIO header as follows:
