5 Basic tools for the designer
Every consultant needs to have some basic equipment that allows measurement of land size, acidity and salinity in water and soil, soil characteristics, slope and property orientation. Here is a brief summary of some of these types of items.
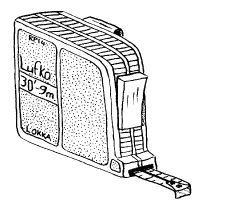
You need at least two tape measures. One, up to 10 m, for most urban backyard measurements, and one about 100 m for small acreage paddocks and some rural properties. I find a 30 m tape very useful. This allows you to measure urban property layout easily.

Figure 5.1 Small tape measures are ieal for small, urban backyards.
You don’t usually measure paddocks for rural designs. Farmers normally know the size of paddocks, or you can drive along the fenceline and record the odometer reading. Alternatively, use a dumpy level, which is described later, to calculate the distance. Rural designs are more concept-orientated and it doesn’t matter if you are five metres out - you just plant an extra tree.
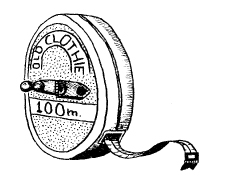
Figure 5.2 A longer tape measure is an essential toolkit item for larger properties.
A 200 m roll of string, with knots every metre, can be used in open paddock situations. The string becomes tangled and caught on plants if you try to use it in someone’s urban backyard.
The only other problem is that you have to mark the knots somehow, so that you know what the measurement is. The easiest way I’ve seen is to paint the knot and part of the surrounding string particular colours. For example, black for the first ten metres, red for the next ten metres, and so on.
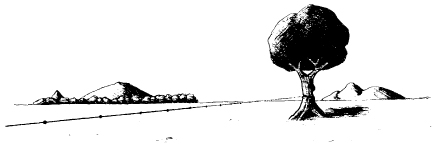
Figure 5.3 A knotted piece of string can be used as a substitute tape measure.
Knowing the sequence of colours will enable you to calculate the distance. For example, it might be the blue section and knot number five along. This may translate to a distance of 85 m.
I prefer to simply pace out the dimensions of paddocks. If you practice your pacing steps along a long tape measure you can work out what distance you cover each step. I would recommend you practice a step of one metre. After a while, your paces become quite accurate, and certainly accurate enough for you to determine distances and draw a general map of a site area.
A penetrometer allows you to gauge the depth of soil layers to parent rock, as well as some indication about soil compaction. You can make a penetrometer from a one metre length of 6 to 8 mm steel rod. Bend one end for a handle and sharpen a point on the other end, so that it easily penetrates the soil.
Generally, if you have difficulty pushing downwards it may indicate a hard pan clay layer below the surface or heavy soil. Rock is easy to determine - you push down and it just stops. Sometimes, you can hear the clunk as it hits rock.
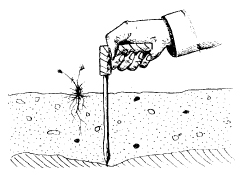
Figure 5.4 A penetrometer permits you to determine some subsurface conditions.
Small, folding shovel or hand trowel
If you suspect heavy soil, hardpan problems or rock, you can simply dig a small hole and have a look. Furthermore, a hand trowel or small, portable shovel helps you to collect soil samples for analysis of pH, salinity, clay content and other soil characteristics.
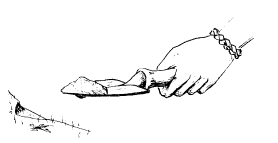
Figure 5.5 Soil samples are often collected in the field and examined later.
Magnetic or directional compass
Every design should contain information about orientation. Normally, this includes a symbol marking the direction of north or south (wherever the main sun direction is, so that the property is sun-facing). Knowledge of property orientation allows easier understanding of wind and storm directions, as these are always expressed in reference to the compass points.
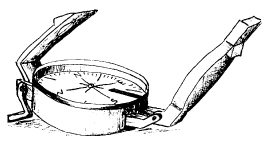
Figure 5.6 A compass indicates the direction and orientation of a property.
There is a good range of kits and meters, which test the level of acidity or alkalinity in soils and water, on the market. Generally, you get what you pay for (where have you heard that before?), so buy a decent kit that you know will be accurate.
For the serious consultant or designer, it is worth the expense to buy an electronic meter - especially since you can usually buy a variety of pH and salinity meters measuring a full range of levels and concentrations.
You will also need a number of sterile bottles or jars, with screw-top lids, to hold soil and water samples. Stick-on labels or marking pens can be used to mark the bottles with sample details.

Figure 5.7 Electronic meters are more accurate, but more expensive, than powder test kits.
These hand-held meters are similar to the pH meter. However, most only measure a particular range of total dissolved salt (TDS) levels and you will, therefore, need to buy the one/s you require. Generally, a meter that measures within the range 0 to 20 mS/cm is suitable for most applications. Sea water is 35 mS/cm and most land properties have TDS readings in soil or water much lower than this. (Note: mS/ cm means millisiemens per centimetre which is a measure of the electrical conductivity of a solution. 1 mS/cm = 550 ppm = 38.5 grains/gallon.)
A variety of methods are used to measure slopes and levels. The simplest is the Bunyip or hose level, while more elaborate instruments include a theodolite and plane table.
Professional designers usually have a dumpy level as a minimum. While water levels, such as the Bunyip level, are very accurate, their use in determining contours and slopes can be slow, especially over long distances or if a large number of points have to be measured. The following brief descriptions of instruments that measure distance and slope are listed in order of their increasing complexity and price.
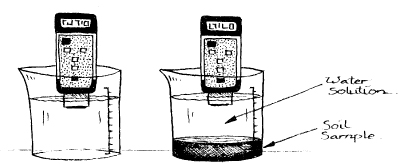
Figure 5.8 A salinity meter allows you to monitor both soil and water samples.
A clear plastic tubing or hose, or at least one metre of clear tubing at each end of a garden hose, enables levels to be determined. The hose is mostly filled with water, with enough space in both ends to allow for water fluctuation. Loose caps, corks or hose clamps can be used to seal or pinch the ends of the hose so that water is held within the tubing while it is being moved around. Furthermore, using a hose with a bore diameter of about 12 mm (half an inch) permits faster equalisation of the water levels than a smaller internal diameter of say 10 mm (three-eights of an inch).
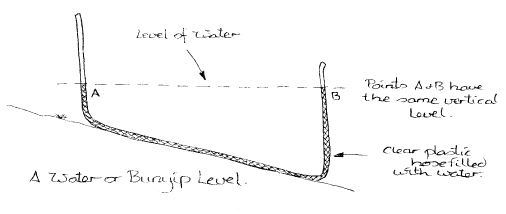
Figure 5.9 A simple Bunyip level made from plastic tubing.
Water seeks its own level. Hence, point A and point B, in the above diagram, are at the same vertical height. When applied to a slope, house sand pad or wall, the amount of fall can be determined over the distance between points A and B.
An “A” frame level is very handy for small areas such as suburban backyards.
It is made using two long pieces (2 m) of timber and one shorter piece for the crossbar (1 m).
A builder’s level is strapped or tied to the crossbar. One leg is swivelled to a new position such that the air bubble in the level remains in the middle. Both legs are then at the same vertical position.
An “A” frame can be pivoted around shrubs and other structures, so it has this advantage over conventional telescopic levels.
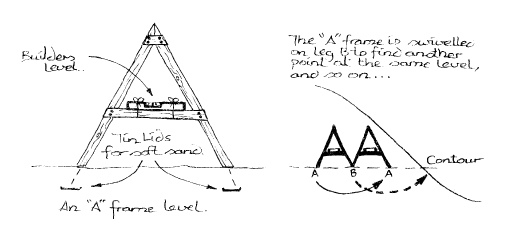
Figure 5.10 One leg is pivoted around the other. Points A and B are at the same vertical height when the bubble is central.
Dumpy levels are used for greater accuracy. These are telescopic levels that are mounted level on a tripod. A staff is used for readings, and markings on the viewing lens permit not only measurements taken at hundreds of metres distance, but permit the actual distance to the staff to be calculated. You get both fall or rise and distance at the same time.
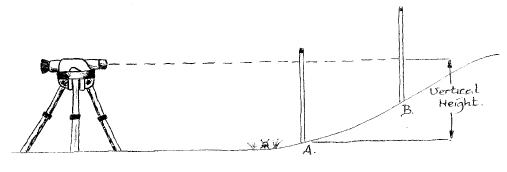
Figure 5.11 The difference between A and B gives the amount of rise in the slope.
The viewing lens usually has three cross-lines. The middle one is the dead centre and this is used to read the staff height. Above and below the centre line are two shorter lines. By reading the staff measurements for these lines and calculating the difference between them, the horizontal distance to the observer holding the staff can be determined. For example, if the top reading was 1.2 m and the bottom reading was 0.7 m, then the difference is 0.5 m. Multipling this by one hundred (this is universal for all such levels) gives a distance of 0.5 × 100 = 50 m. The staff is fifty metres away from the level.
Other more expensive surveying equipment, such as the plane table and theodolite, can be used if you want information about slope, direction and distance. A simple plane table can be made using a timber board on top of a stool or stand. A large, 360� protractor is mounted on the board, so that measurements of angles to objects can be made.
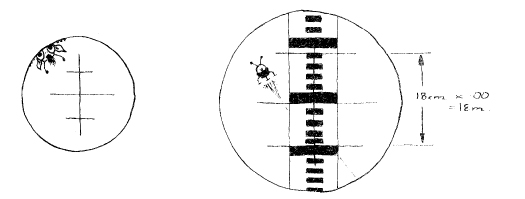
Figure 5.12 The viewing lens has three cross-lines. These help determine the distance to an object. Multiply the difference between the top and bottom lines by 100 to give the distance to the staff.
This tool is ideal for quick, overview plans for a design, as it permits you to measure the distance and angle of any object to a fixed point. By redrawing on a sheet of graph paper, the plan will show whatever objects are fixed for a design.
A theodolite is used by professional surveyors and is not discussed here. You would use a theodolite if you were surveying a large area for contour banks or for a village development.
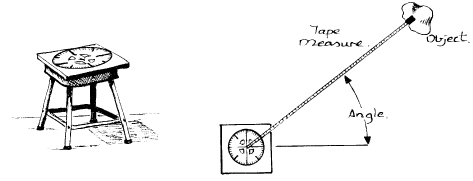
Figure 5.13 A simple plane table is a useful design aid.
Drawing a design requires some skills and some tools. These include a range of pens and pencils, other stationery items, and mathematical aids such as protractors and a drawing compass. You don’t need an expensive drafting table or a drawing board, although both of these would be very handy. Some of the items for a standard toolkit are listed below.
Drawings should always be done to scale. Many urban designs can be drawn on an A4 or A3 sheet using a scale such as 1:100. This scale means that one centimetre on the drawing represents 100 cm, or one metre, on the property.
Rural designs use a larger scale. For example, 1:1000 or more, depending on the actual size of the land you are drawing, is a common scale.
A scale ruler has various scales already imprinted on the ruler edges, and using one saves time and lengthy calculations of the sizes of objects and distances which have to be placed onto the drawing.

Figure 5.14 A scale ruler is a must for designers.
This is a box, normally wooden, which has a clear or translucent glass top. A fluorescent tube or incandescent light globe (40W) is housed under the glass. When it is switched on, the light shines through the glass so that copies of design drawings can be easily traced.
This box is also handy for viewing slides. Just tip the slides over the glass surface and you will be able to view many slides at once. This allows you to quickly sort and order the slides for a presentation.
Keep a good range of standard stationery items such as lead pencils, eraser, coloured pencils, sharpener and fine felt tip pens.
Pens and coloured pencils are used for shading and marking different regions of the design.
Make sure that you have a straight, unchipped ruler, a clean eraser, a new sharpener and a few felt tip pens for labelling and inking in the main design lines.
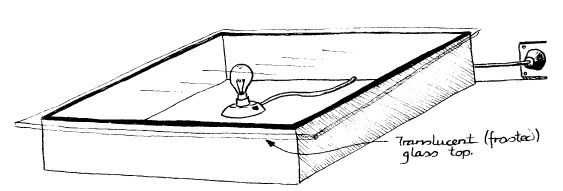
Figure 5.15 Alight box allows you to make copies of basic maps and designs.
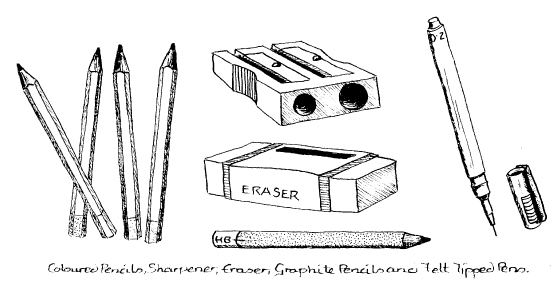
Figure 5.16 Some of the stationery items you will need.

Figure 5.17 A protractor and compass are always used in design work.
You will often need a few drawing aids. These include a protractor, Mathomat™ and drawing compass.
Protractors measure angles, and the skill of using a protractor and a compass is essential in design work. You have to be able to draw in slope (on elevation drawings), various shapes for buildings, rainwater tanks and other structures, and mark out sector angles.
Mathomat™, Mathmaster™ and Math-aid™ are common commercial mathematical drawing aids which contain a range of shapes, such as circles, squares and rectangles, as well as a protractor, curved surfaces and ruler. They are invaluable for design work.
Designers need a reasonable range of graph paper, tracing paper and normal white bond art paper.
Sizes up to A2 (twice A3 size) are useful, but you can get by with just A3 and A4 paper sizes for most design work.

Figure 5.18 Make sure you possess a range of paper sizes for design work.