Chapter Six
Planning a Multiday River Trip
Once you have your basic rafting skills down, it’s time to go on a multiday trip. That’s what river life is really all about, at least in my book.
As mentioned earlier, you can approach a river trip in different ways. There’s the “everything but the kitchen sink” plan, and the go-light boating backpacker method. Your choice depends upon the size of your raft, the number in your group, the nature of the river, and your personal preference. This book will discuss both options.
Planning
Permits
Most popular whitewater rivers requires a permit during the high seasons. These permits are often given out through a lottery system that takes place months before the launch date. If you are interested in securing a river permit, get online as much as a year in advance of your desired trip to find out what you need to do to get a permit. Many people mark their calendars each year to remind them to put in for river permits on a certain date.
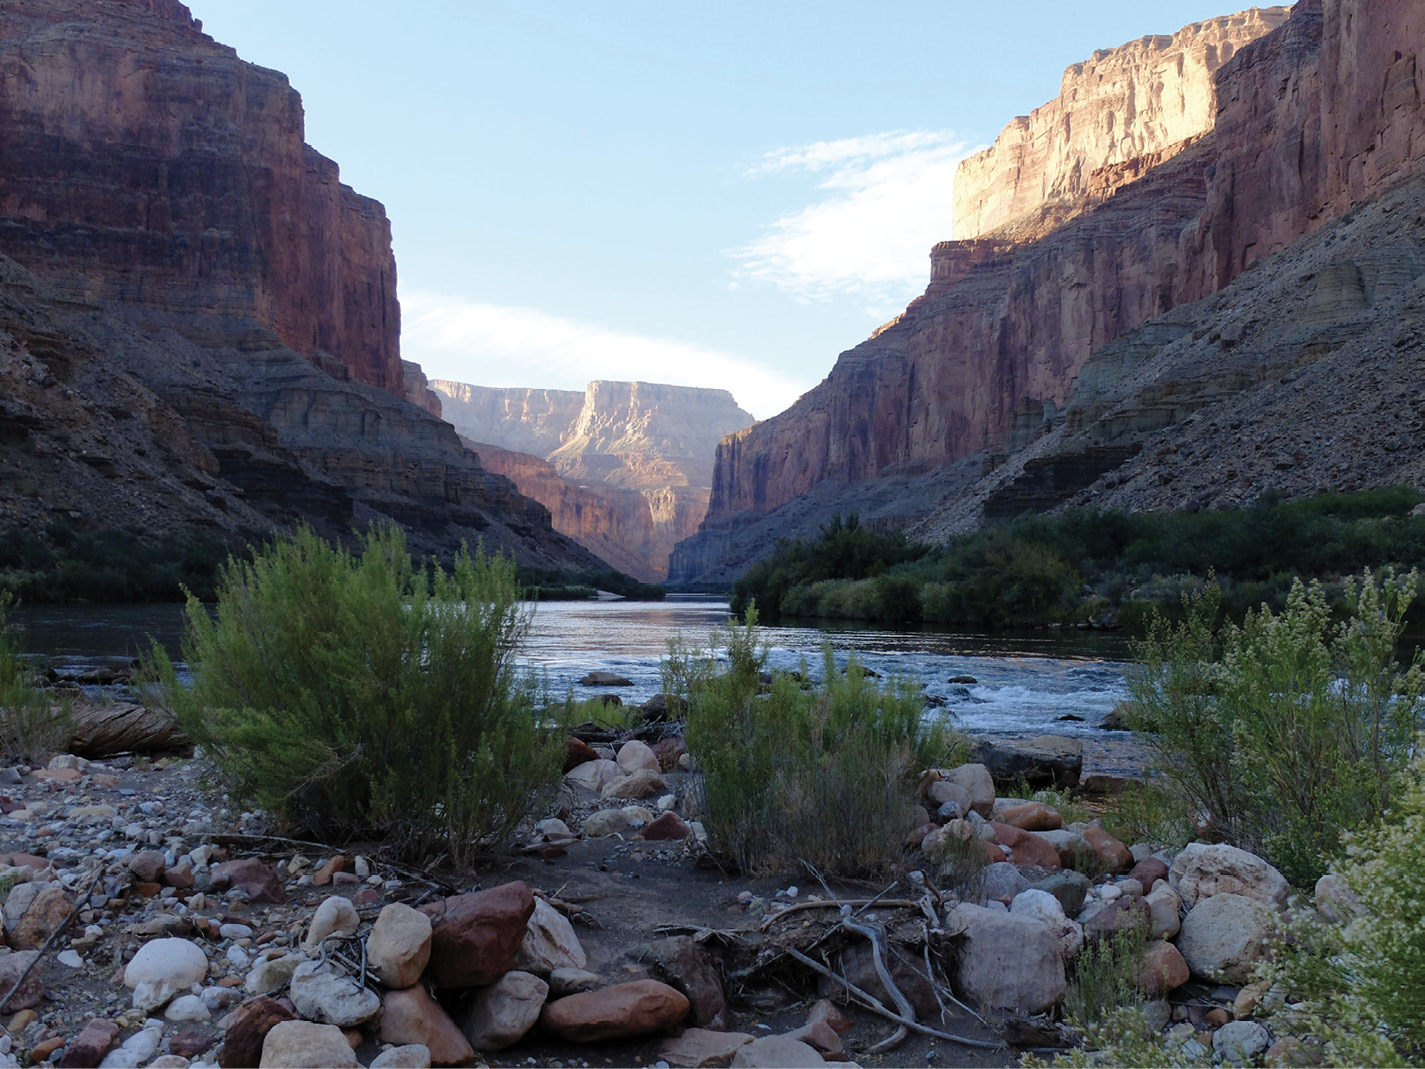
Permits for popular rivers are distributed through a competitive lottery. It can take years to get a Grand Canyon permit.
Stefanie Vandaele
For popular rivers, such as the Middle Fork of the Salmon or the Colorado though the Grand Canyon, permits are highly coveted and the lotteries competitive. Securing a permit for such rivers is never guaranteed. It’s helpful to have all your team members apply for a permit to increase your odds of success, but don’t be surprised if you don’t get what you want. It can take years to get a permit on some rivers.
Some outfitters offer “row your own” hybrid trips. Just what this looks like varies from outfitter to outfitter. It may be you use an outfitter’s permit but bring all your own gear. It may be the outfitter provides the gear and a guide or two, but you and your colleagues do all the rowing. Or it may be something in between. The advantage of working through an outfitter is that often you can secure a specific date for your trip, which is helpful if you have a tight schedule. You may also find a guide willing to give you pointers on your rafting technique, plus guides usually know rivers well, so they can help you pick lines through rapids. Usually these hybrid trips are less expensive than a fully guided expedition. It’s worth asking outfitters if they are willing to consider such an option, especially if you and your entire team get skunked in the lottery.
If you have a flexible schedule, you may also be able to secure a permit after someone else cancels. You can sometimes get on a list to be notified of last-minute openings for the river you desire, or you can check in periodically to see if something has opened up. Some rivers have a low season when permits are not required. All this information can be found online.
When you have secured a permit, read it carefully. River permits have very exacting requirements for how to camp and what to bring on your trip. You may have to show rangers each piece of equipment at the put-in, and often they’ll ask for identification to verify the members of your team, so it’s important to follow the rules.
Your Team
A successful river trip requires a fair bit of planning. First and foremost is the task of coming up with a compatible team.
Pulling together your team takes some forethought. You need boaters capable of navigating the river, plus you want a group that gets along well and has similar goals.
You may have a group of regulars with whom you boat, but if not, it’s helpful to think about the following in pulling together your team.
Skills
It’s fine to have a wide range of experience and skill on your team as long as you have the basic requirements for the river in question covered. You need to have boaters who are comfortable navigating any rapids you will encounter on the trip. You need people familiar with river travel, packing, camping, and rescue. If you do not know some of the people on your trip, ask them about their experience before you commit. Often it helps to have a personal recommendation from someone you trust to ensure an individual you do not know is competent and will be a good fit with your group.
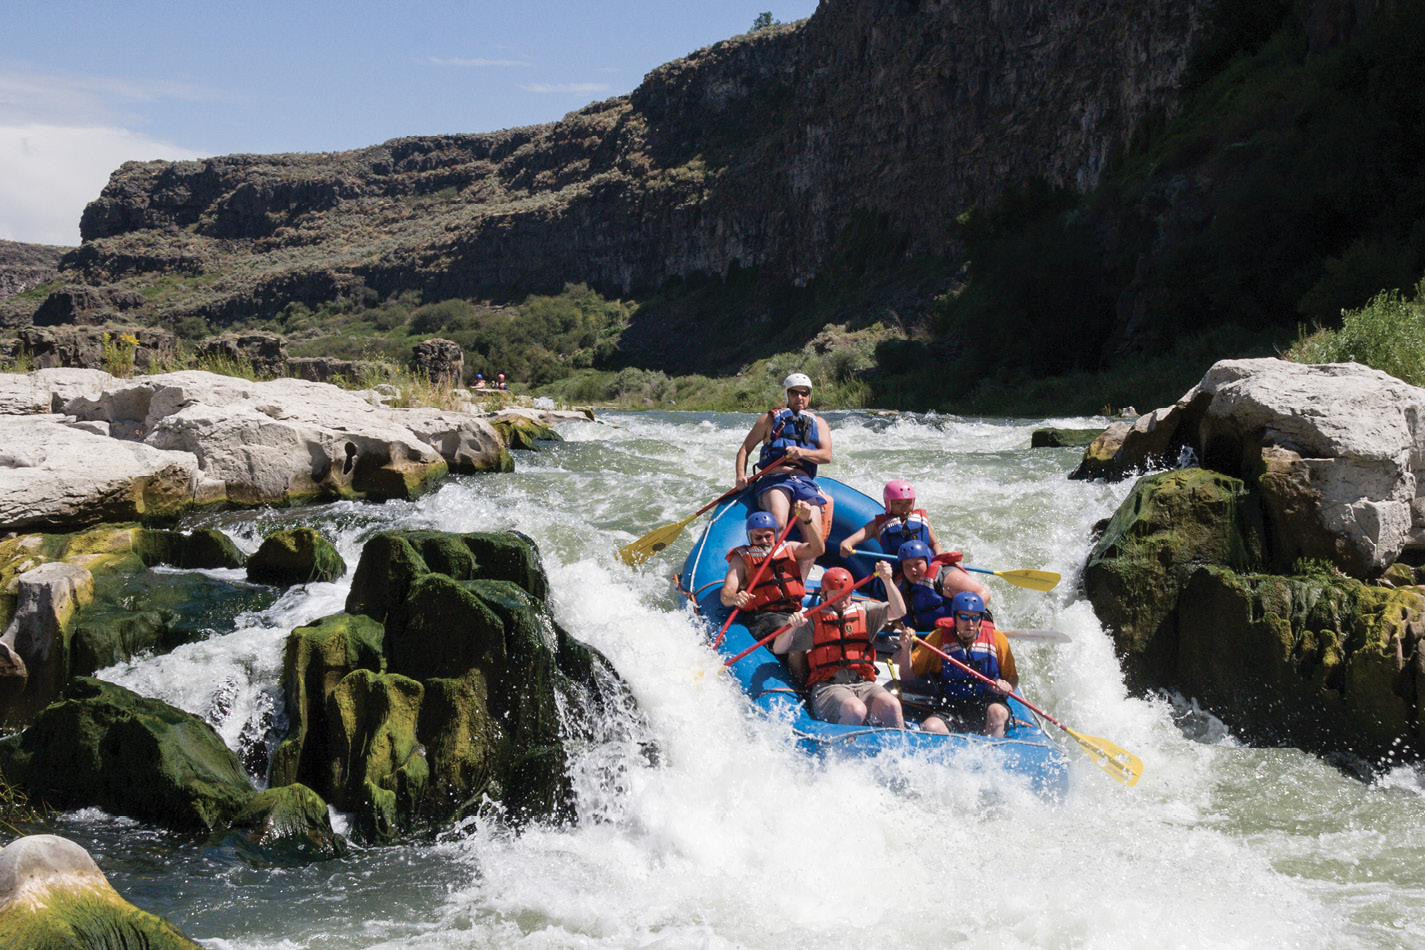
You can have a wide range of boating abilities in your group as long as there are enough competent rafters to navigate any rapids you expect to encounter.
Goals
To help make your trip as smooth as possible, make sure everyone on your team has similar goals. You may be traveling with a group that has been on the river many times together, in which case you probably don’t need to spend any time figuring out goals. But if it’s your first time with the group, it’s important to talk about what you want to happen. If half your group likes to party all night long and the other goes to bed at 8 p.m. and rises at 6 a.m., you could have a problem.
Ask your teammates what they hope to get out of the trip, how they like to live on the river, how long they want to spend on the water each day, and whether they want to hike, party, or just hang out on the beach. Make sure everyone understands how chores will be accomplished, who’s in charge, and what the trip will cost. You can accomplish a lot of this communication over e-mail, or have a face-to-face meeting a few months before the trip to ensure everyone is on the same page. It sucks to get out on the river and find out that the group is not getting along, that one person is doing all or none of the work, or that you can’t trust someone’s judgment.
Leadership
Most groups function better if they have some kind of leadership structure. With highly experienced teams that have worked together in the past, you can have a pretty casual setup, but even then it’s critical that someone is making sure you have everything you need before you launch, and that the entire group knows what is going on during the trip.
Often the de facto leader is the permit holder. He or she usually invites others on the trip and organizes the logistics before you launch, but once you are on the river that person doesn’t have to be in charge.
To figure out how you want to function as a team, take a few minutes to talk to your group. You may want to designate a formal leader who delegates tasks and makes sure that everything is in order. That person doesn’t have to be in charge all the time, but he or she is responsible for ensuring that everyone knows the drill and is comfortable with the day’s plan. On the river, leadership often goes to the most experienced team member, who keeps the group together and makes sure everyone gets through all the rapids safely. Off the water, anyone can be in charge as long as the group knows and respects that individual.
It can be tricky to balance safety and fun on river trips. The best trip leaders are able to walk that line by demonstrating respect for their team, a willingness to listen to and incorporate the opinions of others in all decision-making, and an ability to recognize when to be serious and when to lighten up and goof around.

River trips are fun; they also can be risky. It helps to have a designated leader to help your group find a balance between fun and safety.
Group chores can be handled in any number of ways, but it’s nice to have some kind of agreed-upon system so one or two people don’t end up doing the lion’s share of the work. Typical chores include unloading rafts; setting up the kitchen, toilet, and hand-washing stations; cooking meals; cleaning dishes; storm-proofing camp at night, and breaking down camp each day before launching on the river. Some people like to have a cook team prepare all the meals and do the dishes for a day at a time, leaving the rest of the group to do other chores or chill out. You may prefer to have separate cook and cleanup teams for each meal. You may decide to all cook together. Whatever method you opt for, make sure everyone understands what is expected to avoid tension and share the load.
Most groups function best with some kind of chore schedule so that work is shared among the team members equitably.
It’s a good idea for group members to check in with each other in the morning, before you get on the water, so everyone has a chance to look at the map and knows what is going on that day. This includes sharing information about the number of miles you’re traveling, the rapids you will encounter, boat order, your intended campsite, etc. This can also be a time when the group talks about any issues that have arisen, such as whether you are going through toilet paper faster than anticipated, or if something is going on among team members that needs to be discussed. This doesn’t have to be a formal, rigid meeting. It’s just time for a quick check-in, but if you make something like that part of your daily routine then when you do have an issue that needs addressing, you have a structure in place to allow for it.
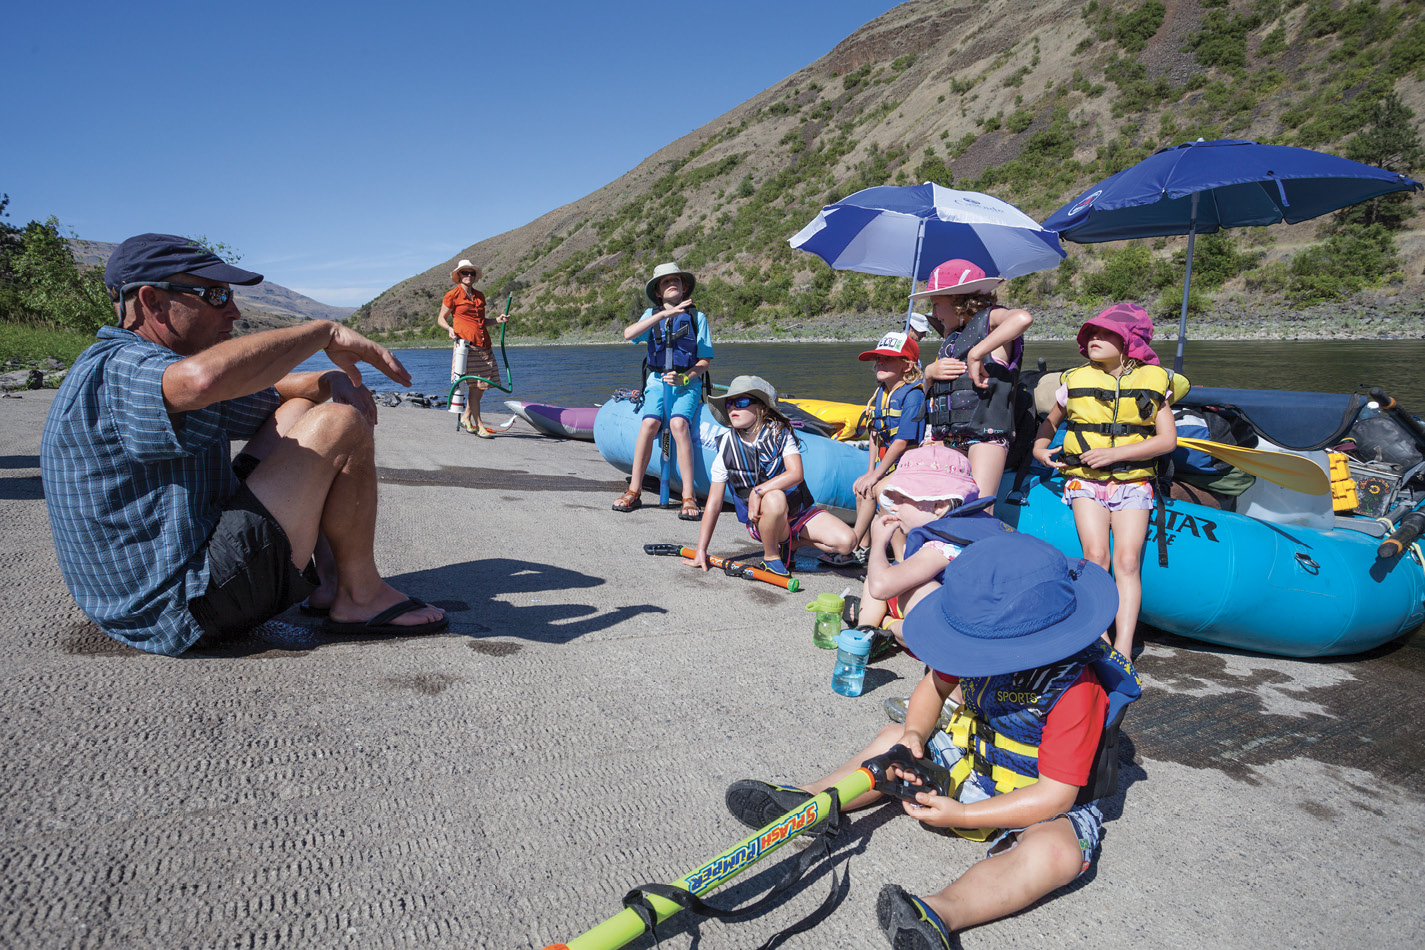
It’s nice to check in with your team—even the kids—before you hit the water so people know what the plan for the day is.
Logistics
Planning your trip involves making sure you have all the equipment, food, and information you need for the river, and that you have your transportation to and from the river worked out.
Shuttle
Part of your pretrip planning includes figuring out how you will shuttle your cars to the takeout. You can run your own shuttle, but on long rivers that is usually impractical as the shuttle can involve days of driving to get all cars to the right spot. Most rivers have outfitters who will shuttle your vehicles for a fee.
Boating season gets busy, so it’s important to make your reservation early. You can search the Internet for shuttle drivers by entering the name of your river and the word shuttle, and usually you will find a number of options. You can also ask around with friends who’ve made the trip for recommendations.
River guides and maps
If no members of your group have been on the river you plan to descend, it’s important that at least someone does some research about what to expect before you hit the water. Most popular rivers have some kind of river guide that describes everything from the rapids you will encounter to the campsites, hikes, history, and sometimes the flora, fauna, and geology you’ll find along the way.
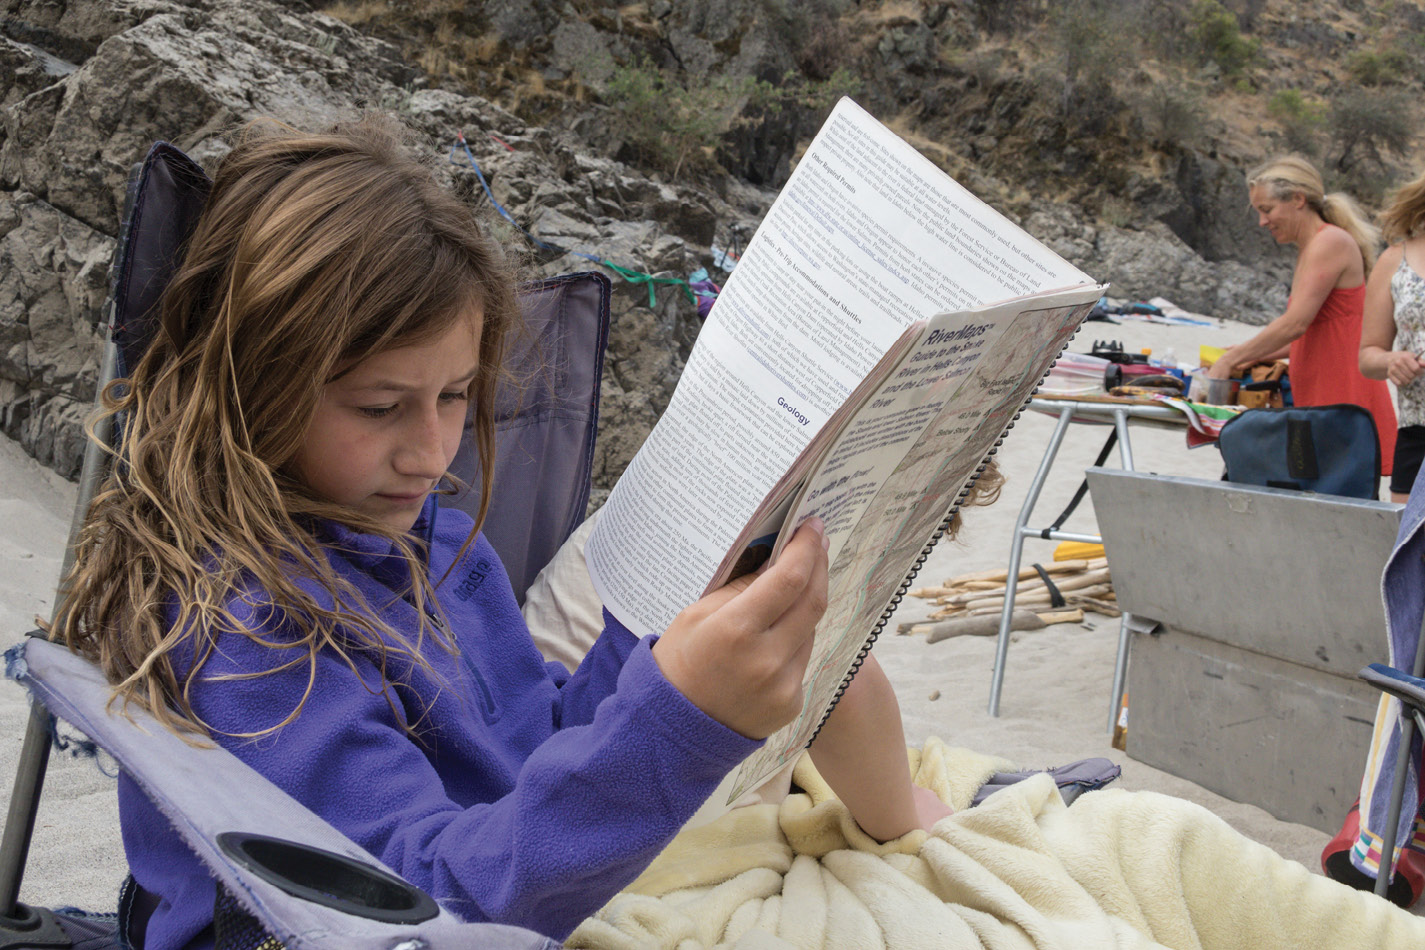
Most popular rivers have some kind of map and guide that tells you about what you’ll find as you head downstream.
In addition to a river guide, you can talk to people about the trip to get more detailed information. Helpful resources include river rangers, guiding outfits, and the Internet. These resources can give you current river conditions, updates on campsites, and even the beta on things like bugs, or whether bears, skunks, or mice are hanging out in campsites.
On some rivers, you are required to choose your campsites when you purchase your permit, so it’s a good idea to know how far you want to travel each day and which campsites fit that schedule before finalizing your permit. It’s also a good idea to consider things like sun exposure when you select your sites. In the summer you may want to look for shade, while in the fall or spring you may want full sun, especially in the mornings when you’re trying to get out of camp. River levels and group size are also factors to consider in selecting your sites.
Finally, if you want to hike or leave the river, bring a topographic map of the area and maybe a GPS to help you navigate.
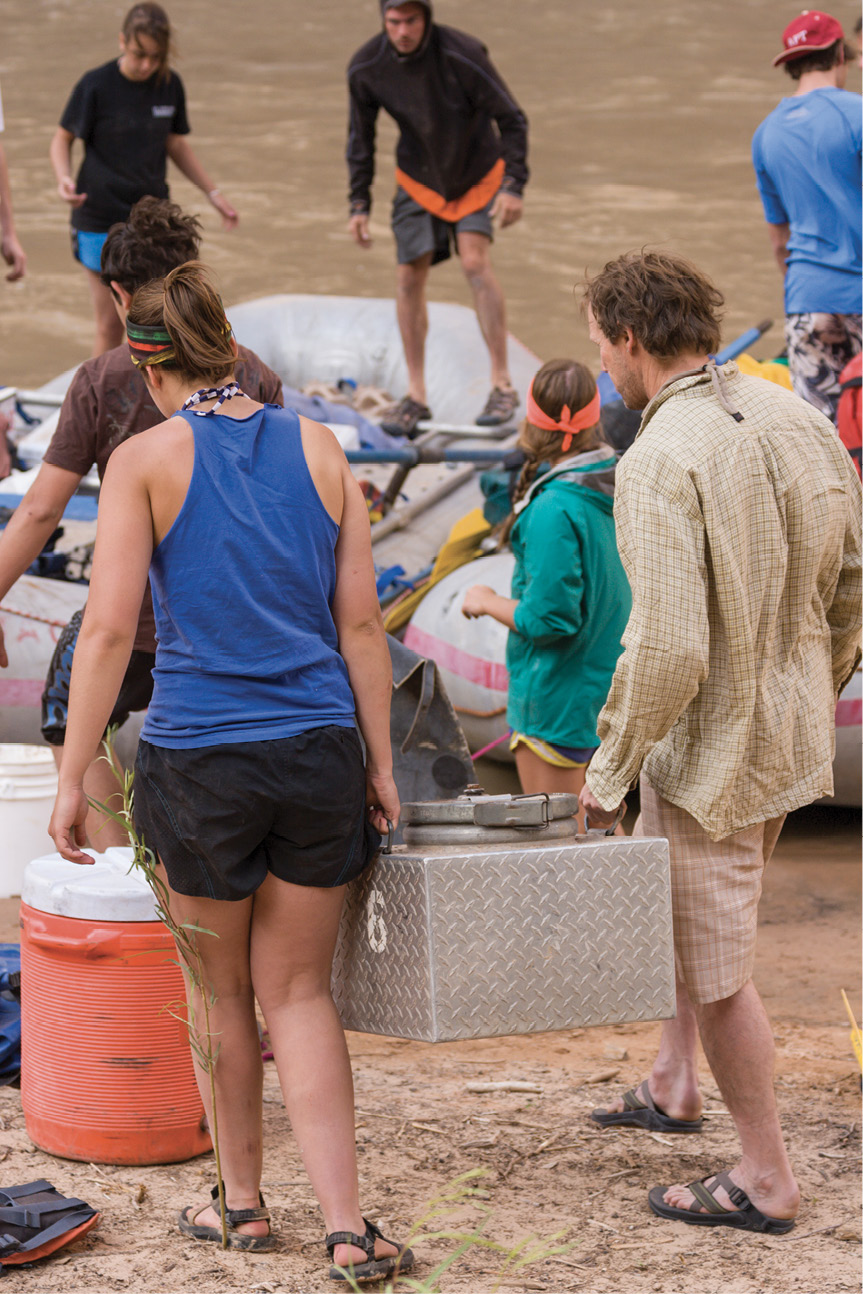
River Gear
We’ve discussed some of the basic river gear you will need in previous chapters, but it’s good to have a checklist to help make sure nothing gets left behind.

The amount of gear required for a multiday raft trip—especially a twenty-one-day Grand Canyon trip—can be staggering.
Dot Newton
River Gear Checklist
- Raft: The number and size of rafts you need depends on your group size and the length of the trip.
- Oars or paddles: One or two extra per raft; check permit requirements
- Oar frame
- Lash straps: Assorted lengths for lashing the frame to the raft and securing dry boxes, coolers, dry bags, and other cargo in place. Loop straps—which have a loop of webbing in each end to girth hitch to the frame—are useful for dry boxes and coolers.
- PFD: One per person, plus one extra per raft (each should be fitted with a whistle)
- Helmet: Optional, depends on the river
- First aid kit: One per boat, with an additional large kit for the group
- Raft repair kit: Details on what to include are in Chapter Fourteen: Basic Repair and Maintenance.
- Pin kit: Details on what to include are in Chapter Thirteen: Basic River Rescue.
- Dry boxes: One or two per raft
- Cooler: One per raft
- Sponge, bucket
- Throw bag
- One or two sand stakes and a mallet per group for anchoring rafts at night if you are on a river with large sandy beaches. Sand stakes aren’t necessary on rivers with lots of trees and rocky campsites.
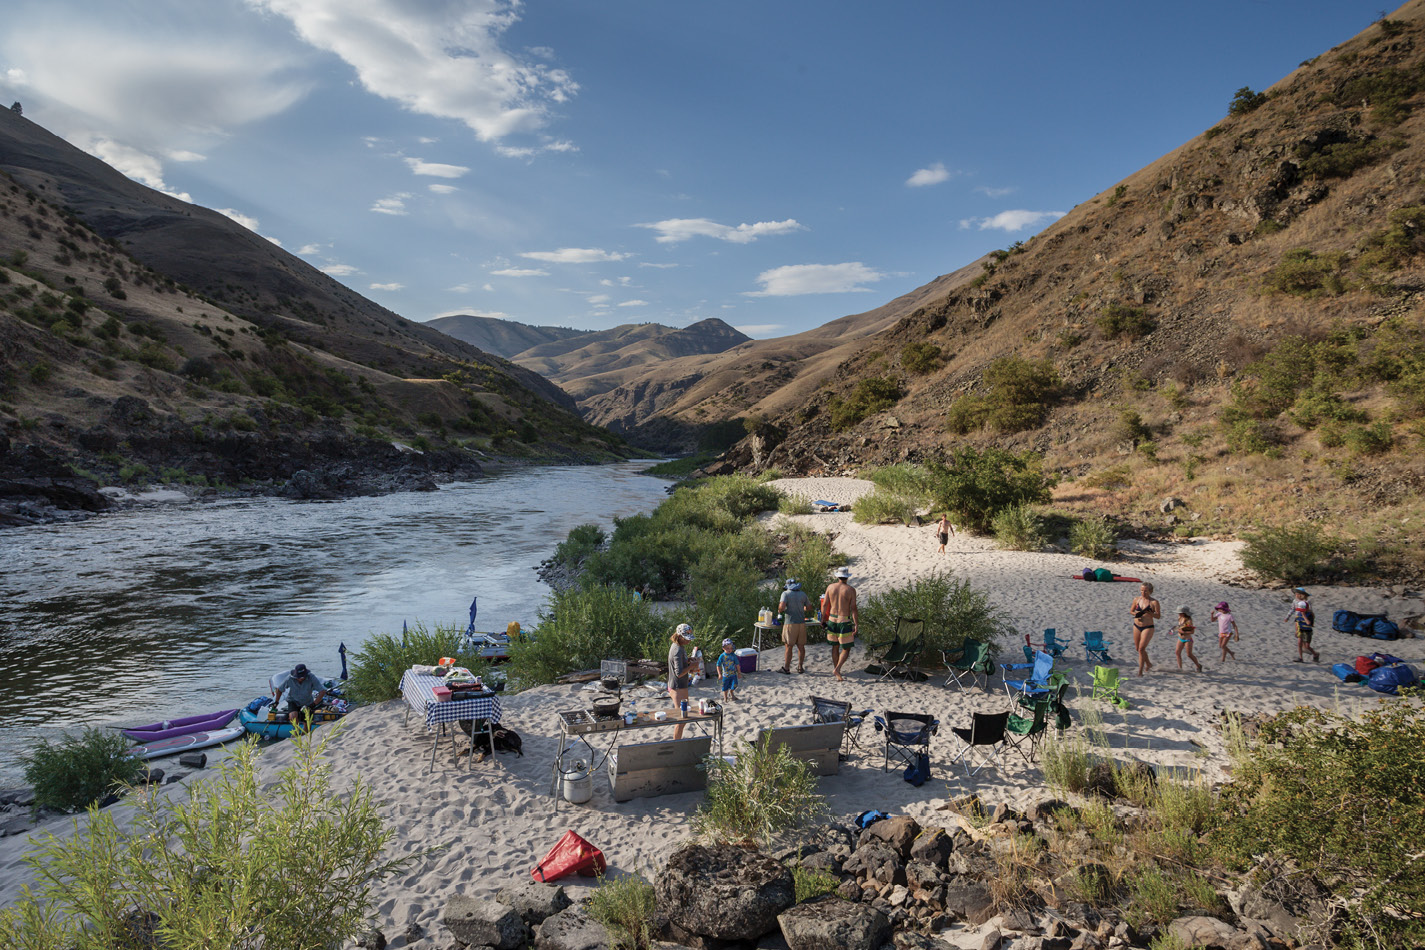
Camping Equipment
You don’t need everyone on your trip to bring all the gear needed, so before your trip create a gear list and consult with your team members to determine who’s bringing what. If you are missing a critical piece of gear you may be able to rent it from an outfitter, or if you have plenty of advance notice, someone on your team can purchase the item before the trip.
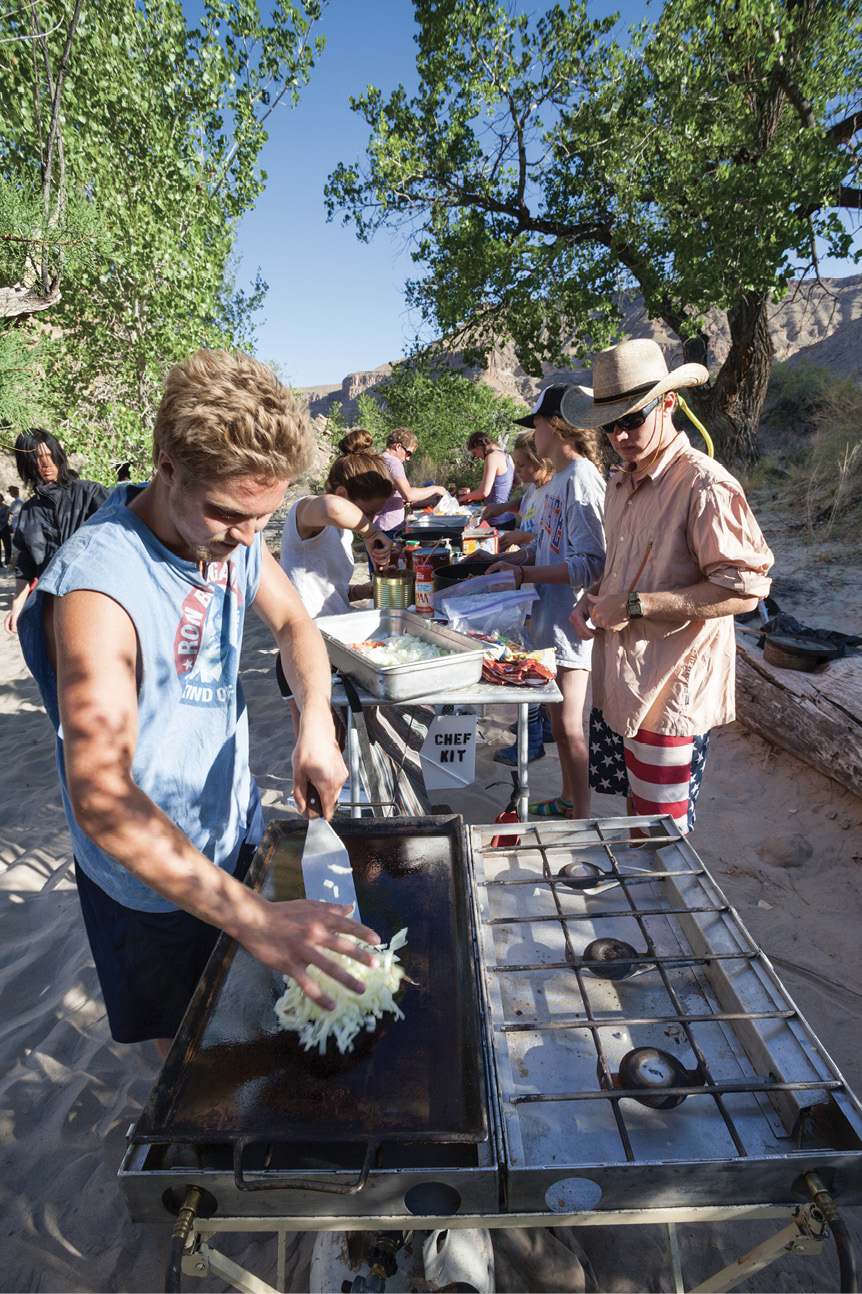
Kitchen
The bulk of your group gear is going to be kitchen gear. Here you can be either elaborate or streamlined, depending on your menu, the weather, the style of trip you plan, and its length. You’ll find the standard river kitchen is pretty well stocked, almost like your kitchen at home in terms of tools and equipment. But you don’t have to follow that system. If you prefer to go light, take cues from your backpacking days and pare things down to the essentials. That means nothing more than a one-burner stove, fuel, a large pot or two depending on your group size, and maybe a frying pan. You’ll want a pot grips or wool gloves to handle pots, and a spatula is important if you plan to fry anything. But otherwise, like backpackers, you can sit on the ground to cook and forgo the extravagance of tables, chairs, coolers, and heavy, bulky kitchen boxes.
The classic river trip includes a well-stocked kitchen and elaborate meals.
That said, it’s fun to have the ability to have nice meals on a river trip, and most boaters enjoy a cold beverage at the end of a hot day, so unless you have a reason for going super light, bring a bit more gear and set up an efficient, comfortable kitchen for your cooking needs.
Suggested Group Gear for a Fully Stocked Trip
|
Kitchen Gear |
Primary Equipment |
Extras |
Details |
|
Folding river tables |
2–3 large tables for prep, cooking, and dishwashing |
1 small table for drinks |
Long narrow tables work well because they can be strapped on top of a dry box or across the frame in the raft and/or serve as seating for passengers. |
|
Mesh dish hammock |
1 large for dishes, pots, and pans |
1 small for utensils |
Dish hammocks should be able to hang from tables. |
|
Stove |
2–6 burners |
Propane sufficient for entire trip |
2 lighters and waterproof matches |
|
Blaster (optional) |
1 burner; 65,000 BTUs for boiling water quickly |
Particularly nice for big groups in the winter, when you want hot water fast, and to expedite dishwashing. |
|
|
Wash bins (plastic bins, metal pails, or collapsible buckets) |
3–4 metal wash pails are nice if you want to heat dishwater in the pail. |
Bleach and dish soap stored in a small mesh bag for transport |
Dish towels, sponge, Brillo pad, or scrubby |
|
Pots and pans |
1 large pot for heating water; 1 large pot for meal preparation; 1 smaller pot for cooking; 1–2 large skillets and/or a griddle |
1–2 Dutch ovens for baking and casseroles |
2 hot pads or pot grips for moving hot pans around |
|
Stainless steel or plastic mixing bowl |
1–2, depending on the size of your group |
||
|
Coffee-making equipment |
Insulated bottles and cone filters, coffee press, etc. |
||
|
Utensils |
1 spatula, 1 can opener, 2 large spoons, 2 large knives, cheese grater, tongs, peeler, kitchen scissors, measuring spoons and cups, corkscrew, etc. |
||
|
Cutting boards |
1–2 (plastic sheets pack well in dry boxes) |
||
|
Strainer |
For removing food particles from dishwater |
Usually required on most permitted rivers |
|
|
Cups, mugs, bowls, plates, and silverware |
1 of each for every team member |
||
|
Trash compactor bags and ziplock bags of assorted sizes |
|||
|
Toilet setup |
Determine capacity by the number of days and the number of people on the trip. |
Toilet seat, toilet paper (some people like special toilet paper designed for RVs), toilet deodorizer, hand sanitizer, sanitizing wipes |
Extra 5-gallon bucket to use as a “pee bucket” next to the groover. |
|
Miscellaneous |
Paper towels; bee or wasp traps; bug repellant; aluminum foil; a mallet to crush cans; survey tape or duct tape for marking things |
||
|
Dry boxes |
1–2 per raft; cardboard boxes or milk crates that fit inside dry boxes are helpful for organizing food |
1 dry box should serve as the kitchen box and contain all pots, pans, utensils, and other cooking and eating supplies |
|
|
Large (20 millimeter) ammo/rocket boxes |
2–4 ammo/rocket boxes are useful for garbage, recyclables, and ash as they are emptied of food or beer. People also use grain sacks or large rice bags for trash and recyclables. |
||
|
Lantern with extra batteries |
Helpful for fall or spring trips with short days |
Inflatable, solar-powered LED lanterns work well. |
|
|
1 scrim cloth kitchen floor |
Good for keeping camp clean and collecting food scraps |
Kitchen floors are required on most rivers. |
|
|
Fire pan with grill and cover |
Fire cloth, folding shovel, ash container (can be an ammo can) |
Charcoal briquettes impregnated with lighter fluid |
Fire pans are required on some rivers regardless of whether you intend to build a fire or not. |
|
Rain or shade canopy |
|||
|
Water jugs |
Capacity for roughly 1 gallon per person per day. Many rivers have places where you can stock up on fresh water mid-trip, which will affect the number of jugs you need. |
Water filter or purification system |
|
|
Chairs |
1 per person |
Consider one extra on long trips as chairs often break. |
|
|
First aid and drug kit |
For longer trips it’s worth talking to your doctor about the pain medications and antibiotics you should carry. |
See the Appendix for a checklist. |
|
|
Maps, river guide |
It’s nice to have a river map for each raft. |
||
|
Communications device |
Depending on the remoteness of your trip, you may want to include a SAT phone or personal locating beacon in case of an emergency. You cannot get cell phone coverage in many river corridors because of the canyon walls. |
Suggested Group Gear for Going Light (group size 4–6)
|
Kitchen |
Main gear |
Extras |
|
1–2 single-burner backpacking stoves, cartridge mixed-fuel stoves, or white gas stoves. You can also cook on fires in some places. |
Fuel, lighter, waterproof matches |
|
|
1 pot per stove |
Wool gloves or pot grips |
|
|
1 cup, bowl, spoon per person (can use cup as bowl and leave bowl behind) |
||
|
Dry box or dry bag for group gear and food |
Trash compacter bags and grain or rice sack for garbage |
|
|
Portable light (inflatable LED, solar-powered lantern) |
||
|
Water bag or jugs |
1 5-gallon jug to carry drinking water |
1 water bag to hang up for handwashing |
|
Toilet setup |
River toilet or personal system for packing out waste, such as WAG bags |
Toilet paper, hand soap, hand sanitizer |
|
Communication device |
SAT phone or personal locating beacon |
|
|
First aid and drug kit |
||
|
Maps |
Note: On most permitted rivers you are required to carry certain equipment, such as fire pans and kitchen floor cloths. If you want to go light, talk to the land management agency in charge of the river to find out if it allows substitutions to cut weight, such as using an aluminum roasting pan for a fire pan, or bags designed for transporting human waste, such as WAG bags.
Kitchen setup
You’ll find a variety of opinions on the best way to set up a river kitchen. All are fine. Your goal is to have your kitchen be as convenient and efficient as possible, just like at home. A good standard setup is to set up two long river tables in an L-shape, with the dish rack hammock suspended from one table and your stove set up on the other. With big groups, you may want to have three tables arranged in a U-shape, as well as a fourth, small table for drinks. Lay your kitchen floor out between the tables so you can cook and prep without worrying about food scraps. Anything you drop will be caught on the floor so you can clean it up easily later.

You’ll find all sorts of ways to set up your kitchen, but the classic is a U-shaped kitchen with a couple of prep tables and a table for dishwashing. This group opted to bring their coolers and dry boxes up to camp. You can also leave them on the boat and just bring up what you need at mealtime.
Most people like to bring their kitchen box, with all the utensils, pots, pans, and dishes, up to the kitchen at every camp. This just makes life easier, as you don’t have to run down to the raft every time you need a spoon or knife. Food, on the other hand, often stays on the boats. The simplest technique is to take a shopping bag down to the rafts before each meal to get all the items you need for that meal.
Food organization in the raft is critical, especially for longer trips. Many people put cardboard boxes or milk crates inside their dry boxes to create bins that allow them to organize their stuff. Wine boxes with internal dividers can work well. On longer trips, such as the Grand Canyon, you can use rocket boxes or large ammo cans to hold each day’s food. These boxes can be used as trash containers after they are emptied. Coolers may be divided by meals or by contents; for example, you can have meat, produce, and dairy coolers, with those holding food for later in the trip taped shut to help them stay cold.
Depending on the length of the trip, you can arrange your food in different ways. The simplest technique is to have everything separated out by meal, but on longer trips you may not have the space to do that. One efficient system is to put four boxes in your dry box, one for breakfasts, one for lunches, and one for dinners, with the fourth for drinks and snacks. You can also opt to have staples, such as pasta and rice, in one place, crackers and bread in another, canned goods, etc., in yet another, and so on. The key is to have a system that everyone understands so your supplies don’t get mixed up and confused every time someone digs in to search of a specific item.
See Chapter Eight: Food for more details on menu planning and cooking organization.
River stoves
Most likely you will use either a two- or four-burner—maybe even a six-burner—propane stove on your river trip. You can use any model stove for this purpose, but it’s worth looking at Partner Steel’s aluminum stoves, which are made with river-running in mind. Some of Partner Steel’s models are built to fit inside ammo cans and dry boxes. The two-burner version folds in half for easy storage, and the 18-inch model is designed so you can have two 9-inch frying pans side-by-side while cooking. Partner Steel also makes a stove stand for some of its stoves. Partner Steel’s products are tough, durable, and reliable.
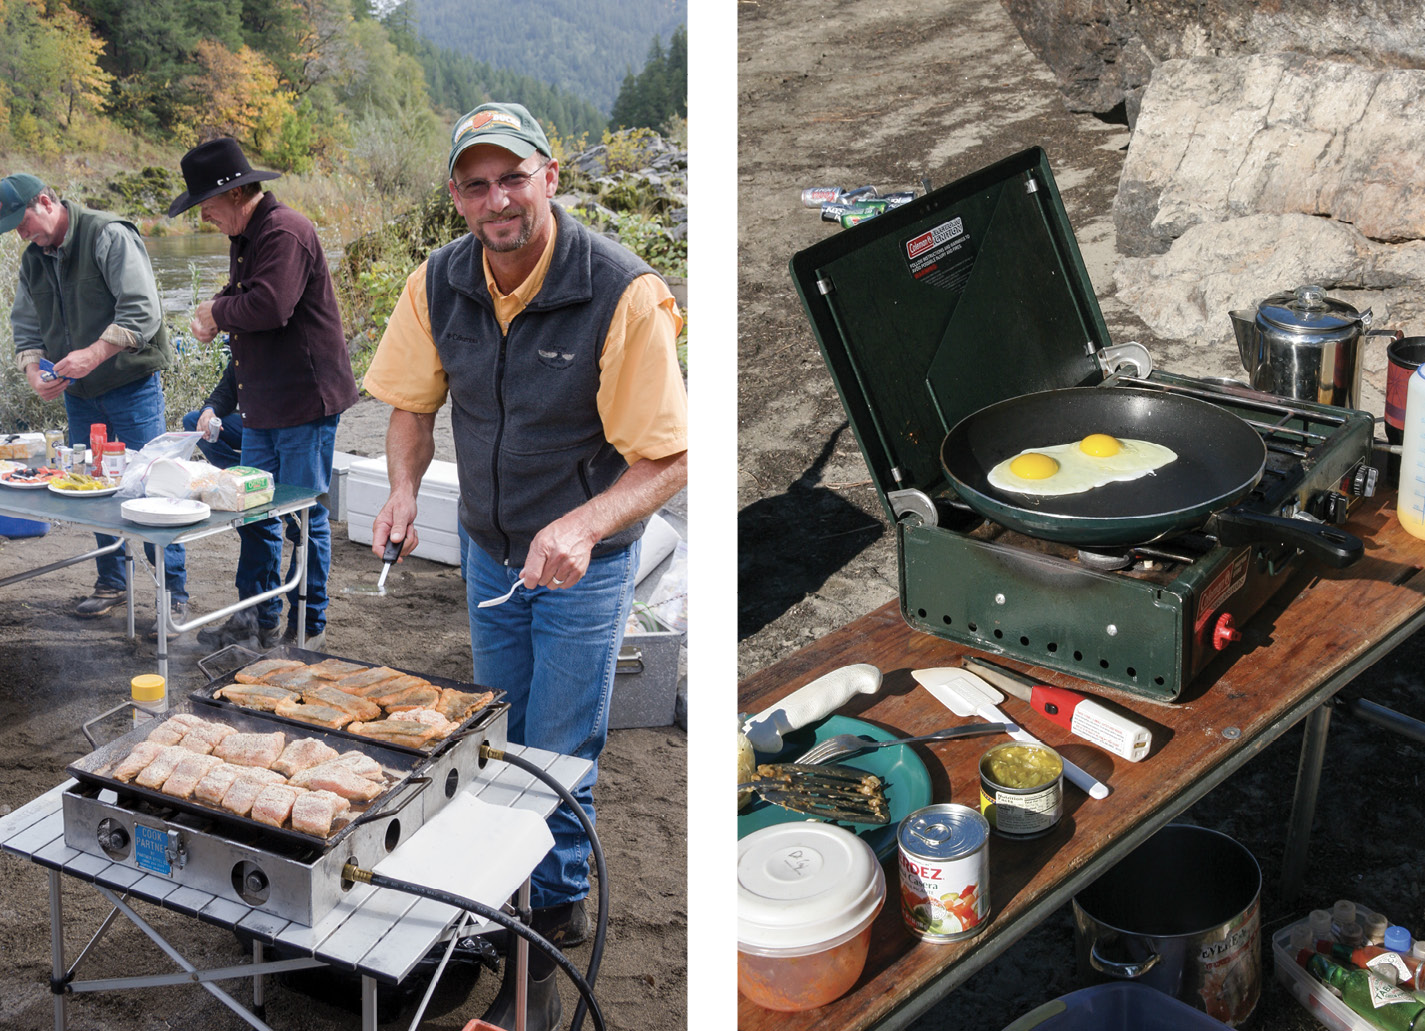
You can use a classic Coleman two-burner stove or a more specialized Partner Steel four-burner for your river trip.
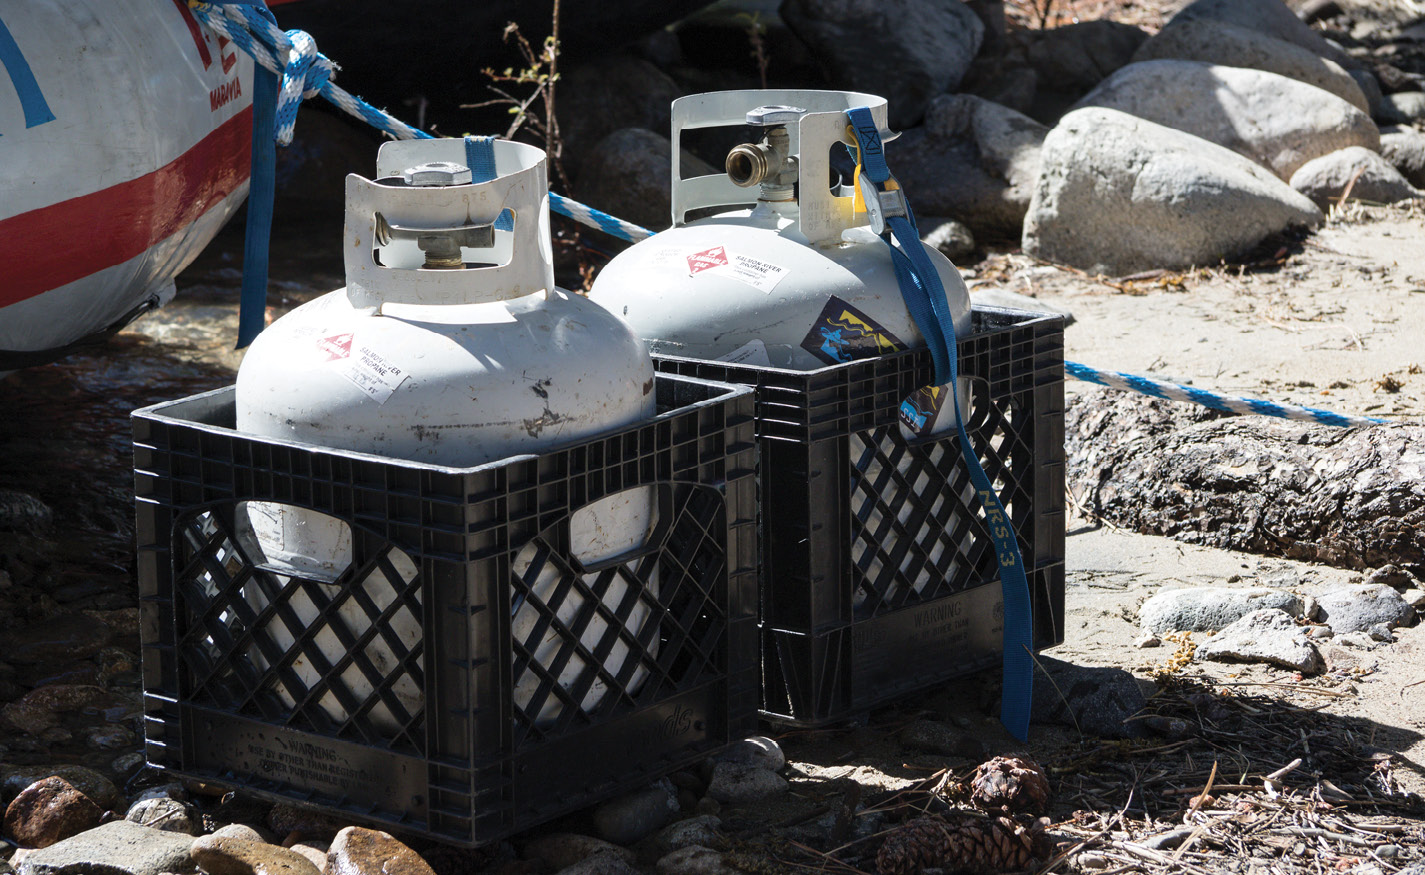
One of these 5-gallon tanks of propane should last a group of sixteen about eight days on a summer trip.
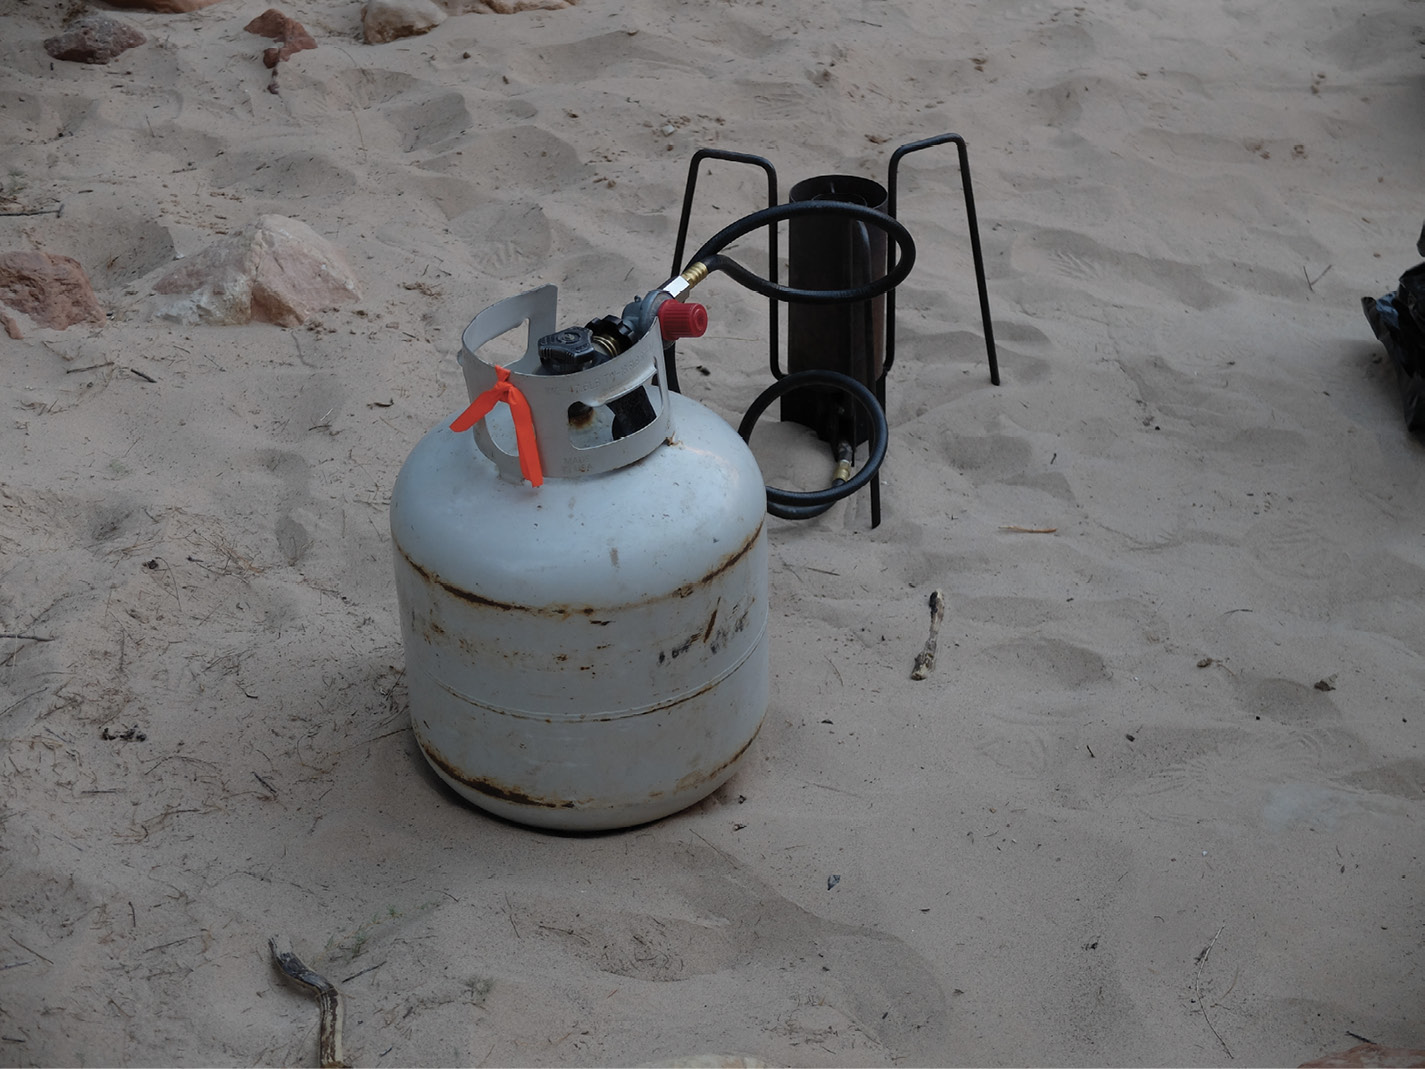
For big groups it’s nice to have a “blaster,” or a 65,000 BTU burner that boils water quickly.
Stefanie Vandaele
Handwashing stations
It’s nice to have at least one handwashing station in camp for food preparers and for people to use after they go to the bathroom. The simplest handwashing system is a water bag hanging from a tree with soap nearby, but on most river trips people use 5-gallon buckets and a foot pump with a spout that fits on the edge of the bucket to create a hands-free handwashing station. If you really want convenience, make a holder for your soap dispenser that can hang off the bucket and keep the soap out of the sand.
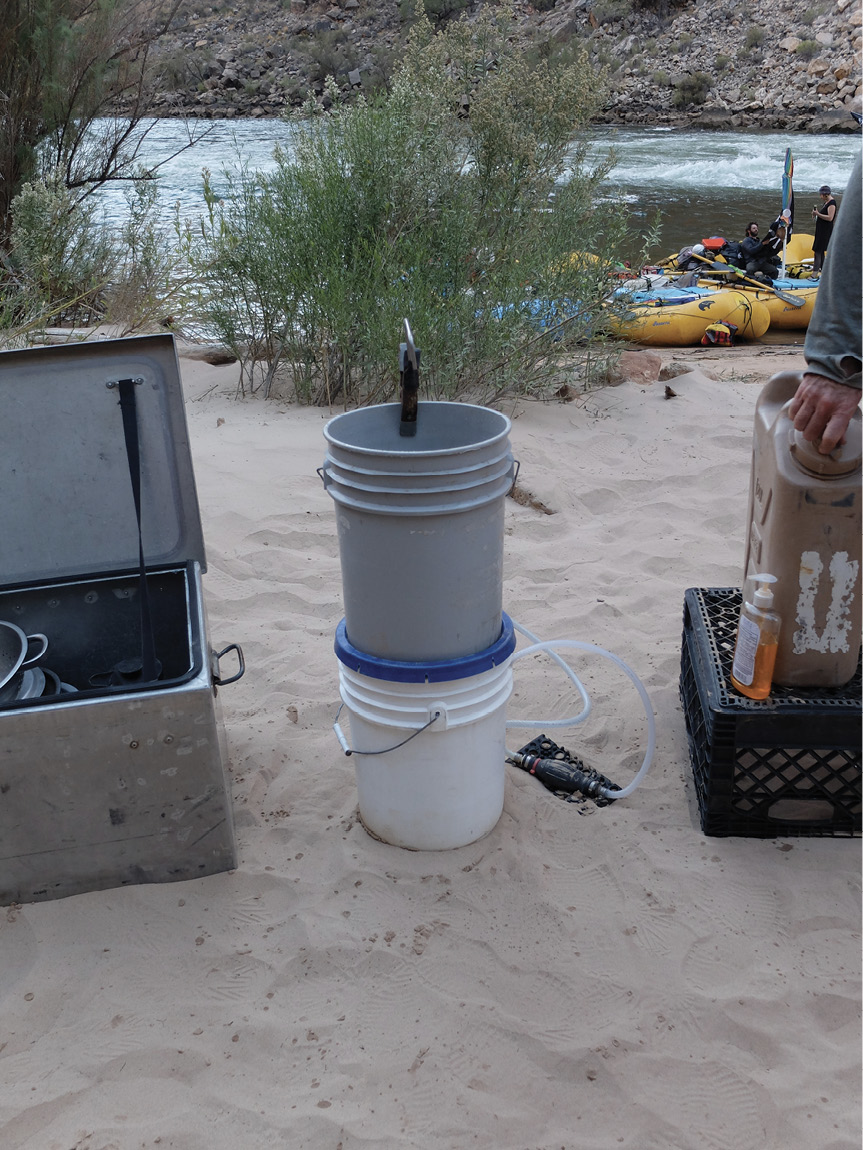
You can help prevent the spread of illness by making sure everyone has clean hands. Easy-to-use, convenient hand-washing stations like this one make good hygiene easy.
Stefanie Vandaele
You can find handwashing setups online—NRS and Partner Steel each make one—or if you are handy, you can create your own.
River water is fine to use for handwashing, but if you plan to use that water for other purposes—say to rinse out a coffee press—add half a capful of bleach just to be on the safe side.
River Toilets
Known as the groover, the unit, or the loo with a view, river toilets are something everyone must use at some point on their float. Back in the old days, people used to poop in 20-millimeter (mm) rocket boxes without a seat. This left indents in their butts, which resulted in the nickname “groover” for the river toilet. That practice is long gone. Even those who continue to use rocket boxes now carry toilet seats that fit on top for comfort. But the name has stuck, and many boaters still call their river toilet the groover.
The best groover on the market, in my book, is manufactured by Partner Steel and is called the Jonny Partner. There are other options: ECO-Safe Toilet System, Selway Fabrications, and Coyote Portable Toilet System all make good river toilets, or you can just use a rocket box with a toilet seat. For short trips people sometimes use WAG bags or other disposable systems for packing out poop, although not all river regulations allow this kind of waste management technique. Check before you head to the put-in to make sure your system is approved. If you plan to do a lot of river trips I highly recommend the Jonny Partner, although on long Grand Canyon trips rocket boxes pack a bit more easily.
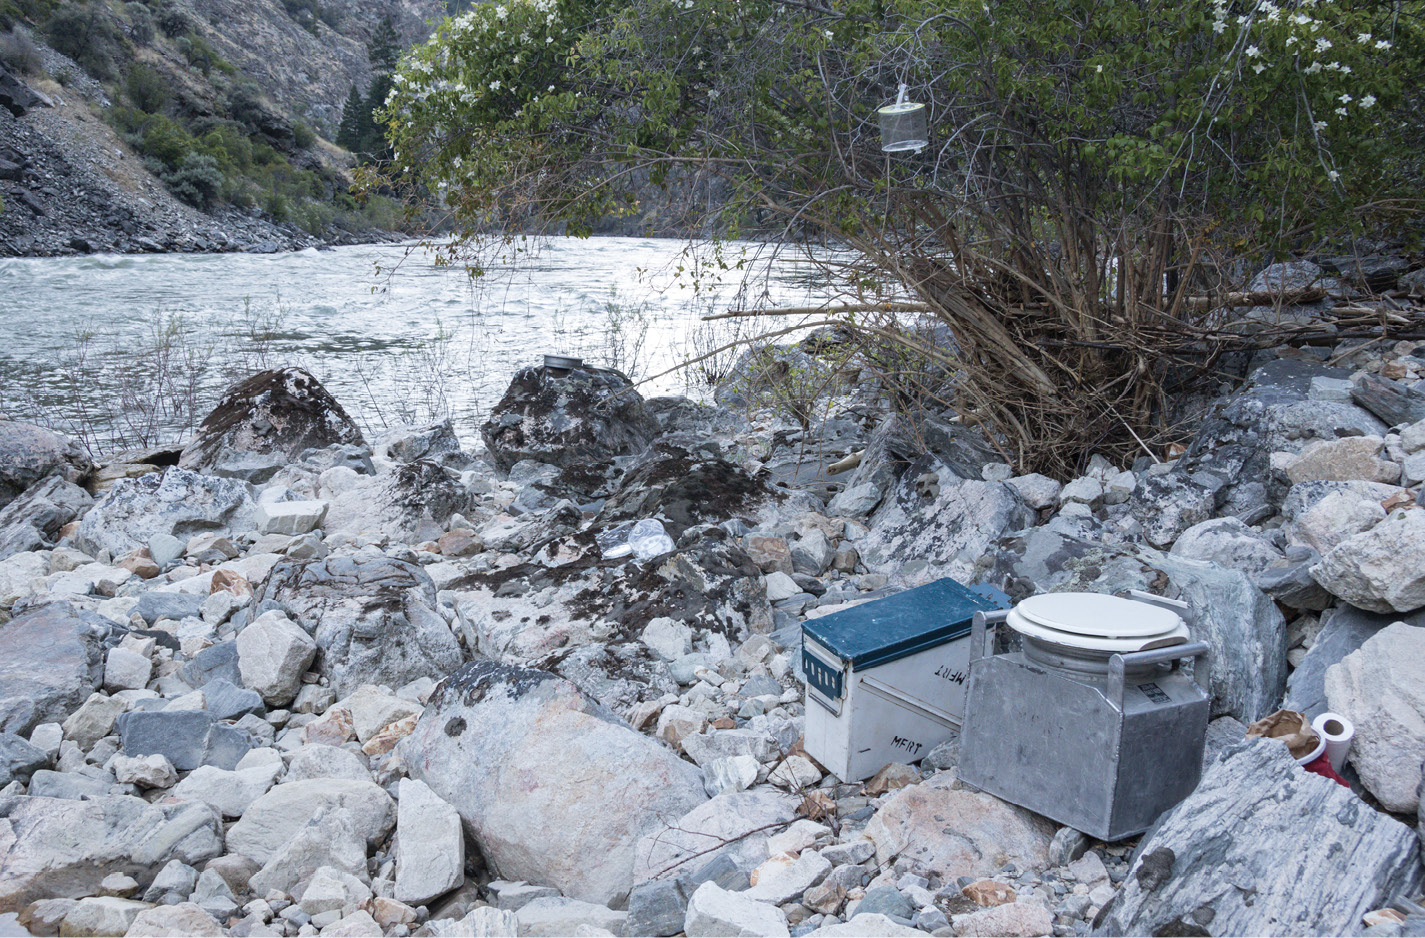
A Jonny Partner portable toilet sits in a scenic spot ready for use.
Groovers come with an estimated capacity, enabling you to figure out how many you need for your river trip. The Jonny Partner is estimated to hold roughly 50-60 uses, so if you have a party of ten, one Jonny Partner should last you for approximately five days. Different models have different capacities, so make sure you check if you are going with another brand. On long trips it’s a good idea to be generous in your figuring. No one wants to run out of groover space.
To save space and control odors, don’t pee in the groover. Most river guidelines require people to pee in the river. You can place your groover on the shore close to the river so people can pee before they poop, or (and I personally prefer this method) bring a 5-gallon bucket for peeing. You can empty the pee bucket into the river at the end of your stay in camp.
For groups of sixteen or less you can usually get by with one to two rolls of toilet paper per day. Encourage people to go easy on the TP. That helps conserve groover space and keeps your needs down. TP goes into the groover. If you are on a long trip, extra TP rolls can be stored in the empty groovers until needed. Otherwise, bring a 20 mm rocket box or spare dry bag to hold the toilet seat, TP, hand sanitizer, bleach wipes (for wiping down toilet seat) and a dry bleach or chemical deodorizer, such as Campa-Chem RV-holding tank deodorizer. Campa-Chem is sold at Walmart and RV camping supply stores. If you go the deodorizer route, start with one packet in an empty groover and add another when it’s half full. You can also use a product known as Groover Tamer to help with odors. Groover Tamer is expensive ($70 for one packet designed for an eighteen-day trip) but the product is supposed to be environmentally safe and many people swear by it.
Groover setup is a critical daily chore. It’s one of the first things to be established when you make camp. If you are on groover duty, look for a private spot away from camp, near the river, and with a good view. Place the groover on level ground, remove the lid, and put the toilet seat in place. If you have a pee bucket, set that up next to the groover. Place the TP in a handy spot inside a plastic bag and weighted down with a rock. If it’s raining, you may want to store your TP in the ammo can that held your toilet seat. I like to store my toilet seat in a stuff sack during transit to keep it separate from the other items stored in the ammo can, such as TP and hand sanitizer.
Setting up and taking down the portable toilet are critical daily chores. Usually it takes two people to carry a loaded groover.
Store all supplies—wipes, stuff sacks, deodorizer—in a closed rocket box next to the groover while in camp. Make sure the toilet seat lid is closed when the groover is not in use. That will help keep the smell down and animals out.
At the head of the trail to the groover site, place some kind of sign that indicates the groover is in use. Anything works—a bandana, a pink flamingo—use your imagination! Whoever is in the groover takes the sign along while they do their business and returns it to the head of the trail when they are done, so people know the groover is free.
Place the hand-washing station near the groover trail so people can’t forget to wash up after they are done.
Typically, the groover is one of the last things to get loaded onto the boats. Whoever is on groover duty should give a last call, so people know it’s time to do their business. Then, once everyone is finished, wipe the toilet seat down with a sanitizing wipe, then return it to the stuff sack and put the seat into the ammo box. Pour the pee into the river, seal up the groover, and load it onto the raft.

Most groups like to store their river toilets on one raft.
When your groover is full and it’s time to move to a new one, leave the full groover sealed up on the boat.
At the end of the trip, the groover needs to be taken to an RV dump station or a SCAT machine (often found at popular river takeouts) to be emptied and cleaned. To facilitate cleaning, you can spray the insides of your groovers with PAM cooking spray or the like before the trip. That helps things slide out when you’re all done.
You may want to add a little water to the groover at the start of the last day if a SCAT machine is at the takeout. If the SCAT machine is down the road, add water before you put the groover on the boat trailer. That little bit of extra fluid and some agitation from driving or rafting helps moisten the load and makes the groover easier to clean. But adding water earlier in the trip weighs down your raft and makes it cumbersome.
You may find you don’t want to venture down to the shoreline in the middle of the night if you must pee. If that’s the case, bring a pee bottle or bucket to your sleeping spot. You can use that during the night and empty it into the river the following morning.
Trash
Twenty-millimeter ammo cans or rocket boxes do a little bit of everything on river trips, and holding garbage is one of their great attributes. You can also use 5-gallon buckets with a lid, large grain or rice bags, or dry bags for holding your garbage. Bring extra-tough trash compacter bags for garbage; these won’t rip when you transfer garbage from one container to another and allow you to compress the garbage with your foot to maximize space.
It’s a good idea to get rid of excess packaging on food before your trip so you don’t end up having to deal with lots of waste on the river. If you have a fire, you can burn paper products.
Bring along a mallet or use a rock to flatten aluminum and tin cans, as well as other recyclables, so they are easier to store as you move down river. Having a “thinnest can competition” can motivate kids—and kids at heart—to smash cans down for you. Cans can be transported in an old dry bag, an empty ammo can, or rice or grain sacks.
Fire Pans
Popular rivers require the use of fire pans and often restrict or forbid the collection of firewood. Make sure you know the rules. If you do have fires, you’ll need to pack your ashes out. Fires are great to hang out around, or for cooking with a Dutch oven.
To help keep camps clean for other river runners, most permitted rivers require the use of fire pans.
Specialized River Gear
Thousands of people go on multiday raft trips every year, and over time the equipment they use has become quite specialized. Today’s river tables tend to be long and narrow so they strap on top of dry boxes or directly onto frames to make seats for passengers; river stoves fold in half to fit inside dry boxes; and the foot pumps employed for hand-washing allow for easy-to-use, hands-free cleaning to help prevent the spread of disease. These are just a few of the tools used on rivers that are not commonly found in other camping settings.
Despite this, it’s still amazing how much variety and individualization you’ll find in the way people rig their boats and the equipment they choose to bring.
That said, there are definite advantages to purchasing camping gear designed for and by river runners. It just fits together better, and has special features that boost performance in a river setting.
A number of reputable manufacturers make river gear. NRS, Cascade River Gear, and Partner Steel are a few that come to mind for essentials such as toilet systems, tables, frames, dry boxes, and more. You may also be able to find used gear with some online searching. Dry boxes, frames, and toilets tend to be indestructible, especially when handled with care, and buying them used is usually a pretty safe bet.
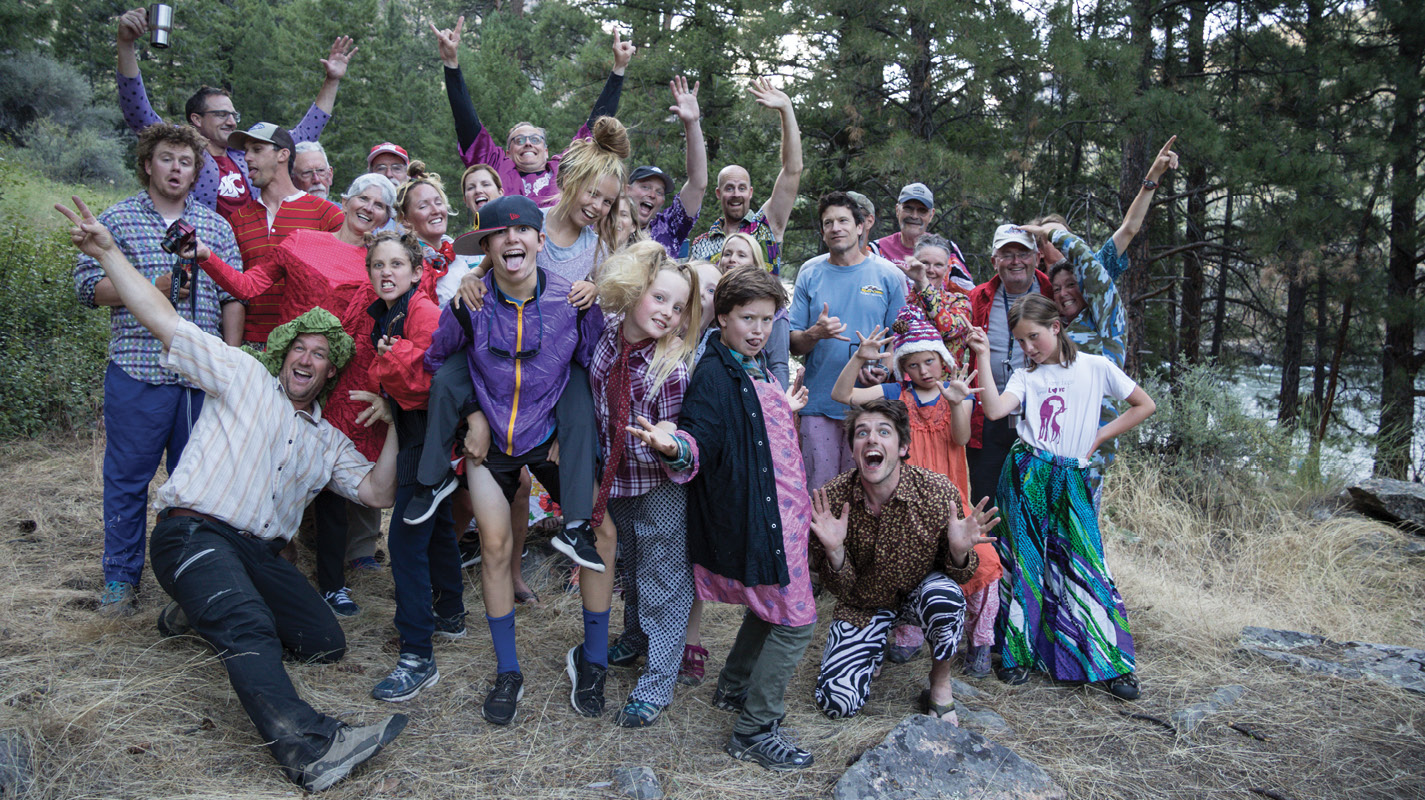
Costumes, theme nights, and games
Long river trips are good excuses to indulge your inner whimsy. You’re alone with your friends on a remote beach far from watchful eyes—what better time for a silly dance party or a costume night? Not all groups are into this kind of thing, but if yours is, plant the seed before the trip so people can bring props.
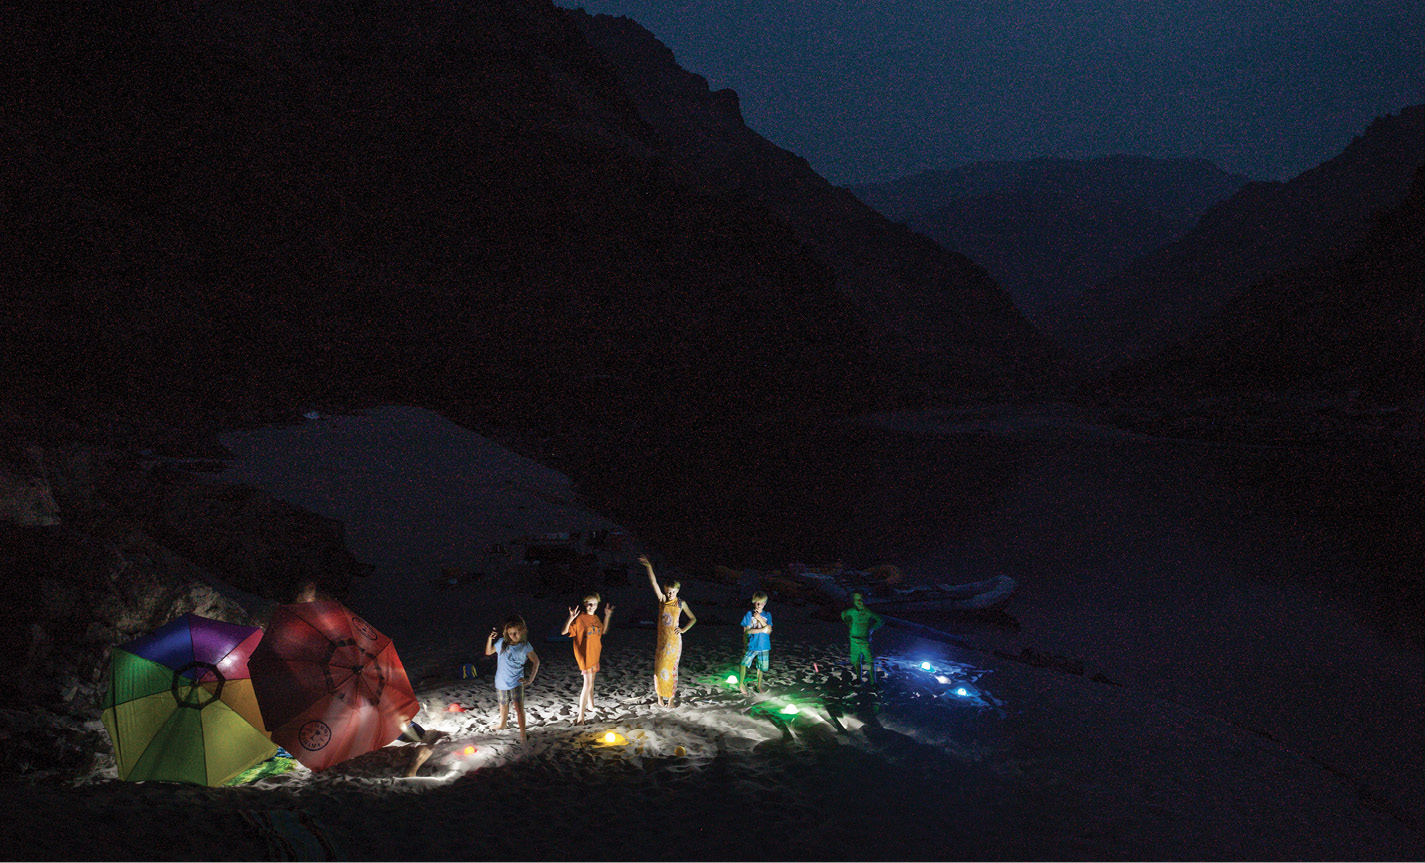
Long river trips are a great excuse to indulge your inner whimsy and have fun.
Theme nights can range from formal affairs, where people wear long gowns and ties, to evenings where you dress like someone else on your trip, to a Mexican piñata party complete with margaritas and sombreros. Thrift stores are great places to find costumes for your trip. A feather boa or a pair of suspenders can do wonders to accessorize your regular river attire and transform boring into amazing.
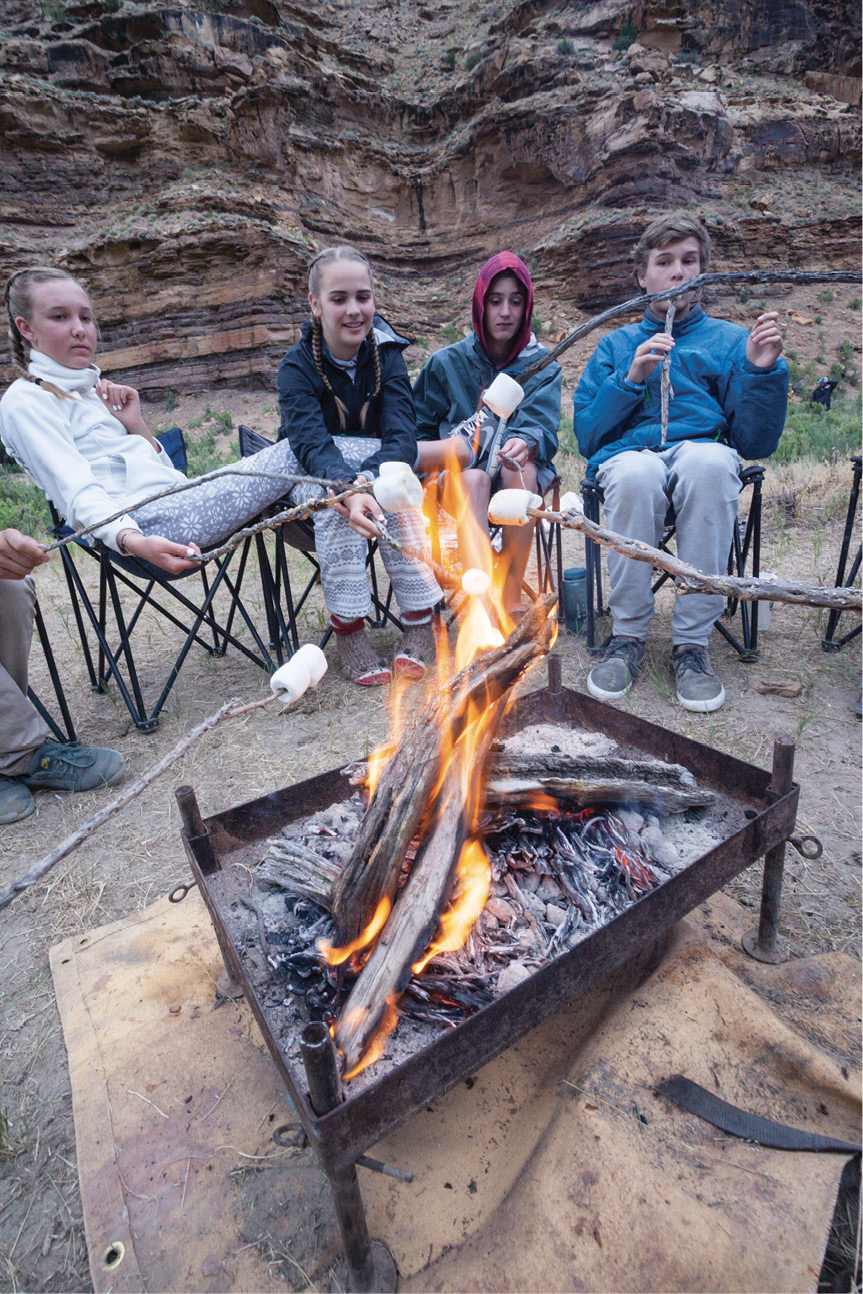
Some groups like to have cocktail nights, with a theme cocktail for each evening. You can bring a hand-cranked blender to make frozen drinks or a shaker for a good old-fashioned martini. Parties don’t have to revolve around alcohol. If you have kids along, make s’mores or play a game that everyone can join in. Bring a How to Host a Murder game for a long evening of intrigue, or carry a hand-cranked ice cream maker for an extra special river treat.
Beach games are always popular. Bocce ball, KanJam, Frisbee, croquet, or other games that can be packed up and put in a dry box on the raft for transporting can keep you entertained onshore for hours. Or bring along cards, dice, or a cribbage board if you expect bad weather and lots of tent time.
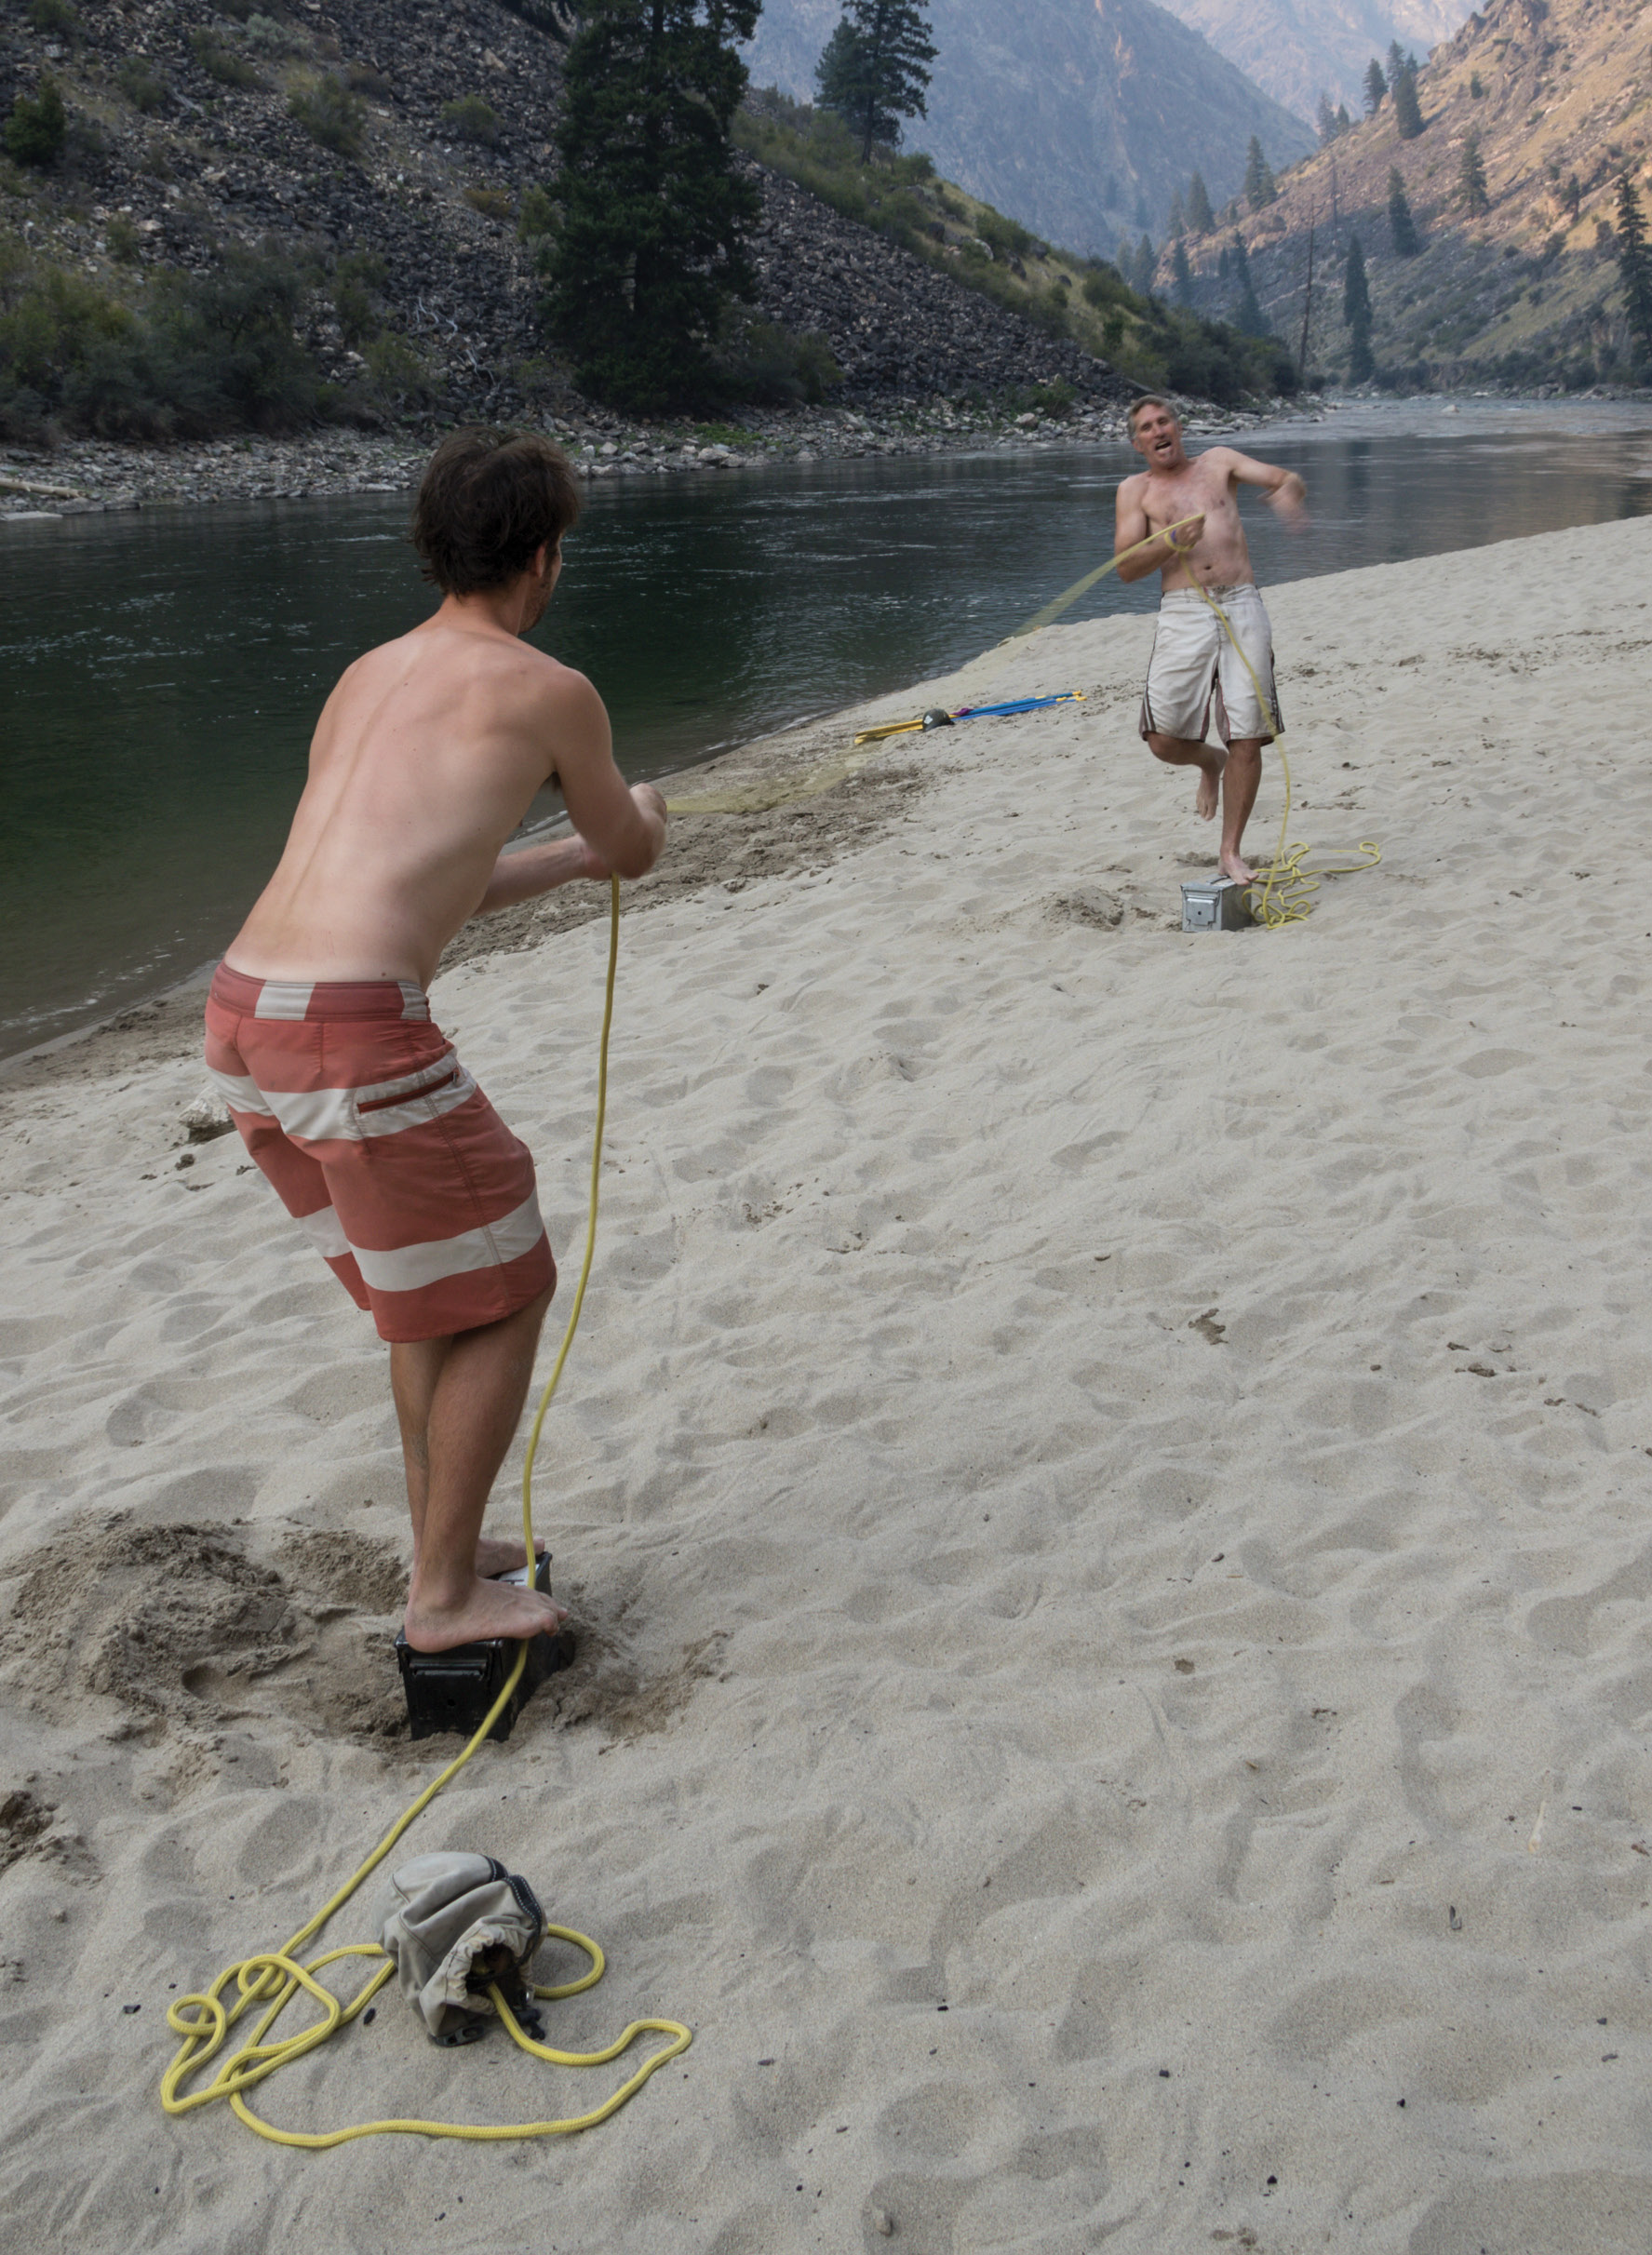
Ammo can tug-of-war is a classic beach game rafters use to keep themselves entertained.
Music
If you have musicians in your group, have them bring their instruments on the trip. There’s nothing quite like sitting around the campfire singing songs while someone plays a guitar. Backpacking guitars are easier to fit into dry boxes, but if you are creative you can find a safe place to carry a full-size guitar on your raft. Other instruments are also fun to have. In addition, many people like to bring speakers and some way to play music on river trips. That’s fine as long as you recognize that there are times when people may prefer to enjoy the sounds of nature more than Led Zeppelin. Be considerate—especially if there are other groups camped nearby.
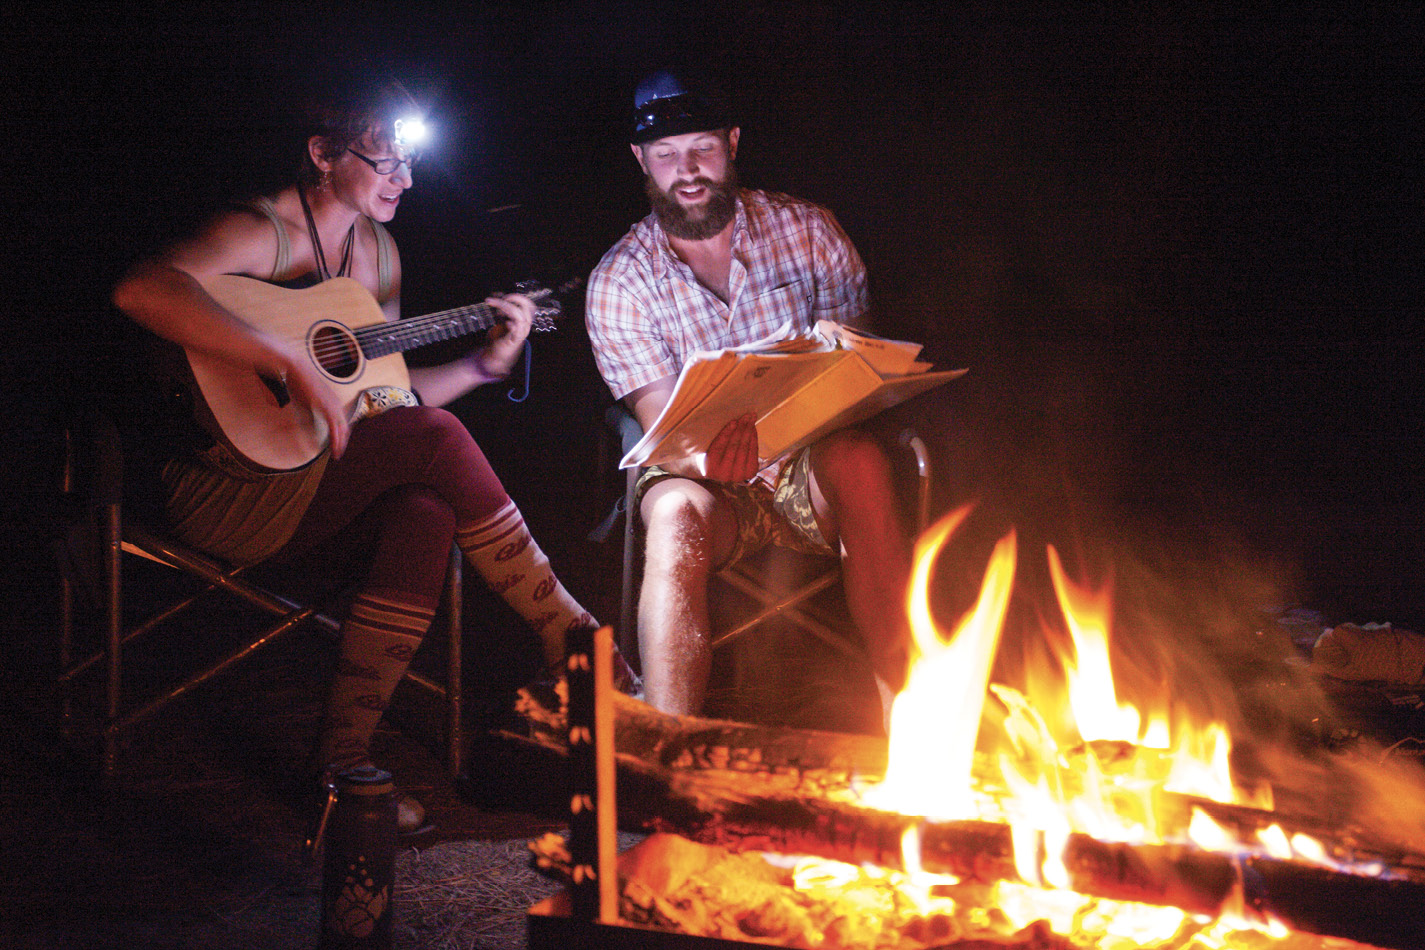
If you have musicians in your group, have them bring their instruments. Making music together on the river can be extra special.