Refine Your Riding
Advanced western riding isn’t about strength, grip, and force. It’s about allowing movement, influencing it without blocking it, and directing that movement and energy into the outcome you want.
You can attain this by improving your balance, seat, aids, and cues. In addition, the more you can refine your timing, breathing, focus, awareness, and other subtle aspects of riding, the deeper the partnership you can build with your horse.
Here are a few areas to explore that will help you increase your riding skills as you continue to advance.
Developing Better Balance and Seat
When you boil it down to its simplest elements, good western riding is about sitting on your horse in a softly supported way, with your skeleton correctly aligned so your bones, instead of your muscles, can do the work of supporting you. You’re secure in the saddle and not gripping with your legs or using your hands for balance. This frees you to give aids independently and to use only the pressure necessary to get a response.
But every rider has certain body idiosyncrasies and habits that can make riding correctly more difficult than it needs to be. Once you become aware of how you move, hold yourself, and use your body, you can start changing patterns for the better.
The postures and body habits you have in your daily life definitely affect how you ride your horse. You are what you practice. If, for example, most of your days are spent in front of a computer, with rounded shoulders and a collapsed back, it will be difficult to ride with good posture when you get on your horse.
Your breathing patterns also affect your riding. If you normally breathe shallowly and into your upper chest, it will be difficult to switch to the low, deep, rhythmic breathing conducive to good riding. (We’ll cover breathing in more detail at the end of this chapter.)
Imagine the effect your head (which weighs about ten pounds—about the same as a bowling ball) has on your posture if it’s not carried in an efficient position so your skeleton can support it. If your neck and shoulder muscles have to carry this weight around all day, that’s a recipe for pain and poor posture in the saddle.
It’s also important to realize that horses often mirror their riders; if a rider has a hollow back, the horse will typically travel with a hollow back as well. Generous creatures that they are, horses often compensate for our imbalances. The more balanced and symmetrical we can be, the better our horses can move. Learning to feel your horse’s rhythm in different gaits can also help you refine your seat and balance.
The good news is that, even if you’re only able to ride a few hours a week, you can practice the posture, alignment, and breathing that you want to bring to your riding during the many hours of your days that you’re not riding.
The first step to developing better balance and a more secure seat is to become aware of your natural patterns and habits. Then, you can work toward letting go of unnecessary muscle tension and play with finding the position that is most secure for you. Here are some suggestions to get you started.
WORK WITH WHAT YOU HAVE
No one has perfect symmetry, alignment, or posture; just like your horse, you have physical issues and quirks. You can, however, work around them and overcome them with awareness and education.
Over a period of a week or two, pay attention to your body movements: Notice how you walk, stand, sit, move, and breathe. (Don’t make judgments about what is right and wrong; just become aware of what is normal for you.) Start noticing other people’s postures and habits, too. It can be an educational experience.
Do you tend to arch your lower back or round your upper back? Where are your shoulders in relation to your hips? Do you walk with your chest leading, your hips leading, or something in between? Do you walk with your head tilted to one side? Do you regularly stand with more weight on one hip than the other? How do you breathe—low, high, deep, shallow? Does your breathing change depending on how much stress you’re under?
Often, these habits are so ingrained that it can be difficult to identify them, and they certainly feel correct because it’s how you’re used to moving and breathing every minute of your day.
All of your habits in your daily life will carry over to your riding. If you notice asymmetries, it can be very helpful to seek the services of a good body worker who specializes in body alignment, such as a Feldenkrais or Alexander Technique practitioner, a chiropractor, a physical therapist, a massage therapist, and so on. A professional may be able to help you reeducate your body and nervous system so you can start carrying your body more efficiently. Eventually, you won’t have to think about moving differently on your horse because the new behaviors will become natural for you.
LET GO OF THE BRACES
The more advanced you become as a rider, the more important it will be to ride with softness, in balance, and giving subtle cues. Becoming aware of your braces—and then letting them go—will help you progress toward this goal. But what is a brace? A brace is any extra muscle power, extra energy, or extra motion used to accomplish a certain task. Let’s use vacuuming as an example.
The next time you’re cleaning a carpet with an upright vacuum, notice what your body does as you pull and push the vacuum over the carpet. When you pull the vacuum back, are you simply swinging your elbow back from your shoulder joint, without raising your arm? Or are you putting in more effort than you need? Are you hiking your shoulder up and back in a circular motion as you pull the vacuum toward you? Are you swinging your whole torso around as you pull the vacuum back? Vacuuming this way uses a lot of unnecessary muscle power. These are braces. Many people develop habits that use more muscle power and energy than is really necessary to complete tasks. Over time, these habits can lead to injury or chronic pain.
To eliminate your braces, start by being aware of them. For example, when you’re driving or sitting at work, be aware of what you do. Notice whether you grip the steering wheel more tightly or hold the mouse with more force than is necessary. Try seeing how little effort you can use to do all the daily tasks in your life.
Use this same awareness to your horse. When you get on your horse, take a moment to scan your body, head to toe, for braces. If you become aware of one, try to let it go. In doing so, be careful that you don’t tense up one area to release another! Make everything easy and comfortable, and have fun with it. You can’t pass or fail. This process, both on and off your horse, really does last a lifetime.

Do you walk with your head down or take longer strides with one leg? Bring awareness to how you use your body and notice how others use theirs.
See whether you ride better when you release your brace, and notice how your horse responds. Try walking your horse while you are relaxed, then brace and tighten one leg, one arm, one hand, or one finger. See what happens. Does she slow down or speed up, flick her ears back and forth, clench her jaw, or swish her tail? Again, there are no right or wrong answers at this point; you’re just becoming aware of how everything you do affects your horse.
FIND YOUR MOST SECURE POSITION
Through her years studying biomechanics and correct body alignment, riding instructor Sally Swift pioneered a new approach to riding that she called “centered riding.” When St. Martin’s Press published her book by the same name in 1985, it revolutionized riding instruction and helped riders find the position that is correct and most stable for their bodies. Wendy Murdoch, a long-time student of Swift, took these ideas to an even higher level in her work. She shares her findings with riders around the world and in her book Simplify Your Riding (Carriage House Publishing, 2004). Other instructors and trainers (such as Peggy Cummings, Mark Rashid, and Dr. Deb Bennett) have also studied biomechanics and how a rider’s position in the saddle helps or hinders the horse.
Riding from a correct position means that your body is aligned so you don’t have to rely on extra muscle power to keep you safely upright on your horse. Not surprisingly, a correct position relates directly to a stable and secure position.
In the saddle, this means all parts of your body are properly aligned. Your ear, elbow, hip, and heel are vertically aligned. Your seat bones are pointed straight down, and your pelvis is in a neutral position. Your back is soft and supported, somewhere between an arched, hollowed position and a rounded, collapsed position. Your breathing expands your lower rib cage and belly rather than lifting your chest. This position doesn’t change drastically from one style of riding to another.

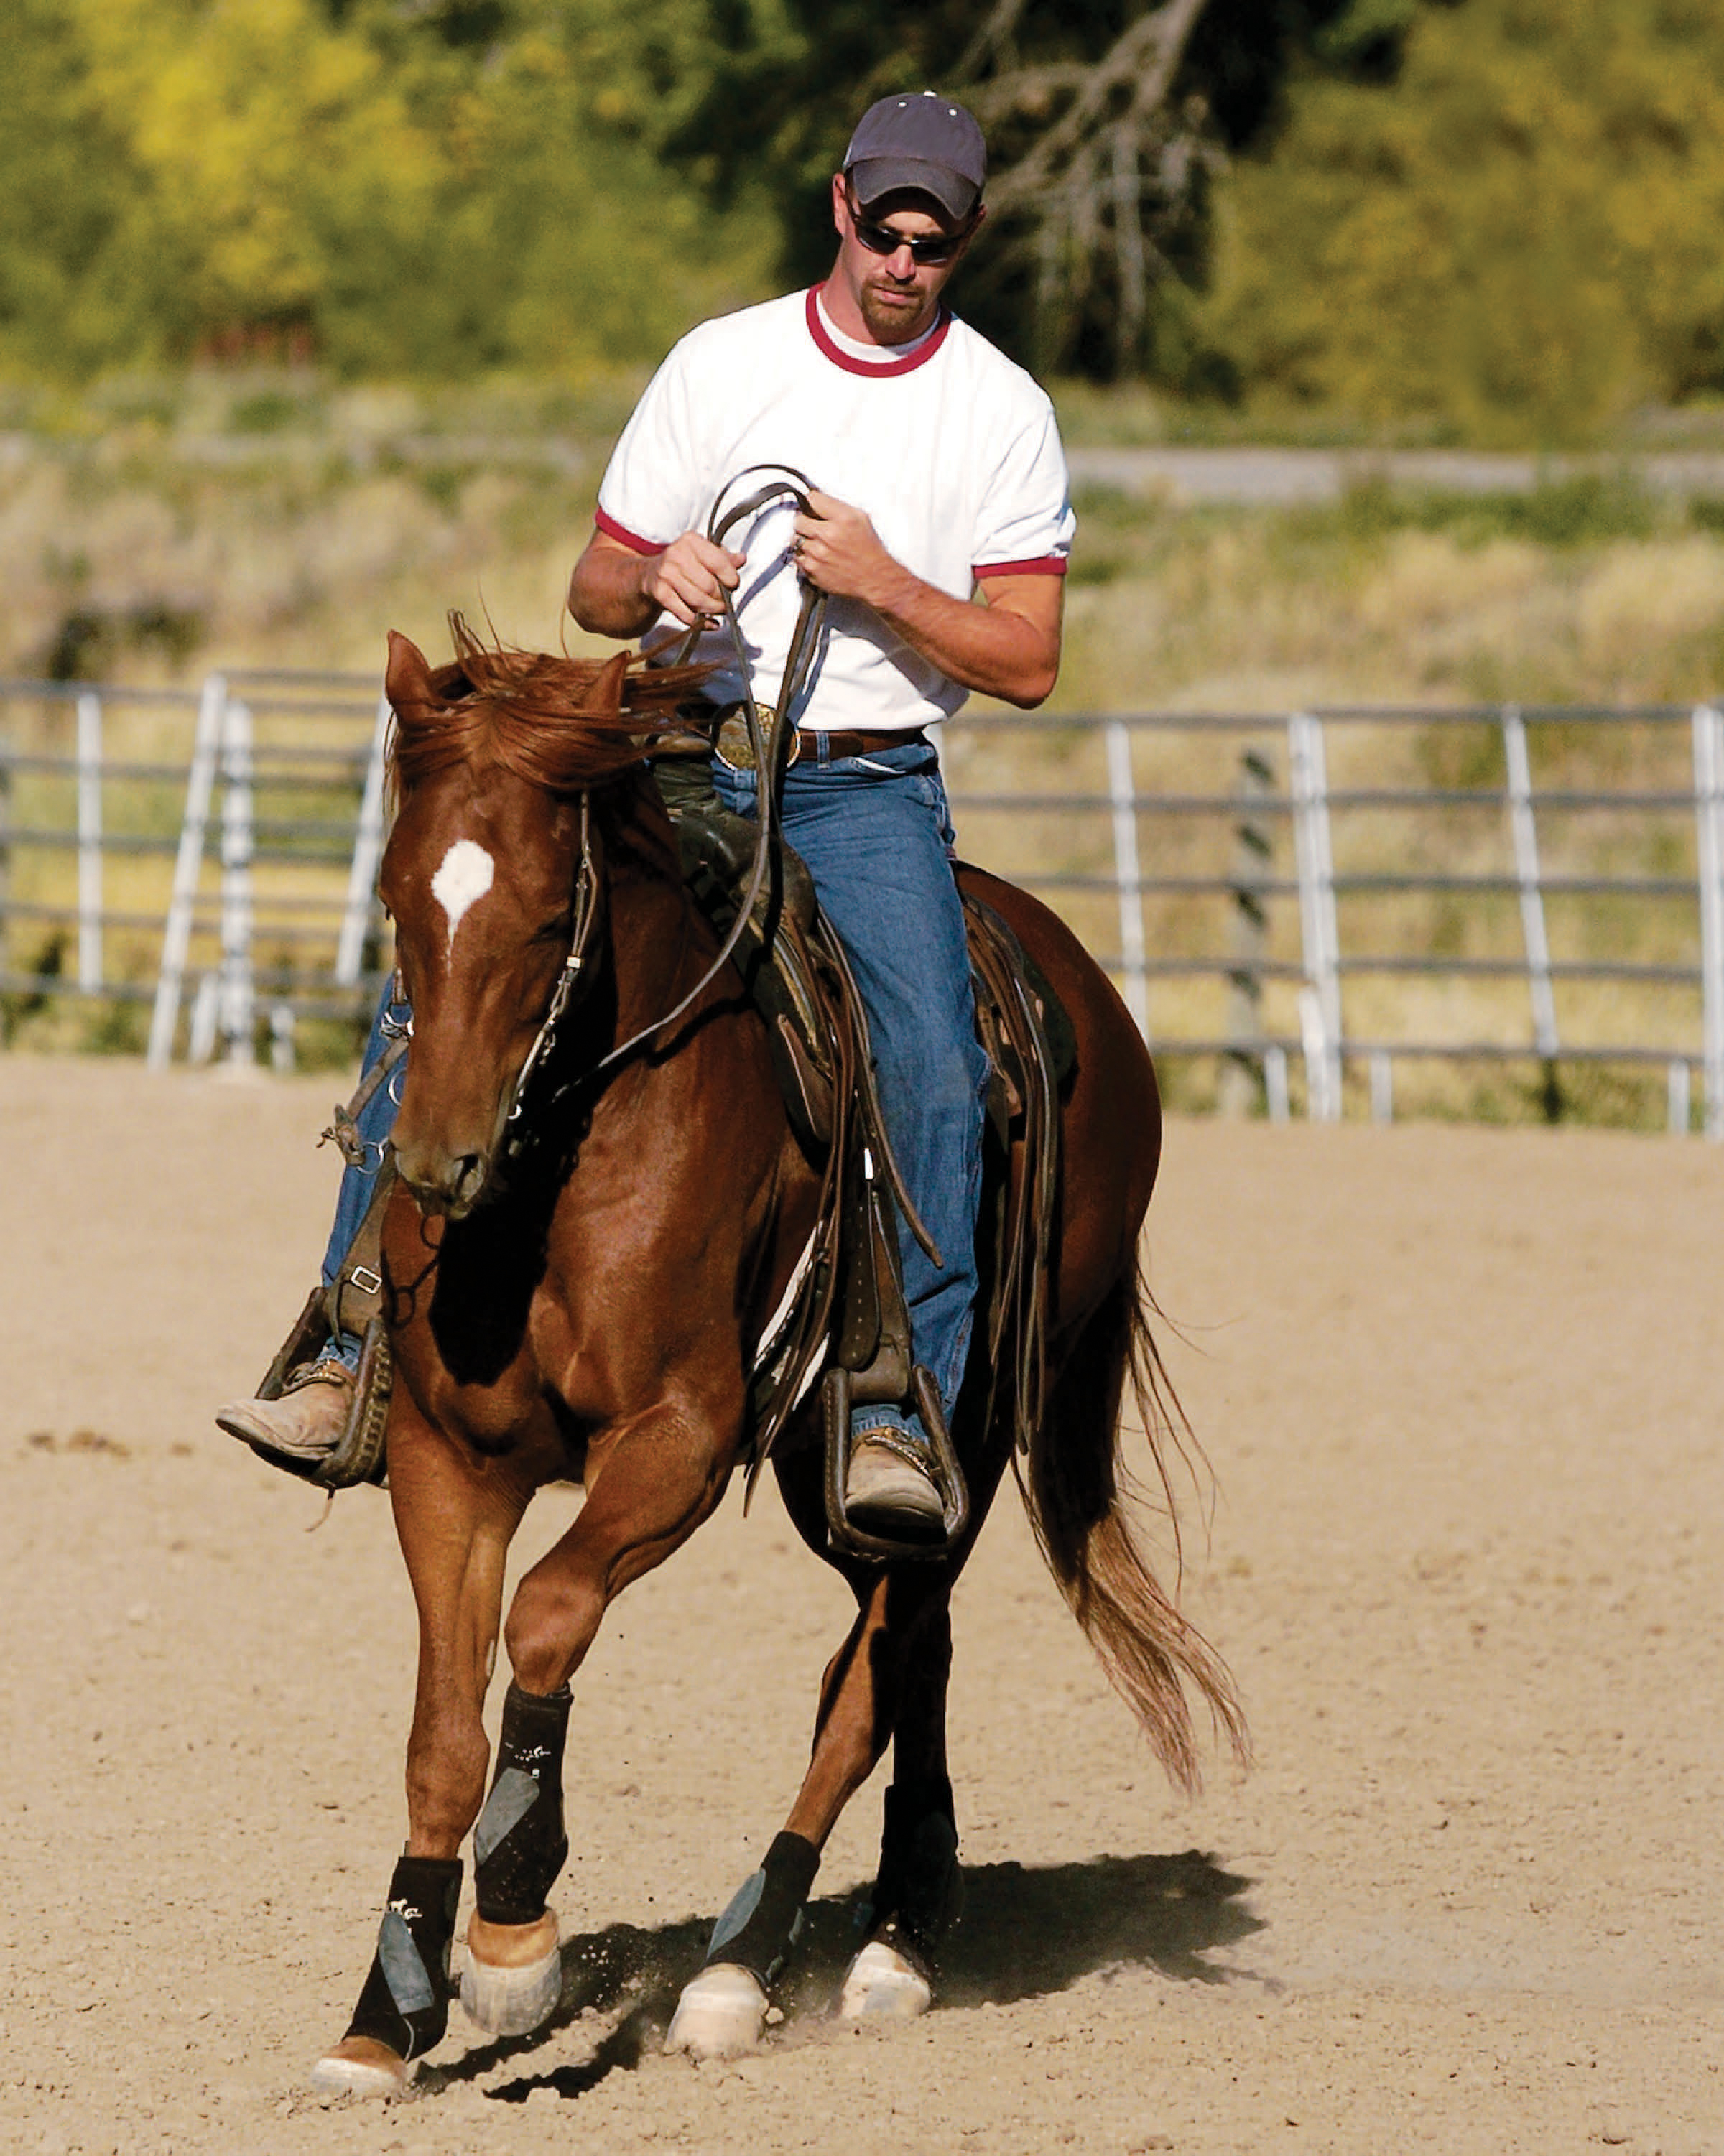
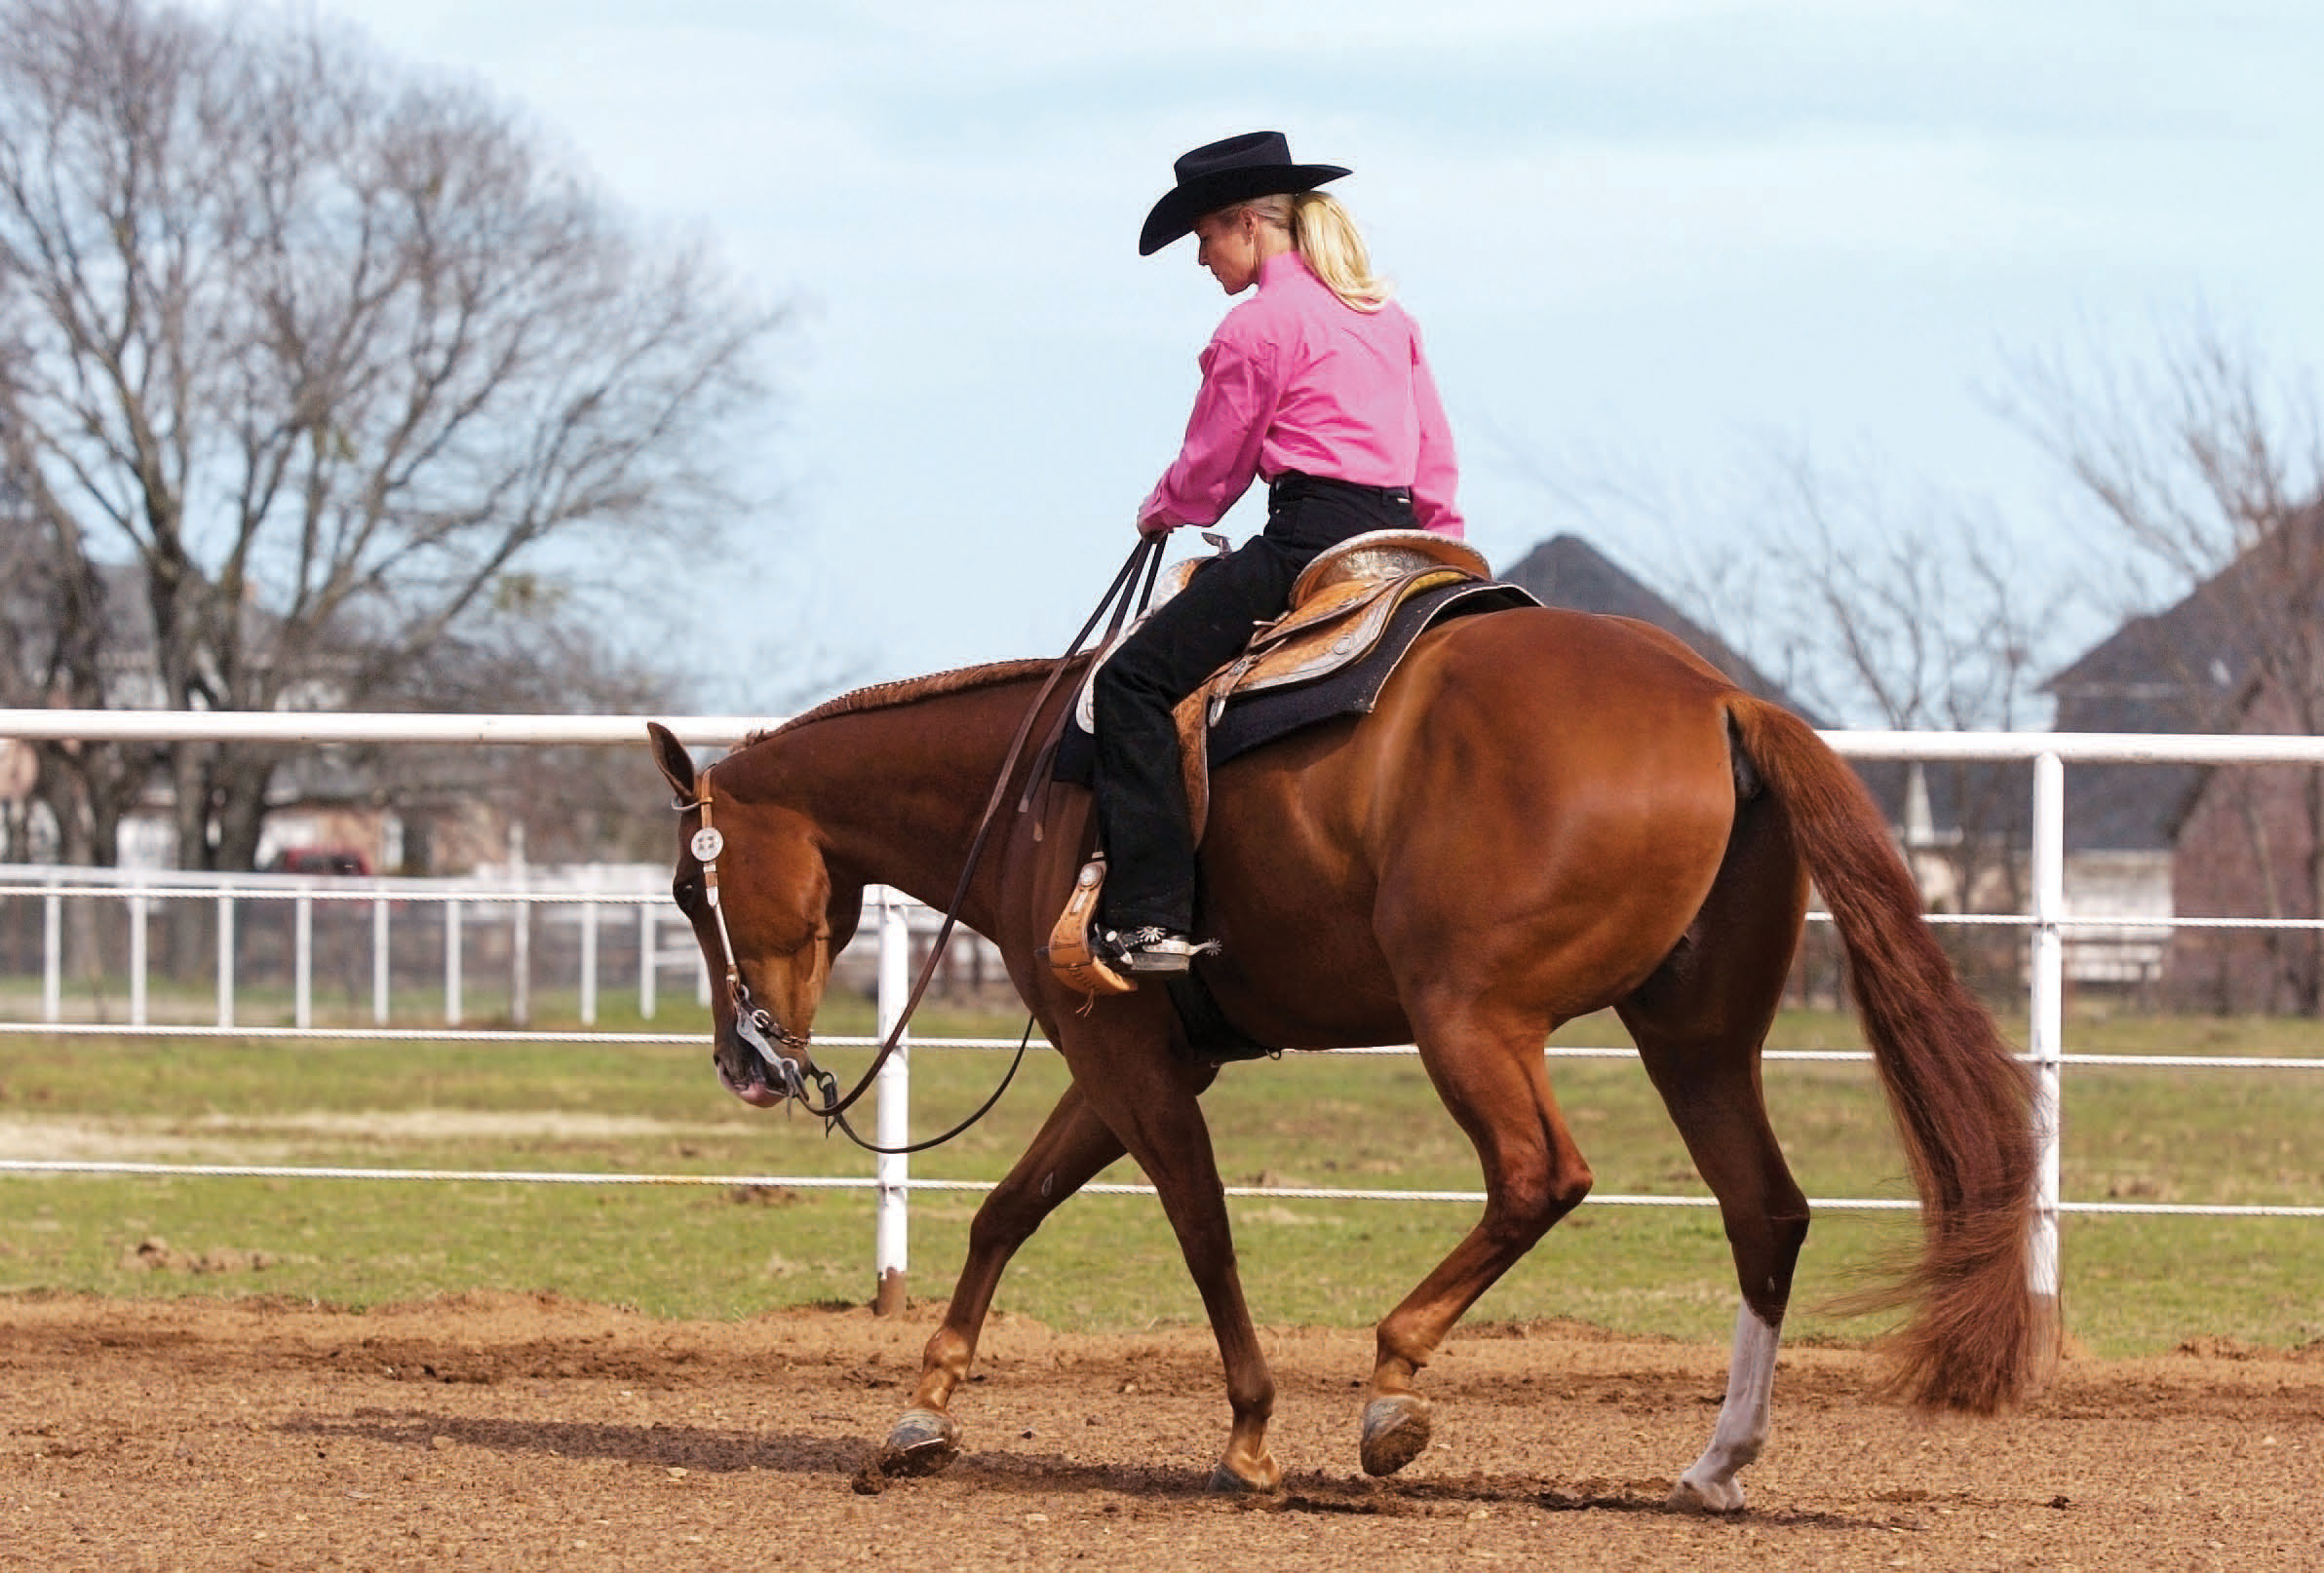
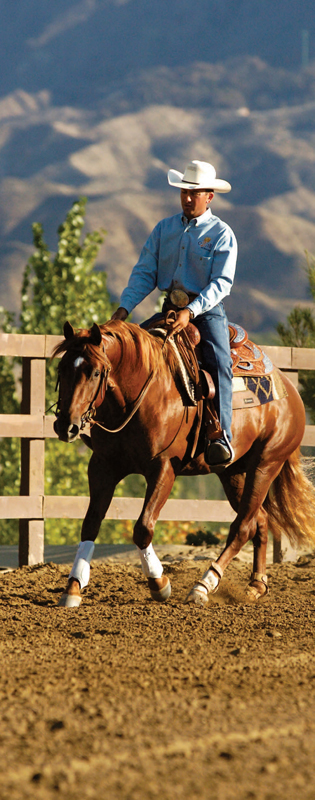
A rider braces against his horse’s movement. Bracing is using more muscle, energy, or motion than necessary, and it can lead to discomfort and pain for horse and rider.
When you are sitting in the saddle in the position that is most stable for your conformation, your body is free to move in any direction to match the movement of your horse. You can influence her movement and speed because your aids are independent of each other. Because you aren’t relying on grip or using unnecessary muscle power, you can use your aids to softly and effectively influence your horse.
To find the position that is best for you, start by sitting on the edge of a hard chair. This allows you to feel your seat bones. Locate the top of your pelvis by putting your hands at the sides of your waist, then moving them down until you feel bone. Play with how rotating your pelvis affects the position of your seat bones.
While on the chair, sit the way you normally ride. Notice whether your back is hollowed (the top of your pelvis is rotated forward) or whether your back is rounded (the top of your pelvis is rotated backward). Every rider will have a different position in which his or her body is the most balanced and stable. Play with rotating your pelvis—first with rather exaggerated movements, then with smaller and smaller movements. Find the place where your pelvis is softly centered between an arched back and a hollowed back, and try to remember how this feels.
Next, take your experiment to your horse. How do changes in your position affect her? Start at the walk. Does she go faster? Slower? Stop altogether?
If you have trouble finding the position that is most secure for your body type and individual characteristics, seek out the educated eyes of a trainer or expert who’s acutely attuned to body position and the biomechanics behind it. This person will help you learn to refine your position based on what’s mechanically correct rather than on what is popular in the show pen or is used in a certain discipline at the moment.

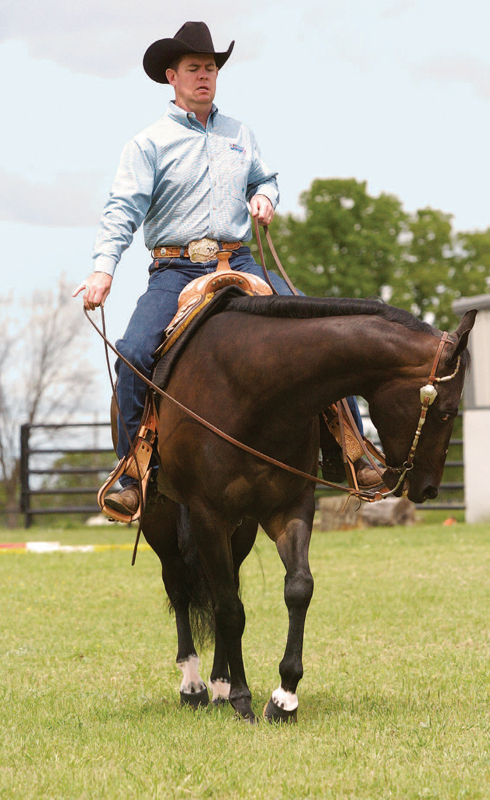
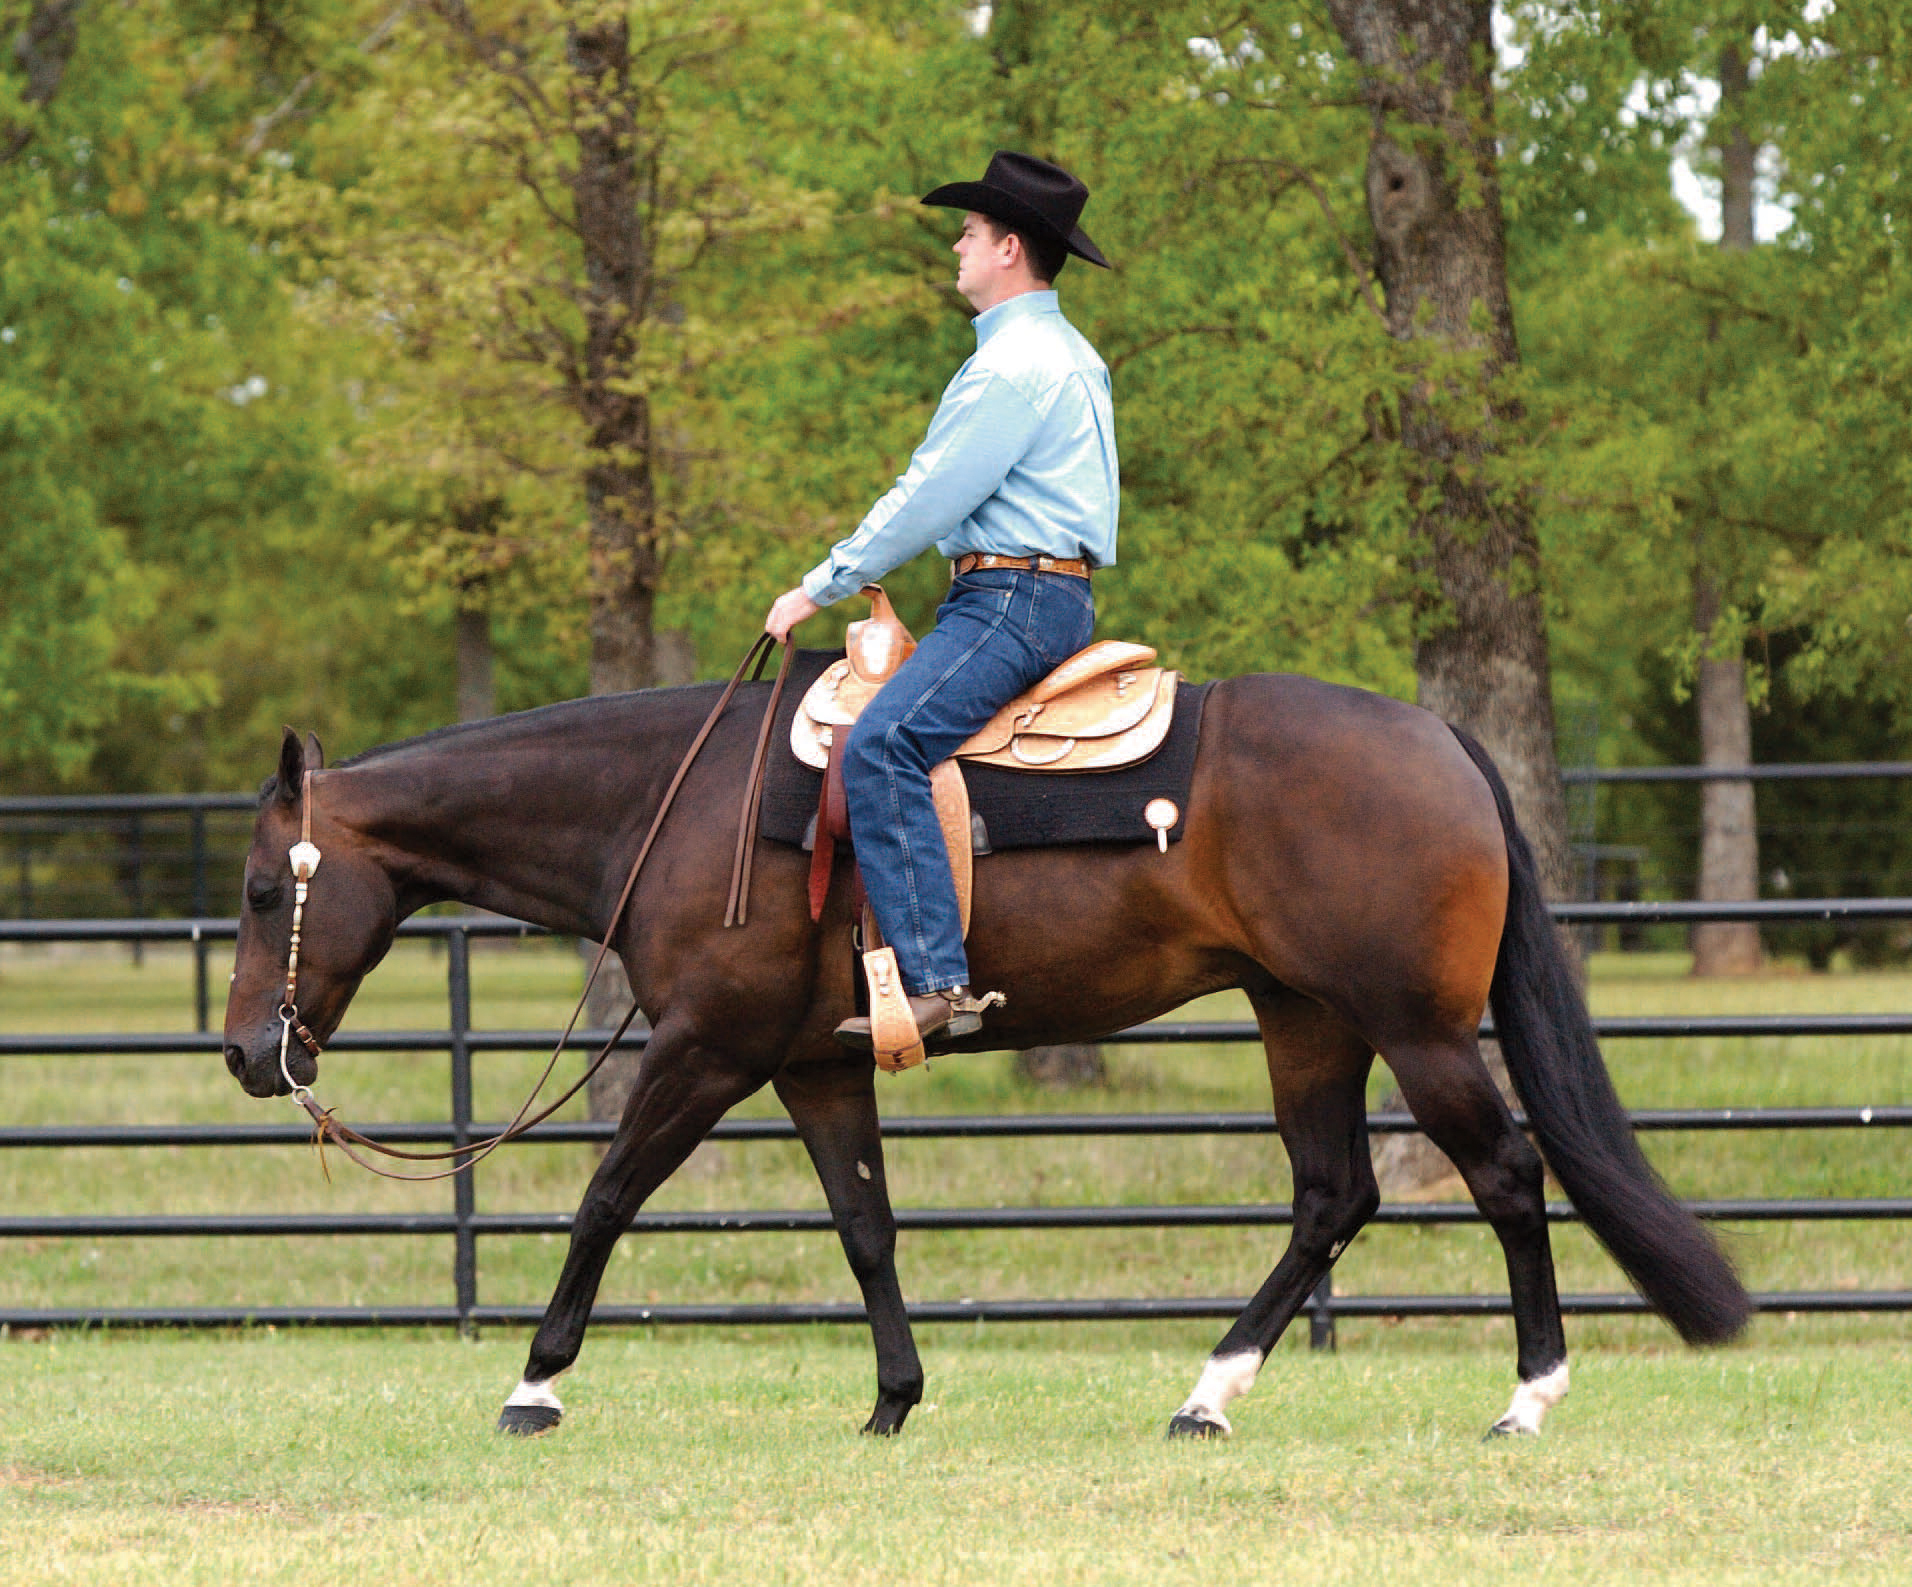
This rider relaxes his foot outside the stirrup. As you ride, scan your body for any braces and release them.
Have a friend check your saddle position if necessary.
Frequently, an additional benefit of learning to ride correctly from a strong and stable position is a reduction of pain. Riding in good alignment, without excess muscular exertion, can make a big difference in your comfort and future riding enjoyment.
Keep in mind, too, that your saddle will have an effect on your position. If you continually struggle with keeping your legs underneath you or if you always feel that you’re being left behind the motion of your horse, it very well could be because of the geometry of your saddle. (See Chapter 4 for more about basic saddle fitting for performance.)
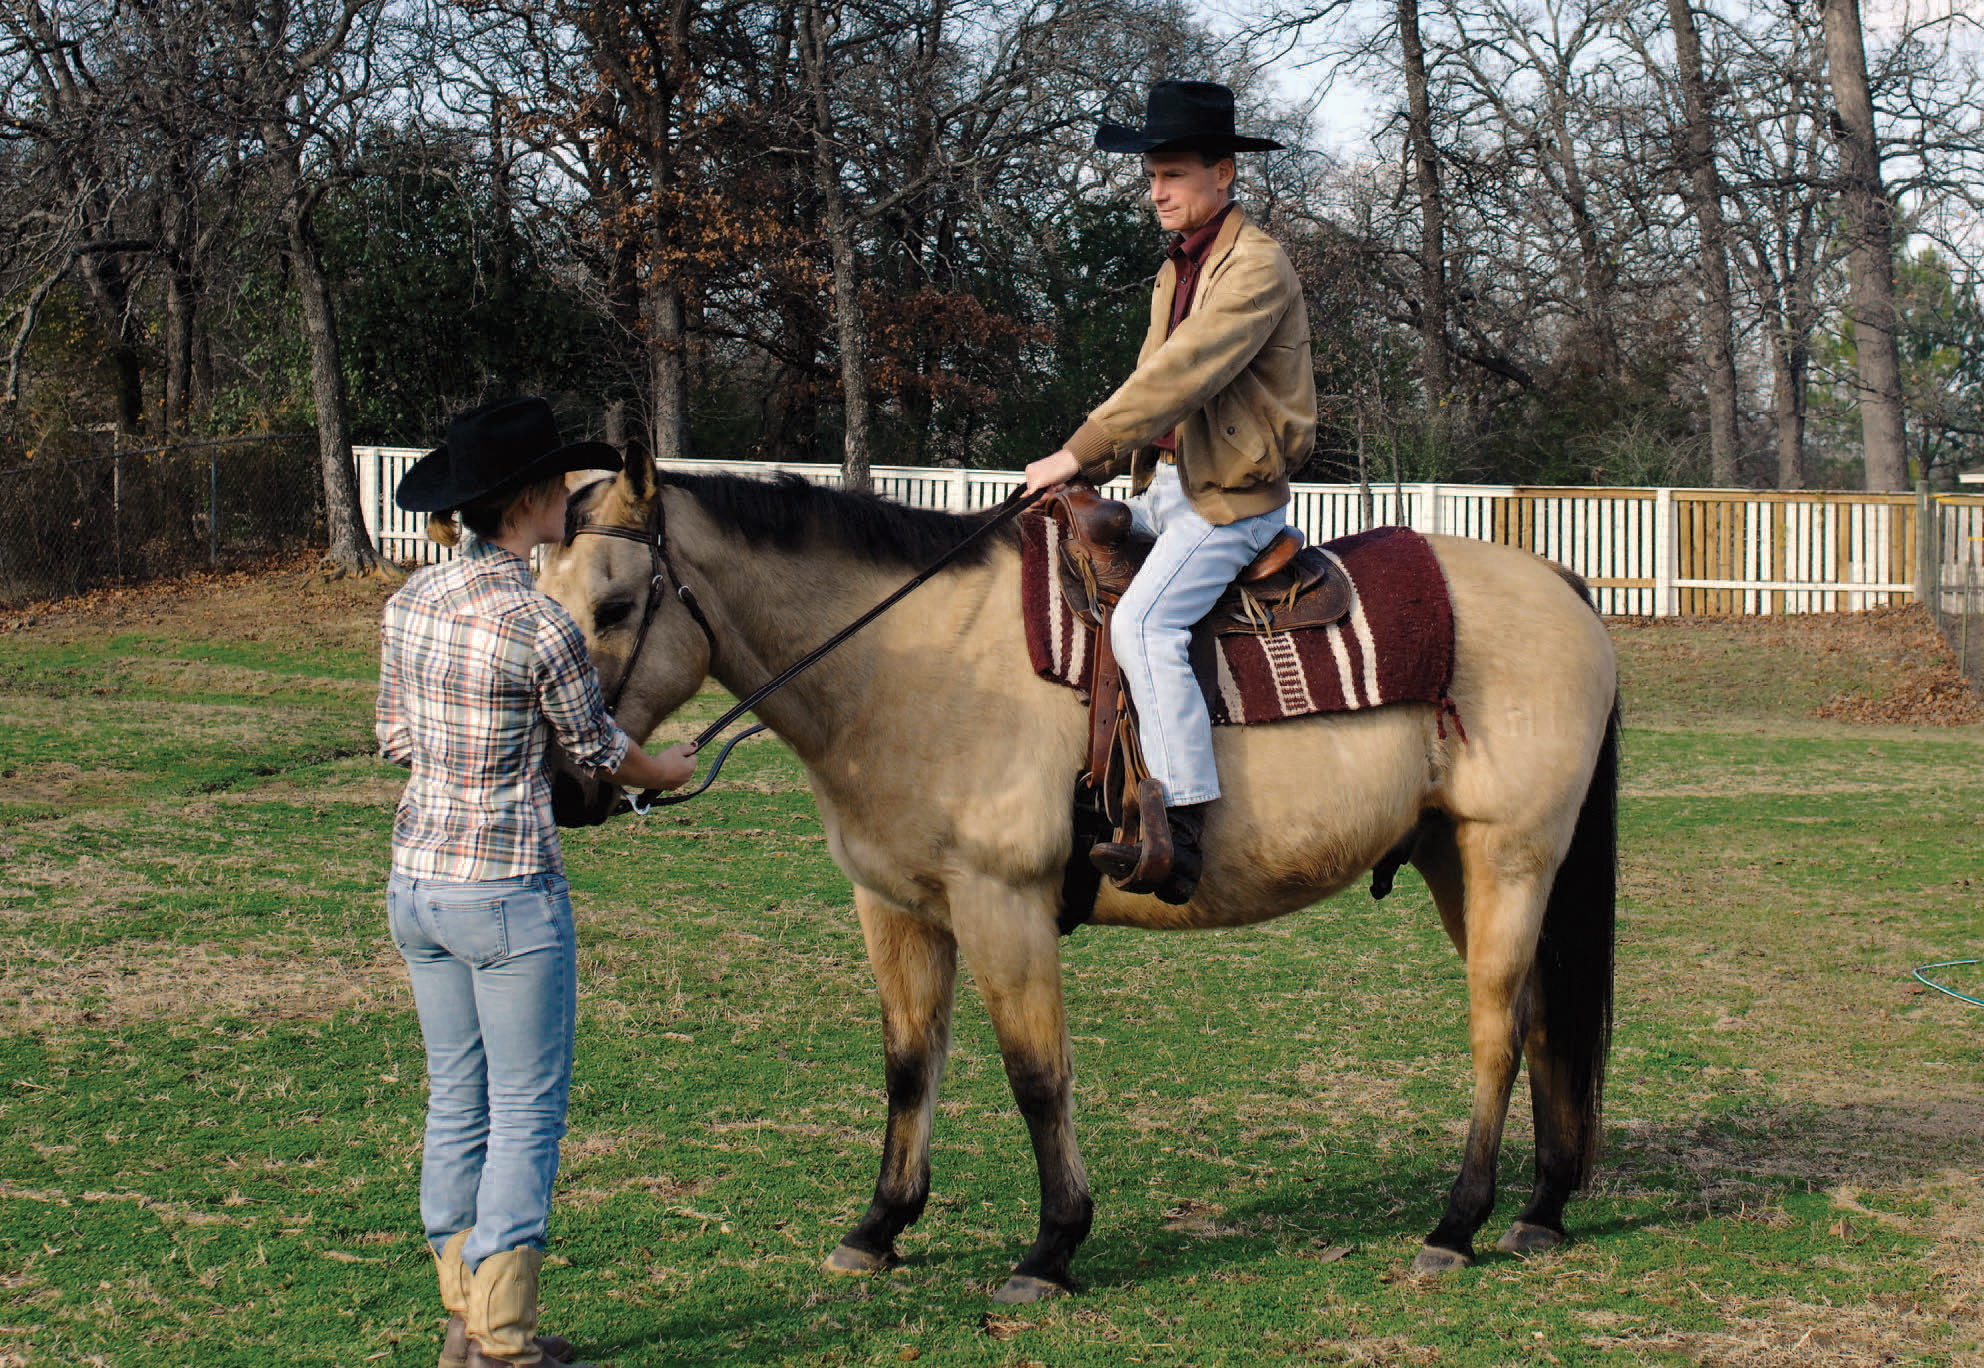
To test whether you have attained your own position of balance and stability, ask for a friend’s help and mount up. Hold a rein in each hand and have your friend stand on the ground just in front of your horse. Sit and breathe as you normally do. Then ask your friend to hold the reins about six inches from the bit and apply steady pressure to the reins in a straight line from your hands toward the bit, not up or down. If your alignment and breathing are correct, your friend’s pressure on the reins will only pull you deeper into the saddle. If you’re not sitting correctly (with a good alignment of your head, elbow, hip, and heel and with your breathing correct), your friend will easily pull you up and out of the saddle!
If this is what happens, play around with adjusting your pelvis slightly in one direction and then in the other, to see whether this prevents you from being pulled out of the saddle when your friend pulls on the reins. Try altering your arm position, as well, to see how this changes your secure position. Try changing your breathing from high in your chest to lower in your ribs. Does this change the outcome?
Once you find a solid position, be aware of it, and try to replicate it every time you ride. Have your friend test you now and then to see whether you are maintaining your most stable position.
FEEL THE RHYTHM
Another way to develop better balance and seat is to start thinking in terms of rhythm and beat while riding. Horses are rhythmic creatures, and they seem to appreciate it when we do things using a steady flow, such as grooming them with a steady rhythm of brush strokes and breathing with steady inhales and exhales instead of holding our breath while we’re with them.
You can take this a step further by riding as if you have a metronome under your saddle horn (there actually are metronomes made for riders) or have a song in your head that has a certain tempo for different gaits. If you are able to play music in your arena, try riding to songs with good, steady beats and see how enjoyable it can be for you and your horse.
To ride to a certain beat, first get in time with your horse’s gait. The walk has four beats; the jog, two; and the lope, three. Don’t drive with your seat to increase your horse’s speed, which actually makes many horses slow down or stop because the pressure puts their weight on their forehand. Don’t squeeze or kick harder with your legs. Instead, try changing the tempo. For example, if you want to increase the speed of the walk, increase the tempo of the four-beat rhythm in your head. It’s not an obvious change or force of movement; however, it allows your body to move to the new tempo.
As you’re doing this, keep your hips and knees relaxed because gripping and tightening will just restrict your horse’s movement. Sure, horses can and do learn to move well, even when their riders hinder their natural flowing movement, but it’s easier when you can help facilitate rather than hinder their movements.
You can also use rhythm and beat to change gaits through upward and downward transitions. Try picking up a nice flowing walk. Notice the definite four-beat movement and count the beat aloud or silently. If your body is soft and not braced in any of your joints, your hips will rotate in a sort of figure-eight pattern: up, forward, down, and back in time with the horse’s walk. Notice that each of your hips moves independently to follow the two halves of your horse’s back, which also move independently.
Now, to transition to a nice jog, change the four-beat rhythm into two beats in your head, and allow your body to pick up this beat. Horses are so sensitive that they often will change their gait to match your new rhythm. Try it and see. If you don’t get the change of gait to the jog, add a little leg and be sure to release your leg as soon as you feel the increase in energy. Then play with changing your internal beat from two to three beats to ask for a lope.
Your horse may not immediately change gaits when you change the tempo in your head and in your body; but the more aware you are of rhythm and beat, the more you can use it to become a better rider and a more effective partner with your horse.
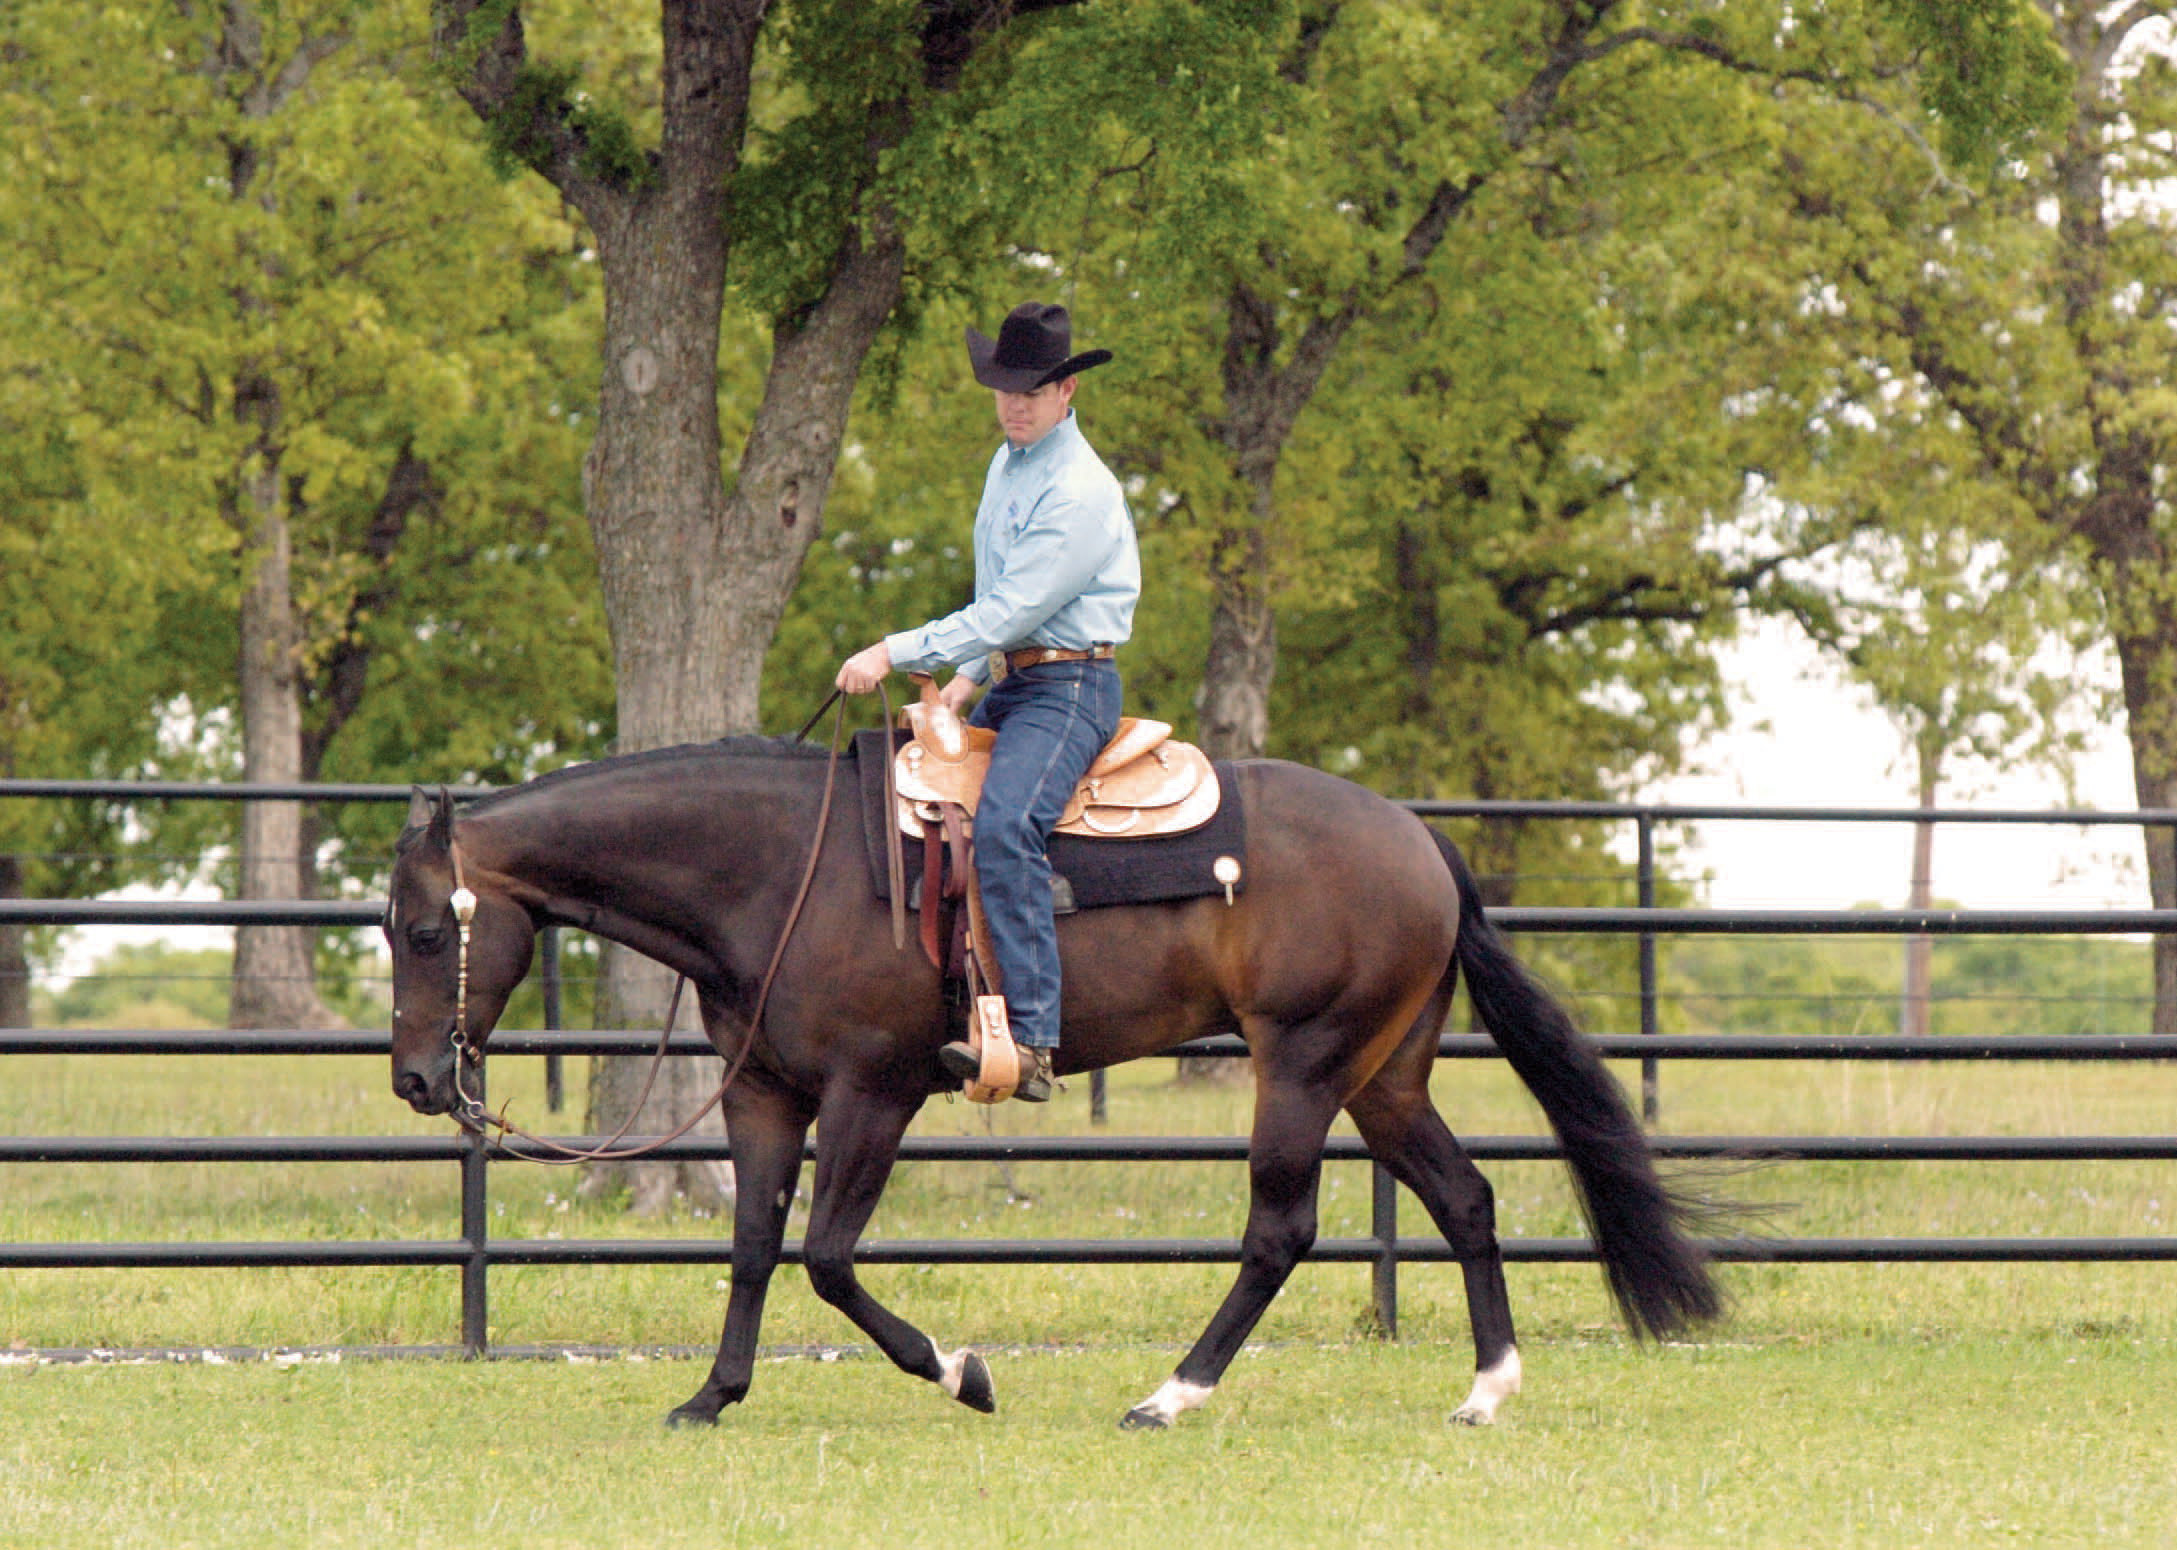
Try changing gaits by changing the rhythm in your head. Here a horse and rider transition from a walk to a jog.
TAKE A LAP ON THE LONGE
One proven way to enhance your balance and seat is to take advantage of lessons on the longe (or lunge) line. Riding on the longe is not just for beginners, so take longe-line lessons whenever you can. Even the most advanced riders spend time on the longe line to improve their abilities.
While your trainer sends your horse out in a circle, you are free to concentrate on how it feels to move with your horse at different gaits and maintain balance and stability while in motion. Without the need for reins to steer or slow your horse, you’ll also discover whether you’re relying on the reins for balance. If you are, this can come as a big surprise, especially if you didn’t previously believe that you were.
During your longe lessons, focus on keeping your breathing rhythmic and in time with the gait, and breathe into your ribs rather than your chest. See how many strides you get with a single inhale, then a single exhale, and play with increasing this interval.
Feel how your horse’s back moves at each gait. The walk may feel like a figure eight, flowing sideways and forward and back in a continuous movement. Be aware of the movement but don’t try to emphasize any one direction over another.
The jog may feel primarily up and down in movement, especially if your horse’s jog isn’t very smooth. A little forward-and-around movement will occur, too. To sit the jog softly, you need to allow your pelvis and hips to match these movements.
At the lope, you may feel a swoop of energy underneath you as the horse is suspended in midair for a split second before her outside hind foot lands. You’ll also feel a very small reach with your hip that corresponds to the lead your horse is on. If your horse is on the left lead, you’ll feel this reaching with your left hip.
While on the longe, try some stretching exercises and anything else you and your trainer can think of to develop a more secure seat. Your goal is to ride well using good balance and alignment rather than bracing, holding with the reins, or being put into position by your saddle. For an even greater challenge, try riding without stirrups, then using only a bareback pad.
Refining Effective Aids and Cues
As you become more advanced in your riding, you’ll want to start refining your aids and cues so that everything will be invisible to an onlooker. This is the goal to strive for. If you keep working toward this, you’ll look back a year from now and see how much more subtle and refined you’ve become as a rider. One of the fun things about refining your aids and cues is that it can lead to a lifetime of further exploration and refinement. You can take it as far as you want.
Even though there may be a well-known approach to cuing for a particular movement— and it’s fine to start with the conventional cue— play with refining it even further. Keep in mind also that horses don’t read training books. If a traditional cue just isn’t working for your horse, try something different and see what happens.
As you start to refine your cues and aids, it’s helpful to know what you’re looking for, to start at the lowest amount of pressure and release at the correct time, and to vow to never get into a pulling match (or a fight) with your horse.
KNOW WHAT RESPONSE YOU EXPECT
Clarity in horse training is very important. After all, if you don’t know exactly what you’re asking for, how can you reward your horse promptly for responding correctly? If, for example, you’re asking your horse to back up, what are your specific expectations? If she is just learning to back up, are you only looking for her to submit to the pressure of the bit, perhaps to drop her head a fraction of an inch or to shift her weight backward? Or is she a well-trained horse that can give you a few steps backward? What you ask for depends on your horse’s level of training and how much prior knowledge she has.
Knowing what response you expect before you ask your horse to do something allows you to reward your horse when she gets it right or to keep asking if you don’t quite get the response you expect.
YOUR PRESSURE SCALE
One very important idea to help you advance your riding skills is to use as little pressure as possible but as much as is necessary to get the change you’re looking for. Doing too little—and getting no response from your horse—doesn’t necessarily make you a soft rider, but it can make you an ineffective rider.
To get the response you’re looking for when you begin training, you may need to use more pressure than you’d like to for a period of time. If your horse needs more pressure to understand your request initially, that’s OK. Just remember to always begin with the cue you ultimately want to use. This will help your horse become as soft and responsive to cues as possible.
This approach will take you far in your western riding. It will ensure that you can ride any horse and work well with her because you are adapting your riding to each horse’s needs rather than keeping your skills static.
Let’s say you’re asking your horse to pick up a jog from a walk. Start with a nice free-flowing walk, then choose a place to start jogging. It can be the far corner of the arena, a tree down the trail, or any other place that you want. Choosing a concrete location for your transition will allow you to focus, organize your thoughts, and direct your energy. As you near the chosen place, think “jog” and see what happens. If your horse doesn’t respond, squeeze with your legs using light pressure. Even if she simply gets a little more energy, that’s great. At first, you’re looking for a change and an increase in energy, not necessarily the full transition from walk to jog. Remember to release your legs the instant she responds with a little more energy. This release of pressure lets your horse know she’s done something correctly.

Know the response you’re looking for before you ask. This rider is using a cue large enough so her horse understands she’s being asked to lower her head a certain amount but not so large that her horse feels intimidated or forced to do so.
If your horse doesn’t respond to the small cue, don’t ignore her lack of response. Doing so won’t help her become softer to your aids. At this stage, although soft leg pressure may be all the pressure and cue you want to use, you may need to use a slightly bigger cue initially to get the change you are looking for.
Remember to ask with the cue you ultimately want to use first and wait for a response. If you don’t get the response, increase the pressure to the point where your horse understands what you want. If you’re riding a very sensitive horse, increasing the pressure may mean just adding a kissing or clucking noise. A less sensitive horse may need a decisive tap with a crop, just once, immediately after your cue. The next time you ask for a jog, start again with the small squeeze of your leg that you want to use as the cue and see whether she responds this time by stepping up into the jog.
You may find it helpful to rate increasing pressure on a scale from 1 to 10. The 1 on your scale may be the bare minimum of cues (such as the mere thought of asking for a jog), and the 10 on your scale would be more pressure than you’d ever use (chasing her with a tractor). Your 1 and 10 levels of pressure will vary depending on your current skill level, and it’s fun to see how you can change the parameters of your levels of pressure over time as you and your horse become a better team. Today, your 1 may be a squeeze with your legs, and your 10 may be a tap from a crop. In a few years, your 1 might be refined to a weight shift, and your 10 might be a squeeze with your legs. Make this a game of seeing how little it takes to ask your horse to do something. When your 10 becomes your 1, then redefine your parameters!

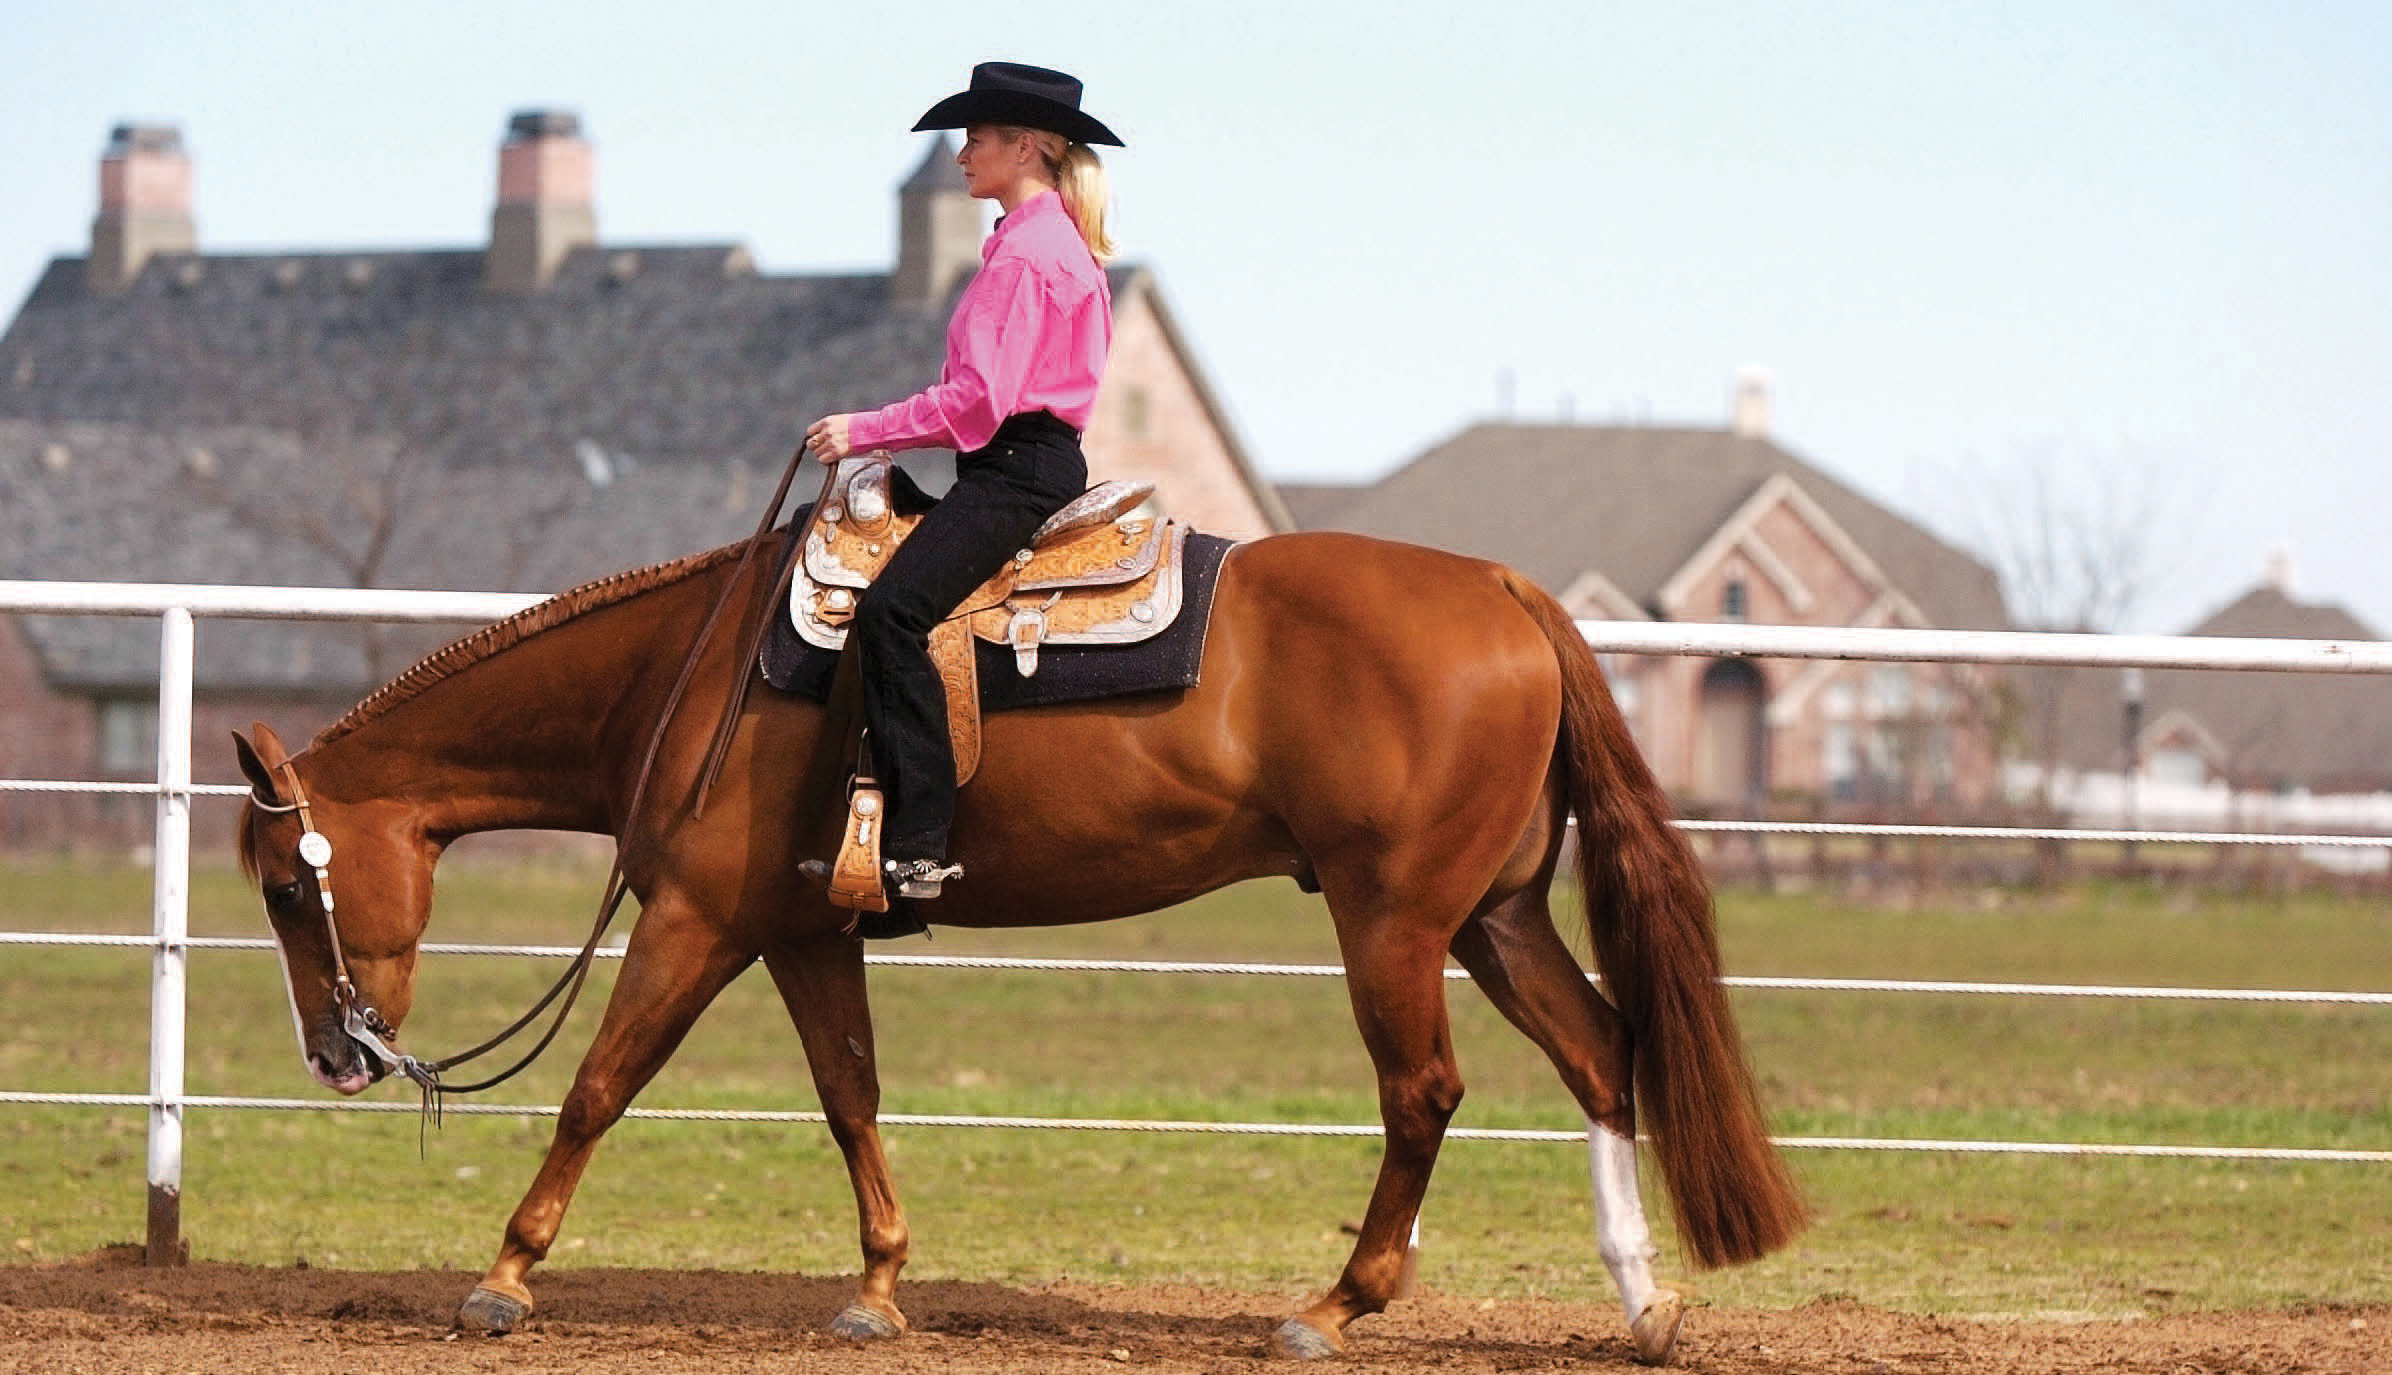
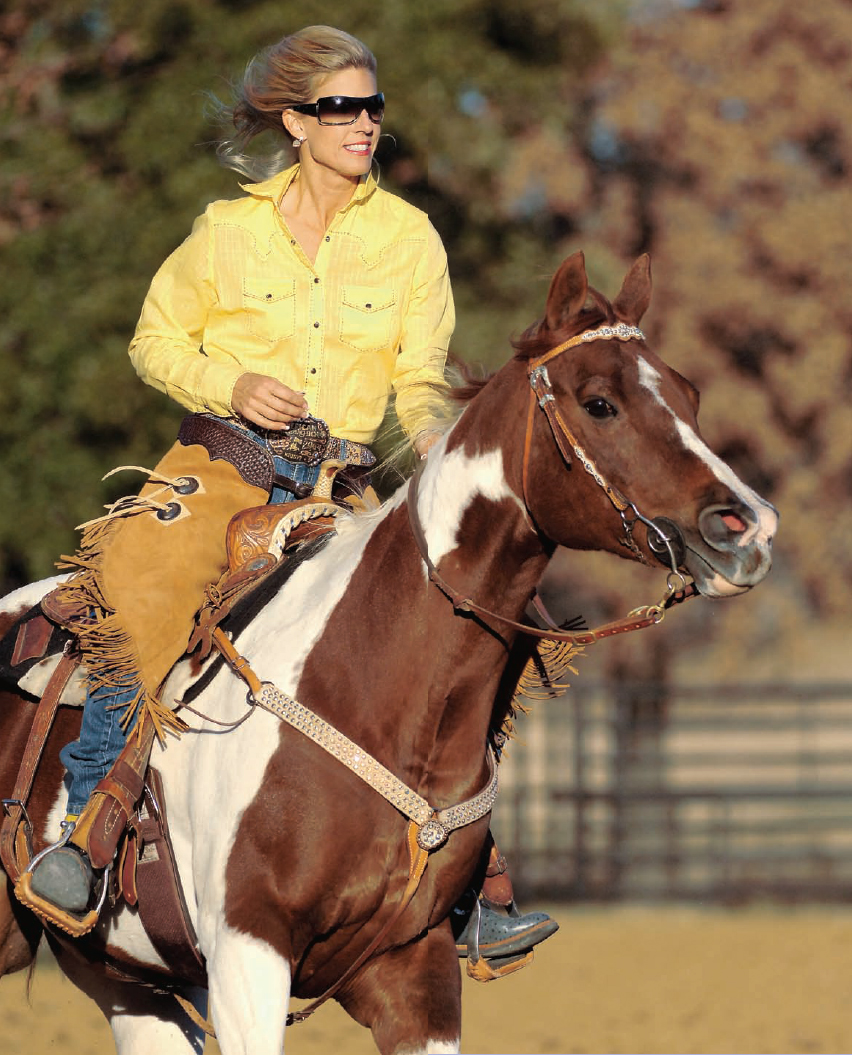
Use only as much pressure or cue as your horse needs. Otherwise she may resent your “shouting,” communicated here by tail swishing and ear flicking.
RELEASING CUES
Horses learn by trial and error, just as we do. After all, a horse is not born with the knowledge that the pressure of a leg aid means “please move over” or that the rein on her neck means “please turn the opposite way.” Horses have to learn that “cue A equals response B” by trying different answers to the questions you ask and discovering what the results are.
Especially when you’re working with your horse on something new, remember to release your cue (the pressure) the instant she even thinks about offering what you’re looking for and tries to do what you’ve asked. It’s the release of pressure that lets your horse know she’s on the right track, so it’s important to stop cuing when she’s trying.
If you’re teaching your horse to side-pass, for example, release the pressure as she shifts her weight to the side. Don’t keep the pressure on expecting an entire step, or she may get frustrated because she doesn’t yet know that this particular cue means to move her body sideways. Build on the weight shift. Next, reward her for lifting a foot, then for moving an entire leg, then for taking a step. Rewarding these small attempts will let your horse know she’s on the right track and is giving the answers you’re looking for.
To notice these tiny attempts, you must be quiet enough in your body and your mind. It may be tempting to get louder with bigger cues if nothing is happening, but you may miss what your horse is offering. If you miss her response the first time, she may decide she got the answer wrong and avoid trying that movement again.
PULLING MATCHES ARE FOR TRACTORS
If you miss your horse’s attempts because you’re too loud or hasty in your cues or because you’re not quiet enough to feel a change, you may inadvertently start a pulling contest. Horses outweigh humans by several hundred pounds, and they’ll always have the advantage in sheer strength. If you ever feel that you’re getting into a pulling match with your horse, change tactics. She won’t pull by herself if she doesn’t have anything to pull against.
Instead of pulling, release pressure just as your horse starts doing what you ask.
Let’s say you’re asking your horse to back up. Slow down mentally and physically. Ask for a shift of weight to the rear and reward it if she complies. If you don’t get a response, lifting just one rein instead of pulling harder on both reins. Otherwise, your horse may meet your pull on both reins and add to it. Or try tilting her head to the side to break the hind end free, then build on that movement. Move on to another task, take a break, or do anything else that is productive rather than giving in to the temptation to start pulling.
And above all, resist turning a pulling match into a full-blown fight. Neither of you will win, even if you succeed in making your horse do what you demanded.
Timing Cues for Greatest Effectiveness
As you’ve already read, horses’ gaits consist of certain beats and rhythms that are created by the pattern of each hoof landing on the ground in a particular order. While a foot is in the air, its direction can be influenced. When a foot is on the ground or nearly on the ground, it is committed to that path, and you have to wait until the next stride to influence it. You can learn to time your cues to coincide with the moment when it is easiest for your horse to respond to your request. Learning the basics of footfall patterns in each gait and correct cue timing can help your horse respond quickly and easily to your requests.
Although it may sound daunting to learn which foot is doing what, it’s really not that difficult to master. It’s all about biomechanics and how the skeleton (whether yours or your horse’s) moves through space and follows the laws of gravity. For example, the next time you go for a walk, notice that, when your right foot is completely on the ground, your left heel has lifted off the ground and your left toes are about to follow. Your horse moves in similarly predictable ways, all based on anatomy and physics. When you can start feeling where your horse’s feet are, you can start using your cues more effectively.
FOOTFALL BASICS
One way to determine how a horse’s feet move in relation to her body is to watch (and feel while you’re riding) the swing of her barrel. In general terms, the horse’s barrel must move out of the way so there is room for her legs to come underneath her. How much and in what direction the barrel moves depends on the gait and the degree of collection, as well as on the horse’s conformation and breeding. However, every horse moves in the same general way when walking, jogging, and loping. Gaited horses move with different patterns of footfall, but the basics of movement still apply.
Take turns with your friends walking your horses in straight lines so you can see how the barrel moves and how each foot moves in relation with the barrel movement. Then, put a horse on the longe line, and study the movement of the horse and her footfall patterns at a jog and a lope. Here’s a quick look at gait analysis, as well as some tips to keep in mind as you refine your understanding of a horse’s movement.
Walk
The walk is a four-beat gait in which a horse’s feet move hind, front on one side, then hind, front on the other side. This means she will step left hind, left front, right hind, right front.
The horse’s barrel will swing out and back in, to allow her legs to come underneath her body. So when the barrel nears the apex of its swing to the right, the right hind will be coming off the ground. When the barrel swings past the midline and starts out toward the left, the right front will be coming off the ground. When the barrel continues to the apex of swing on the left side, the left hind is coming off the ground, and when the barrel continues back right past the midline, the left front is coming off the ground.
To feel this swinging when you’re riding, become aware of how your legs and your pelvis move in time with the horse’s barrel. Can you feel the side-to-side swing of your horse’s barrel? If you can’t, see if you can identify any braces and let them go. Now can you feel the swing? You may feel this movement more in your hip joint or in your shoulder than in your lower leg or thigh. Every rider is different, so there’s no specific area of your body where you are supposed to feel the movement; just soften and try to feel it. But don’t emphasize the movement in your pelvis or try to force your seat to move with your horse’s movement. Again, just become aware of it.

The horse’s direction and speed can be influenced at the moment when the horse’s foot is coming off the ground.
Jog
The jog is a two-beat diagonal gait, so the right front and left hind legs move together as a pair, and the left front and right hind legs move together. There is also a barrel swing associated with the jog, but it is much more subtle than the swing at the walk.
Can you feel your horse’s back move up and down as she moves from one diagonal pair of legs to the other; do you feel both halves of her back moving forward and backward very slightly? Again, as with the walk, try to become aware of feeling how your horse moves in the jog but don’t emphasize or exaggerate any movement. Just try to be aware of and feel her movements, as well as how they move your pelvis.
Lope
The lope is a three-beat gait followed by a moment of suspension when all four feet are in the air at the same time. If you’re on the right lead, the pattern of footfall will be left hind, then right hind and left front together, then a push off from the right front, followed by a moment of suspension before the left hind touches the ground again.
Before a horse’s leg can come under her body, the barrel must swing out of the way, as shown.
In the four-beat walk, the front and hind legs on the same side move in sequential order. Note, though, that the horse’s head should not be carried below the withers.
Diagonal pairs of legs move together in the jog.
TIMING YOUR TRANSITIONS
The easier you make it for your horse to do what you’re asking, the greater the likelihood you’ll become partners who move together effortlessly. When you ride as partners, riding becomes more like ballroom dancing and less like just getting from here to there. Once you become aware of the position of your horse’s feet, the sky’s the limit as to how you use this tool to become one with your horse. Here are some ideas to get you started with transitioning from the walk to the jog and from the walk to the lope. We’ll also discuss downward transitions.
Walk-Jog Transition
Because you won’t be posting (rising out of the saddle in time with either front foot) at the jog, it’s not as crucial to time your cue to a certain foot when you transition from the walk to the jog. However, it is helpful to ask for the jog from the walk as a foreleg is landing. First, cue for the jog as the right front foot comes to the ground. This will occur while the barrel swings right (the same side as the front foot you’re timing to your cue). Because the opposite (left) hind leg will be coming off the ground, it’s a perfect time to ask for the push off to the jog with that diagonal hind leg.
Walk-Lope Transition
To pick up the right lead, for example, apply your cue to coincide with the left hind’s coming to the ground. An easy way to pick up the right lead is to start cuing with your left leg at the apex of the barrel swing to the left and to follow it to the midline of the swing. Cuing here will help influence the left hind leg and create the first step of the right-lead lope.
Downward Transitions
On any downward transition, such as from lope to jog or from jog to walk, you can time your request to coincide with the outside hind foot as it is in the air. Doing this helps keep your horse from falling on her forehand in the transition and gives you a precise moment to time your cue. It will take practice to perfect your timing and set both you and your horse up to transition at a certain phase of her stride, but the awareness you gain will help you develop your skills of timing and feel.
The lope is a three-beat gait followed by a moment of suspension when all legs are in the air, as shown.
Whatever gait you’re in, get in time with the outside hind leg, which will vary depending on which direction you’re going in a circle. If you’re riding a straight line, pick either hind leg as the “outside leg.” Start with the walk and become aware of where your horse’s outside hind foot is in space. Remember that it will be coming off the ground as her barrel swings to the apex of the same side as her outside hind. Let’s say you’re asking for a halt from the walk, and her outside hind at this moment is her right hind. Notice when her barrel swings and when her right hind is coming off the ground, then add your cue to halt when this foot is in the air. Imagine your horse planting that outside hind foot and stopping on it as it lands on the ground. With practice, you’ll be able to do it.
Use that feeling and imagery in the jog and the lope, and time your cue to stop when the outside hind is in the air. It may take a few strides to get the hang of this, but practice will bring you closer to having this foot initiate the downward transition.
HAVE FUN WITH FOOTFALL
Timing cues to certain footfalls is advanced work that will help you be a better rider for your horse. It may be challenging to correctly pick the timing every time, but you will become proficient with practice. To be most effective, be sure you’re centered, don’t hold your breath, and relax as you ask for a transition. Otherwise, you will put you and your horse out of balance.
But don’t be afraid to make mistakes. If something doesn’t work very well, try something else. If something does work, try to remember what you did and attempt it again. Your horse will let you know when you’re on the right track by becoming softer, lighter, and more responsive.
In the walk-lope transition, the rider gives the cue when the out side hoof is coming to the ground.
Moving Beyond Cues and Aids:
The Inner Aspects of Riding
You can and will make great strides in your riding ability by concentrating on improving your balance, seat, and hands and by refining your aids and cues. But there’s more.
Breathing correctly and consistently can affect your horse in a powerful way. In addition, seemingly esoteric actions of focus, awareness, and intent can give you many positive results if you choose to use them. Riding from your center can lead to greater physical and mental connection with your horse. These more subtle aspects of advanced riding can take you to even higher skill levels. Their applications can last a lifetime, and they can also bring you benefits in other parts of your life. Here are some tips on integrating these ideas into your riding.
BREATHING
If we don’t breathe, we don’t live very long! While breathing is automatic, correct breathing may be something you need to work on. Your breath should have the same rhythmic flow as the quiet ticking of a metronome, no matter what’s going on around you.
As mentioned previously, strive to breathe more into your belly and lower ribs rather than high in your chest. The benefits are more oxygen and a technique to help quell anxiety during stressful times. The benefits for your horse are that you become a calm, trustworthy presence that can help her during a quick spook, in a new and overstimulating environment, or when a storm kicks up on a trail ride.
Horses hold their breath when they’re startled or worried, just as we do. Just for fun, the next time your horse seems nervous or is not focused on you, pay attention to your breathing. Where is it? Is it high in your chest? Is it shallow and quick? Are you holding your breath? See if you can bring your breathing back down to your ribs, slow its tempo, and time it to your horse’s strides. See if your change to low, rhythmic breathing helps your horse regain her own calm breathing and helps her settle.
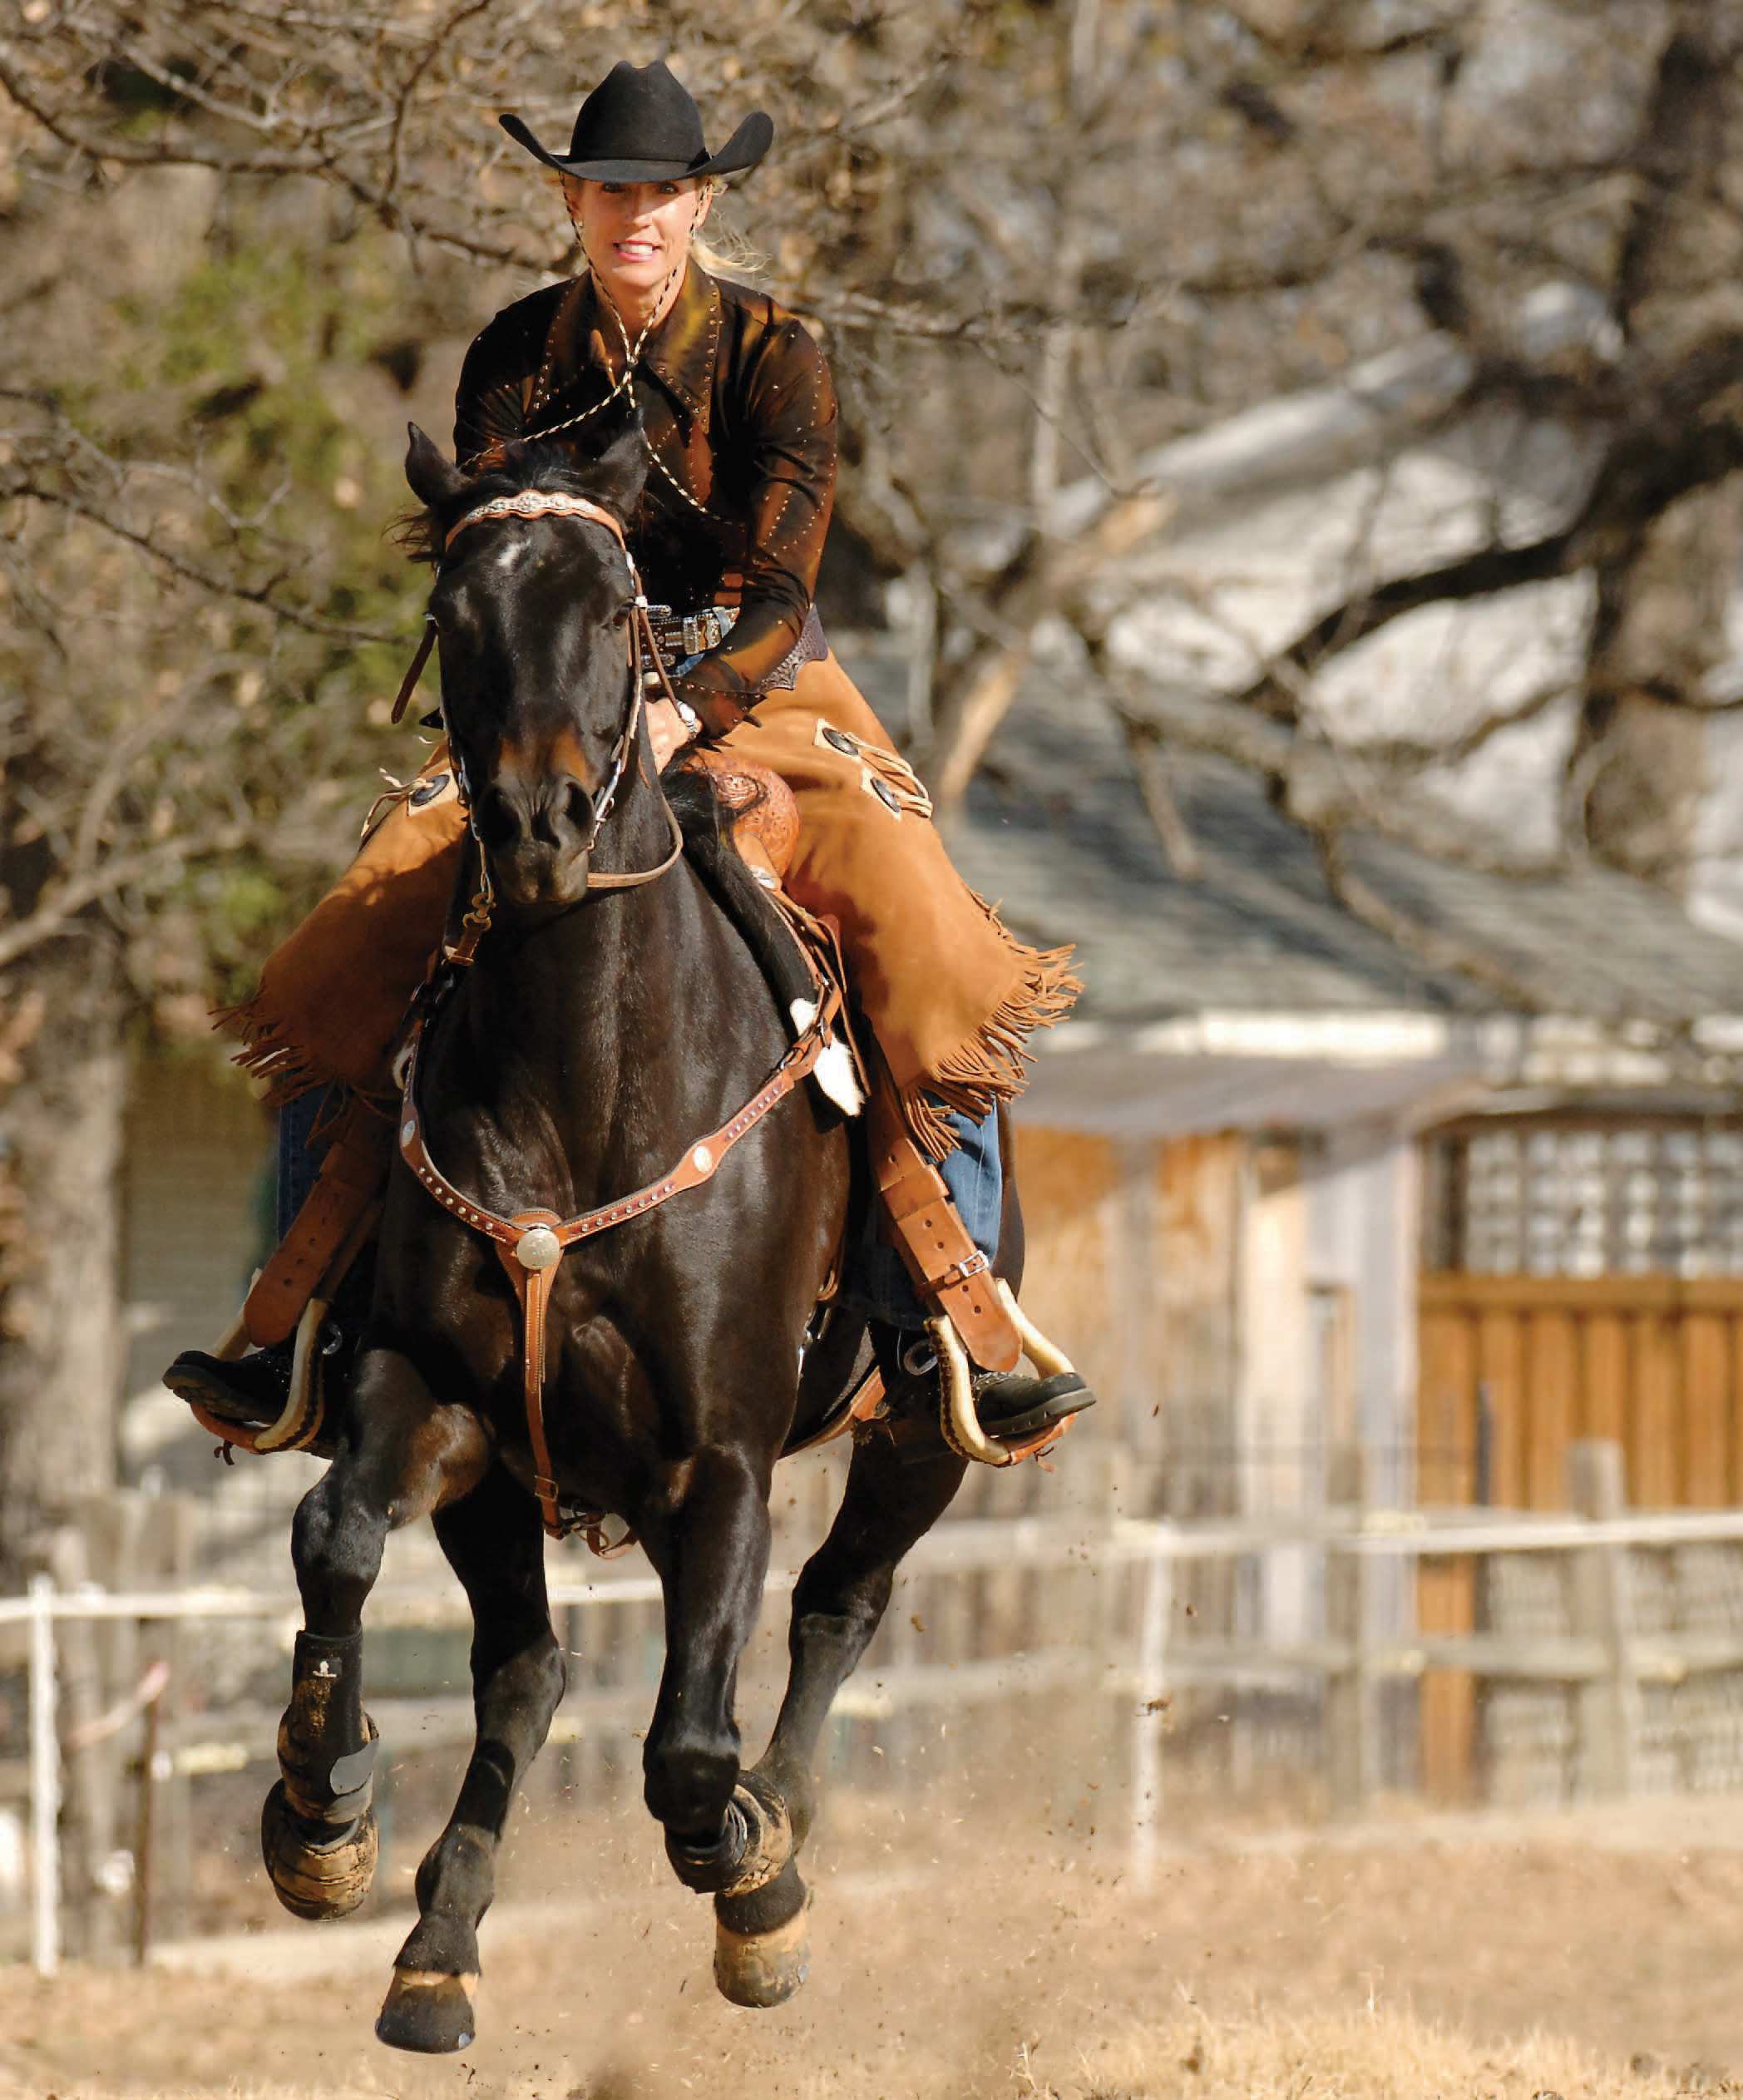
Here a horse is on high alert. Slowing and regulating your breathing when your horse is reactive can help her settle and calm down.
Pilates, yoga, aikido, tai chi, meditation, and other methods that use focused breathing can help you learn to control and use your breathing to help your riding. Over time and with diligent practice, correct breathing will become automatic and positively affect your riding and your life.
FOCUS
What should I fix for dinner? Hey, could you walk through the puddle rather than jumping over it? Are we out of milk? Would you please not crowd the horse in front of us? He might kick! I’ve got to pay the car insurance bill. I wonder what mood my boss will be in tomorrow. Would you please quit diving for grass? You’re yanking my arms out of their sockets! I’ve got to remember to pick up the dry cleaning on Wednesday. Whoa! I’ve had enough with your jigging and head tossing!
Does that internal monologue sound like one you’ve had while riding? Many riders, even those with quite a bit of experience, tend to get upset when they think their horses aren’t focusing on them. But to be fair, their horses are focusing on them just as much as they are focusing on their horses. The problem is that neither partner is fully focused. It’s rather uncanny how a horse’s attention span exactly matches that of her rider.
Human beings tend to think in scattered ways and believe they are efficiently multitasking when doing so. However, think about the folly in multitasking. Is it really possible to do two things at once, fully and completely? No, one activity will have more thought directed to it than the other will. The second activity may get accomplished, but it might not be done as well as it could have been.
Horses live in the present, in the here and now. When we choose to be with them, we should strive to be with them mentally as well as physically. The next time you ride, play a game with yourself and count how many times you start thinking about your grocery list, the phone calls you need to return, your plans for dinner, and so on. You might be surprised.
When you’re riding, let riding be the most important activity at that moment. Put aside the other cares of your day, and focus on working with your horse. Changing your thoughts so you are mentally present with your horse can be challenging, but the rewards are huge. The result will be a horse that’s more focused on you because you’re more focused on her. It’s also likely you’ll have less trouble with spooking or other unwanted behaviors because you are with your horse at every step. You will be able to defuse worry and distractions because you will feel them start before they escalate into fullblown spooks or other unwanted actions.
Start working on your focus in your hours spent out of the saddle by completing one task before moving on to another. Try noticing the details in the task. What are the efforts involved in doing that task? Spend a few minutes a day being present in each moment rather than thinking forward to tasks you need to do or rehashing events from the past. Start small and build on your successes.
AWARENESS
Have you ever driven from one place to another and arrived safely but had no recollection of the trip? Many people go through life in a daze, unaware of their surroundings. This state of distraction can get you into trouble if, for example, you don’t see the brake lights come on in the car ahead of you in time to stop.
When you’re with your horse, your awareness can also keep you out of harm’s way. You’ll notice situations or obstacles that may cause an accident, and you can take care of them before they cause harm. You’ll be alert to changes in your horse’s behavior that tell you something is wrong, whether it’s a minor bout of colic, the start of lameness, or the first signs that your horse is about to pull back in the crossties because something startled her.
Make a game of increasing your awareness. As you go for a walk, take mental notes of people’s clothing, hair color, and height. As you’re driving, remember car colors, license plate numbers, and numbers of passengers. Recall those details a few minutes later.
While riding, shift your awareness to how your horse is responding while also staying aware of your surroundings. If you’re riding in an arena with others, keep an eye on what’s going on so you can avoid trouble. Ride with the flow rather than against it. With time, you’ll find that your awareness in all parts of your life is improving.
INTENT
Because horses evolved in an environment where noticing tiny differences meant survival instead of death, they are attuned to subtle changes and unspoken language. They can read the good intent behind a beginner’s bumbling technique, and they can recognize malicious intent behind an abusive trainer’s technique.
Here’s the catch. If your intent is always to help your horse understand what you’re asking and consider why she may not be responding, she will probably try very hard to do the right thing. If your intent is to force her to do what you say no matter what and with an element of threat, she will still probably try very hard to do the right thing.
To the untrained eye, the outcomes of both approaches may appear to be the same: The horse is doing what you ask. The differences lie in the long-term effects and the type of relationship that will result from the variations in the treatment of the horse. A relationship with a horse whose responses are based on a foundation of mutual respect and trust feels very different from one with a horse who responds from the fear of negative consequences.
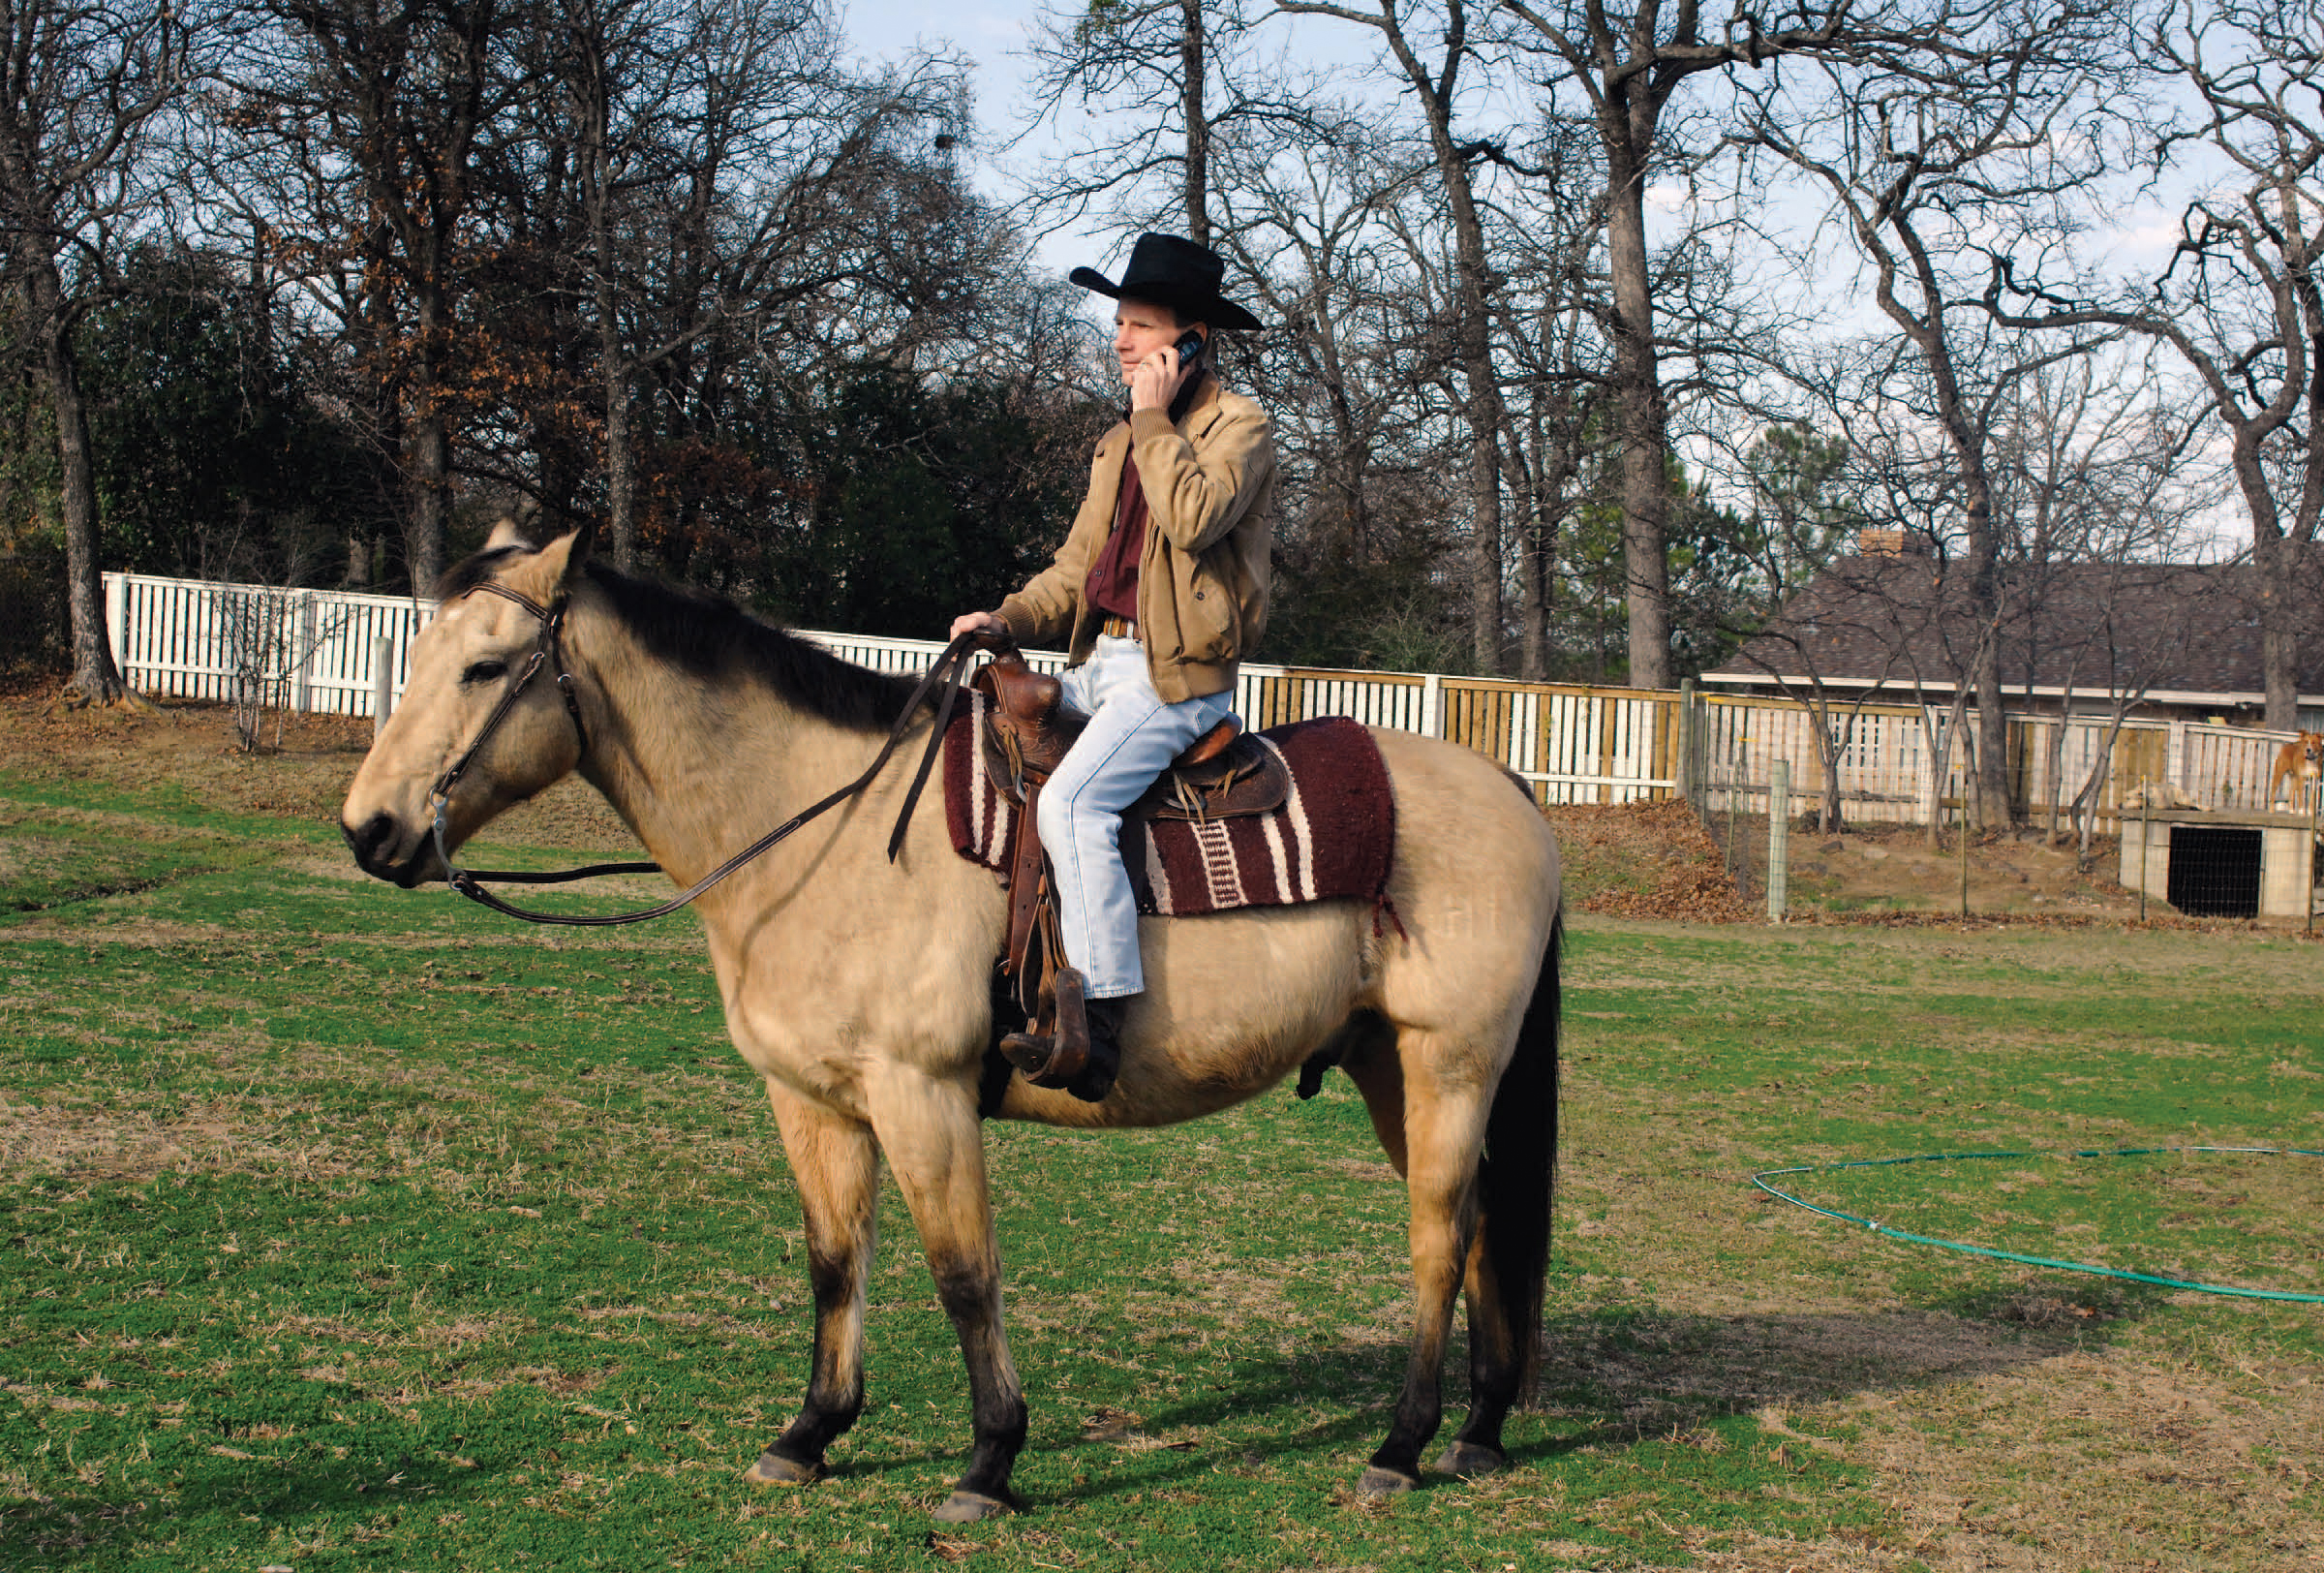
A rider gets distracted by a call on his cell phone. He should be fully focused on his horse, if he expects his horse to focus completely on him.
Remember: You are the same person on and off the horse. Your intent and actions toward others—humans and horses—affect the quality and depth of your relationships with them. Whether you choose to create relationships based on cooperation or coercion is up to you. Just be aware that your intent has consequences.
CENTERING
You may have heard of the term “center” in relation to Pilates, core abdominal work, or correct lifting techniques. Your center is located about two inches below your belly button and in the middle of your body. As mentioned earlier, riding instructor/author Sally Swift brought us the concept of centered riding, which has given many riders the ability to move in sync with their horses and to learn to ride in a balanced and supported position.
Bring focus to your center as you ride and move from the energy in your center. Whether you want a transition or a change of direction, a change of tempo, or a change in the horse’s degree of collection, learning to ride from your center brings a new level of connection to your horse. Physically, this can help you sit with better balance. Because you’ll initiate movement from your center, you’ll be less inclined to lean forward or backward. Your movement will always start from your center. Riding from your center can also help you feel that you’re sitting deeper in the saddle, with more stability and control.
Centering when you ride and during the other hours of your day assists you mentally by helping you remain calmer during stressful moments, think with more clarity, and stay focused on the task at hand rather than allowing your mind to race to all sorts of unrelated issues. Not surprisingly, centering also enhances your correct breathing, focus, awareness, and intent.
As with so many aspects of becoming an advanced rider, if you start to bring awareness to your center during your day, you will soon become more centered all the time—not just when you’re riding. The benefits of this can extend to your job, your home, and your family.
