Additive Painting Technique: Stamp Carving
Materials list
acrylic paint
archival ink pad (optional)
brayer
carving material
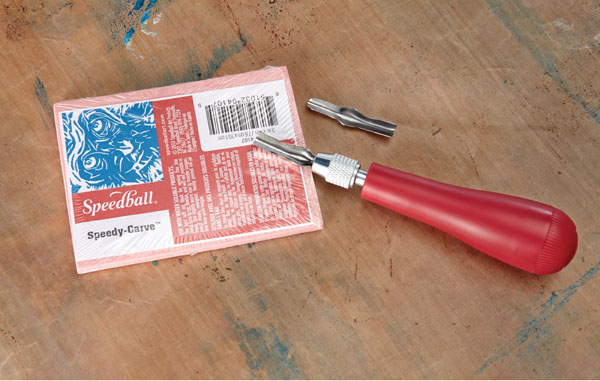
carving tools
pen or pencil
rice paper
Carving your own stamps can be addictive. With the invention of softer carving materials than in the days of wood or linoleum, you can carve curved and smooth lines with barely any resistance. I can spend hours at the kitchen table or in front of the TV at night carving stamps. I usually purchase an 8" × 10" (20cm × 25cm) sheet of carving material and cut it with scissors to divide it into multiple different-shaped sections. And here’s a tip for you: I put a towel on my lap to catch all the shavings when I carve while sitting on the couch.
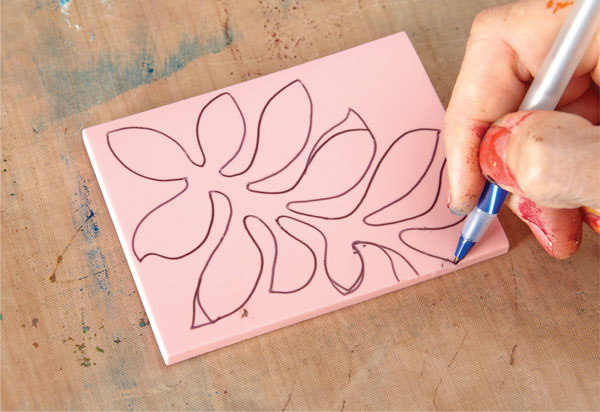
STEP ONE: Use a ballpoint pen or pencil to sketch your design onto an appropriately sized piece of carving material.
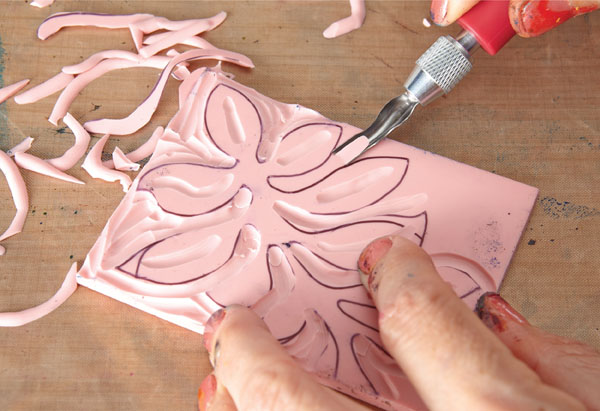
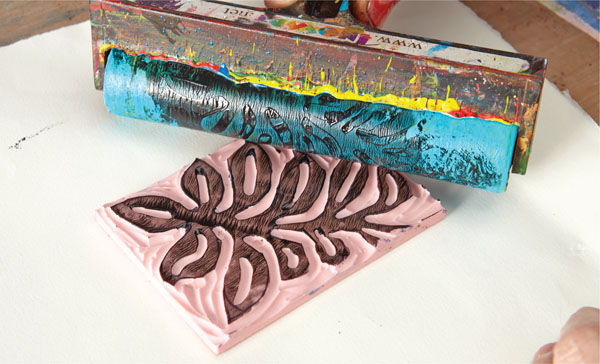
STEP TWO: Once you have a plan, you can go ahead and carve through the material with your carving tools. Change the nib on the handle for thicker or thinner lines in your stamp. Carve out positive or negative spaces in your stamp. (Carve away the background to leave a positive print design; carve away the pattern to leave a negative print design.)
Toning Down And Adding Depth To Your Stamped Images
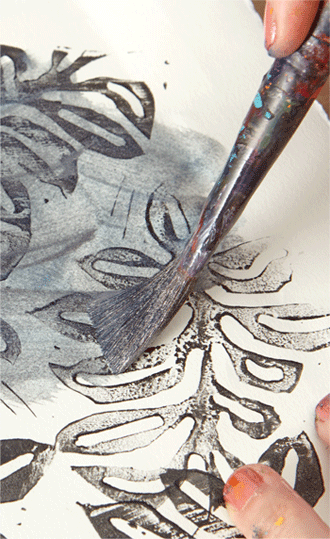
Once the stamped impressions are dry, try adding a wash of color to your paper to tone down any white areas.
STEP THREE: Use an archival ink pad or coat your stamp with acrylic paint using a brayer.
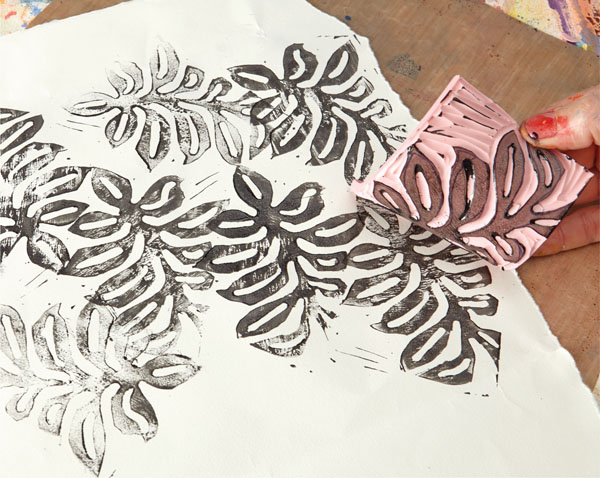
STEP FOUR: Cover your paper with overlapping stamped images. Make impressions in multiple colors, if desired.
Add More Layers By Introducing Another Stamp
Layering one stamp over itself is a great look, but don’t discount the visual interest that comes from layering with multiple stamps.
STAMP CARVING TIPS
- Readycut carving material (a Dick Blick product) is economical and high quality. Readycut is created by fusing a thin layer of a traditional gray carving block to a thicker white block. This allows you to carve away the gray layer to reveal the white so you will instantly see how your image will look printed.
- Readycut eliminates the repetitive inking, proofing and cleaning sometimes necessary in stamp carving because adjustments and additions are easy to see in the contrast between the gray and white layers.
- Speedball offers a flexible pink eraser-like carving block called Speedy-Carve that is flexible and durable and won’t crack, crumble or break. You can also transfer images from inkjet printers onto it to give yourself an easy-to-follow carving pattern.
- Companies such as Ranger offer stamp pads that are permanent and fade proof. You can use these for your paper painting, or you can use acrylic paint; the effects are different, and the choice is yours.
- Once armed with a few different hand-carved stamps, you are ready to stamp on paper. Stamping is just one of the techniques you will use in creating hand-painted papers. The idea is to take one sheet of paper through multiple techniques, adding layer upon layer of texture and pattern. This multipass process is what makes your papers rich and painterly.
- Using your archival ink pad or painting your stamp with acrylic paint, make impressions in multiple colors, overlapping the images over the surface of a white sheet of rice paper or a printed piece of found paper. Once the stamped impressions dry, try adding a wash of color over them to tone down the white areas of the base paper. Colors next to each other (analogous) on the color wheel offer harmonious effects, while complementary colors (those across from each other on the color wheel) offer more intense and color-vibrating effects. Both are effective.