
After the sketch comes the underpainting, and the underpainting should not be highly detailed. I use the underpainting process for two reasons:
I also work out my colors during this part of the process. It’s much easier and quicker to work out these challenges with paint than to have to work and rework the collage. Once I get the values and colors to my liking, I let the painting dry completely.
I use fluid and full-bodied acrylics for the under-painting. When I do drippy, splattered backgrounds, I use strictly fluid acrylics thinned with water or acrylic medium or both. I like leaving the wood grain showing through these drippy areas. When letting the wood show through, I’ll either leave it natural or stain it with a diluted yellow/gold/ochre fluid acrylic.
Don’t spend tons of time laboring over your underpainting; use the underpainting process as an exercise to help you determine where your values are and what colors you will use in your collage. Sometimes I’ll paint the underpainting the complementary color (the color across the color wheel from my main color) of the collage paper I intend to use on top, letting some of that color peek through for a vibrant, interesting effect.
And just to emphasize one more time: Do not fall in love with your underpainting! Do not take this to a level of finished detail that you love so much that you will not want to apply collage over the top.
STEP ONE: Lay in a simple background wash. Keep the color of the background lighter than that of the main subject.

STEP TWO: Add details of the subject, focusing on simple shapes that can be later achieved with collage papers.
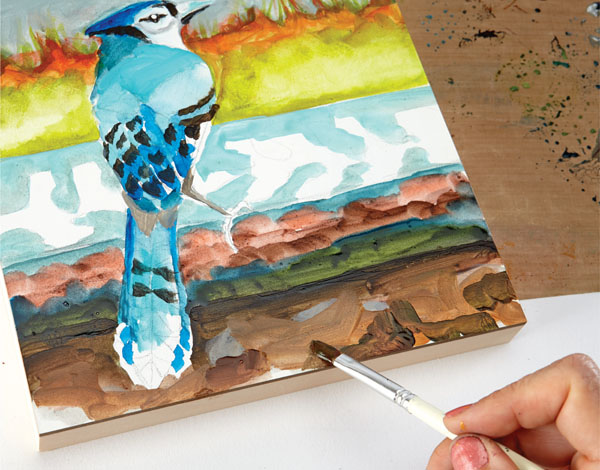
STEP THREE: For finishing touches add a simple background in darker colors than the bird toward the bottom and lighter at the top. Make sure the bird stands out in contrast.