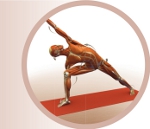

EXTENDED LATERAL ANGLE POSE
This pose represents a natural progression from virabhadrasana II—another example of continuity between poses. Imagine that in Warrior II you are taking an exaggerated step in preparation to throw a spear. Utthita Parsvakonasana would be the “follow through” of throwing the spear. We go from an erect trunk in Warrior II to one that is laterally flexing in this pose. The back arm moves from extending away from the body in Warrior II to stretching over the head in Utthita Parsvakonasana. Combining the action of the shoulder and arm with anchoring the back foot into the ground creates a stretch of the entire upper side of the body. Turn the back foot in and the front foot out ninety degrees. Straighten the back knee and externally rotate the hip. Flex the torso over the front thigh and rotate the chest upward from the abdomen. This causes the lower side of the body to shrink and the upper side to stretch. Look at how the shoulders and pelvis tilt in opposite directions, communicating with each other through the spine. Press the front foot into the floor with the weight starting at the posterior heel and spreading across the ball of the foot and toe mounds. Turn the face slightly upward and tilt the head back.
Remember that the underlying story of this pose is in the breath. Use the accessory muscles of breathing to open the chest and deepen your inhalations while relaxing into the exhalations. Turning the body activates the abdominal muscles, which work in conjunction with the internal intercostals and the elastic recoil of the lungs to aid in exhalation. Remember to ease in and out of the breath to create a sound like waves on a beach. Use ujjayi breathing.
BASIC JOINT POSITIONS
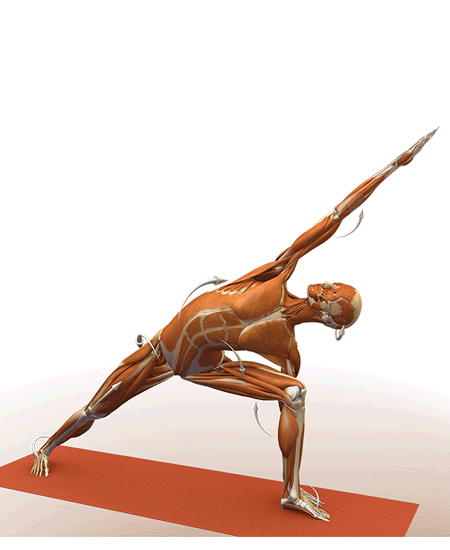
The staging I use in this pose involves isolating and activating the psoas first. Begin by leaning back slightly, raising the arm to stretch the front of the body. Then, place the elbow onto the thigh and press down with the torso, as shown. Contract the back-leg buttocks and feel how this co-contraction of the front-leg psoas and back-leg gluteus maximus stabilizes the pelvis. Straighten the back knee to press the heel into the floor. Extend the arm down and place the hand onto a block or on the floor. Press into the block with the weight of the torso to re-engage the psoas (flexing the trunk). Finally, turn the chest upward and extend from the tips of the fingers to the back heel.
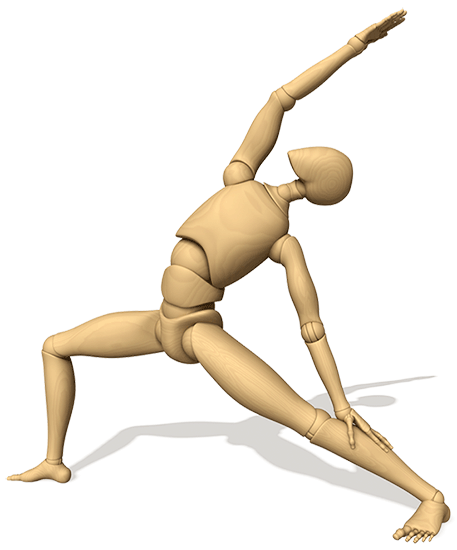
STEP 1 Combine contraction of the lower-side abdominals, hip flexors, and spinal rotators and flexors to bend the torso over the front leg. This involves a layered movement of the femur flexing, the pelvis tilting forward (anteverting), and the various deep back muscles laterally flexing and rotating the spine.
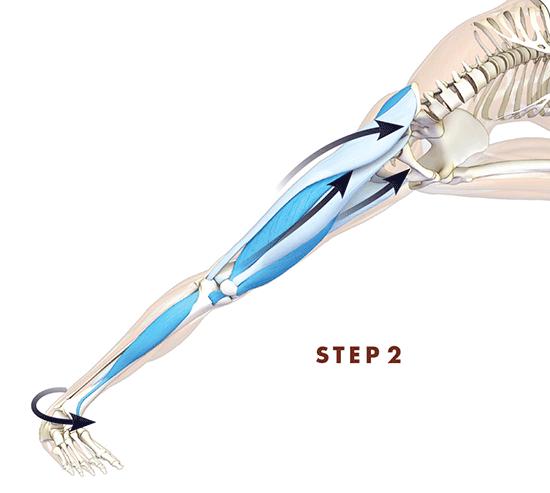
STEP 2 Anchor the back foot into the floor by contracting the tibialis posterior to turn the foot inward (inversion). Then try to draw the top of the foot toward the shin by engaging the tibialis anterior muscle. This presses the heel down. Straighten the knee by activating the quadriceps and its synergist, the tensor fascia lata. Co-activate the gluteus medius and adductor magnus to stabilize the femur in the hip socket. The cue for this is to attempt to drag the back foot away from the front, while pressing the sole of the foot into the floor.
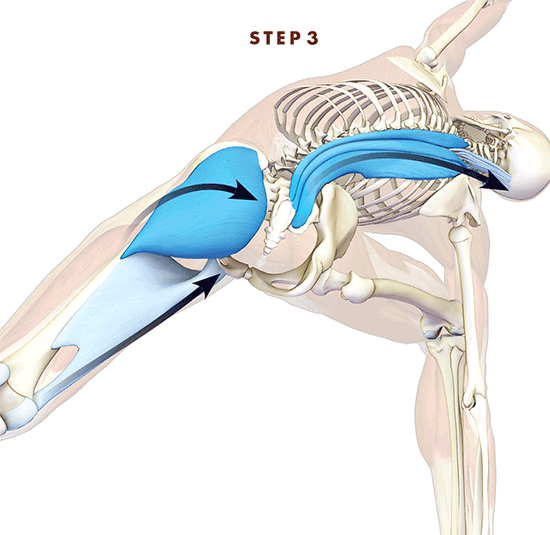
STEP 3 This image shows a combination of muscles that can be used concurrently to extend the back body and open the front body. The gluteus maximus forms the cornerstone, extending and externally rotating the back femur. The adductor magnus synergizes this extension. The cue for engaging these muscles together is to press the sole of the back foot into the floor and drag it toward the back side of the mat. The lower-side erector spinae both flexes the trunk and opens the chest forward and upward. The cue for this action is to arch the lower-side back.
STEP 4 Here we show the principle of connecting the upper and lower appendicular skeletons, that is, the upper arm and outer knee. Engage the triceps to straighten the elbows. Press the hand onto the floor or onto a block to contract the serratus anterior. Then activate the external rotators of the shoulder, including the infraspinatus and teres minor, to turn the shoulder out. Press the outer knee into the arm to engage the gluteus medius and tensor fascia lata. Notice how this counteracts the tendency of the pelvis to move outward and the knee to drift inward. This is an example of closed chain contraction, where we move the origin of a muscle instead of its insertion. In this case, the gluteus medius and tensor fascia lata move the ilium bone. Connecting the arm and leg in this manner creates leverage and combines with the action of the back-leg gluteus maximus to open the front of the pelvis.
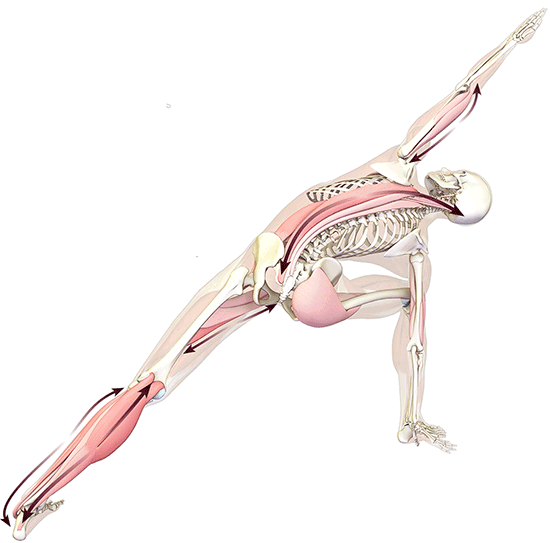
SUMMARY All of this culminates in the final pose stretching the upper-side back muscles; the front-leg gluteals; the front of the pelvis, including the back-leg adductors; and the calf muscles of the back leg.