Living in the Midwest, I’ve often dreamed of growing tropical fruits in my dining room, imagining a stretch of mangoes and papayas juxtaposed against the snow-sliding-sideways view of a February afternoon. The kitchen would become a tangle of vines, lush with colorful blooms and quirky vegetables, and I’d be able to pick my breakfast while the morning coffee brews.
Theoretically, with the right conditions, I should be able to achieve at least a fraction of that daydream. For example, it’s likely that I could grow a dwarf Calamondin orange tree, which is reputed to be hearty to 20 degrees Fahrenheit, or opt for an avocado tree sprouted from a pit, waiting the four to six years it takes for the new plant to bear its own fruit.
I did attempt to achieve the somewhat impossible once, trying to grow my own loofah plant, even though I knew Minnesota is far out of the loofah’s zone. I managed to get it about 5 feet tall, with luscious, broad leaves and plenty of potential, but it never fruited, only kept spinning its tendrils around curtain rods and houseplants. When the project resulted in more pruning than loofah harvesting, I came to an important realization: indoor growing is a pursuit that can be zesty and ambitious, but when it begins to feel like an overwhelming chore, it might be time to scale back. Most of all, I determined that indoor growing is best when it starts with a plan.

Turning your home into an orangery with fresh oranges and lemons growing in abundance is a lovely dream, but you’ll have better luck if you start with a more practical plan and build on your successes.
 THINKING AHEAD
It’s ridiculously easy to become overcommitted and enthusiastic, especially when perusing seed catalogs. Some of the dreariest parts of gardening—weeds, rabbits, squirrels, more weeds, birds, and did I mention weeds?—are eliminated with a kitchen counter brimming with herbs, microgreens, lettuces, and edible flowers. So, some people tend to jump in and place a seed order that wouldn’t be out of place for a five-acre hobby farm.
Before hitting “send” on that order, though, take a moment to think about what you really want to grow, and what it will add to your current growing mix (if you have one going).
Creating a plan might seem like it would take the fun out of the adventure of indoor growing, but I’ve found that the opposite is true. By understanding why I’m planting a specific “crop” and how I’m going to use that vegetable or herb in the future, I’ve been able to stay on top of my projects and very little goes to waste. I may not have tropical fruits crawling toward the ceiling, but I don’t have guilt pangs from overgrown plants that have to be carted grudgingly out to the compost pile, either.
Similarly, it helps to have a strong sense of timing. Understanding when certain plants will mature and planning accordingly can be helpful for staying on top of multiple growing projects without feeling like you’re now a greenhouse manager.
Once you have a plan in place—even if it’s a rough idea of what you want to grow—then it’s easier to take a look at other factors like space, lighting, containers, etc., with a view toward creating the best conditions for your indoor growing adventures.
For those just starting on the indoor growing path, it’s much easier to choose projects/plants based on a few basic questions:
 What do you hope to gain? If you want a crop of year-round herbs that keep your meals spicy and seasoned, think about which herbs you might use the most, and focus on those. If you’re looking to boost the nutritional profile of your dishes and add flavor, consider microgreens, pea shoots, or other nutritionally dense plants that take up minimum room and deliver abundant health benefits.
How ambitious do you want to be? Certain plants like tomatoes, mushrooms, and potatoes aren’t always easy to grow inside, but it can be done. As long as you’re taking on projects like that with a sense of play and excitement, then full speed ahead, fellow grower. But if you’ve never grown so much as a cactus inside and suddenly want to make the leap to indoor tomatoes, you might want to add a few more baby steps into your plan. For instance, start with a reasonably sized container of herbs and once you’ve mastered the art of watering, pest control, and succession planting, move on to swooning over those heirloom tomato seed descriptions.
What’s your vacation schedule like? A “quick trip” or holiday plans have derailed many of my indoor growing projects in the past. As much as I appreciate the kindness of friends who offer to water and prune, I’ve found it’s better for me if I add vacation time into my growing plan and take a break during those times. This seems to be especially prudent when I’m growing a wide array of vegetables. No housesitter wants an elaborate 30-item list of instructions about how to deal with baby carrots, lettuces, microgreens, and mushroom bags while I’m ordering another beer from the cabana server.
Are you looking for indoor-only growing, or transfers between the kitchen and outdoor garden? Many gardeners extend their growing seasons by bringing some plants inside when the weather begins to cool. Herbs, in particular, are a favorite for this transfer since many can thrive fine indoors over the winter, and then go back out in the garden in the spring. If this is your goal, then that’s great, but you’ll need to tweak your planting mix accordingly. There are certain plants—like cilantro, for example—that simply don’t do very well in making the transition. So, when choosing what to grow in your indoor space, do some research on what does best going from outdoors to indoors.
FIND YOUR SPACEAlthough this book is called Indoor Kitchen Gardening, there are many instances where a kitchen isn’t the ideal spot in the house for vegetable or herb growth. Also, the kitchen might be perfect during a certain time of year, especially during cooler months when plants can use the ambient heat of that room, but less suited for growing in other seasons.
For example, I’ve found that my trays of microgreens do very well in the kitchen during the autumn, when temperatures begin edging toward frost, but suffer in that room during the summer because the south-facing windows heat up the space too much. In those warmer months, the micros thrive in the basement, where I can control the light and air more easily, and avoid the humidity that makes growing more challenging.
Tomatoes and peppers, however, love the heat. Putting them by a large kitchen window in the middle of summer allows them to thrive, but placing them in a basement or cool attic space requires an exhausting amount of control measures to make sure they’re happy. In other words, it’s likely that your home has the right spot for whatever you have in mind; you just have to find out where that space might be.
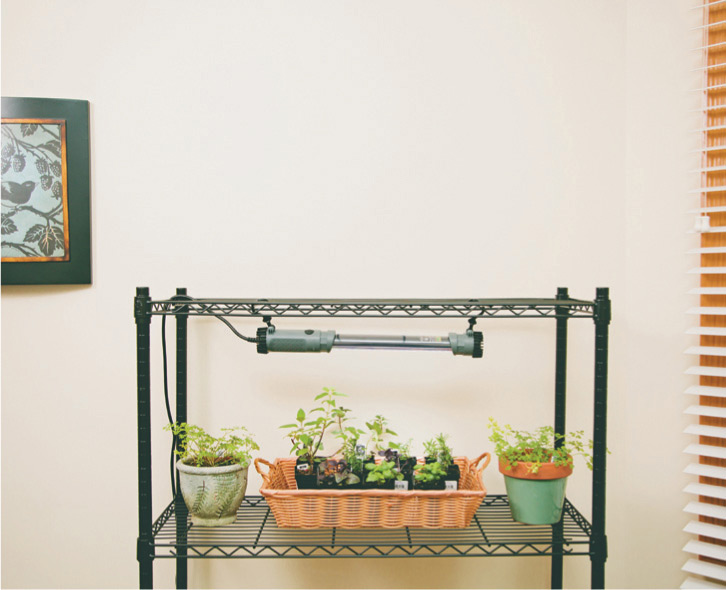
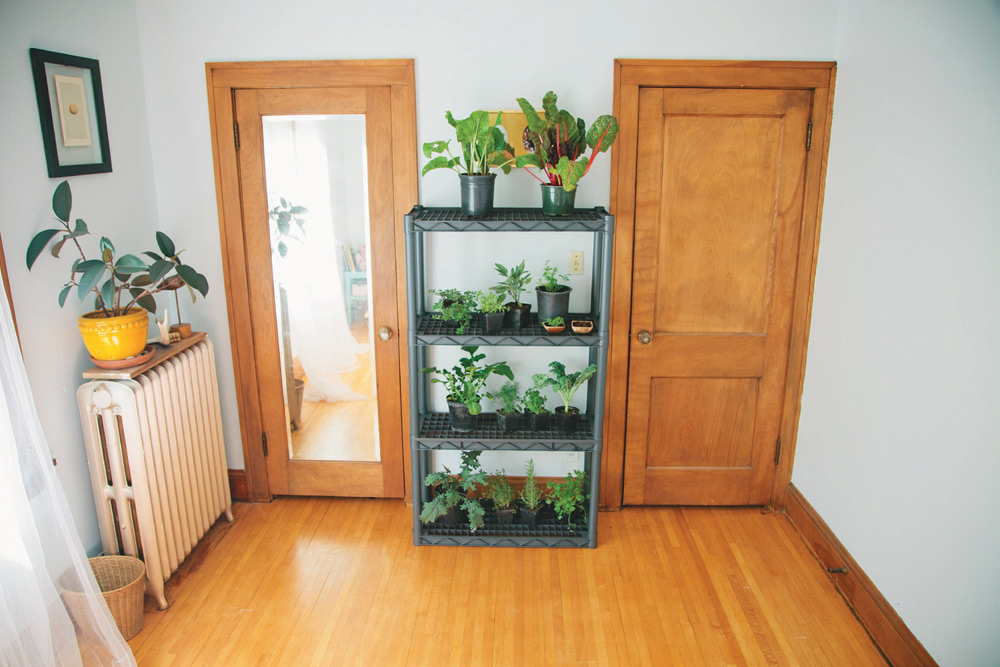
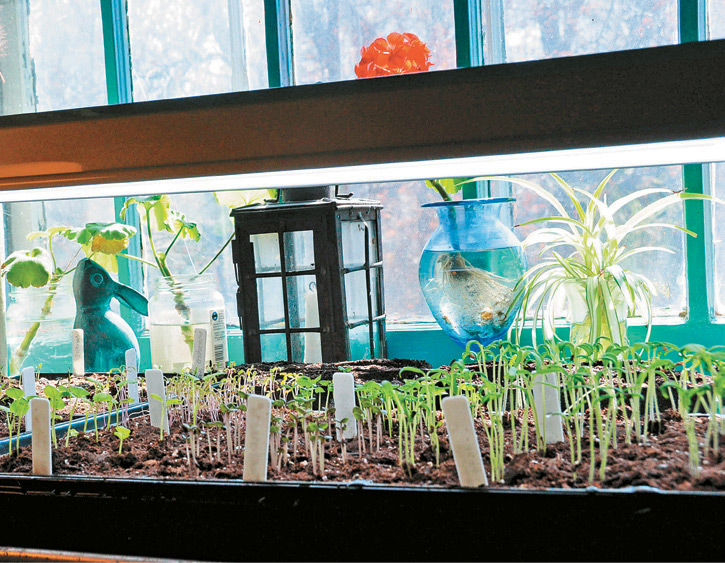
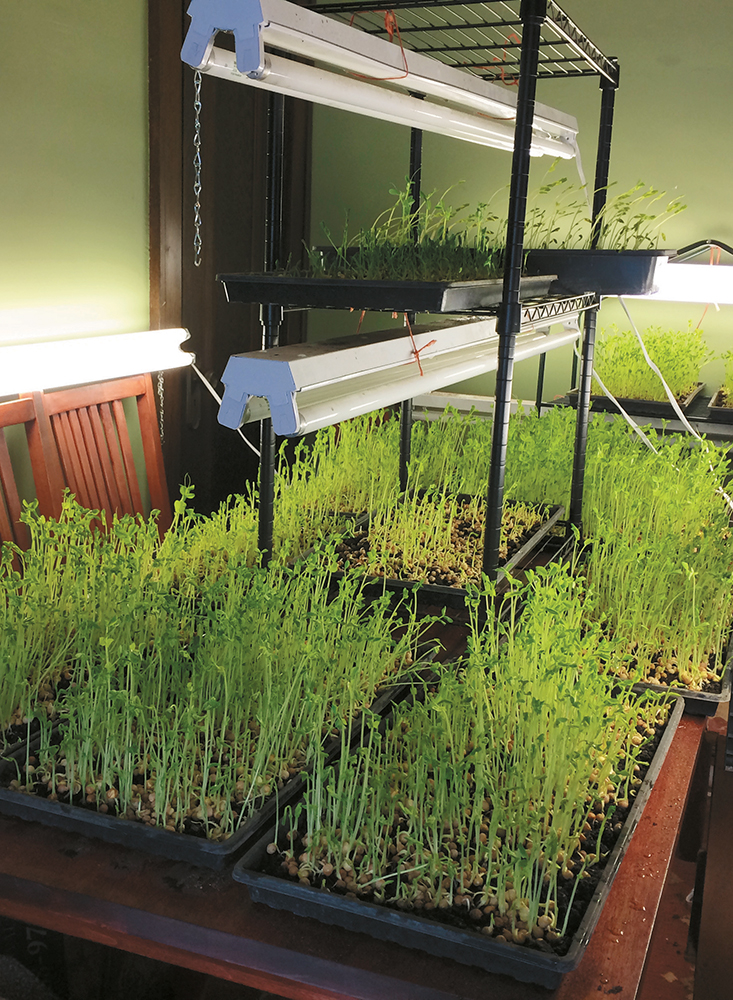
A quiet cornet in a living room can be used as a garden or nursery. Here, seedlings are coaxed along under an LED light until they are strong enough to be transplanted into bigger containers and scattered throughout the house.
You wouldn’t want to put a recliner or a desk in the small space between these doors, but a shallow shelf filled with garden plants fits the space very nicely.
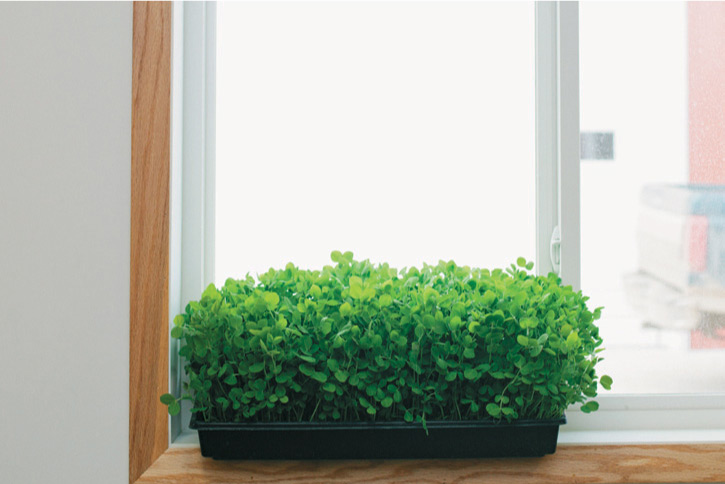
A healthy tray of microgreens or shoots can do a lot to improve the view of a window that looks out on a dreary area, such as a garage.

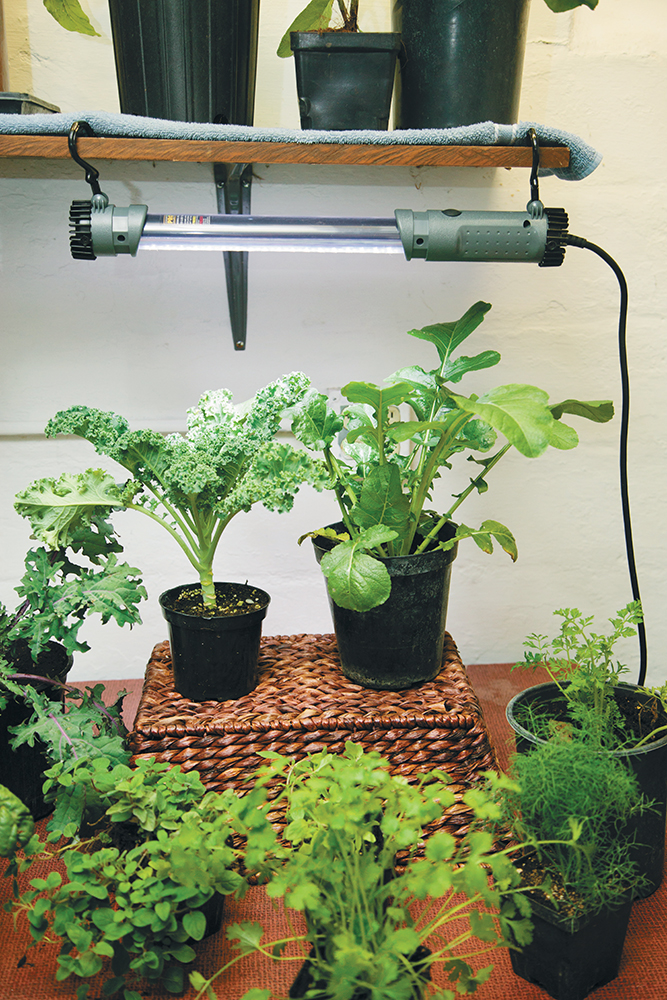
Basements typically offer a wealth of utility space for raising your indoor crops. All that’s needed is a decent grow light and perhaps some supplemental heat.
You can’t do better than natural sunshine when it comes to providing a light source for starting and growing your edible indoor garden plants. But do be aware that too much sunlight will damage some more delicate plants.
For many indoor growers, some form of artificial light will come into play (more on that later), but for maximum efficiency and sustainability, utilize natural light as much as possible.
As a general rule, south-facing windows are preferred because they allow for abundant light, but depending on where you’re located in the country, this could be a benefit or a drawback. Light streams in, but heat does, too. Placing some plants in direct sunlight during the hottest part of a summer day, especially without proper airflow, can cook them instead of bolstering growth.
When selecting a site for growing, look for one that allows for natural light, but can also be shaded in some way. This might be as easy as picking a window that has an awning outside that blocks the sun during the middle of the day, or placing plants on a shelf that gets indirect sunlight. Most likely, if you’ve noticed good results with existing houseplants, you’ve found some good spots already, but keep in mind that vegetables, herbs, and fruits need extra care like airflow and pest management.
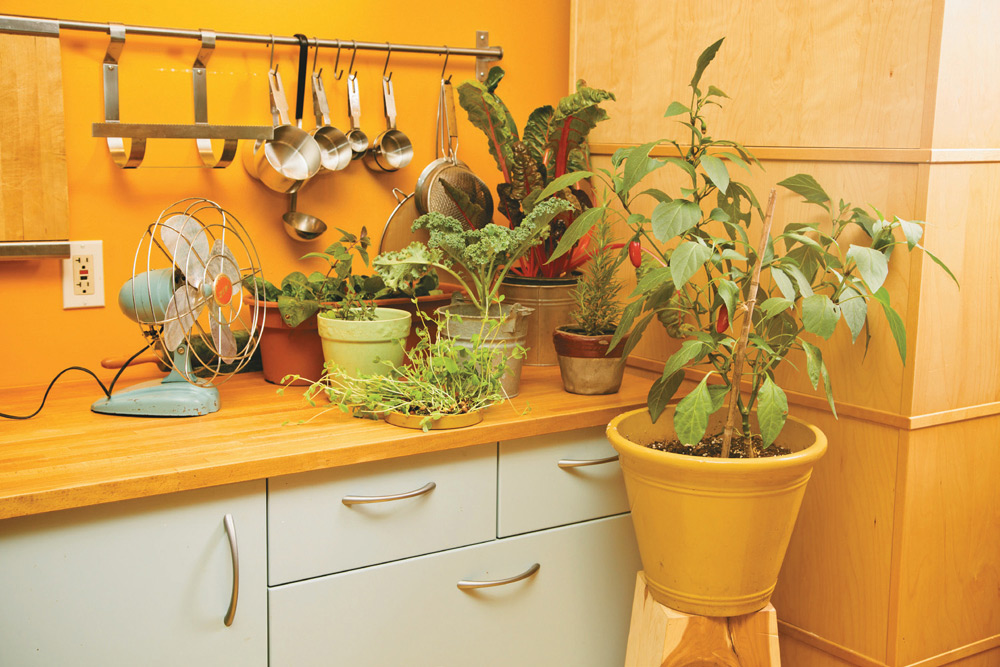
Choosing a spot with natural light isn’t mandatory, but it does cut down on the amount of work you’d have to put in for creating an all-artificial-light system. In my own grow space, I use sunlight as much as I can, by lining up plants on a window-level shelf in my south-facing kitchen and dining room, and then supplement with artificial lights in the winter.
Unlike many houseplants, indoor edibles need some type of airflow in order to grow properly. When I first started growing, I didn’t realize the importance of this factor, and quickly saw the results of my knowledge gap: molding seeds, struggling starts, no germination, and bugs that seemed to come out of nowhere.
Air circulation helps to mimic outdoor conditions, helping plants to grow in a robust way while minimizing the risk of bacterial issues and pest problems. In my space, I’m fortunate enough to have a cross breeze from windows on two sides of my kitchen, but I still utilize small fans for days when there isn’t much wind.
In areas like basements or attics, which can get stagnant pretty quickly, it’s especially important to create better airflow. Check out the air circulation section later in this chapter for more in-depth strategies once you’ve chosen your primary growing space.
A small desk fan can create enough ventilation for a few potted plants.
While microgreens and shoots are planted very densely, herbs and veggies that are grown to full maturity require space between containers to allow for airflow and to give them access to direct and indirect light.
Here’s some bad news: you can’t grow twenty different kinds of herbs on a three-foot space in a kitchen. Believe me, I wish someone had told me that a few years ago.
Like plants out in a field or in an outdoor raised bed, indoor plants need space apart from each other to stretch out. With the exception of microgreens and shoots, which are harvested during the first stage of growth and don’t need ample room to expand, most indoor plants benefit from at least some breathing room. Herbs and many types of vegetables can be cozy, but they shouldn’t be crowded.
When picking your growing spot and making a plan, create a rough sketch of where each pot or container will go, to give yourself a visual representation of your indoor garden. When it begins to feel like a game of Tetris, consider scaling back on the number of plants, in favor of giving the top contenders a better shot at growth.
If you plant your in-home garden near a water source, such as the kitchen sink, you’ll have the option of bringing the plants to water. The main reason this is preferable is that it eliminates the risk of spilling water all around the plants set up throughout the home.
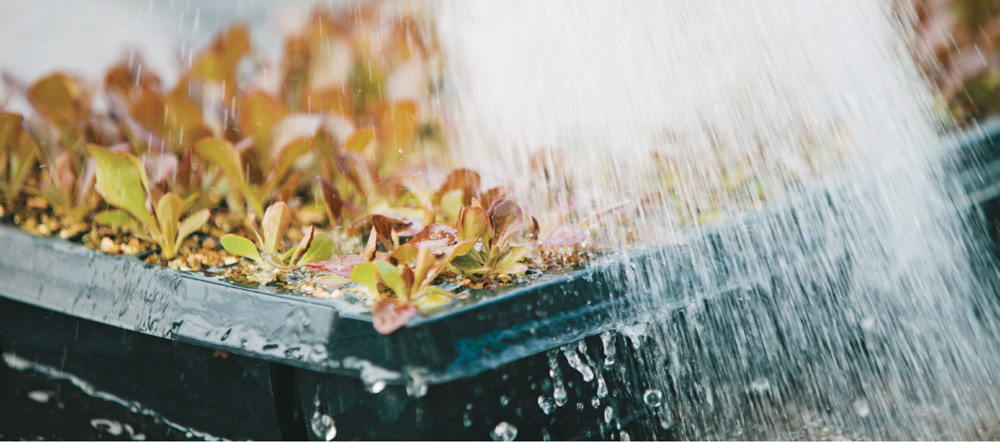
To contain mess and water runoff, many indoor farmers move their plants to the sink area for watering and then return them.
Thanks to the breadth of container types available, water and drainage isn’t usually a major issue, but it should be considered with plants like microgreens, which have very specific watering needs. Locating those type of plants in a kitchen usually makes the most sense, since it’s a few steps from a sink, where plants can be placed to drain or soak.
Another popular spot for just that reason is the bathroom, where the humidity levels can boost the health of some types of plants, usually those that grow in more humid zones. Dwarf citrus trees, for example, can thrive in a bathroom as long as there’s enough air circulation and some natural light.
When considering the bathroom as a growing area, though, there are several notes of caution. One comes from my plumber, who’s also an avid gardener: Don’t soak plants in the bathtub of old houses, unless you want to be asked why you have vermiculite in your drains. Also, bathrooms tend to have the lowest level of light in the house, so some form of artificial light might be necessary.
Finally, think about all the product types you use in the bathrooms: spray-on deodorant, hair spray, perfume and cologne, talcum powder, and so on. Everything that goes airborne will affect the plants you keep in that room, and while that might be fine for houseplants, keep in mind that you’ll be consuming the edible plants at some point.
Much like air circulation, humidity control is crucial when dealing with indoor growing. In some situations, like seed sprouting, abundant humidity can be very beneficial, but in others, such as pea shoot growing, it can make once-robust stems droop and fade.
Because of this, you may want to choose one spot in the house for seed starts—the bathroom, for example, or a sunny porch—and another for the majority of growing. This two-location approach allows you to develop a greenhouse space that can be better protected against pests, bacteria, and other issues that might affect tender seedlings. It’s not always necessary to pick a greenhouse area that’s hot and humid, but being able to control humidity in the area, either through plastic sheeting or individual domed lids for pots, can be helpful for making sure that plants get the best start possible.
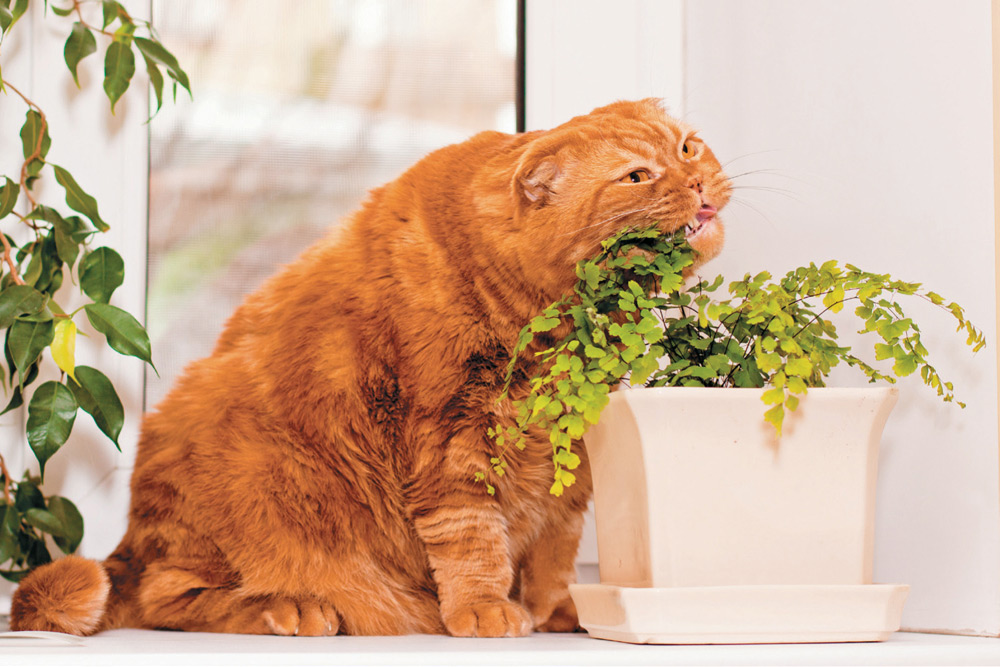
Sometimes, these can be the same thing. Although indoor systems benefit from being protected by outdoor critters like squirrels, rabbits, and chipmunks, one cat can become a mini-Godzilla to a burgeoning kitchen garden’s Tokyo.
In our house, which is ruled unconditionally by two dogs, all we need to do is shut the basement door or move pots onto a counter instead of the floor. For other indoor growers with more wily pets like cats, the strategies may have to be more elaborate. I’ve seen a number of anti-kitty systems cobbled together by other indoor growers, and they can be impressive. Wire screens, large rocks, plastic mesh, repurposed bookshelves: suddenly, a once-simple indoor growth space looks like a kid’s fort in the woods.
When choosing a space in the house, it’s helpful to find a room that can be sectioned off easily, without scrap lumber becoming involved. This might be a kitchen where a swinging door is shut during the day, or a guest room that’s already off-limits to pets.
In terms of true pests, this is far trickier. The aroma of fresh seeds can be compelling for critters like mice, and even houses that never had mouse problems before might be breached because of the new buffet you’re creating. In the homes where I’ve lived, I’ve found that this is a problem mainly in unfinished basement spaces, and often during the colder months. Because of this issue, I don’t grow in that type of area between September and April as a general rule. If that’s the only space available, I mouse-proof all areas of the gardening area with as much creativity and kindness as I can muster. Fortunately, I haven’t seen a problem in any upstairs spaces like a kitchen or dining room, perhaps because the dogs are overly enthusiastic about seeing small creatures as new best friends.
If it’s green and growing, the chances are pretty good that cats and other pets will want a nibble or two.
There will be more, much more, about handling pests and insects in other parts of the book, but for now, it’s best to try and choose a space that seems protected already. That can go a long way toward preventing anything other than you from eating your garden produce.
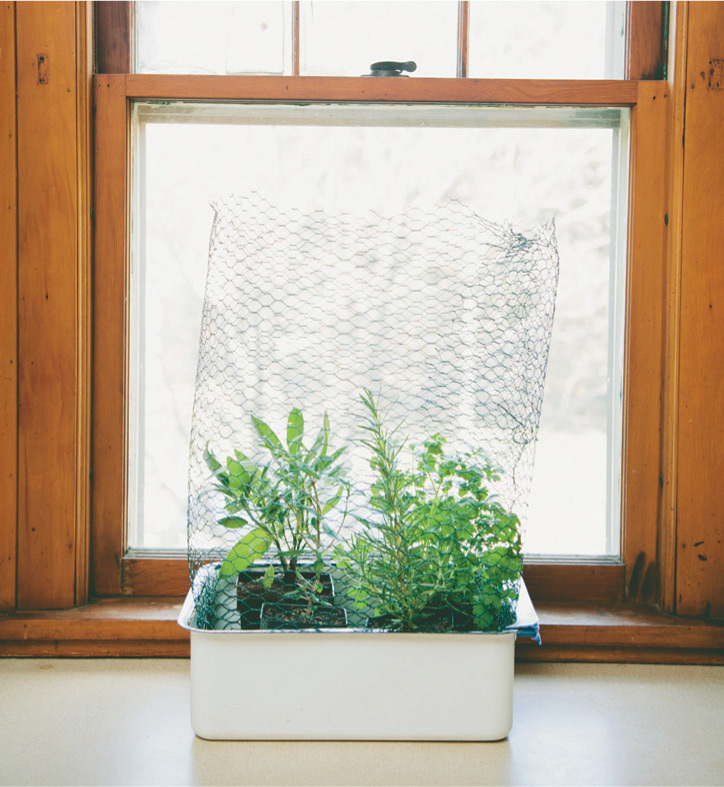
A custom-made cage of poultry netting (otherwise known as chicken wire) can be fashioned around plants and containers to provide a layer of protection from curious pets. This may help, but on the downside, most pets are persistent enough to defeat this strategy and the cage definitely detracts from the loveliness of your indoor garden. Controlling access to the room or perhaps a few sessions at obedience school are better long-term solutions.
One of the greatest advantages to small-scale, in-home gardening is that many of the items you need to get started can be found lying around in most homes, looking for something to do.
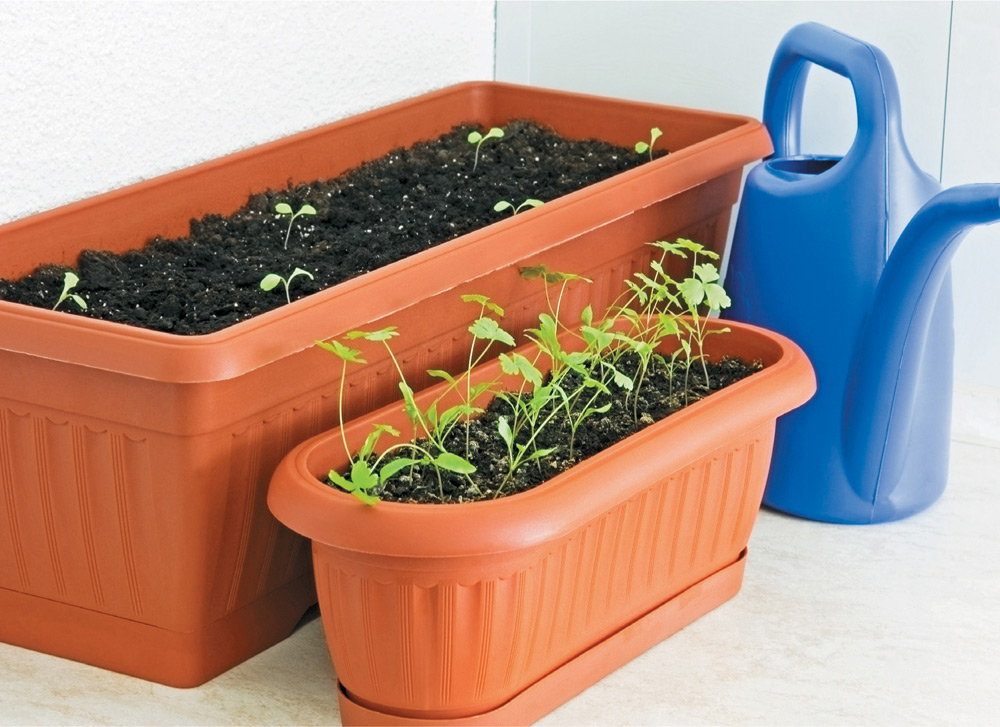
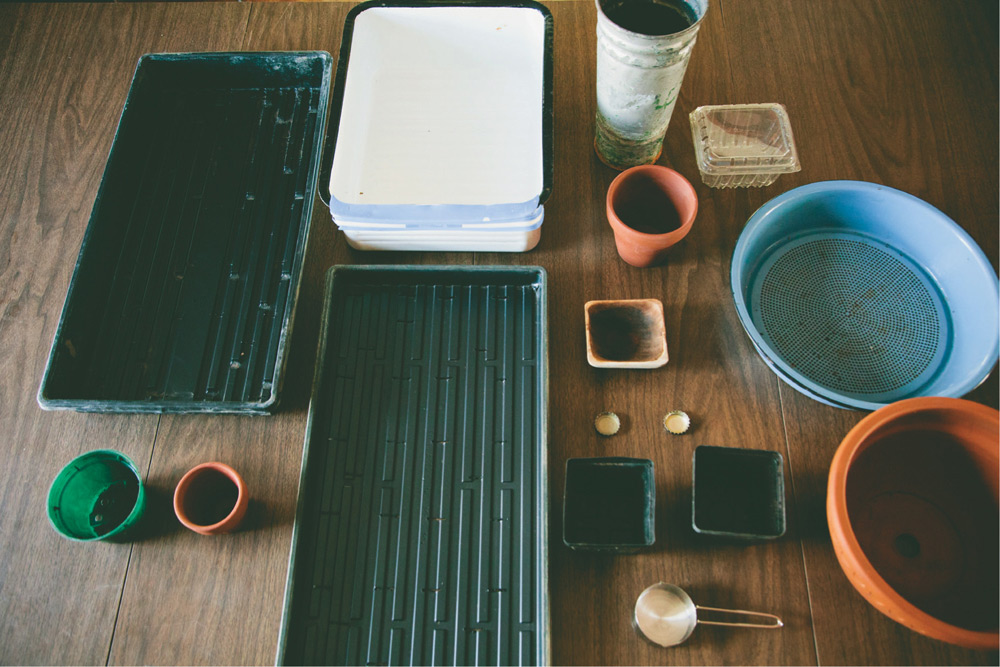
Shape is an important consideration when choosing containers. Oblong and rectangular ones are quite useful.
GETTING STARTEDNow that you’ve chosen a few prime spots in your house, it’s time to create an optimal growing area that will be so amazing it will triple your dinner party invitee list, just so you can show it off in a faux-casual manner. “Oh, this space in the kitchen? Yes, I just thought I might grow some salad mix and herbs for tonight’s dinner … you don’t do that too?”
While practicing your humble-yet-talented gardener expression, here’s what you should pick up to create a workable, efficient growing space that will lead to potluck ingredients galore: containers, soil, shelving, lights, fans/air, and of course, seeds or transplants. Let’s break it all down.
Even though you can repurpose about anything you can imagine as a planting container, there is something to be said for the utility of purchased items made for planting compared to an old rubber boot. Plastic plant trays with drainage panels are not expensive.
The breadth of container options is limitless; I’ve seen indoor vegetables grown in children’s old sand buckets, retired purses, worn-out boots, tackle boxes, partially broken drawers, wicker baskets, even a rolling luggage bag that lost its top. Repurposing unused items that are just taking up space in the basement is a fun idea, and it works well for certain kind of projects, but there are a few items to keep in mind when digging through the junk room:
Every vegetable, fruit, or herb will have a certain root depth that it needs. Even though it’s likely that you won’t be attempting to grow deep-rooted plants like asparagus or artichokes (both of which have roots that extend at least 2 feet down), it’s helpful to think about how much room you really need.
For microgreens, for example, harvest is done so early in the plant’s growth stage that roots barely need any depth. In fact, some people grow them without soil at all, on algae-infused mats that provide nutrients and support growth up to a few inches in height. As a fun kid’s project, you could grow microgreens in a bottlecap, or a teacup saucer, anything that can be gently watered and tended for about a week.
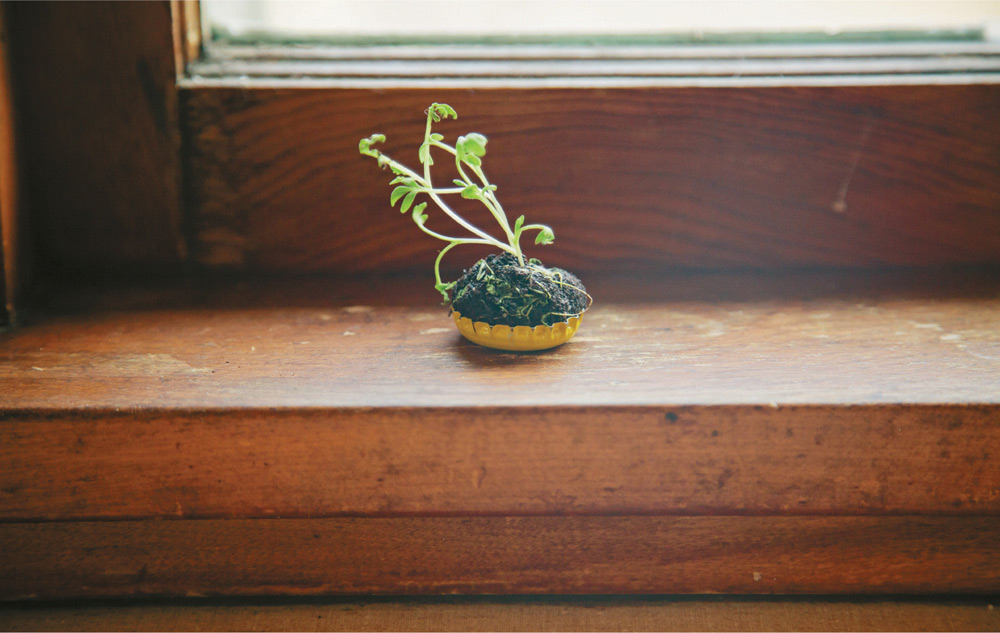
It may not be the ideal container for microgreens, but it sure is cute. The wisp of micros growing in this bottlecap demonstrate one thing quite clearly: you can grow microgreens in just about anything.
Most of the other candidates for indoor growing, though, do need some room for the roots to expand properly. For most vegetables, most of the root mass is within the top 6 inches of soil, so choose a container that can be aerated properly—no small-mouth jars, for instance, or other items that prompt soil compaction—and are reasonably sized for the project. You could choose a large, deep pot for small carrots, for example, but you’d end up using far more soil than you need.
So, choosing a container should have a sense of economy about it: Pick one that gives you room for root growth, but doesn’t lead to soil waste.
Most likely, you already have plenty on hand if looking for repurposed options, but if you’re shopping around at garden stores, consider containers that allow for drainage.
These containers have either a single hole in the bottom of the pot, or several small slits that stretch along the expanse of a tray or pot. Although I love the idea of repurposed containers, and I have a stack of potential candidates in my basement, I usually opt for rectangular trays with drainage slits.
Not only do these types of containers let me accidentally overwater without too much risk of mold, they also allow me to water a plant by setting the whole tray or pot into a sink filled with a few inches of water. For certain vegetables, especially if they’re suffering from overwatering issues or leaf problems, “bottom watering” in this way is particularly helpful. Also, very dense plantings, such as a heavily planted pea shoot tray, benefit from this strategy. The roots can reach the moisture that they need without adverse effects on the upper plant.
Commercial growing trays normally have drainage slots, which is important for growing indoors. But of course you must set the planting tray into a liner tray to keep the water from running everywhere.
There are some plants that don’t need this kind of care (usually drought-resistant houseplants) but the majority of vegetables, shoots, herbs and other edibles benefit greatly from the aeration that comes as a result of drainage.
That’s not to say that you can’t take that antique lunchbox from middle school and turn it into a charming indoor gardening option—however, if plants seem to be struggling in that container due to root rot, then it may be time to go with better drainage strategies.
Many repurposed items are fine in terms of their material—old rubber boots keep the moisture in the soil, metal children’s wagons make a nice mobile container, etc.—and many can be modified for drainage by drilling a few holes in the bottom.
One note of caution, though: keep in mind that you’ll be eating whatever grows in these containers, so if you’re utilizing a cool, retro oil can, you’ll have to be diligent in removing all traces of the oil before you plant. Even then, I would be reluctant to utilize that container unless it was my only option.
Any kind of container that seems suspect to me in terms of potentially toxic substances gets scratched off my list. It may seem like farm chic to plant in a rusty wheelbarrow, for instance, and it would be fine for non-edible plants, but I’m hesitant to expose the plant to rust, old chemicals, and other dangers because those issues may affect plant growth, but most importantly, those chemicals would be on my dinner plate, albeit in a small amount.
Plastic and terra cotta pots are two of the most readily available types. Each has its pluses and minuses when it comes to growing edibles indoors.
Some containers are more porous than others. Terra cotta pots, for example, draw moisture from the soil, so they require more frequent watering. Here are some other benefits and challenges of common container types:
Plastic: For most of my growing, I lean toward plastic even though it’s not the most attractive or durable solution. These types of trays and pots are my preference because they’re lightweight, stackable when not in use, generally quite cheap (or free, if you know a bunch of gardeners who are constantly trying to downsize), and easily modified with additional drainage holes. That said, they are still a petroleum-based product, so they’re not the most environmentally friendly option available. I try to minimize my non-green impact by reusing them as much as possible, though.
Polystyrene: Although I don’t use many white polystyrene foam boxes myself, I’ve seen numerous examples of successful growing with these. The trick is to find food-grade containers, but if you live in an area with any kind of supermarket diversity, it just takes a few phone calls to gather a nice collection. Most grocers, and all fishmongers, use these boxes but they have very limited re-use, so you’d be keeping them out of landfills. The foam provides excellent insulation, and it’s easy to drill drainage holes in the bottom. The appearance is a drawback, but many people paint them so they look less like a Styrofoam cooler.
Stone: Most of these containers will likely be outside, since the largest drawback is weight. Smaller stone pots, though, can be a good option because they have a nice amount of heat insulation and are definitely very durable.
Terra cotta/Clay: In addition to being more porous, these pots can be prone to cracking when soil freezes. That’s not a huge issue for indoor growing, but if you’re storing them in a garage when they’re not in use, be sure to empty the soil from them first. A more serious issue is that clay pots retain heat very effectively, which is great if you have plants that love heat (like peppers or eggplant), but for those that are less fond of long periods of heat, the plant roots can get burned. In general, though, these types of pots are visually appealing, fairly inexpensive, and have good drainage.
Wood: For many indoor growing spaces, wood is a nice choice because these containers can look amazing, especially with weathered wood (achieved by exposing it to actual weather, so throw a new containers outside for a few months). But wood can also be problematic when it comes to food safety—some containers are treated with very harsh chemicals to keep the wood from molding or rotting, and those toxins can leach into your edibles. Older containers in particular may have been treated with chemicals that leach arsenic into the soil. A good solution that I employ often is to put another pot inside the wooden planter, especially if the leaves will drape over the side to hide the gap between planter and pot. It’s possible to seal the container with a good food-grade choice as well, such as a mineral oil and beeswax combination, or a soy sealer (brands include SoySeal or SoyGuard). Just be sure to avoid any conventional wood sealers, because they’re chock full of chemicals that don’t play well with edibles.
Basically, there’s no single, perfect container type that works fantastically well for indoor vegetable and herb growing. Instead, choose a container mix based on what’s safe for edible plants, attractive in your kitchen or other growing space, and easily watered.
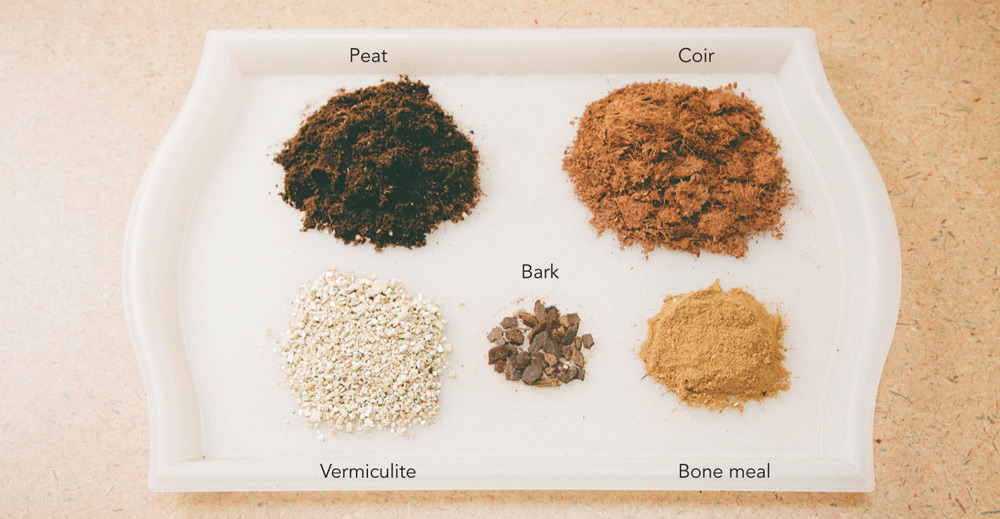
Many indoor growing media blends contain no soil or compost. A suitable media can be made from a blend of peat, coir, vermiculate, bark, and bonemeal.
Among the many variables that come with in-home growing, the importance of your soil mix can’t be overemphasized. Seriously, your soil can make all the difference between healthy, vibrant, nutrient-dense vegetables and sickly, non-germinating, pale plants.
When I first started indoor growing, I thought: dirt is dirt, right? I can just go in my backyard, get a shovel full of the stuff, and I’m on my way. Forget the trip to the garden store and those fancy bags of soil—vegetables grow in dirt outside all the time, so obviously those soil mixes are a scam. This was followed about a week later by an exclamation of: hey, where did all these bugs come from? And about a month later by: hmm, I wonder why nothing is growing?
Very well-prepared soil that’s geared toward indoor growing isn’t a scam, and it’s not optional. Homes and apartments tend to be drier than the outdoors, and putting plants in a container gives them less room and fewer nutrients than they’d have outside, even in a raised bed. Because of that, you need soil that’s well aerated, yet able to retain enough moisture to foster growth.
If you use soil from the outdoors—even lovingly mixed with compost—drainage and aeration are almost always impacted, leading to poor growth, if you’re lucky enough to get any growth at all. Often, garden soil is higher in nitrogen as well, which is fabulous for an outdoor garden, but when packed into a small space, it acts like a welding torch to your plant’s roots.
Also, bugs. I think I could grow plants in a sealed room, ventilated with the purest filtered air, and handled only by volunteers in HAZMAT suits, and I would still get bugs if I used garden soil. That’s because the insects are already in the dirt, so it doesn’t matter what kind of pristine conditions you set up in your house, you’re still giving them a free taxi ride to an all-day seedling buffet.
With those caveats, though, it’s true that some people can pull it off. My partner, Karla, seems to be able to grow anything anywhere, and I believe she could nurse along a mango tree successfully through a Minnesota winter. She has the touch. But, because I don’t, I tend to be more deliberate in how I set up my space for growing and with that in mind (in case you tend to be one of those people, too), here are some tips for choosing good soil:
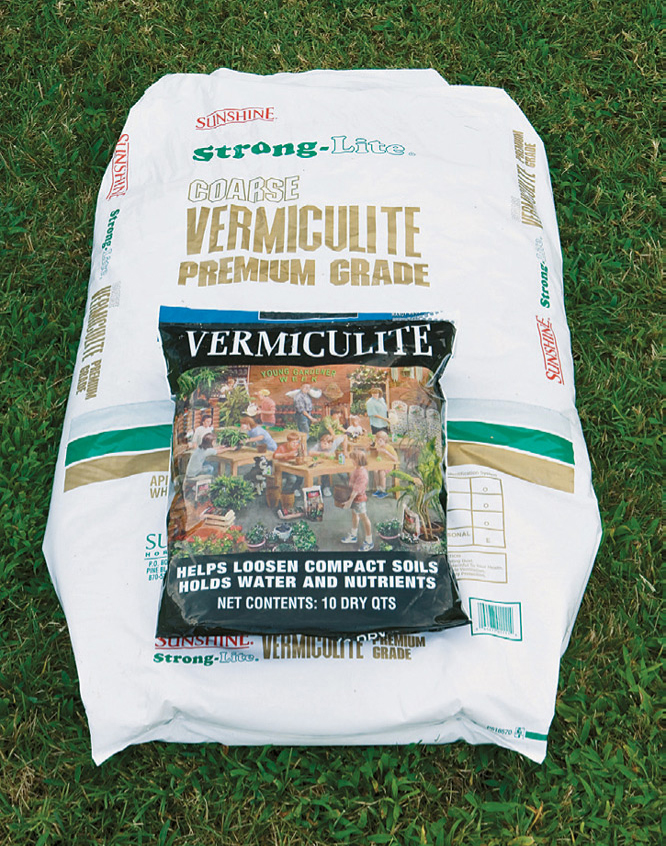
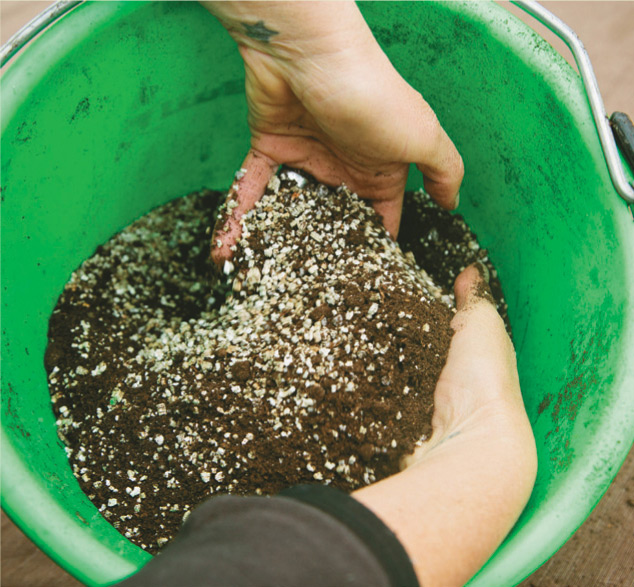
Vermiculite is a mica rock that is ground and then heated up until it explodes like popcorn. It has no nutritional value for plants, but it prevents the growing media from compacting.
Some of the best options for indoor growing don’t contain soil at all, but are instead a combination of materials like peat, bone meal, coir fiber (ground up coconut hulls), bark, and vermiculite.
That last item can be particularly useful—vermiculite is a silicate that’s fluffy and pebble-shaped. It helps to promote fast root growth, anchor young roots, boost moisture retention, and assist germination. You’d look for horticultural vermiculite, as opposed to other types that are used for shipping chemicals or enriching concrete. Many potting soils already have vermiculite added, however, and you can tell by the distinctive white, chalky flecks distributed throughout the mix. If you’re whipping up your own mix, consider blending compost and vermiculite.
This seems like a good point to climb atop my soapbox about organics. I love the view from up here. Simply put, we farm organically, and we believe deeply in creating a sustainable agriculture system, and that extends just as much to the cilantro growing on my kitchen counter as it does to the heirloom tomatoes out in our fields. So, I do my research on planting mixes, and I buy from locally owned greenhouses. Most of the time, this means that I pay more for my potting mix, but also that I feel better about what it contains.
I’m always keenly aware that what I grow will end up in my body, and a few extra dollars upfront is worth it to me to know that I’m getting as close to chemical-and-toxin-free as possible.
Just because something is labeled as “organic,” though, doesn’t make it natural and sustainable.
Recently, I went against my own eco-friendly policies because I was in a planting emergency (they really do happen!) and needed potting mix quickly. I opted for a stop at a big box retailer and got a suspiciously cheap mix that was labeled organic. Inside, I found a mix that was quite heavy and contained bits of candy wrappers, small wires, glass beads, and other weird garbage.
Since I was in a jam, I used it anyway, and I shouldn’t have bothered. The mix was so dense that it turned my trays into mud blocks that wouldn’t drain, and nothing germinated. When I dumped them out, the blocks had solidified into nearly unbreakable bricks of soil. Perhaps if I was building a mud house on the frontier, this would have been a valuable moment, but otherwise, it was a waste of time, money, and effort.
Choose a potting mix that is specifically for indoor vegetable and herb growing. These are put together in a way that fosters better drainage, and most of all, contains only a small amount of fertilizers. This is important, because too much fertilizer can burn a plant’s roots, especially in smaller containers. I tend to use a compost-and-vermiculite blend for growing, and if it seems like any of my plants are struggling or slow in germinating, then I might turn to fertilizer like bone meal or fish meal, which are both great at maintaining proper soil chemistry without burning the young seedlings. Compost and fertilizer tends to work well together, because each supplies nutrients, especially during the early stages of plant growth.
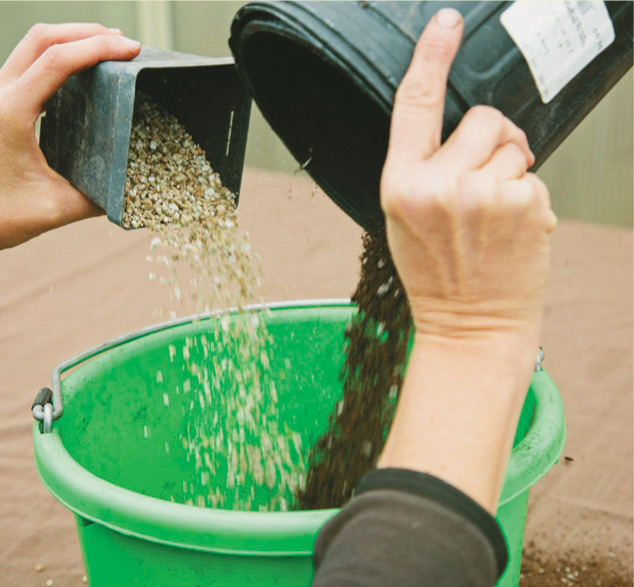
Step One: measure out about 7 to 8 cups of indoor potting soil or compost mix, and about 2 cups of vermiculite.
Step Two: blend the dry ingredients thoroughly with your hands.
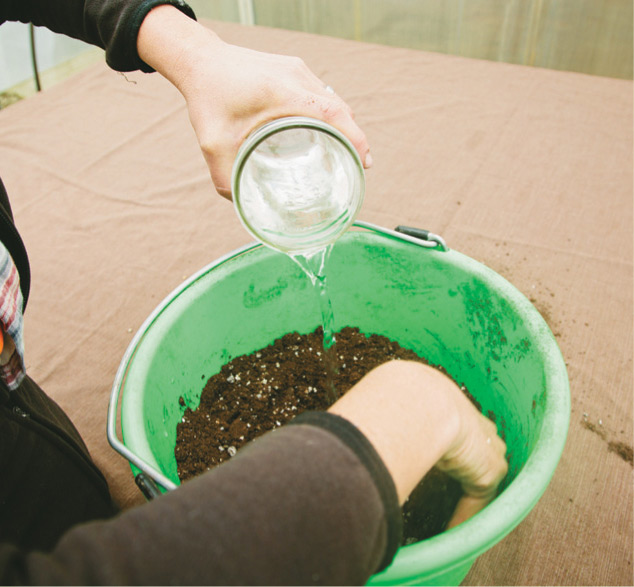
Step Three: add water; depending on how dry the soil is, you’ll probably need at least 2 to 3 cups of water, but add it gradually and mix it in until you can squeeze a handful and have a few drops (not a stream) dribble out.
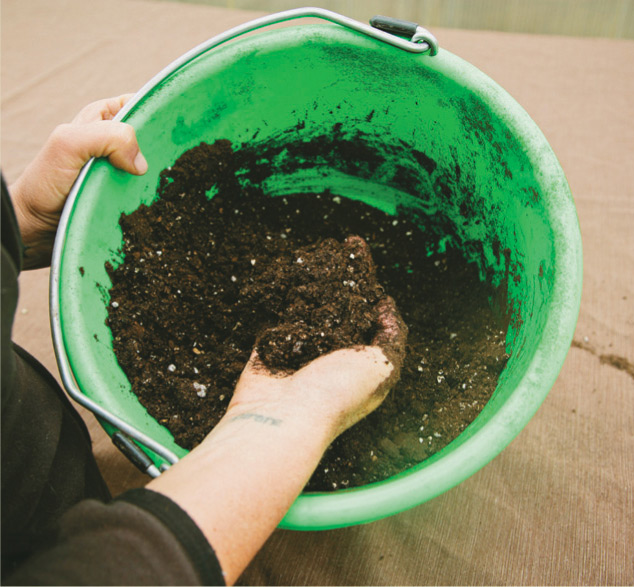
Step Four: test the consistency of the growing medium. It should clump together without too much pressure, but fall apart once you let go of it.
You don’t have to make your living room or kitchen feel like a commercial greenhouse to grow edibles indoors. Tasteful wall shelving that’s integrated into your room décor does the job, too.
Coated wire shelving is inexpensive, durable and adjustable. It also allows good airflow.
Of all the parts of a growing strategy, shelving usually has the most do-it-yourself appearance. I’ve seen “shelves” cobbled together from old screen doors, repurposed planks of wood on top of cinder blocks (making me recall my early days of college living), and bookshelves that have plants on top and slightly water-warped novels on the bottom.
Basically, it doesn’t matter too much what you use, as long as it will support the weight of your plants and you don’t mind getting it wet if you need to mist the plants or to put just-watered pots or trays on the shelves.
I’ve repurposed a wide range of shelving options, from countertop spice racks to old nightstands, and it’s fun to root around in the basement and see unused furniture with new, savvy gardener vision. If putting together a system from scratch, though, here are some recommendations as a guide:
Consider metal, industrial-style shelving. This type of unit is usually sturdy, able to be configured easily, and best of all, has a nice degree of openness in the back and sides. Also, steel shelves have an open slat design for each shelf, which helps to increase airflow. Especially handy, these open slats let you hang lights fairly quickly without the kind of drilling or clever DIY effort you’d need for standard wooden bookshelves.
Don’t put plants on shelves that you love. This sounds like odd advice, but believe me, any surface will get dirty and wet very quickly. Even when you think you can be extremely careful in keeping the bottom of the pots and trays dry, you can still get water stains on wood shelves.
Think about your lighting options when buying shelves. We’ll dive into lights in the next section, but for now, all you have to remember is that a standard-sized shop light is 4 feet long. If you buy an industrial-type shelving unit that’s 48 inches across, and has the open slat design for hanging those shop lights, you’ll feel like a pro. At least, that’s how I felt after years of weird systems that I patched together, many of them featuring shop lights hanging way past a shelf’s edge.
Go for adjustable shelving. Being able to change the height of your shelves is very useful, because plants need different levels of light. It’s possible (and recommended) to use the chains that come with shop lights to adjust height of lights, but it’s also a nice option if you can reconfigure shelves as well. This comes in handy, too, when using one of the shelves as a storage area for tools, extra pots, a watering can, and other growing supplies. Quick note on storage: if you’ll be keeping your seeds on this shelf, make sure to store them in a sealable plastic bin, to lessen the temptation to pests.
Take the edible landscape idea indoors by combining your edibles with houseplants and even cut flowers in your existing shelving and display furnishings.
In general, find a shelving system that allows for a nice amount of light (natural or artificial), gives the plants room to spread out a little, and offers enough space for proper airflow around the plant. As mentioned previously, lack of airflow is one of the biggest causes of nasty issues like mold and disease, so keep it in mind as you’re creating your shelving setup.
Also, if you’re just starting out, be aware that you may have to move your shelves if your chosen space turns out to be less than ideal. A spot that seems like it would be perfect may end up being too close to the window, or not situated near an electrical outlet for your shop lights, or too cold and damp. Being flexible about placement (here’s where the wheeled shelf comes in handy) is all part of the adventure when it comes to indoor growing.
A plug-in shop light with a full-spectrum fluorescent bulb makes a perfect light source for indoor gardening. Look for one that has hanging chains for easy lowering and raising.
When I teach classes about growing vegetables, microgreens, and herbs indoors, the question of lighting always comes up first, no matter how early I put it into my talk. At this point, I should probably just issue a note of assurance before the introduction: “I promise, you don’t need special, expensive grow lights that are hard to find and burn out easily. Really. I promise.”
In fact, all you need are full-spectrum fluorescent bulbs, similar to what you see in office buildings. They can be put into standard metal light fixtures that have one bulb in them, and feature small chains on either end for easy placement into a shelving setup.
These are found in any hardware store and are called various names like utility lighting or shop lighting. Occasionally, they go on sale, and this is when you should pounce on them and buy several at a time if you’re going to create a shelving unit filled with plants. Otherwise, you can probably get one, with bulb, for under $30 and usually for much less. Thanks to buying bulbs in a bulk contractor pack (also at the hardware store) and a sale on the fixtures, I paid about $10 for each of my lights. That’s quite a difference from the LED grow light systems, where a single bulb can be $60.
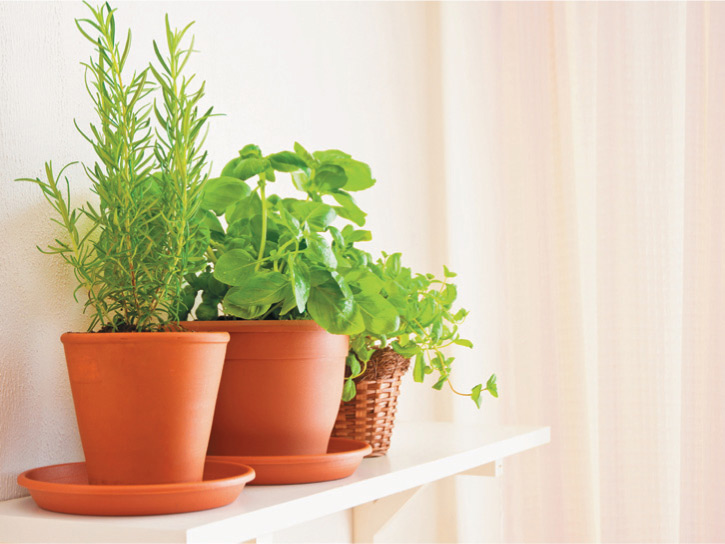
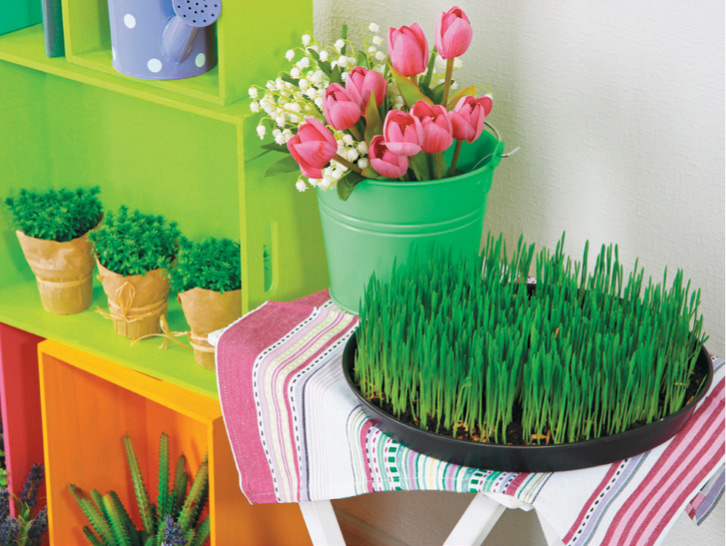
You may already have proper lighting if you’re planning on growing vegetables, herbs, and fruits in your kitchen. Most under-the-counter fluorescent lighting works well for fostering growth, and all you’d need is some type of small block or shelf that brings the plants closer to that light. I have this type of lighting in my kitchen, and I like to grow herbs in smaller pots so that I can use a little shelf that used to hold dried spices.
Beyond that basic setup, there are other lighting options if you have specific growing needs—sometimes, plants need a boost in some way, and that’s when you can try playing around with lighting options.
For example, if a plant seems to be spindly or too leggy, you can give it a burst of red or orange light, which stimulates growth and flowering. If the plants are too short or stocky, you can use blue or green light to regulate plant growth or foliage.
Here’s a quick guide to your options:
Incandescents
Used most for low-light, heat-loving houseplants like ferns or vines
Only about 10 percent of their energy used for light, with the rest used for heat, so they tend to be inappropriate for indoor edibles since they “cook” the plant.

A hanging trouble light with an incandescent bulb emits more heat than light, which isn’t necessarily a bad thing for growing plants.
Full-Spectrum Fluorescents
Best replicates the natural solar spectrum
Life span of 24,000 hours
Good choice for year-round growing
When buying these, look for T8 or T5 bulbs

Full-spectrum fluorescent lighting most often is found with thinner T8 style bulbs like the one above.
Fluorescents
Two to three times more light than incandescent bulbs for the same amount of energy
Least expensive option
Tends to be the most available, especially if you’re considering using existing under-the-counter kitchen lighting or shop lights
Life span of 16,000 to 20,000 hours
When buying these, most standard is a T12 bulb
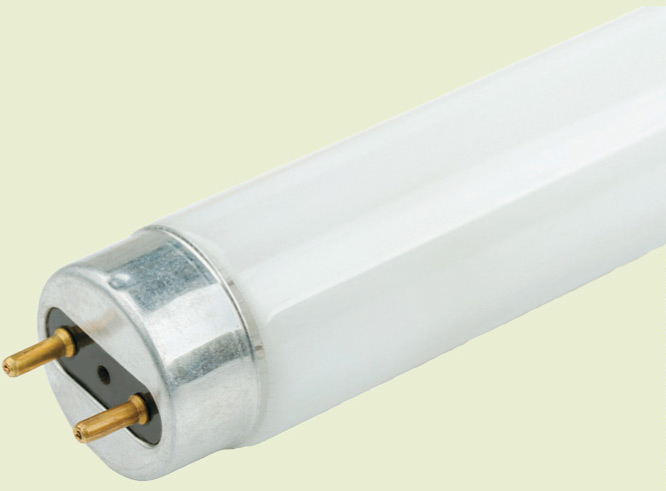
Fluorescent tubes are efficient and available in full-spectrum light models that are intended to replicate natural light as closely as possible. The standard T12 style bulb, like the one above, is by far the most common, but this style is gradually being phased out in favor of more efficient, narrower tubes that operate with an electronic ballast. The T12 works with a magnetic ballast.
High Intensity Discharge (HID)
More expensive than fluorescents, but twice as efficient
Can get bulbs that are only red/orange (called MH bulbs) or only blue/green (called HPS bulbs) so you can tweak your growing conditions
Color of the lights distorts the appearance of plants and grow space; a minor consideration, but some gardeners are put off by the tendency of HID lights to make everyone look jaundiced
Light-Emitting Diode (LED)
More expensive than fluorescents
Some bulbs don’t require special fixtures, since they’re already placed inside panels that can be plugged in.
Tend to be more appropriate for commercial use
The newest grow light technology is plasma, which purports to be as close to real sunlight as possible. However, I haven’t seen one of these systems for under $1,500, so for now, if I want my plants to have more sunlight, I’ll just shove them closer to the window. In general, I prefer the full-spectrum fluorescents because they’re affordable and available, but if you want to try an HID or an LED system, then by all means, go for it.
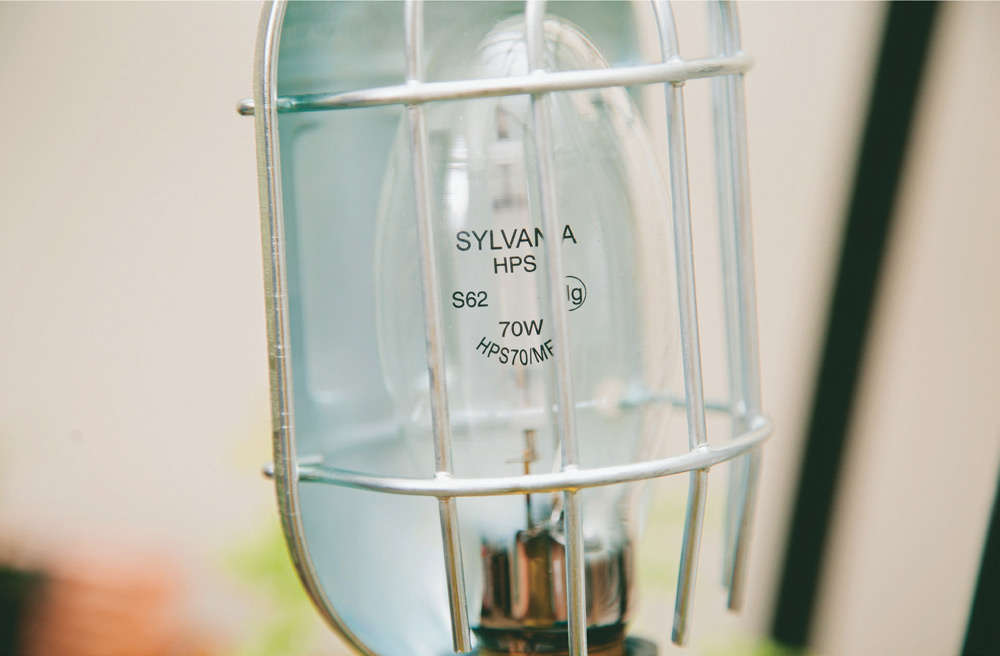
HID bulbs fit into standard sockets, such as this hanging trouble light. Because the bulbs are filled with an inert gas they operate very efficiently.
One important note when it comes to lighting: just like people, plants need a night as well as a day. Some growers have tried to boost growth by keeping the lights on at all times, but I’ve found this creates unnecessary stress on the plants because they don’t have time to “sleep.” You wouldn’t water them with Red Bull, so why would you keep them sleep deprived? A better strategy, I’ve found, is to turn the lights on in the morning and turn them off about the same time as sunset; in the winter, I’ll keep the lights on longer in the evening, but I’ll be sure to turn them off before I go to bed.
Nerdy gardening facts: plants measure the duration of light and dark through a pigment called phytochrome, and their response to the relative length of a day is called photoperiodism. This response is vitally important for growth, seed germination, and vegetable or fruit formation. So, no matter what type of light source you’re using, be sure to switch it off at night so the plants get their rest.
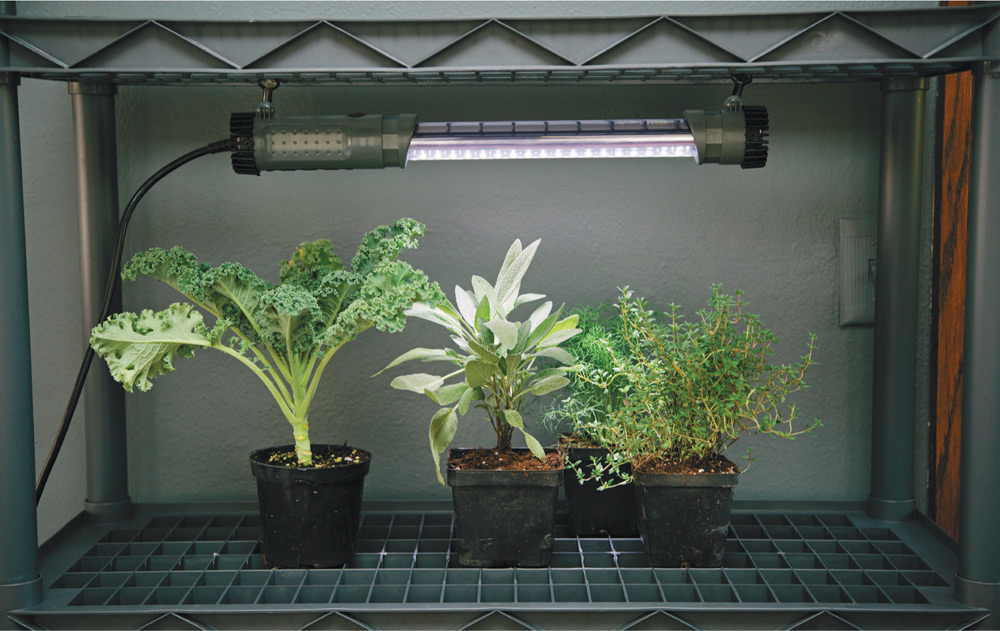
LED lights are extremely energy efficient and come in an ever-expanding range of sizes and configurations. While any light will do to some extent, you’ll get best results from an LED grow light that is designed to emit the complete spectrum of light wavelengths that plants require.
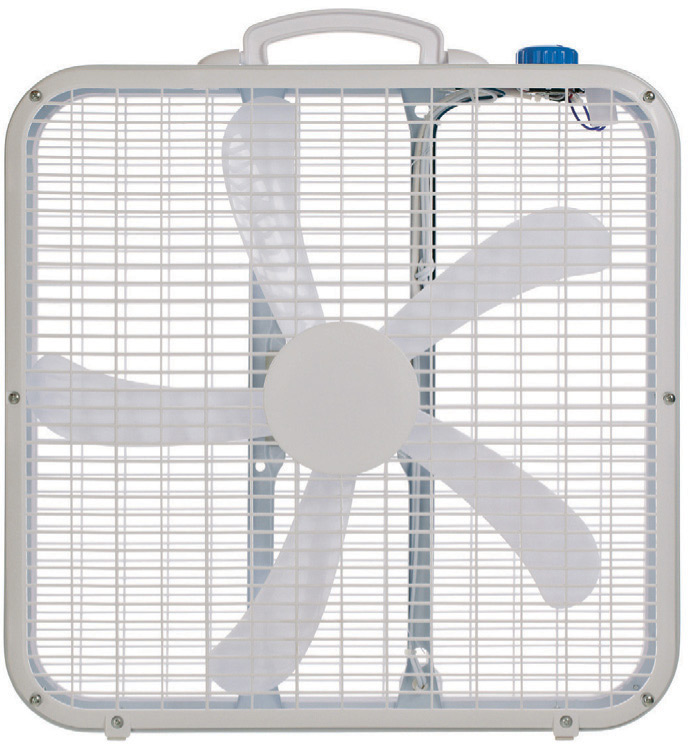
For vegetables grown in our basement I set up two box fans and arranged them so the airstreams would cross, set on low.
When crops are outside, they get a little blown around by the wind, and this is crucial for more than taking pretty farm pictures of swaying corn and sunflowers. That airflow assists with temperature control, humidity, disease resistance, and oxygen intake. Plants grow stronger from being “stressed” by the wind, and they end up more robust as a result.
Growing plants indoors, you need to find a way to replicate natural conditions—similar to setting up an artificial day for your vegetables and herbs, you also need to create an artificial wind. Fortunately, you can do it on the cheap.
If your plants are near a window and the temperature outside isn’t extremely hot or bitingly cold, simply opening the window for a few hours per day can yield enormous benefits.
When plants are in a more enclosed area without a window, it can be trickier to adjust airflow, but certainly not impossible. For vegetables grown in our basement, for example, I set up two box fans and arranged them so the airstreams would cross, set on low. This made the seedlings waver in the “wind,” but not get mowed down by the strength of the breeze. The circulation is crucial, because plants don’t do well if air is directed in a solid stream in one direction. That would be like taking a hairdryer, putting it on the coolest setting, and aiming it at your seedlings.
In another room, where there was a window on either side but I didn’t put the plants close enough to benefit from opening them, I put a fan in each window—one angled toward outside, and one angled into the room. This sets up a simple intake and exhaust system, where fresh air came in regularly and stale air vented out the other side. In order to break up the airflow and create cross-ventilation, I set up a small oscillating desk fan above the plants, at the same level as the intake fan.
If you already have plants in place and are starting to notice any fungal issues or disease problems (like mold), and you’ve worked to make sure you’re not overwatering, chances are good that airflow will be able to help. Buy a few cheap oscillating fans or box fans and set them up so that you can get some ventilation in your growing area during the day, about the same length of time as you have the lights on. If the air seems very stagnant, though—which can happen in an area like a basement—it’s fine to leave them on at all times.
A small desk fan, like this retro-style, oscillating model, is sufficient to provide a light breeze to help keep a small grouping of edibles healthy. Generally, the more your growing conditions mimic the outdoors, the better your plants will do.
In general, the idea is to mimic the low levels of wind that a plant would get while outside. This can help reduce incidence of disease, and make vegetables and herbs heartier.
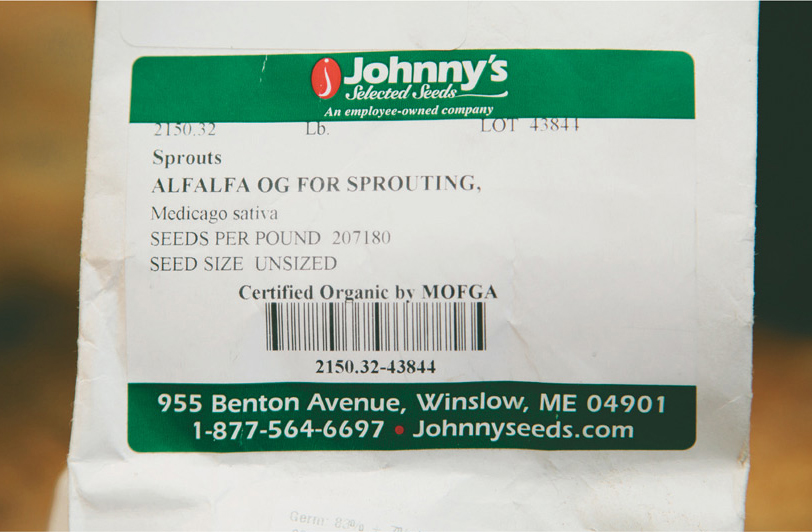
A sampling of seeds for indoor kitchen gardening includes seeds for growing microgreens as well as sprouting and growing shoots and vegetables.
Every winter, it seems that the seed catalogs arrive at roughly the same time, leading to a pile of reading material that always makes me geek out with happiness. I pore over each description, look longingly at the heirloom varieties, and make my (often overly ambitious) plans for the summer. During a part of the year when the only sound seems to be wind and snowplows, the seed catalogs provide a delicious glimpse of abundance.
They’re also hugely helpful for indoor growing as well, because beyond the luscious descriptions, these catalogs—both in print and online—provide a wealth of information that can be used to plan a better indoor garden strategy. A quick note on organics here: because we own a farm that’s been certified organic, we must buy organic seed, since that’s part of the certification process. Beyond that, I’m a fan of organic growing, so even if we didn’t have to use those type of seeds for Bossy Acres, I’d still buy them. I believe that organic practices lead to more sustainability, healthier soils, and a better agricultural system in general. Because of that, I think organic seeds are worth the extra cost that’s usually involved in purchasing the seeds. You might opt for inexpensive, non-organic seeds instead, and that’s cool, no judgment.
This is what you need to know when choosing seed varieties:
Light requirements: Similar to houseplants, it’s useful to know the level of light an edible might require. For example, beets do well with full sun every day, but chard can thrive with some occasional light shade.
Seeding depth: This is usually more important when you’re seeding outdoors, but is still worth knowing if you’re planting inside so that you don’t push the seed too far into the pot and lessen your chances of germination.
Plant spacing: Again, this information is better suited to row gardening or farming, but if you’re putting multiple edibles in one pot (such as lettuces or herbs), it’s good to know so that you don’t crowd out the plants before they’ve had a chance to establish.
Days to maturity: This is one of the most crucial pieces of info for me, because it can help me gauge when I can expect to harvest. Even with plants that regenerate, like herbs, I like to have a sense of the timeframe from seeding to harvest.
Soil and fertilization needs: Many seed companies will provide acidity level information, which is great if you love to dig into the science of growing, but it’s not mandatory to check those levels in order to have a good growing strategy. However, do pay attention to what type of soil works best—loose, well-drained soils are usually recommended for container gardening—and whether you need to use any type of fertilizer. Since nutrient requirements vary widely according to plants, we’ll delve into fertilizer needs later in the book when discussing specific crop varieties.
Plant management: Some seed companies do a fantastic job of providing tips on pests, diseases, harvesting, and even storage. Reading through these descriptions can feel like a college agriculture course sometimes, and I’ve walked away from a seed catalog reading session knowing about things like pirate bugs (not as adorable as they sound).
Container gardening suitable: Because of the rising interest in indoor growing and container gardening outside, seed companies have started putting some great information on their websites. High Mowing Organic Seeds, for instance, has a nice online section about the topic, including suggested varieties, tips on growing, and a “seed collection” of 10 packets that tend to do well in containers.
I’d just advise you to make sure your seeds are coming from an established source, where you can get the type of growing information that you need. There have been many times that helpful family members have given me seeds from who-knows-where and they hand them over in little plastic bags. “These are hot peppers,” one of them will say. “They’re really good. I think. They might be sweet peppers, though.” That’s the extent of the information I receive—they don’t know the variety, growing timeframe, potential root depth, or anything else that helps me make a decision in how I grow the plant. So, I usually just end up putting them in my backyard’s raised beds, in a grab-bag experimental area that doesn’t get much devotion or tending. Sometimes it works out, most times it doesn’t.
Another consideration in choosing seeds is whether to opt for heirloom varieties, even though some growers have found that heirlooms may be less consistent in terms of yield. Still, they’re fun for me, because it feels like I’m continuing a tradition and keeping plant variety going. Heirlooms are plants that aren’t grown in commercial-scale agriculture, and hail from previous generations. For example, there are only a few potato varieties grown on large-scale farms, which makes it enjoyable for me to choose lesser-grown varieties that might “die out” if it weren’t for dedicated growers who keep them going.
Just about any of the seeds you’ll use indoors are available as organic or conventional (non-organic). Both work, and while conventional are cheaper and easier to find, choosing organic seeds is a great way to support organic growing practices by voting with your wallet.
Keep in mind that not all heirloom seeds are organic, but if you want both heirloom and organic, there are many options. Take a look in the Resources section of the book for a short list of seed providers that I’ve found dependable. Basically, seeds are everywhere if you start looking for them; once, I saw a seed rack in the gas station of a small town.
No matter where you obtain your seeds, be sure to store them properly, in a plastic bin with a secure top. This will prevent numerous pest issues, and help to prolong the life of your seeds. For best results, use the seeds within a year or so, and sooner if possible. The older seeds get, the less likely they are to germinate. Sometimes, when I’ve had seeds around for a while, I create an “anything goes” microgreens mix, since I’ll harvest at the first stage of growth anyway. If I want actual vegetables, though, I go with fresh seeds whenever possible.
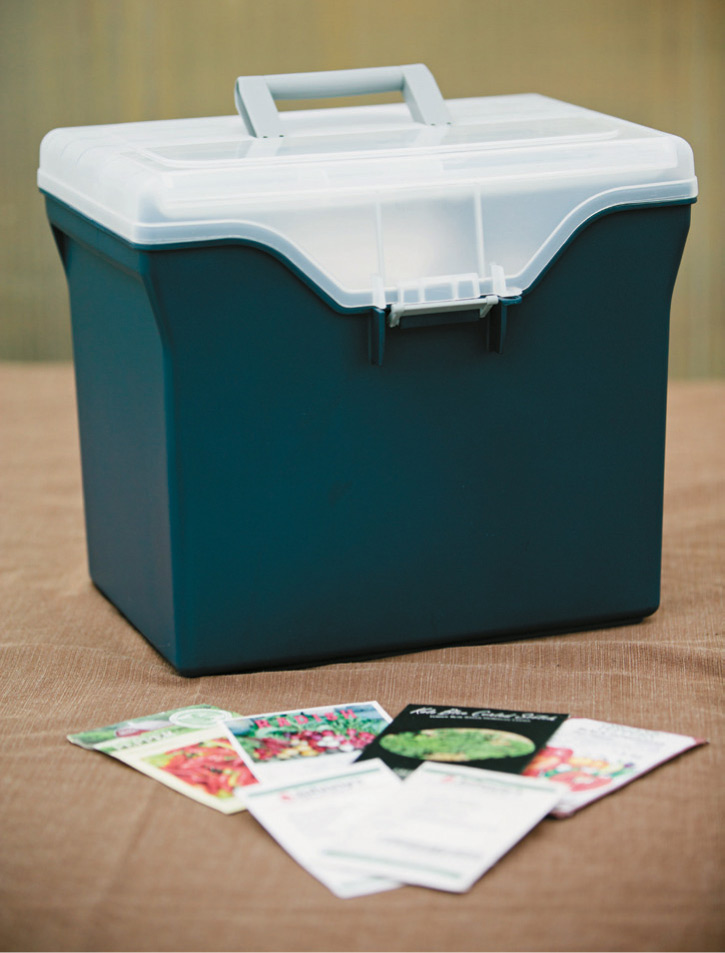
A small plastic file box makes a great storage container for seed packets. Keep the box in a cool, dry area away from direct sunlight.
Another handy tip: jot down notes right on the seed packet, including when the seeds were purchased. I use the packets for observations as well, noting what might be fast growing or whether a variety proved to be particularly good for one of my vegetable fermentation projects. It’s very easy for me to lose track of notebooks, even when I try to store them with my growing supplies. But because I keep my empty seed packets in the same bin as my other seeds, I know where they are, and that one small packet will be rife with information, from both the seed company and my own experience.
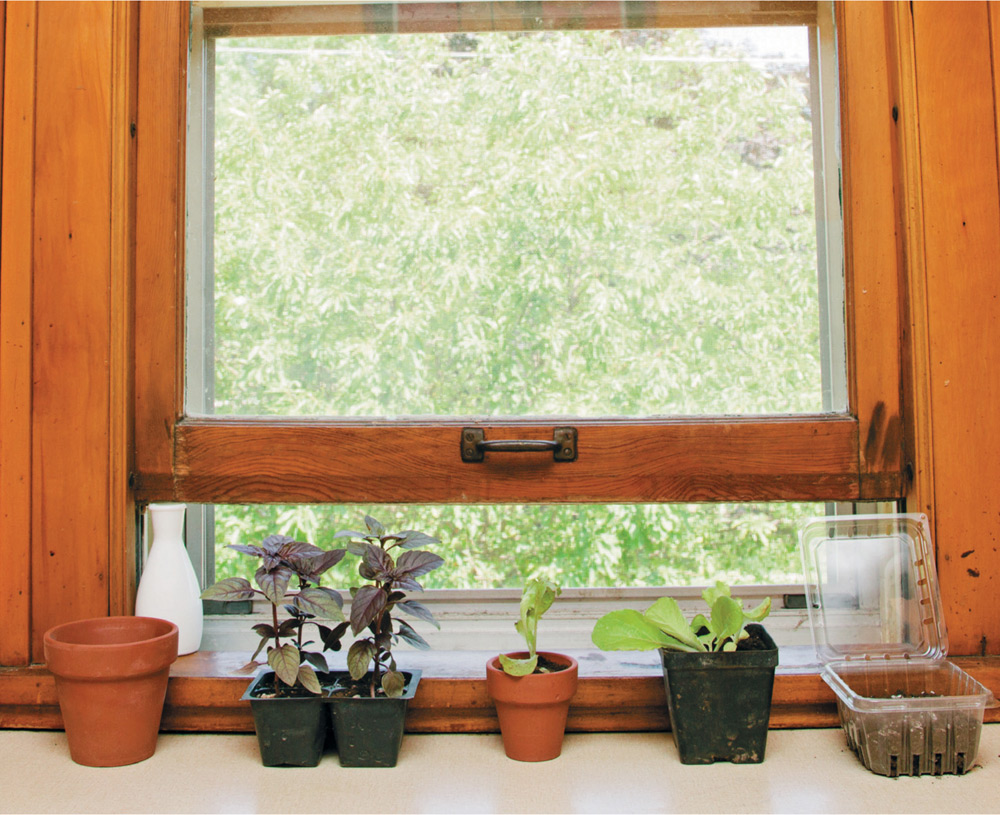
Although there’s a certain thrill with growing from seed—seeing the germination and that first little pop of a plant start never gets old for me—transplants might be more useful for some indoor growing. Particularly if you’ve had difficulty starting from seed before, or you just want a jumpstart on your growing plan, transplants from a reliable source are a nice way to build your garden quickly.
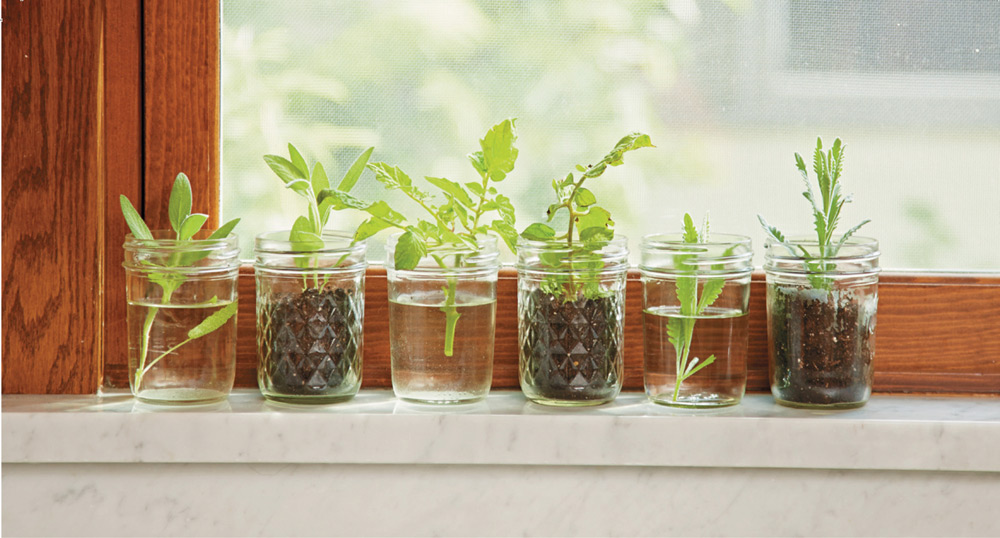
In some cases, especially for herbs, it makes sense to transfer the plants from an outdoor garden into your indoor growing mix. If you have some robust rosemary outside, for example, there’s no need to start rosemary inside from seed since you can just take a cutting off that plant or dig it up completely and plunk it into an indoor pot.
When bringing a plant from outside to inside, make sure to knock as much garden soil off the roots as possible, without damaging the plant. Even if the plant has thrived in this soil for months, there’s risk of transferring insects or disease that can affect other parts of your indoor garden. Also, outdoor soil doesn’t drain well when used in pots or planters, so use a potting mix instead.
Another consideration is the transition temperature. Whenever you move a plant from an indoor environment to an outdoor space, you need to make that shift gradual so that the plant has time to adjust, and the same consideration is helpful for bringing the plant in the other direction. Re-pot outside, if possible, or in a cooler space like a garage. Water well, and then plan on leaving the plant in a transitional area for a few days—garage, porch, enclosed deck, anyplace where the temperature is slightly warmer than outside. If available, make one more transfer before bringing the plant inside.
For example, if I were to re-pot an herb from outside, I’d put it in the garage first with the windows open for better airflow, then after a few days I’d transfer the plant to my enclosed porch, near one of the open windows in there. Finally, I’d bring the plant inside after a week to 10 days, making sure to water thoroughly in order to aid the transition. Like many people, plants don’t respond well to sudden changes, so taking a gentle approach is always helpful.
If using transplants from a garden store or farmers’ market, then it’s fine to bring them directly inside. The plants have already had a chance to be in an environment that’s cozier than outside in the ground, and they’re prepared for indoor growing.
Whether your transplants come from a store or your own outdoor space, also be sure to pot them up in a container that’s free of disease. Using a new pot or tray works for this, but you can utilize what you have on hand as long as you make sure that the container’s previous tenant didn’t have any issues. If you’re throwing out a plant because it never thrives, for example, or seems to always have disease problems, it’s best to recycle that container as well—even if the plant is gone, the disease can linger, so it’s better (and more economical) to be safe.
Transplanting a new seedling from a nursery can be done simply by setting it into your container and filling around the roots with growing medium. If you are transplanting a small plant or seedling that you’ve grown outdoors, remove as much soil as you can from the root system to minimize the chance of introducing disease.
Even when you’re working to keep costs in line, it seems there’s always just one more thing to buy at the garden center. Maybe you want to try some coconut coir to mix into your soil to improve drainage, or you’re loving those glass watering bulbs that can be stuck into a pot and left for days. When I’m trying to stick to a budget, I try to avoid going to the garden center for anything because I feel like one of the kids who saw Willy Wonka’s candy garden for the first time.
In order to properly outfit your little growing space, though, you do need a few supplies, and these come in handy:
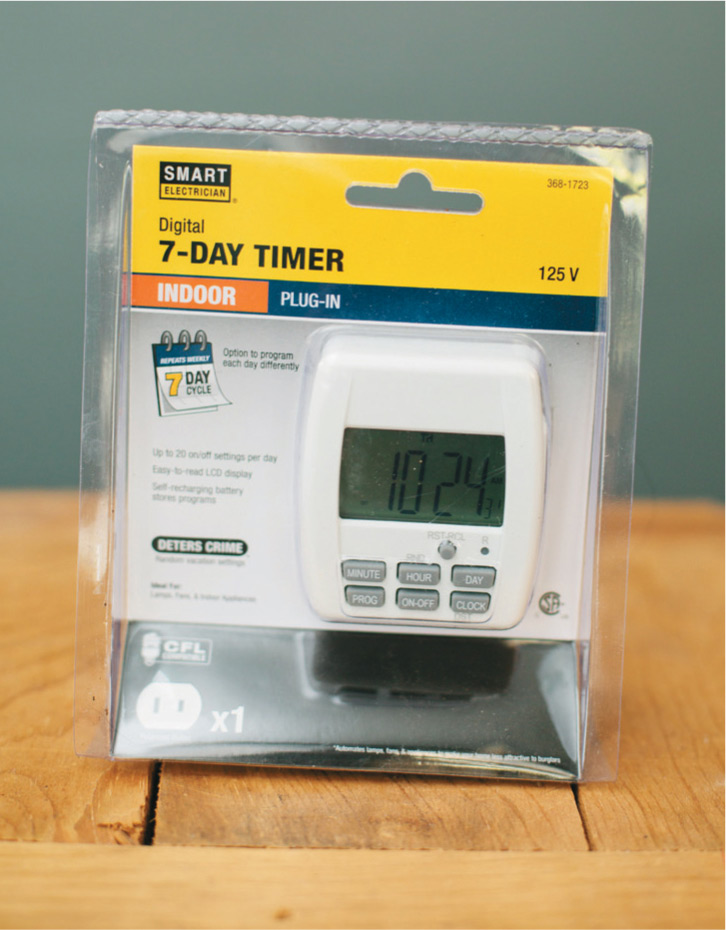
Timers are plugged in to your receptacles and programmed to turn lights on and off (you plug the light into an outlet on the timer body).
Automatic light timers. If you don’t want to worry about turning lights on and off during a specific timeframe, these timers are very useful, and they’re often fairly inexpensive. I use them when I’m going away for a weekend, or if I’ll be busy for a stretch of time and want to reduce my indoor garden maintenance.
Heat mats. Also called germination mats, these are designed to be placed underneath plants so that roots stay warm in cooler areas like basements or drafty corners. They’re usually rectangular, and don’t have temperature settings; you just roll them out, plug them in, put your pots or trays on top and you’re good to go. The low temperature won’t burn your plants (unlike, say, a heating pad would) and they do help during the winter months, I’ve found. Also, if your plants seem slow to germinate, using one of these can provide a boost. One caveat: they’re usually not cheap, so if you see one on sale, snap it up.
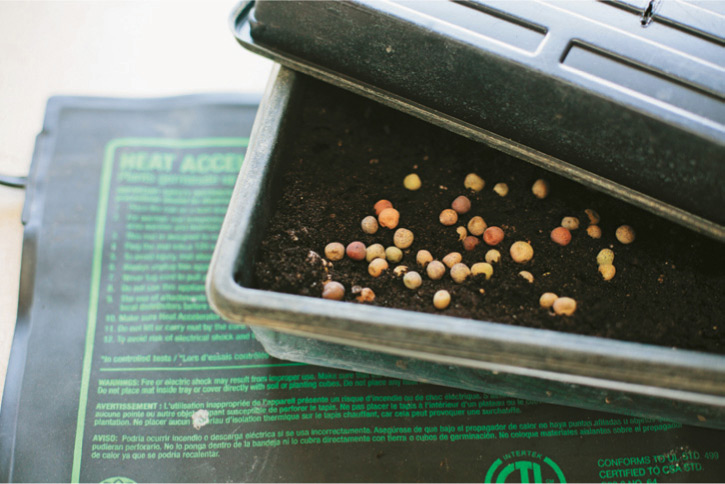
Heat mats are placed beneath planting trays to warm the plant roots and to speed up germination in cooler weather.
Plastic mister bottle. These are extremely useful, and only cost a few dollars. They can be utilized for an array of growing-related tasks, like spritzing fish emulsion on tomatoes, or spraying a soapy solution on aphid-ravaged plants. During certain times of year, my growing space feels a little drier than other times, so I often mist water over all the plants at least once per day.
Small plastic bins/totes. Usually, I can get these for just a few bucks from places like Target, Family Dollar, or IKEA. Whenever there’s a sale, I must look like a professional organizer, because I load up on them, especially ones that are about the size of a shoebox. Put everything in these that you need: scissors, twine, Sharpies, pens, light timers, rubber bands, etc. Also, these bins will be handy for organizing seeds; I tend to use several containers so I can sort seeds according to usage (pea shoot seeds in one bin, microgreens seed in another, and so on). I really wish that the rest of my house was as organized as my indoor gardening space.
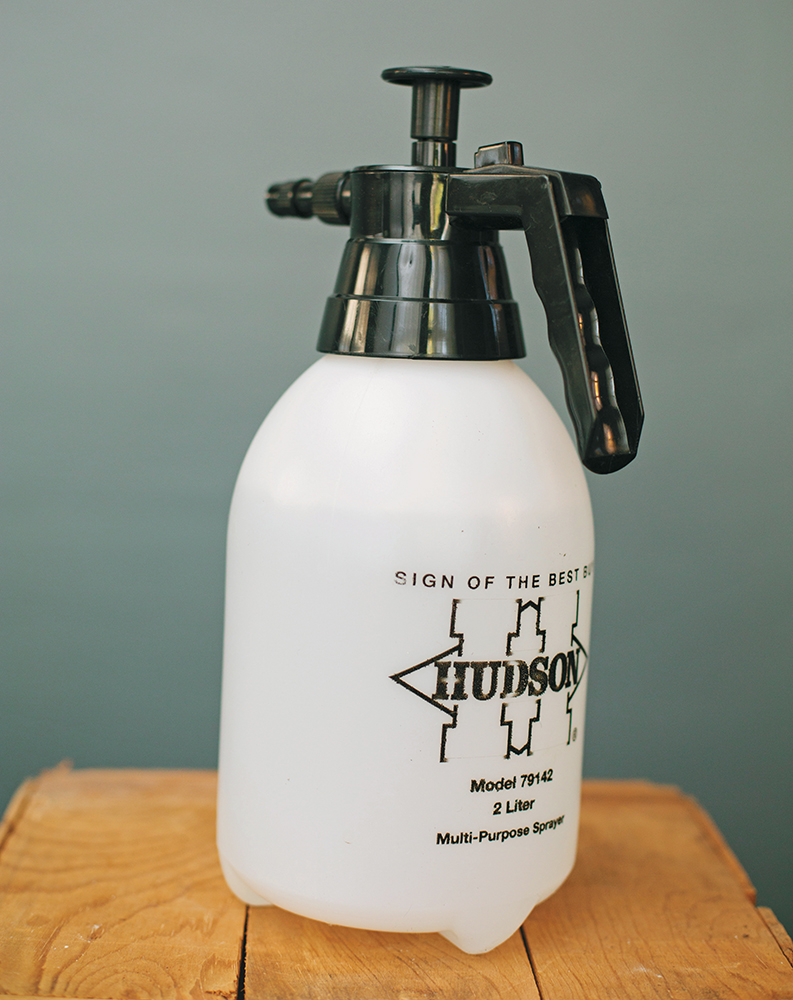
Mister bottles come in many forms, from very cheap to professional grade. It’s worth investing in a better quality model.
COMMON PROBLEMSIn the rest of this book, I’ll dive into details on how to grow specific types of indoor vegetables, herbs, and fruits, but there are common issues that affect most indoor edibles, and it’s helpful to know these general concerns before planting that first seed.

Living indoors does limit the type and number of afflictions that can affect plants, but they are by no means immune from problems such as mold and disease. In most cases, the remedy is more or less water and/or light.
Vegetables, herbs, fruits, and even houseplants are all more susceptible to mold issues than outdoor plants for a number of reasons. They tend to get more water, which can introduce mold spores, and they’re sometimes growing in wooden containers, which introduce that water into small cracks in the wood. Humidity, airflow, and poor soil also contribute to mold.
It’s quite easy to tell that you have a mold problem, because if you’ve ever seen a loaf of bread go bad then you know what can happen—a gray or yellowish fuzz begins forming in just one spot and soon it’s expanding everywhere. Getting mold on the plant itself is less common, fortunately, but it does happen if mold on the soil isn’t treated in a timely way. Most often, you’ll see that telltale fuzz at the base of the plant, or along the container edge.
Prevent mold by watering when the plant needs it, not as a daily (or twice daily) habit. There are many conditions, such as cooler temperatures, when plants don’t need as much moisture, so putting plants on an automatic watering schedule can result in dampness, leading to mold. Another problem is inadequate drainage. When this is lacking, plants are sitting in soggy soil, which can lead not just to mold but also insect issues and disease.
Putting the plant in more direct sunlight can be helpful, as well as increasing the airflow or putting the plant near an open window so it can get more fresh air.
There are also chemical fungicides, but I like to consider those as a very last resort since I’m spraying them into my indoor air, even if it’s a couple spritzes. Instead, I’ve had some success with crushing up a clove of garlic and letting it sit in a cup of water for about 15 minutes; then, I put the concoction in a mister, shake thoroughly, and spray on the plants. That method, combined with moving the plant to a sunny spot, often does the trick.
Also, some essential oils can be used as natural mold fighters, including rosemary, cinnamon, and tea tree. Just put a few drops into a cup of water, add to mister, and spray the affected areas—for stubborn mold, you can spray once a week.
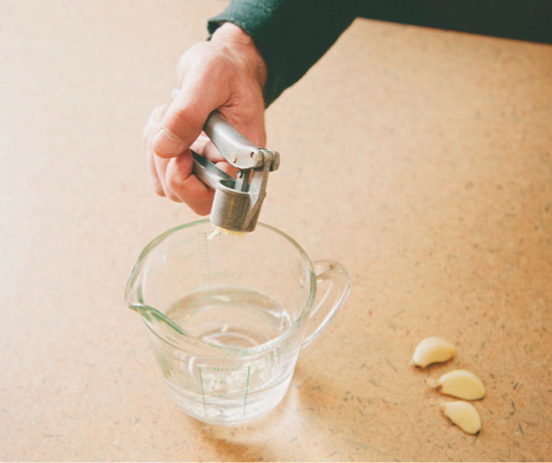
One homeopathic remedy for abating mold on your indoor plants is to crush a clove of garlic into a cup of water. Let the garlic steep for 15 minutes or so, then transfer the garlic-infused water to a mister and spray the affected plant lightly.
No matter what the method used, just be sure to isolate the plant so that the mold doesn’t spread to other vegetables, herbs, and fruits.
If mold keeps cropping up—and for some people, it’s a scourge that seems to plague their indoor growing efforts on a continual basis—consider switching out your setup completely, especially your soil and containers. It can be pricey to do a total rehaul of your efforts, but a fresh start can help to tackle ongoing mold issues.
As a farmer, and especially as an organic farmer, I’m used to seeing an array of bugs, from flea beetles that feast on my cabbages to Colorado potato beetles that can strip a plant down to sticks in less than a day. Even with the knowledge that we’ll be losing part of our crops to insect damage, however, I still feel an elevated sense of injustice about them, as if they’re the mean girls in my otherwise peaceful high school lunchroom.
That same smoldering frustration comes up in my indoor growing efforts, but at least my at-home gardening is on a much smaller scale, and so I can actually do something about the situation. The usual suspects for indoor pests include aphids, whiteflies, mites, and mealybugs, all terrifically annoying.
No matter what options you choose, it’s smart to gravitate toward non-toxic options. Although I’m obviously a fan of organic methods, this goes beyond my beliefs—conventional pesticide sprays that are designed to be used outside (and usually with respiratory protection) can wreak havoc when used inside where air ventilation is severely reduced.
Here are a few pest control measures to try on any kind of vegetable, herb, or fruit plant:
Increase the air circulation by placing a fan nearby or opening multiple windows that allow strong cross breezes.
Move adjacent plants, especially houseplants, away from your vegetables and herbs—the pests may be targeting one type of plant but end up affecting your whole indoor garden.
Dip a cotton swab in rubbing alcohol and gently brush the plant’s leaves, if the insects are mainly on the top of the plant and aren’t too numerous.
Create a mix of mild liquid soap (like Dr. Bronner’s) and water and spray the plants.
If the outdoor weather is amiable, put the plants outside; if you’re dealing with aphids, you may have a hungry ladybug population outside just waiting for this kind of takeout.
It’s possible to buy beneficial insects like ladybugs or lacewings and release them inside your house without causing a rippling effect (in other words, you’re not getting a mongoose to handle the snake that you bought to kill the mice), but keep in mind that this method tends to work best with large-scale pest populations. If you have a sizeable greenhouse area, for example, then it might make sense, but if you’ve only got a few aphid-infected indoor tomato plants next to your kitchen window, buying a standard order of ladybugs (at least 4,000) seems like overkill, to put it mildly.
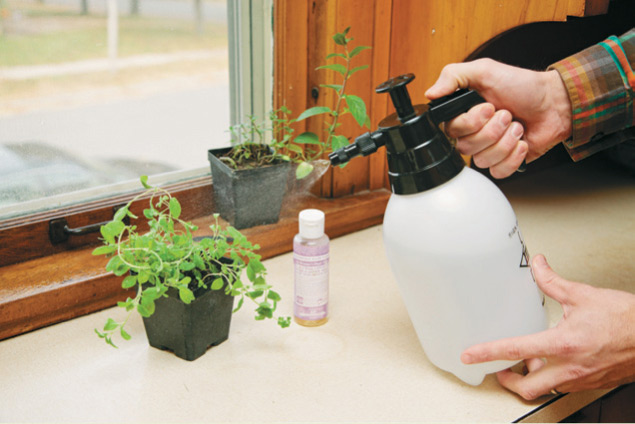
To discourage insects from munching on plant leaves, mix a small amount of mild liquid soap with warm water and lightly spray the plant with a mister. This won’t harm the plant but makes the leaves quite distasteful (be sure to wash them before eating them yourselves).
Never use pesticides intended for outdoor usage indoors.
Also, much like choosing a non-toxic container for planting, keep in mind that whatever comes in contact with the plant may eventually affect the person or animal who eats it. Personally, I don’t like the idea of nibbling on chemical-laden pesticides, even in trace amounts. So, I choose not to go that route. But if you’re finding that nothing works whatsoever and you want to try to save the plant from infestation, then at least bring the plant outside if you spray it with conventional pesticide formulas, so that the toxins don’t get trapped inside the house.
On a preventative note, carefully inspect any transplants that you’re planning to bring inside for indoor growing. If leaves are shiny, or tiny eggs appear in clusters anywhere on the plant, clean it off carefully and leave it outside for a few days if possible to make sure the pests don’t hatch into a full infestation.
In terms of other pests, mice can be an issue, too. They tend to appear in older houses, I’ve found, as well as greenhouse spaces that are attached to kitchens, because those rooms may have air ducts close to the ground. Nearly every greenhouse I’ve ever visited has mousetraps tucked into the corners, and birds swooping in and out through open windows to steal seeds.
Controlling these pests is very difficult, but not impossible. Some anecdotal evidence suggests that sprinkling peppermint oil around pots and trays is effective, as well as a box-type device called “the tin cat,” in which mice can enter but not exit. The ultrasonic devices, however, have been universally panned by nearly everyone I’ve asked (and believe me, I’ve had way too many mice discussions in the past few years), and most people just suggest I get a real cat.
As disheartening as mold or mice are shriveled or mottled leaves, blackened vegetables, or other indications of disease can also be dismaying. Unfortunately, disease can occur even in the best setup, and greenhouse managers are often on a constant state of high alert to try to prevent issues. At our farm, we make sure to wear greenhouse-only boots, and to rinse off any tools or carts that have been in the fields, to prevent diseases from hopping inside from outside.
In a house or apartment, measures like that aren’t feasible. You may be transferring disease because you didn’t shake off enough of the outdoor soil when repotting herbs from the garden, or your plants might be more susceptible to issues because your care isn’t quite what’s needed.
Powdery mildew is one of the more common fungal infections plants experience in agriculture, but it can hit your indoor garden too. Overly humid conditions are a prime contributor to its growth. One organic treatment that growers suggest is spraying the plant leaves with a solution of 1 part milk to 10 parts water at the first signs of mildew.
When it comes to indoor growing, there are several types of diseases that can come into play, and here are general disease categories worth noting:
Fungal: Simply put, these involve a type of fungus that’s trying to take over your plant’s leaves and stems. Most often, this results in black spots, grayish mold or fuzz, rot at the base of the stems, or whitish powder coating leaves and stems. Sometimes, the plant seems fine and then suddenly wilts and dies within a short timeframe, which is an indication of root rot. Another fungal problem is “rust,” which manifests as small, rust-colored bumps on the underside of leaves that eventually turn yellow.
Bacterial: When a detrimental bacteria affects your plant, the decline can happen fairly rapidly as the plant tries responding to the invader. The most common symptom of a bacterial problem is leaf spot, which can create round areas of dead cells on foliage, indicating infection. You might also see odd-looking bumps on stems, or abnormal growth on leaves and roots.
Viral: If a plant is suffering from a viral issue, it’s most likely that you have an insect problem, since that’s the most common way that plants get infected. Bugs feast on a diseased plant and then jump over to a healthy one and spread the disease when they begin their new meal. But viruses can also be spread by people, or even come from infected seeds. Plants with viral problems often appear stunted in some way, or misshapen. Leaves might roll up, or appear yellowish or white.
Abiotic: This is the term used when environmental factors cause problems rather than organisms like bacteria, fungus, or insects. Abiotic issues range from salt burn—caused by too much fertilizer in the soil—to sunburn from excessive light. I’ve sometimes seen frost damage occurring when a plant is put too close to a window during cold weather; the leaves might touch the chilled glass and then turn black as a result.
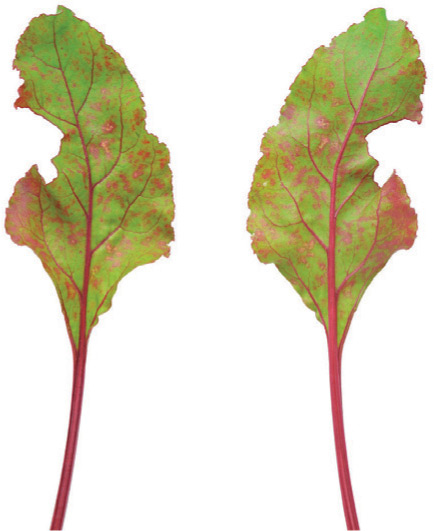
Fungal infections that select plants quite specifically are fairly rare in indoor gardens. The Cercospora beticola infection visible on these beet leaves is commonly known as “sugarbeet leaf spot” and can be combated only with harsh chemical pesticides that should not be used indoors. In most cases, the best action if you discover disease in your indoor garden is to discard the entire plant (and the soil it is in) before other plants are affected.
Reading about plant diseases can begin to feel disheartening, like browsing WebMD when you have a cold and walking away convinced you have scurvy. But don’t worry—there are ways to prevent issues, and deal with them if they come up:
Don’t overwater: In the same way that mold can form from overwatering, diseases can find a hospitable environment in an overwatered plant.
Don’t overfertilize: Although you may think that more nutrients are better than fewer, there’s danger in putting too much fertilizer into your plants. Specifically, the excess nitrogen can weaken a plant and affect its ability to resist diseases.
Ventilate: I know it seems like I keep harping on airflow, but at the risk of constantly repeating myself, think about airflow. Ventilation is your friend.
Space properly: When you crowd plants too close together (except for microgreens and shoots), problems can occur, so be sure to adhere to the spacing requirements for each plant based on seed company information or advice on specific crops found later in the book.
Isolate: When dealing with a disease in a plant, move it away from your others, even if they’re different types of plants. This helps to keep the disease contained to one area, and makes it easier to treat just one plant instead of several.
Throw out: Sometimes, you put a great deal of effort into a project and it’s just not working. If disease is the culprit, it’s better to discard the plant and start fresh, because you don’t want your other plants to be affected. It’s also advisable to use the pot or tray for other purposes (pencil holder, perhaps, or an in-box for mail) because even if you thoroughly wash it, there’s always a slight possibility that you didn’t get all of it. I find it’s better to be paranoid than to go through multiple rounds of fighting the same problem.
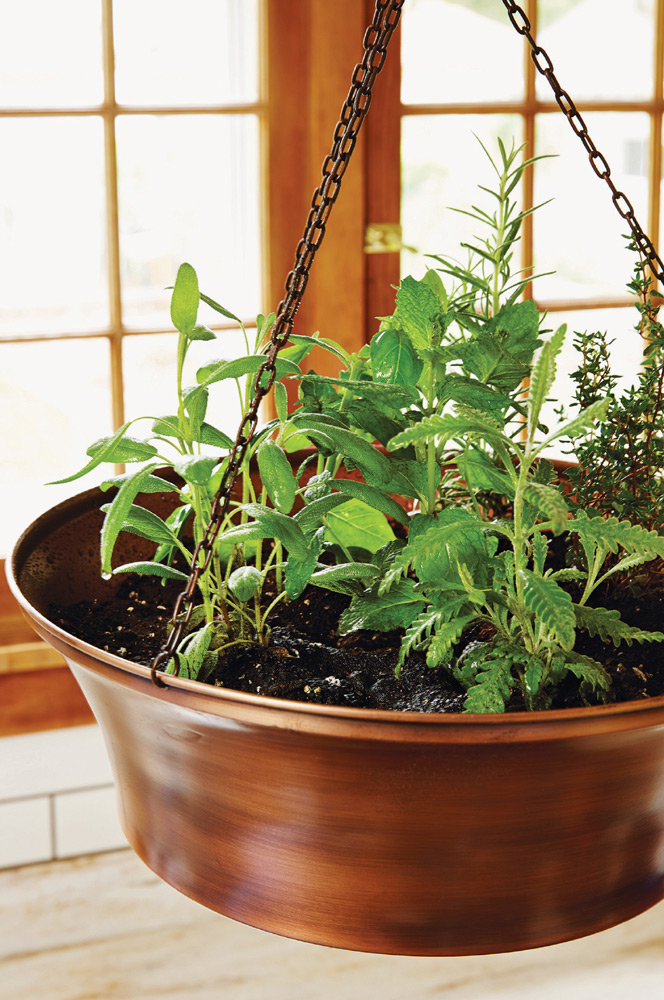
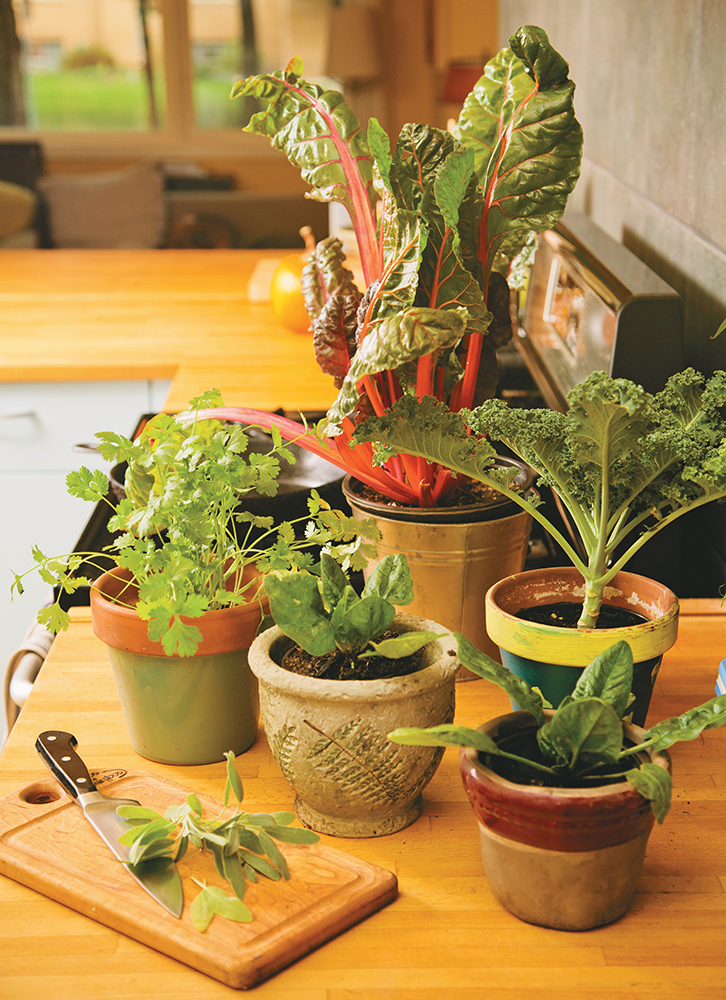
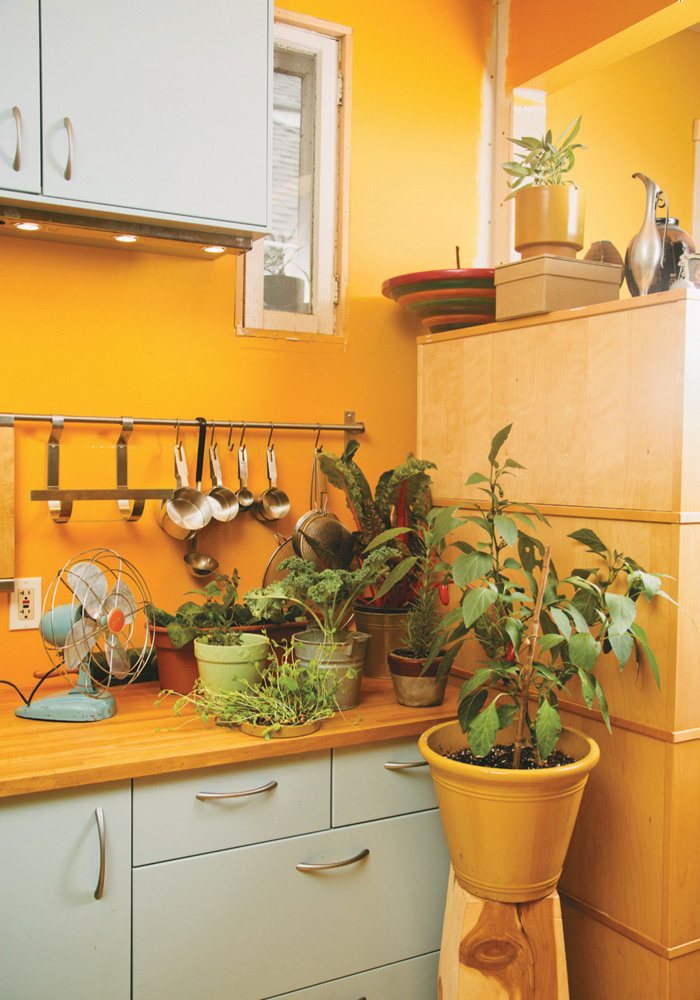
A copper pot, a sunny window, fresh herbs ready for picking … indoor kitchen gardens will boost anyone’s attitude.
ATTITUDEThis may sound cheesy, or like the start of motivational speech, but a good attitude really does go a long way in your indoor growing efforts. When chatting with other avid gardeners, I’m often struck by the differences I see in how they approach their growing efforts. Some are so enthusiastic and joyful about their projects that they apologize for oversharing. They love to talk about what they’re growing, they play and experiment and laugh off their failures because they embrace their successes so completely.
Others, however, are almost the polar opposite. They fret over their plants, get stressed about proper watering, and sometimes automatically assume that most of their efforts will falter. They’re quick to throw out a struggling plant and then sigh miserably when talking about trying to find suitable replacements.
When I first started indoor edible gardening, I’d say my approach was definitely more Eeyore than Pooh, but over time, I gradually took on a more light-hearted attitude. After all, this is supposed to be fun, right? Sure, it can feel serious as you deal with aphids, yellowing leaves, lack of germination, and occasional mold incidents, but even with those challenges, it’s still possible to see this whole venture as an experiment.
I once tried to grow mushrooms from inoculated logs in my basement, just to reset my attitude. Even though I managed to set up what I believed to be the perfect conditions, the project didn’t work and I was stuck with some expensive firewood. Still, I took some good notes, realized my missteps, and I’m sure at some point, I’ll give it another shot, or at least I’ll get one of my much-more-experienced mycologist friends to grow some mushrooms for me. I won’t stop doing crazy little projects, though, because yes, this really is supposed to be fun.