Many plants with a shallow root system can grow well indoors, such as beets, radishes, some varieties of carrots, lettuces, and with the right conditions, even hot peppers and tomatoes.
With these types of crops, it’s even more important to establish good growing practices as outlined in Part One of this book—proper airflow, a robust indoor soil mix, good lighting, pest prevention, and appropriate containers.
With a designated growing area set up correctly, the fun can begin. Although growing mini-crops like pea shoots is a jaunty endeavor, I find deep satisfaction in nurturing indoor vegetables that take time to develop, rewarding me with a plate filled with lush salad greens, sweet carrots, peppery radishes, and other bounty from my kitchen garden.
Especially in the spring, when I’m craving fresh greens but only find West Coast (or internationally shipped) options in my grocery store, I feel inspired to go on a planting frenzy, filling up every available space with shelves, lights, and just-seeded pots.
Not every vegetable is perfect for my kitchen counter, though. I’ve tried many varieties that might start out fine but lack the soil depth needed, or that thrive better outdoors in the field.
Here, we’ll cover the different varieties of crops that make the most sense for indoor growing, and take a look at special considerations in terms of soil, pest prevention, containers, and lighting. Much like the preparation for faster-growing plants like microgreens and pea shoots, successful growing and harvesting of indoor crops is all about good upfront work, paying attention, and maintaining that all-important sense of adventure.
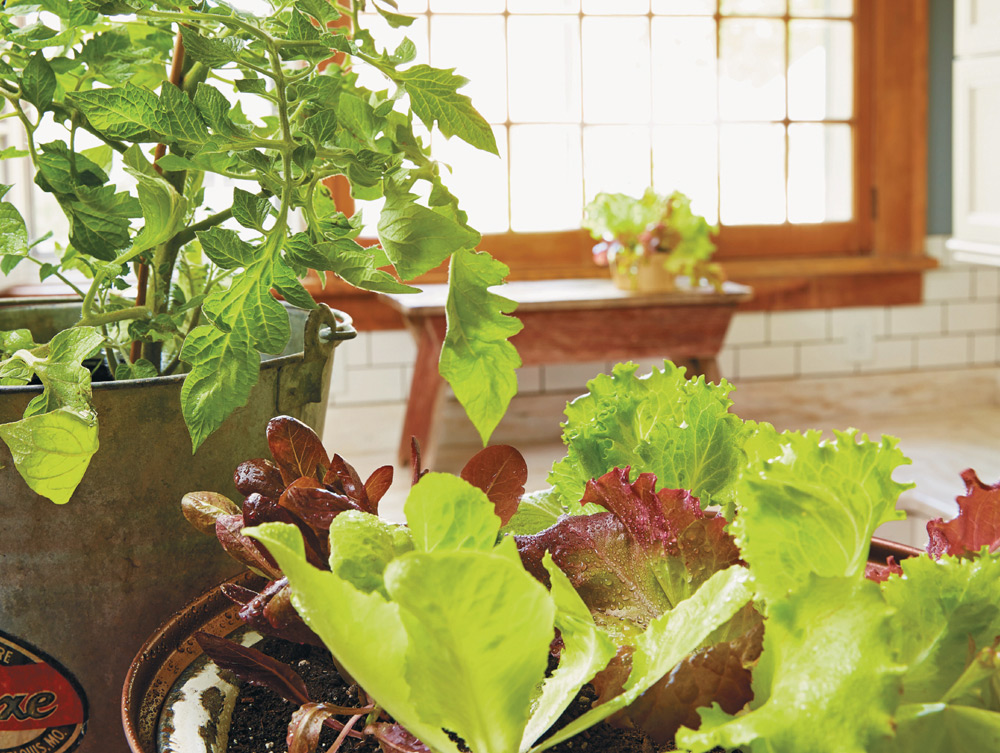
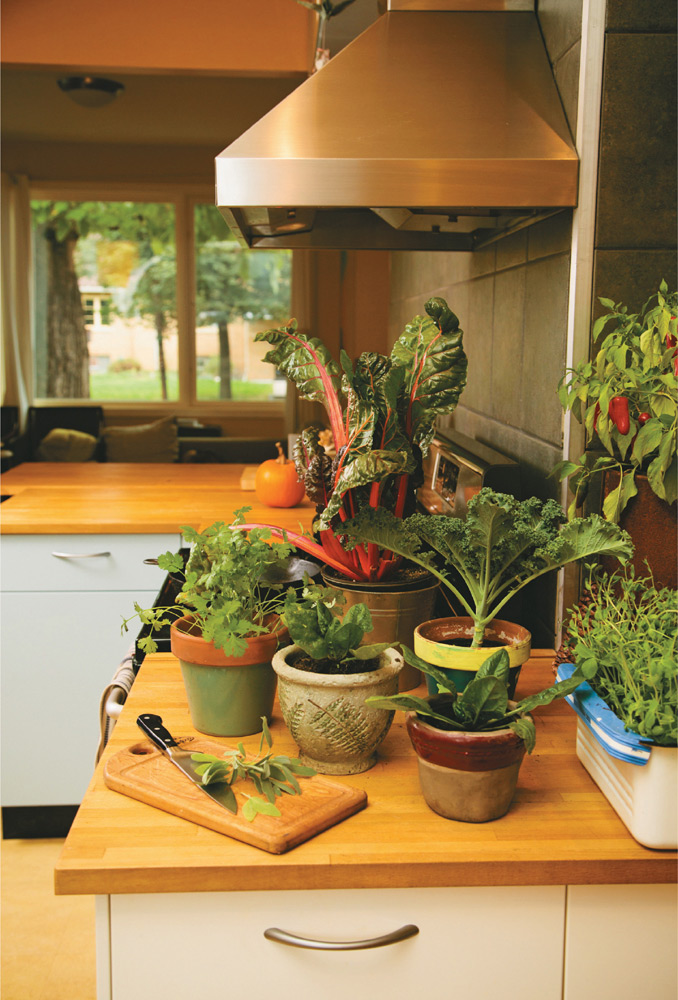
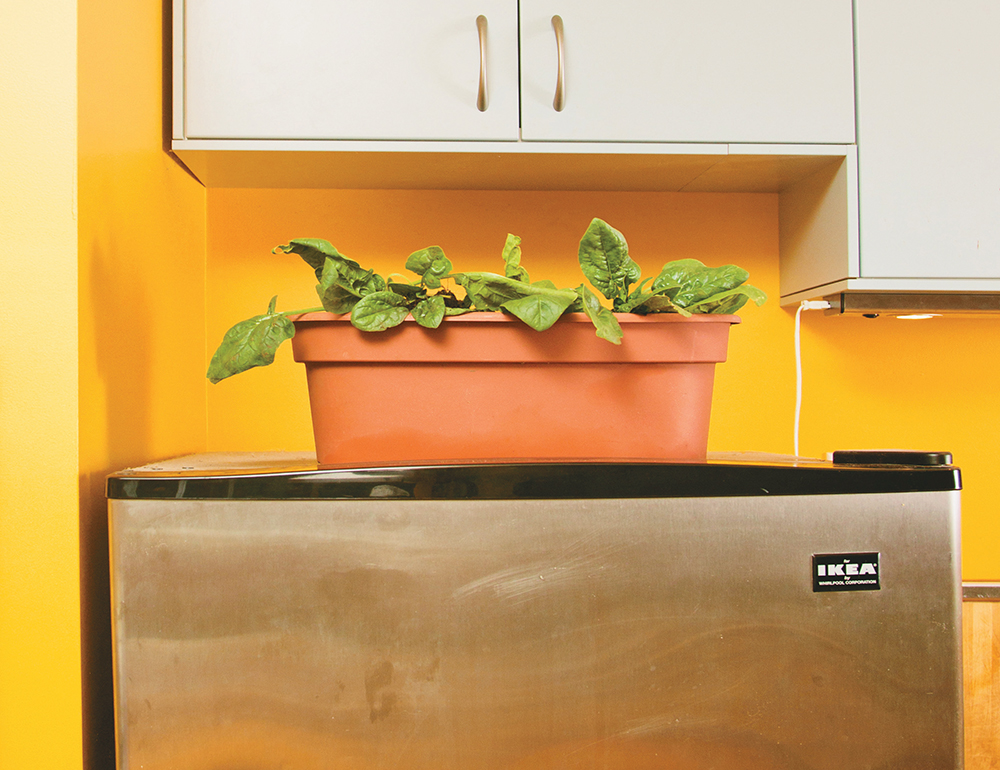
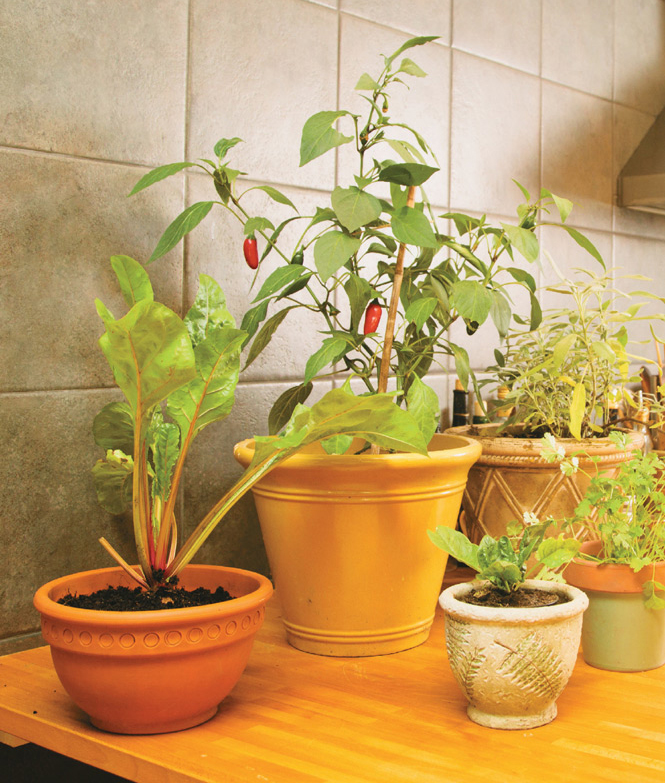
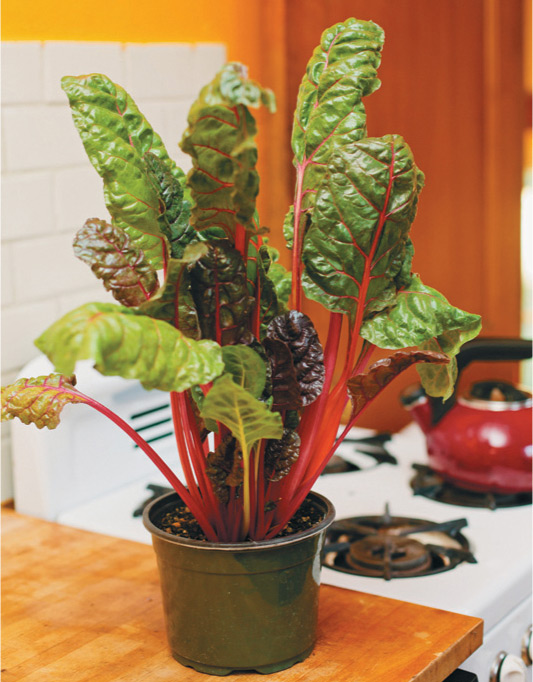
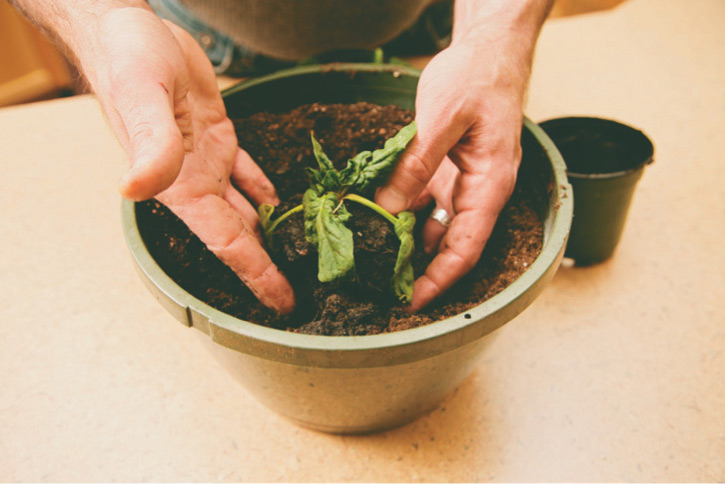
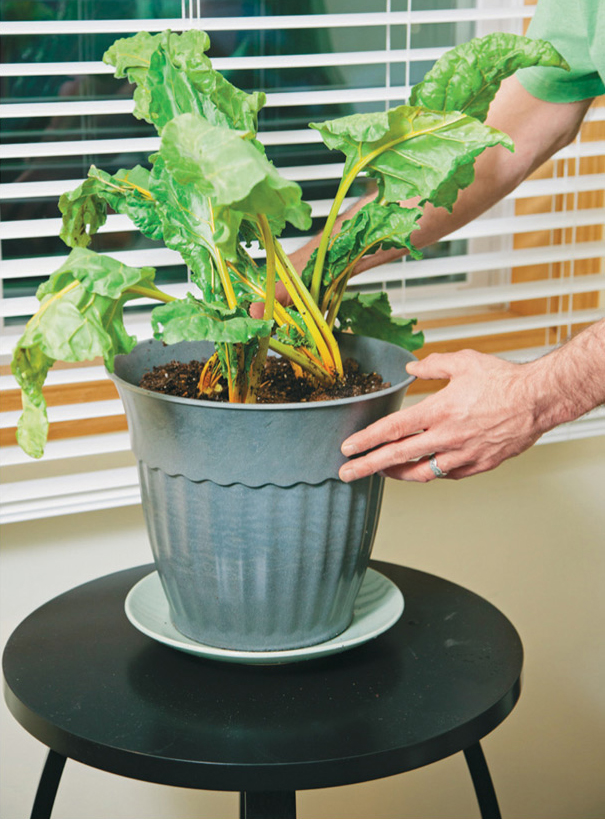
Potted vegetables with relatively shallow roots can succeed in an in-home growing setting. Here, a pot of cilantro and a tray of pea shoots are nestled in among larger veggies, including Swiss chard, kale, and spinach.
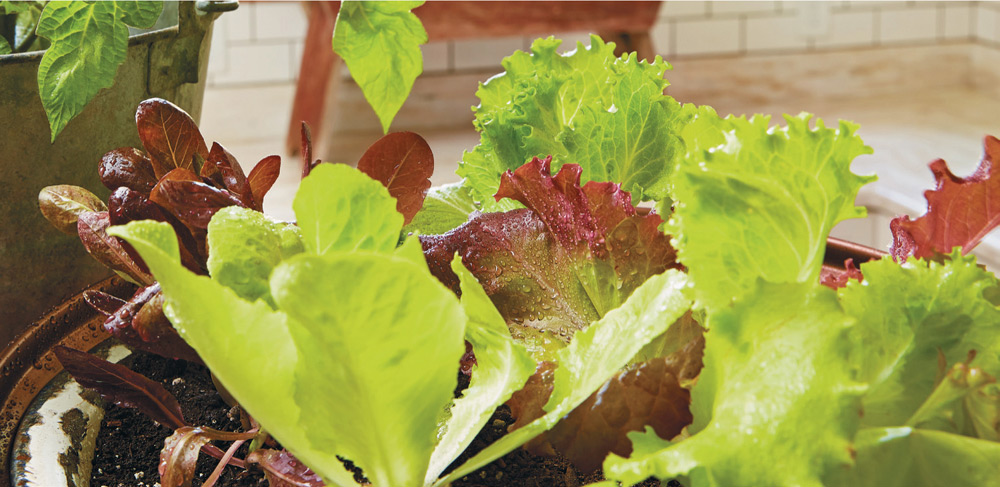
 LETTUCES
Even before I started farming, I was a salad kind of girl. That label evolved over time, though: growing up, “salad” was a wedge of iceberg lettuce with ranch dressing and little else (we’ll sidestep the fact that in Minnesota, “salad” can also be Jell-O and Cool Whip), but eventually I made my way to a huge variety of greens, including red oakleaf, butterhead, bibb, and romaine.
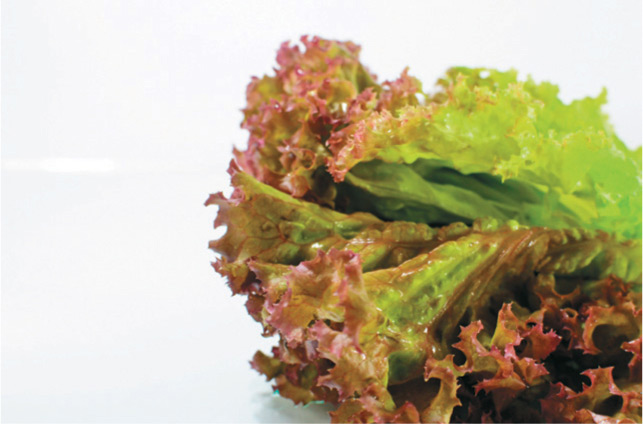
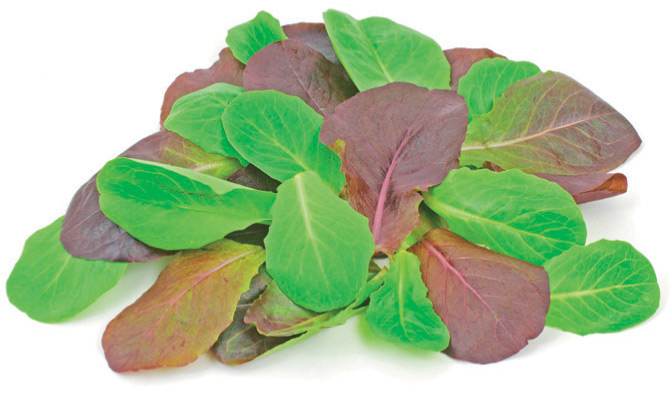
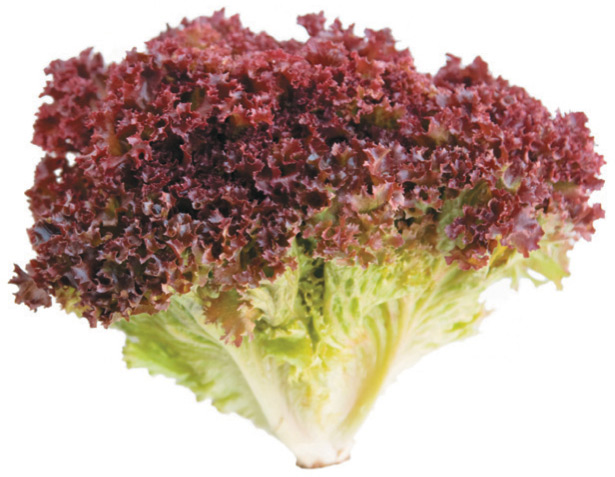
I love the blend of textures and colors you can put together with salad mixes, especially with choices like the ‘Freckles’ variety that grows with deep splashes of crimson or ‘Rhazes,’ which forms tight heads of red leaves that hide a solid lime green center.
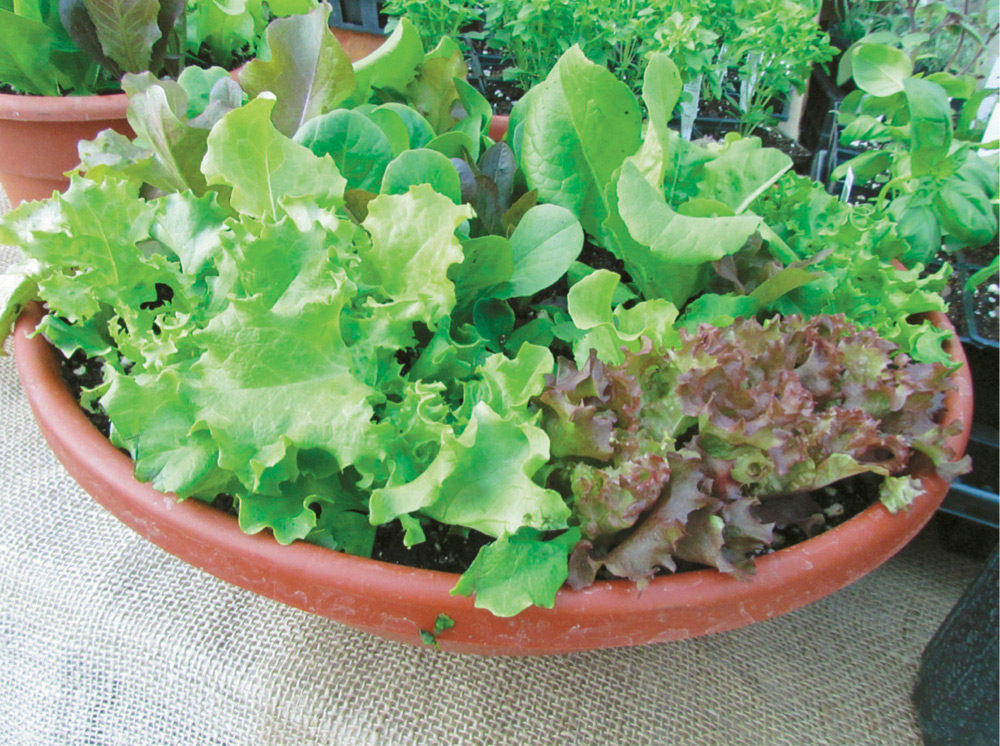
A lettuce bowl isn’t just a way of serving greens at the table: it is also a way of growing replenishable lettuces indoors.
There are so many options when it comes to lettuce variety that it only seems right to kick off the crops chapter with this versatile and much-loved vegetable.
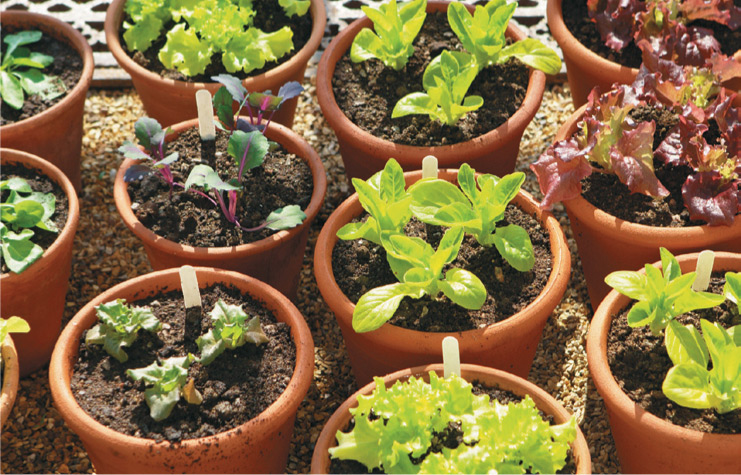
A variety of small, potted lettuces.
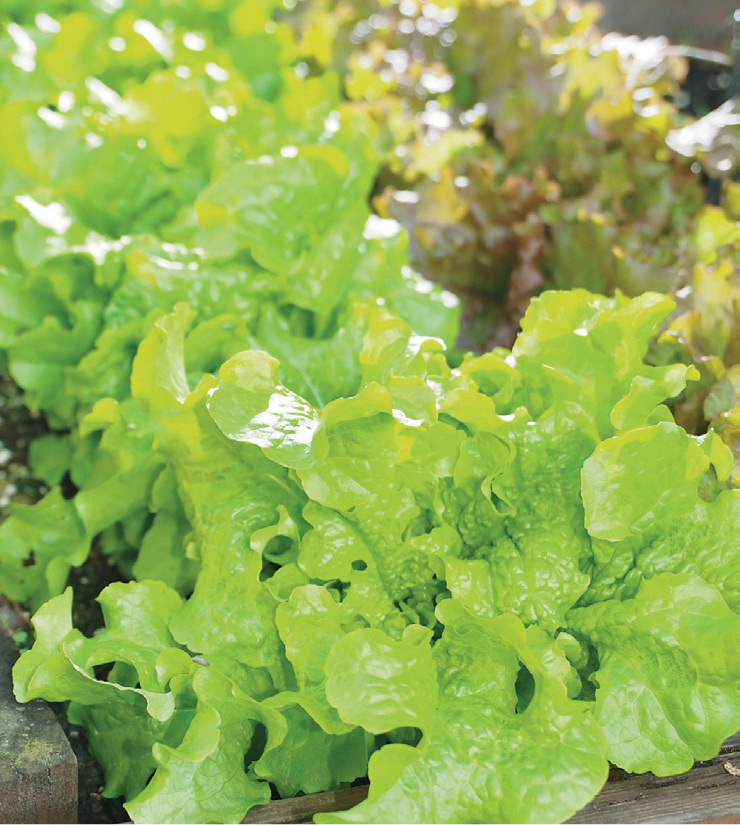
Rows of red and green leaf lettuce.
A variety of potted organic salad greens.
Green leaf lettuce.

‘Lollo Bionda’ lettuce.
At the risk of oversimplifying the range of lettuce choices, I’ll make a general claim: lettuce tends to come in one of two versions—either you have head lettuce that’s true to that definition, or you have salad mixes that combine a number of varieties and grow in a cluster rather than a tightly contained head.
That doesn’t mean that they’re two distinct types—head lettuces can be included in a mix, you just harvest them when they’re still petite greens. The difference comes during the seeding process, because you either space them to accommodate for head lettuce growth in those varieties, or you seed liberally (though not as heavily as microgreens) so that you can harvest several varieties simultaneously.
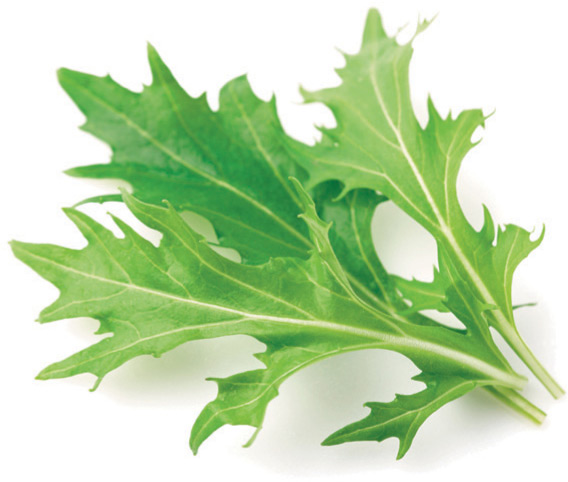
When it comes to indoor growing, I nearly always gravitate to the mixes because they grow quickly, I can seed them according to pot size, and they incorporate a range of flavors from mustard greens and peppery arugula to pretty ‘Rouge d’Hiver’ and frilly ‘Lollo Rosso.’
Many seed companies sell their own mixes (see Resources page at the end of the book), but you can also create your own from contenders like these:
 Arugula: Also known as rocket, this is a dependable choice for adding a peppery flavor to salads. The spiky, dark green leaves mix well in a salad but also can be substituted for spinach in some dishes.
Arugula
‘Green Oakleaf’ and ‘Red Oakleaf’: Not surprisingly, these lettuces get their name for having leaves that are similar to those of oak trees. In this case, oakleaf is an umbrella term with several varieties in that family, such as ‘Tango,’ ‘Bolsachica,’ ‘Panisse,’ and my favorite, ‘Sulu’ (which I love because I’m a sci-fi nerd). Oakleaf varieties are very easy to grow, and tend to have a mild flavor and crunch.
‘Red Oakleaf’ lettuce
Baby leaf: Much like oakleaf, “baby leaf” is a general term rather than a variety in itself. Designed to be harvested at an early stage of growth, some nice picks for baby leaf lettuce are ‘Red Sails,’ ‘Refugio,’ ‘Parris Island,’ and ‘Defender.’ Here’s a head’s up for seed ordering: some baby leaf options are also oakleaf varieties, but not all oakleaf choices are designated as baby leaf. Confused yet? Don’t worry—the designation doesn’t matter for growing, it’s just a way to indicate which lettuces are best when harvested at a petite stage.
Baby leaf lettuce (Romaine)
There are so very many varieties of lettuce that it’s really a matter of taste and visual preference as to what you pick. I tend to like a bit of peppery flavor, a hint of bitterness, and an array of reds and greens. If you like only mild greens, opt for a single variety that promises that color and taste. If you can’t decide and just want numerous seed varieties blended together, then go for one of the lettuce mixes offered by the seed companies that specialize in those.
‘Lollo Rosso’: Incredibly frilly and slightly bitter, this lettuce has an intense flavor that gets stronger as it gets larger. The red leaves have a bright green splash near the bottom, and it tends to be best when mixed with milder lettuces rather than served solo.
‘Lollo Rosso’
No matter what you pick, I’d advise jotting down growing notes in a journal. When growing several varieties of lettuce, I sometimes forget what works well and what doesn’t, or what tasted too bitter or too boring. A quick perusal of my gardening journal before ordering always helps me to distinguish the bountiful from the blah.
Because lettuce has a shallow root system, it works well in a medium-sized container. I tend to use hanging baskets because I can move them around more easily, and because they look nice as a focal point in the kitchen, especially if I’m growing lettuces with plenty of red leaves.
Like other plants, lettuce will do better in plastic than in terra cotta pots, because the clay will dry out the soil mix faster than the plastic. If you like the look of terra cotta, just pop a plastic insert into pot. Just make sure there are holes in the bottom for proper drainage.
As long as you’re not using soil from your garden, lettuces can thrive in a variety of soil types. You don’t have to play around with drainage options by including rocks, or mixing sand into a compost blend—just grab a bag of all-purpose potting mix and you’re good to go. Ideally, the mix should be organic and designated for vegetable growing.

Sterile potting mix works just fine for potting indoor veggies. Organic products are available.
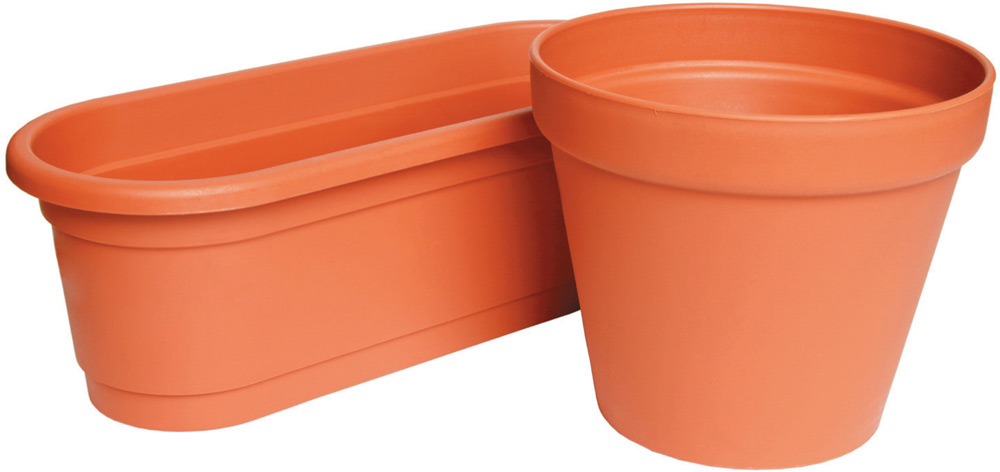
Plastic planters dry out less quickly than clay and tend to work out better for just about any plant, indoors or out. The oblong shape is perfect for a short row of lettuces.
Fill the pot with soil, with about an inch of space between the top of the container and the soil. Sprinkle the lettuce seeds on top of the soil, taking care to separate any that are too close to each other. For a medium-sized pot, you’ll probably use about twenty seeds, but it’s not necessary to be picky about it and count them out. You don’t need to get anxious about spacing, either, as long as they aren’t clumped together.
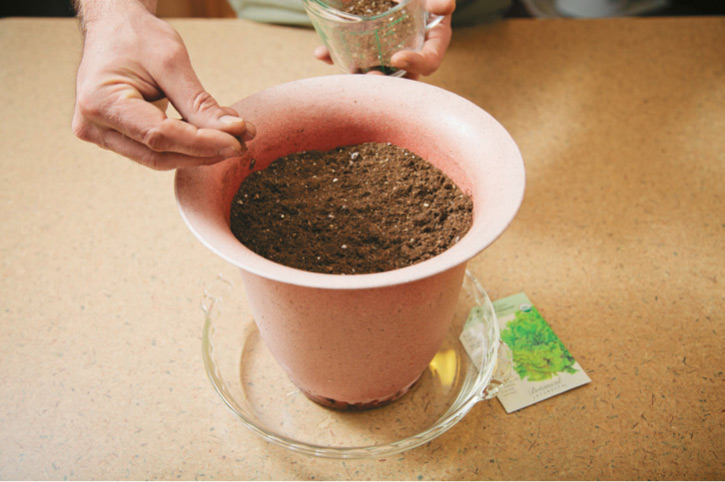
Sprinkle potting soil lightly over the top of the seeds, only enough to barely cover them. If the top cover of soil is too heavy, it will prevent light from boosting the germination.
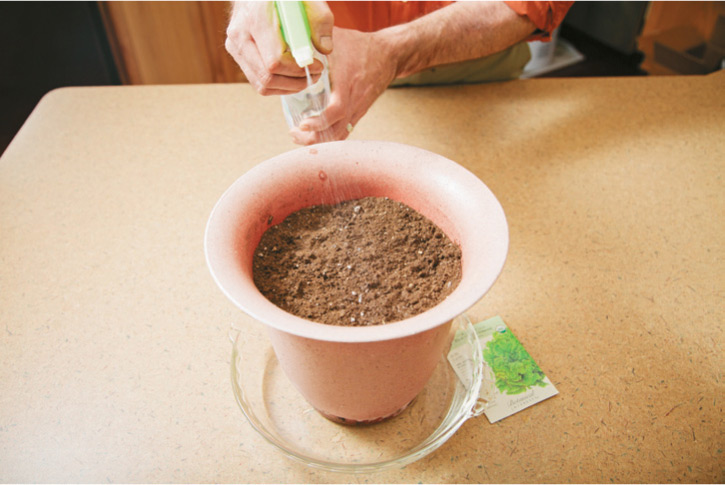
Spray the seeds with water from a mister bottle so that soil is moist but not thoroughly soaked. Watering them directly from a watering can could cause the seeds to shift or to be driven farther down into the soil.

Continue to mist once per day, ideally in the morning. I make it into a habit by misting the lettuce seeds while I’m waiting for my first cup of coffee to brew; I know I’ll never skip that java, so by tying the two activities together, it’s easy to make sure I don’t forget to hydrate the seeds. You should start to see germination in about one or two weeks, depending on varieties.
Once the lettuces begin to establish, there are several tactics for fostering growth:
Water every other day to keep the soil moist but not soaked. The way to tell if it needs water is to put your finger about half an inch into the soil and if it feels dry, then water.
As lettuces get larger, it’s usually better to bottom water. This means filling a sink or tray with a few inches of water and placing the lettuce pot into it for about ten minutes. Don’t let the lettuce sit in water for a long time, or collect water in a plate under the pot; this can lead to root rot.
You may notice that several lettuces are sprouting from the same area. Weed out the weaker seedlings so that the stronger ones can have more room to expand. If the weeded-out seedlings look viable at all, just transfer them to a separate pot or eat them as microgreens.
Fertilize if growth seems slow. I don’t usually use fertilizer for lettuces because they don’t tend to need the boost, but if your lettuces are looking like they could use some extra nutrition, apply a fertilizer once a week for three weeks and see if that makes a difference. Don’t apply more than that, though, or you could “burn” the plant through over-fertilization.
If you’ve been watering faithfully and giving the lettuces enough sunlight, then be patient and wait another week; sometimes, in certain conditions, they can be sluggish in terms of germination but will establish fine once they start growing. If it’s been a few weeks and there’s no germination, you may be overwatering or setting the pot in a location that’s too dark.
One of the nice things about living in the Midwest is that lettuces do well indoors because so much of the year is cool (maybe a little too much of the year for some folks). Lettuce loves cooler temperatures and will thrive most at around 60 to 70 degrees Fahrenheit. If you’re experiencing higher humidity or temperatures in your house, try moving the lettuce to a cooler location.
Harvesting lettuces is a breeze—just snip them at whatever stage of growth appeals most to you. Usually, I prefer smaller lettuce greens rather than larger leaves, so I cut them when they’re only about 6 inches high. No matter what size you choose, just be sure to avoid the inner leaves of each lettuce cluster, since it contains the immature growth that will lead to your next salad.
Like microgreens, lettuce tends to keep best in glass containers. They also do fine in plastic bags placed in the crisper drawer of the refrigerator. In general, though, it’s better to harvest only what you need for a particular meal and let the plant keep generating lettuce leaves.
Whether it’s a single plant or a whole row, lettuce grown indoors brightens the house and is a very convenient source of greens.
Choose lettuce leaves on the outer part of the plant for picking. Let the inner ones stay so the plant continues to grow.
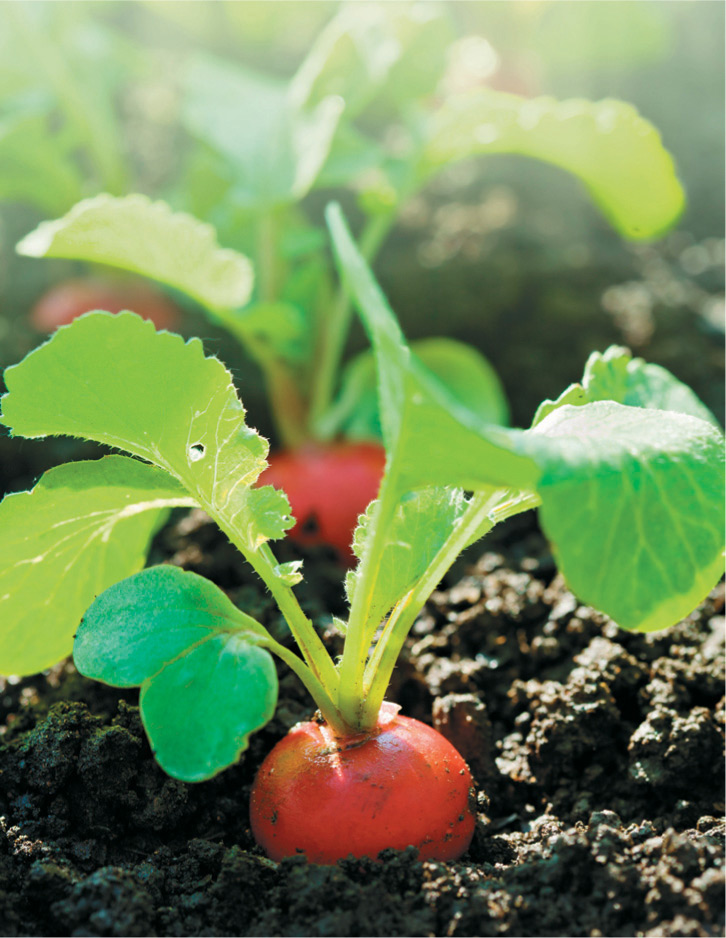
RADISHESAlthough I’ve always included lettuce in my food mix, radishes are a recent addition. In fact, despite significantly boosting my culinary expertise over the past decade (it’s not hard to get better at cooking if you start out eating potato chips for dinner—from that base, anything is an improvement), I only began eating radishes when Karla and I grew them at Bossy Acres.
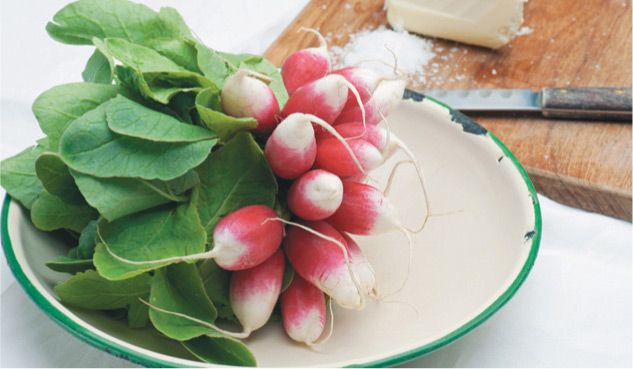
Radishes were our first crop to harvest, and I was shocked at how flavorful they were. I’d always believed that radishes were dry and peppery, based on the reactions of other people who said they hated the vegetable. But freshly harvested radishes—particularly those that aren’t left in the field for too long—are actually somewhat juicy, and impart subtle flavors. Some have a kick, true, but those can be tamed with quick pickling (see storage notes later in this section).
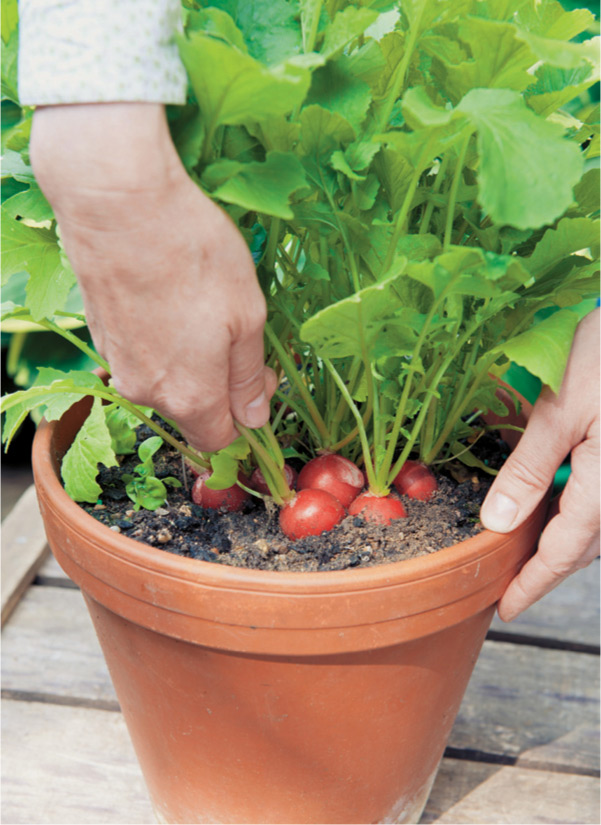
The best thing about growing radishes (indoors or out) is that they grow very quickly; sometimes they’re ready to eat less than a month after planting.
For indoor gardeners, radishes can be a fun crop to grow, because they mature very quickly, sometimes in only about three weeks from seeding. You can eat the greens, and their bright colors (for most varieties) are a gorgeous addition to any kitchen garden.
Because radishes are a root crop, you’ll want to pick varieties that will fit in whatever container you choose. If you want to experiment with growing a long radish in a tall container, you could opt for a Daikon, which can grow up to 18 inches long and usually takes two months to mature. In general, though, I tend to like fast-growing varieties that don’t take up much space. Here are some options for those:
When choosing a container, you can plant several radishes in a round pot, but I tend to like a narrow, rectangular pot to mimic the way that radishes would grow in the field. They need to be at least a few inches apart for adequate growth, so putting them in a long container will create a nice row that’s also visually appealing.
Consider planting radishes during a cooler part of the year, like late spring or early autumn. Although radishes planted indoors won’t be as sensitive to sudden temperature changes the way they would outside, they do like cooler temps. That’s why they’re often one of the first crops to be harvested at the farm.
‘French Breakfast’: More tapered rather than round, this is a popular variety for its white-tipped end and crunchy texture.
French Breakfast radishes
‘Cherry Belle’: These mature in less than a month and tend to have a mild flavor. True to their name, they have a bright, cheery red exterior.
‘Cherry Belle’ radishes
In terms of soil, standard indoor potting mix will work, and just make sure that there’s adequate drainage. This is one case where a little compost mixed into the soil would be beneficial, since radishes tend to like some added nutrients.
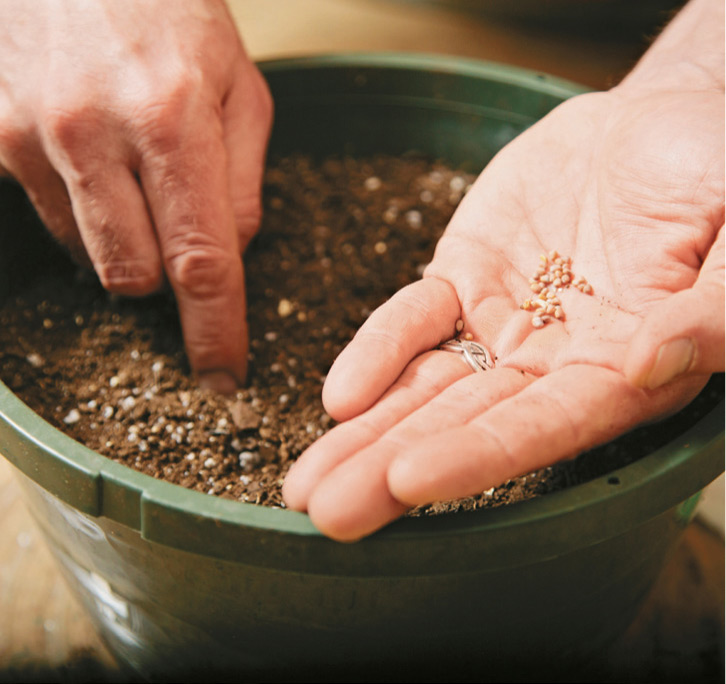
Sow the radish seeds about 1/2 inch deep, which usually means putting them in the soil and poking them down slightly. I like to place the seeds about 2 inches apart, with the recognition that I might need to “thin” them at some point to let the heartier radishes thrive.
Sprinkle some potting mix on top of the new seeds, and water so that the soil is dampened but not soaked. Place in a sunny spot, or under a full-spectrum fluorescent. To help with germination, create a “mini-greenhouse” environment by covering with plastic wrap for a few days until you begin to see them sprout. Once this starts, remove the wrap and mist with a spray bottle until the soil is moist.
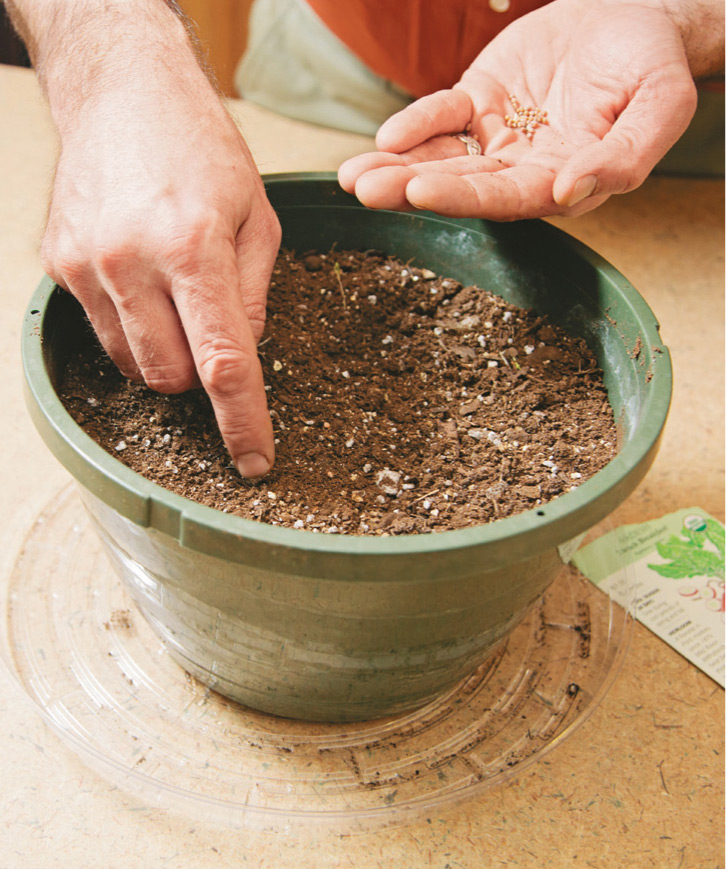
Sow the radish seeds so they are 1/2 inch deep and about 2 inches apart.
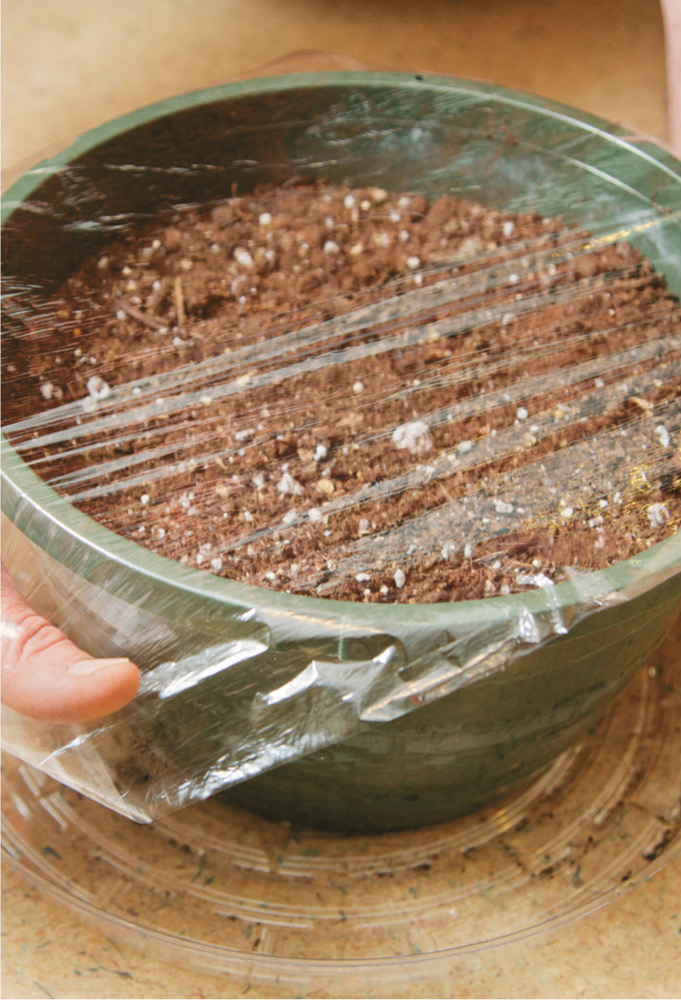
After planting and topdressing with a light layer of potting mix, water the radishes and then stretch some plastic wrap over the pot for a couple of days.
Here are some tips on getting your radishes from seed to harvest:
Water regularly—unlike some crops that should be watered when the soil is particularly dry, radishes do well with a frequent, predictable watering schedule. This will help them to grow more quickly, which leads to a milder taste rather than the overly peppery, woody taste that occurs when radishes grow too slowly or are left for too long before harvest.
Plant more in additional containers every few weeks—this is equivalent to crop rotation, but on a tiny scale. Planting on a continual basis will ensure that you always have radishes in progress to replace the ones you harvest, so you don’t have to wait another month after picking to get more radishes.
Some common problems with radishes and potential solutions:
Most likely, this is a light issue. Since radishes prefer cooler environments, try moving the pot to an area with more indirect sunlight, or moving it farther from its grow light.
In the field, we plant radishes quite close together and then thin them later, so that the strongest are given the chance to thrive. This increases the yield on a harvest, but for a home garden effort, you don’t need to plant them quite this intensively. If you do happen to experience crowding, simply pluck out the young radishes that seem weaker, and remember, you can eat the greens so that they don’t go to waste.
There’s not much that can be done at this point since they’ve already been harvested, but it’s good to note for the future so that you can harvest them earlier next time. Some people believe radishes should be larger before they can be eaten, so they wait until the radishes are the size of small apples, but for most varieties, that’s too large.
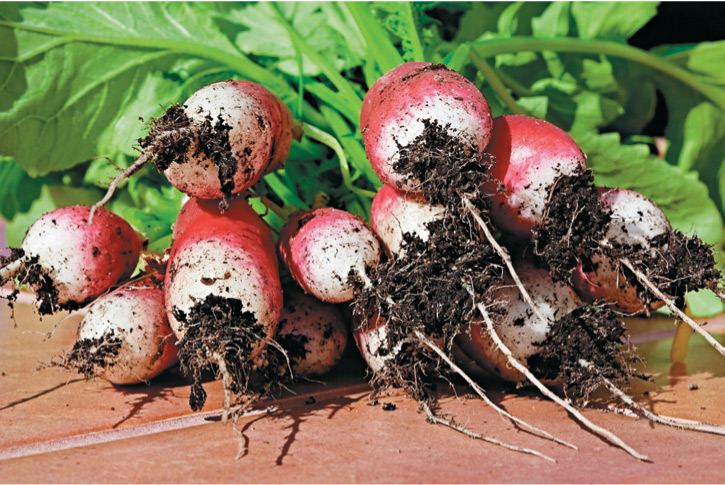
Pick radishes when they are still relatively small and tender.
Often, much like carrots, radishes will “shoulder” when they’re ready to be picked. That means they push up out of the soil with part of the vegetable showing. This is hugely helpful in determining the size of the radish, which should be about an inch in diameter at harvest time.
If they aren’t shouldering, gently dig into the soil with your finger until you can feel the top of the radish, and this will give you an idea of the size. If they’re not ready, just replace whatever soil you’ve moved and check again in a few days.
Once they’re ready for harvest, just take hold at the base of the leaves and give a firm tug. It doesn’t take much effort, and they tend to pop out easily.
Radishes are ready for picking when the shoulder is about an inch across—don’t let them get any bigger, as they tend to get woody.

For most of us, one or two sharp-flavored radishes go a long way, making them a great choice for indoor, small-space planting.
If you’ll be storing radishes instead of eating them immediately, just brush the soil off and store them instead of washing them right away. This helps to keep them fresh for longer.
Radishes last for weeks if stored in a plastic bag in the crisper drawer, but my favorite tactic is to create a quick pickle that doesn’t require any canning equipment; you simply store it in the refrigerator. This is the only recipe I’ll include in the book, because during the farm season, it’s what I make on a weekly basis, and I feel like it really brings out the flavor of the radishes.
10 radishes (equaling about a pound)
1/2 cup apple cider vinegar
1/4 cup honey
1/4 cup raw sugar
1/4 cup filtered water
2 Tbsp canning salt
2 Tbsp mustard seed
2 tsp ground ginger
1 tsp turmeric
1 garlic clove, thinly sliced
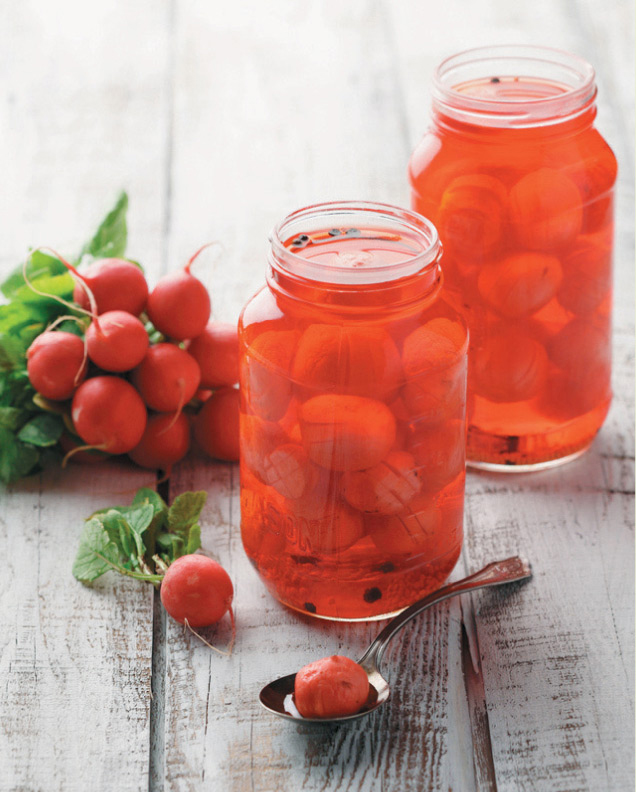
1. Scrub radishes and cut off their “tails” and root ends, no need to peel. Slice thinly or in chunks.
2. Combine remaining ingredients and bring to a boil; cook until sugar and honey have dissolved, then turn down to low simmer.
3. Put radish slices in glass canning jars (such as Mason or Ball) and pack tightly.
4. Pour hot liquid over radishes and use a spoon (poke it into the jar) to remove air bubbles.
5. Put in fridge, and let “set” for at least eight hours before eating.
Note: You can adjust spices based on what you have on hand, or reduce the sugar if you find it’s too sweet or you want more radish flavor. Because these are “fridge pickles” they’re not subject to the kind of rigor needed for standard canning projects.
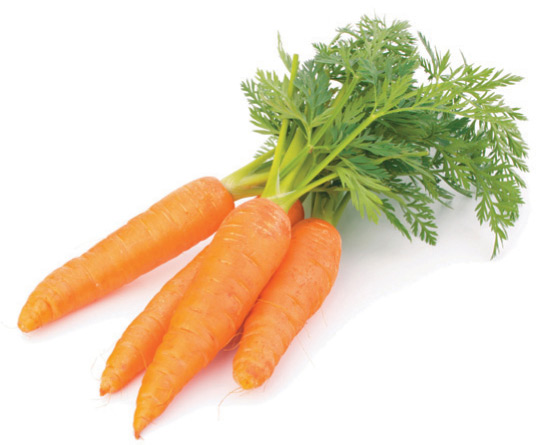
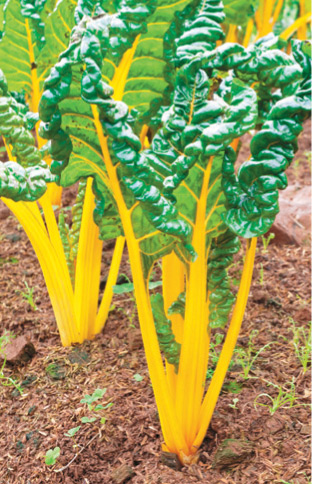
CARROTSTo be honest, carrots grown in containers can be tricky, but you can boost your chance of success by choosing the right varieties. My favorites in the field tend to be rainbow carrots, with their long tapers of pinkish red or dark crimson, both cut open to reveal a rich orange inside.
As much as I’d love to plant those type of full, luscious beauties inside, however, it just doesn’t make much sense to utilize that much soil and lug around a large container just for the thrill of growing larger carrots indoors. I get my fix instead from smaller varieties, and also from growing just one or two pots at a time.
Would I like to turn my office space into a carrot-filled zone, with radishes and hot peppers on the periphery? Of course I would. Maybe someday I’ll decide never to sell my house and start building raised beds in less-used spaces. I’ll be that weird lady who gets raided by the DEA because a neighbor sees massive grow lights in every room.
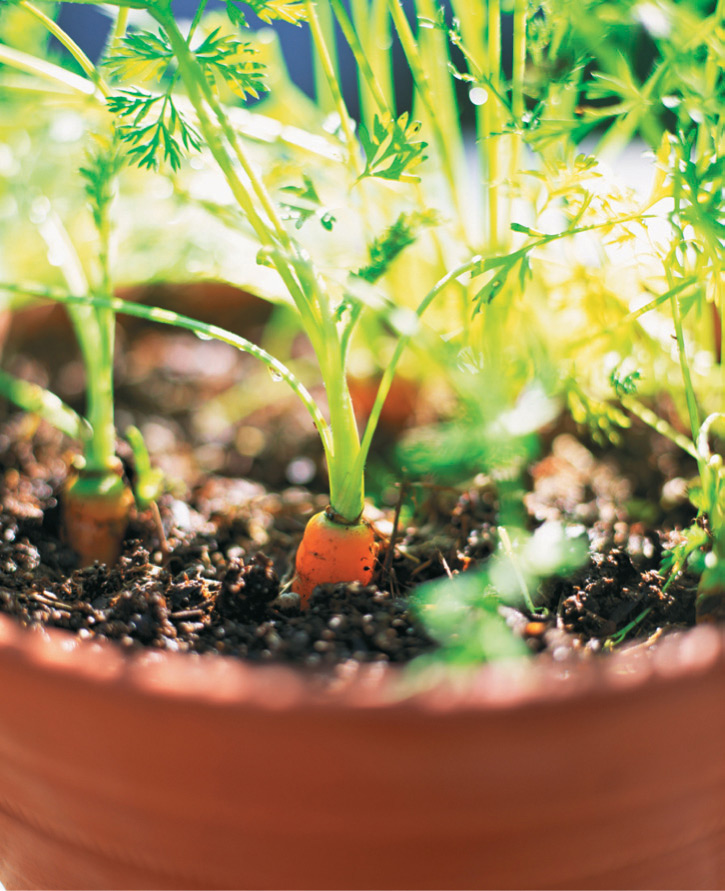
With their intense flavor (compared to grocery store carrots), carrots grown in-home go a long way when seasoning soups.
Until that time, though, let’s go with carrots that make sense for a small-scale growing plan.
Resist the temptation to grow your own juicing garden (unless you actually do have an indoor greenhouse, and in that case, full speed ahead to you) and opt for varieties that are more round than tapered. These work very well:
‘Parisienne’: Looks like radishes, tastes like carrots. This variety is easy to grow and if there’s such a thing as an adorable carrot, it’s this one.
‘Parisienne’ carrots
‘Tonda di Parigi’: Another choice for a radish-size carrot that resembles the ‘Parisienne’ carrots above, this one takes just sixty days and only grows about 2 inches long.
Another option is a type of carrot called ‘Nantes’ that has the tapered shape that’s familiar to all carrot lovers, but is shorter and wider than traditional varieties, making it better for indoor growing. Try these:
‘Shin Kuroda’: A Japanese variety that takes about seventy-five days to mature, but results in a tender carrot that’s only about 3 to 5 inches long.
‘Danvers Half Long’: If you have the container space for a 7-inch carrot, this is a nice choice since it’s dependable and hearty.
‘Nantes’ family carrots
‘Little Finger’: Although these take a bit longer to grow, they only grow about 3 inches long, which make them perfect for indoor gardens.
Even with shorter varieties, carrots need ample room to grow, so use containers that are at least a foot deep, if not more. Even though the vegetables won’t take up that space, their root system will use the room to develop properly.
You can opt for a rectangular container to mimic the look of carrots in a field, or utilize a round pot, which looks cool when all the carrot greens are fluffed up together. As with other crops, terra cotta pots are less ideal because they tend to draw moisture from the soil, but with a regular watering schedule, this is less important than it would be for something like lettuces.
When selecting a planter, make sure that it’s thoroughly cleaned if you’ve grown plants in it previously. Even with old pots, it’s possible to transfer diseases onto the new crop, and since carrots are root vegetables, they would be more affected by any contaminants that leach into the soil.
Carrots do well in loose soil, and even a small degree of compaction can result in stunted growth. Because of this, you might consider a soilless mix like compost and sand mixed together, or at least putting some vermiculite in your potting mix to allow for more drainage.
This may be a chance to try out coir bricks, if you haven’t played around with those before. These bricks, made up of coconut fiber (called “coir”) can be expanded to create a carbon-rich base beneath potting soil, or parts can be broken off and used to create a looser soil mix. As an added bonus, coir is great for compost piles, and is often used for vermiculture, so if your next step in gardening is creating your own worm bins, coir should be on your greenhouse shopping list.

Coir bricks are made of compressed coconut fiber. You can break off pieces and mix them with compost for a perfect carrot-growing medium.
Like radishes, carrots tend to do well when planted during cooler times of year like late spring or early fall, but in an indoor environment, they can thrive as long as the temp doesn’t get too hot.
After creating your soil or soilless mix, fill your container and leave an inch of empty space at the top. Poke your finger into the planting medium where you’d like the carrots to go, about half an inch deep. Space the seed holes about 3 inches apart, if not more.
Drop two to three seeds into each hole, which will increase your chances of having at least one sturdy, hardy carrot in each spot. If more develop, you can simply thin them out and let the strongest one keep growing. Sprinkle soil or vermiculite on top of the holes, being careful not to press down when filling, since compaction could hinder germination.
Water thoroughly, so that the planting medium feels very wet but not flooded. Place pot in an area that gets at least six hours of light per day, usually in an area with some direct sunlight and some indirect. Carrots do well in shade, but also grow better with at least some partial sunlight.
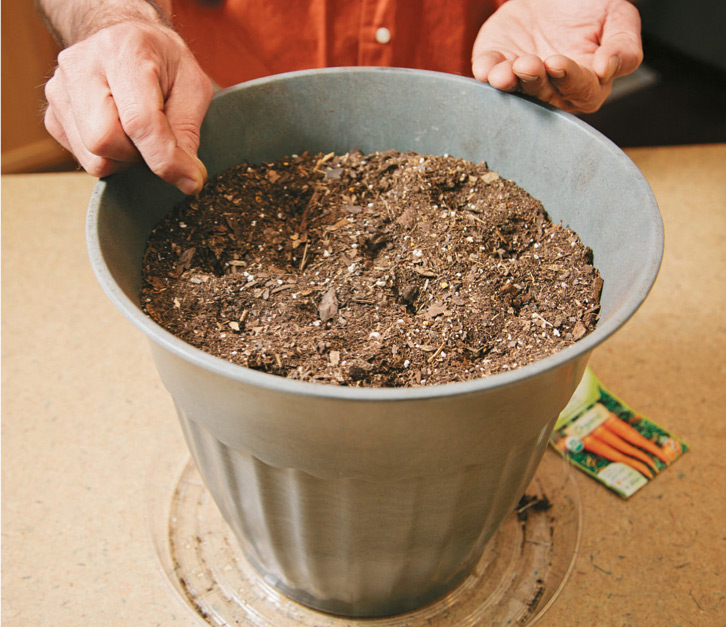
Poke 1/2-inch deep holes for the carrot seeds, about 3 inches apart.

Sprinkle some soil or vermiculite on top of the planted seeds, then water. Continue to water regularly until the carrots are ready for picking.
Keep the soil or soilless mix well watered. Because you’ve created a looser blend than for other vegetables, the carrots will probably need to be watered more often, especially during hotter days. Carrots can tolerate some dryness in the soil, but prefer a steady supply of moisture for better growing.
If growth seems sluggish, you can apply fertilizer once a week for a few weeks, but this isn’t necessary if growth is proceeding well.
Thin out the carrots if they begin to seem crowded by simply plucking out the greens that are smaller than others. Be careful during the process, though, since you don’t want to damage the roots of the remaining carrots.
Some common problems with carrots and potential solutions:
Carrots need their greens to be upright, so take this concern seriously. Fortunately, there’s an easy fix: simply “hill up” the greens by adding more soil around them and forming a larger base for them until they stand up. This tactic will also be helpful if carrot roots begin to appear too early, which can turn them green and bitter.
Frequent watering helps carrot growth, but it can also lead to mildew formation, which is what’s happening here. Carrots, in particular, can be prone to mildew because they need ample water, and mildew often forms in a field or garden after too much rain. All is not lost, though. You can either use a commercial antifungal spray or apply a natural spray made up of these ingredients:
1 gallon of lukewarm water
1 Tbsp baking soda
2 to 3 drops of mild liquid soap (such as Dr. Bronner’s)
1 tsp of olive oil
Mix well, and put in a spray bottle, then mist the plant daily. The solution helps to tweak the pH balance on the surface of the leaves, which usually takes care of the mildew.
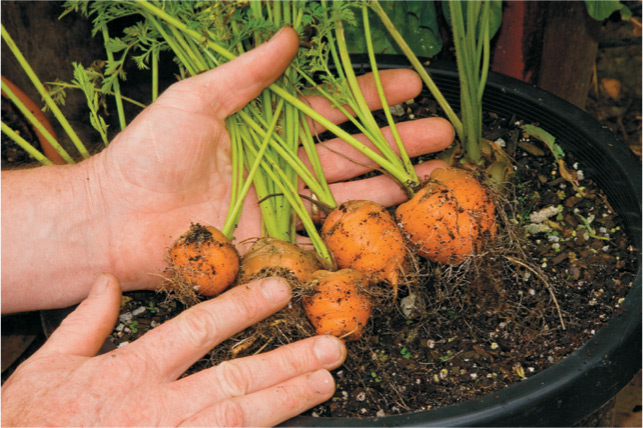
Much like radishes, carrots indicate when they’re ready to be picked by “shouldering,” which means they push up out of the soil with part of the vegetable showing. This is hugely helpful in determining the size of the carrot.
If they aren’t shouldering, gently dig into the soil with your finger until you can feel the top of the carrot, and this will give you an idea of the size. If they’re not ready, just replace whatever soil you’ve moved and check again in a few days. In some cases, carrots will shoulder too early and begin to turn green, and if this happens, hill up the soil around the carrot to prevent more of the carrot being exposed.
Once they’re ready for harvest, just take hold at the base of the leaves and give a firm tug. It doesn’t take much effort, and they tend to come out easily.
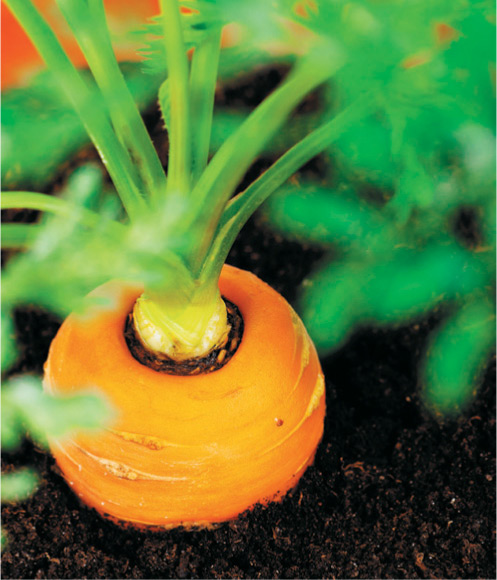
Carrots, like other root vegetables, tend to “shoulder” as they mature, and this makes it easy to judge when they are ready for picking. A shoulder of about 1-inch diameter is a good range for most carrots.
Carrots are well suited for long term storage, and they’re a staple in many root cellars. The trick to storing them for weeks or even months is to refrain from washing them after harvest (save the scrub up for right before eating), since that can hasten spoilage. Also, if possible, arrange carrots so they aren’t touching each other.
Whether you plan on short-term storage or a longer timeframe, remove the greens because they draw moisture away from the carrot and make the vegetable dry out faster. If properly stored, carrots can keep in the refrigerator up to three months.
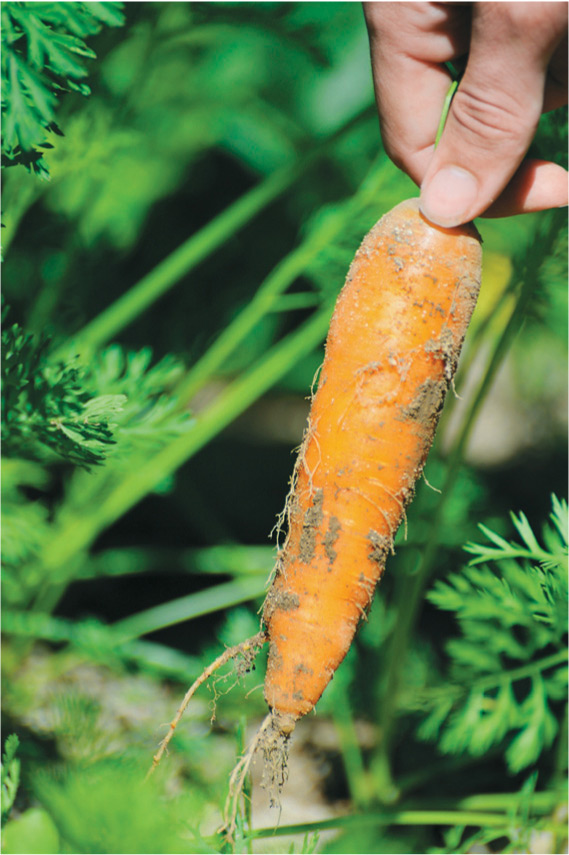
Indoors or out, few veggies are more fun to harvest than carrots: especially if you like surprises.
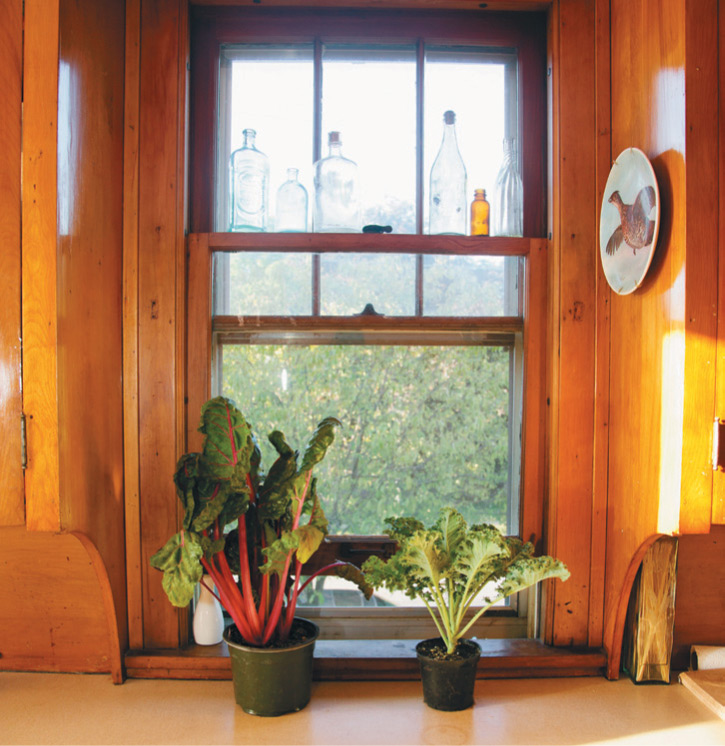
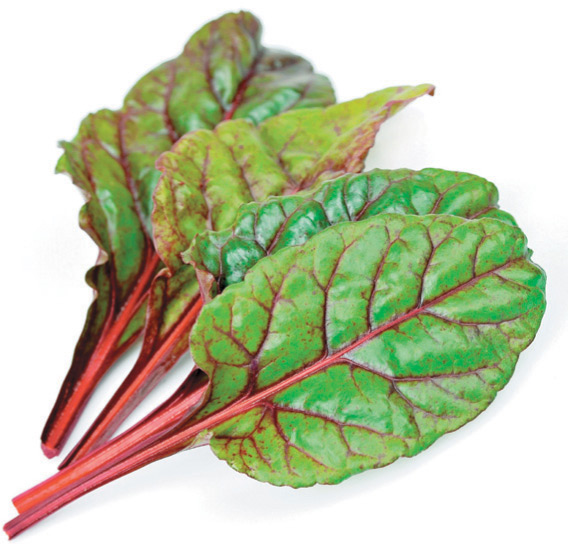
In addition to their high nutritional value, kale and chard are beautiful plants with impressive structure. They make fine focal points in high-visibility spots.
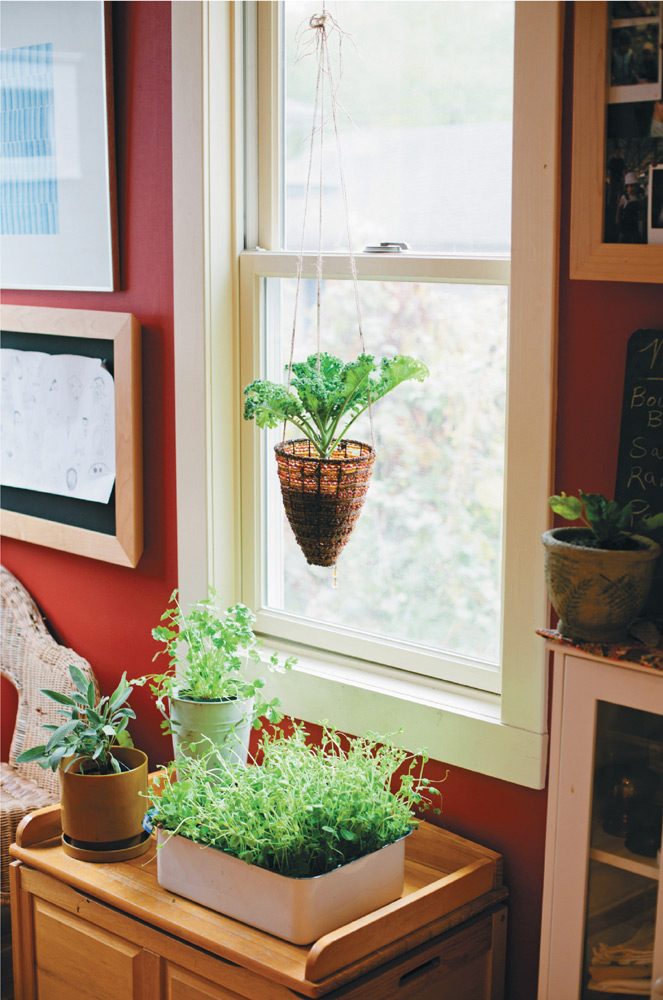
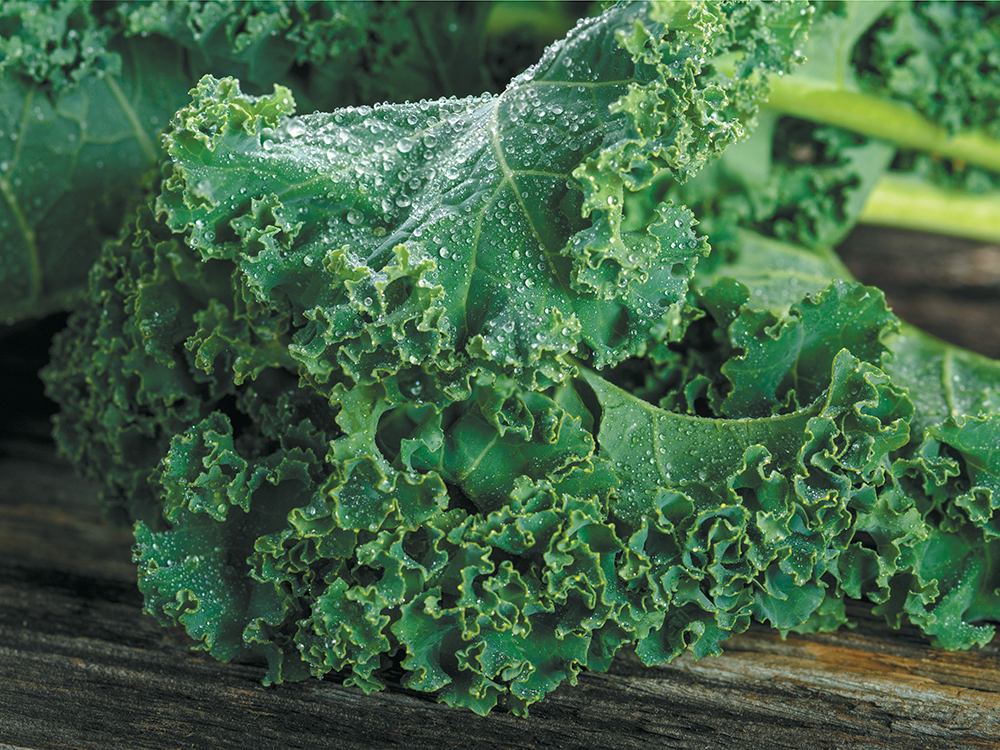
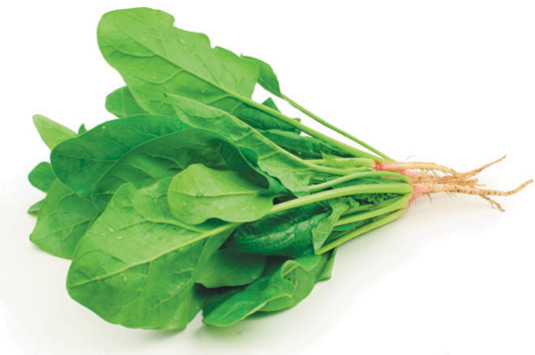
KALE & CHARDMuch like lettuce, kale and chard are some of my favorite foods, and we grow plenty of them at the farm. Because they’re such nutritional powerhouses, I also like growing them on a smaller level at home, and I tend to use a fair amount of both in my microgreens mixes.
Until we started farming, I wasn’t aware of the breadth of varieties for both these hearty greens, since I usually saw only a few kinds of kale and two types of chard at my local co-op. But you’ll find a beautiful array of options once you start traveling down the rabbit hole of seed catalog perusal, believe me.
Each has unique benefits when it comes to health, but they tend to have the same requirements for growing, which is why they’re grouped here. Technically, I could also put collards into this category, and feel free to use these instructions if you want to add those to your indoor growing mix. But I’ve found that collards do best when they’re allowed to grow to full maturity, which usually means leaves the size of dinner plates. That requires a mighty big container for an indoor space, but if you have a large planter and you’re a collards lover, that would be a nice option for your indoor edibles mix.
All chard is attractive to a certain extent, but red chard (shown) and rainbow chard are particularly colorful and striking.
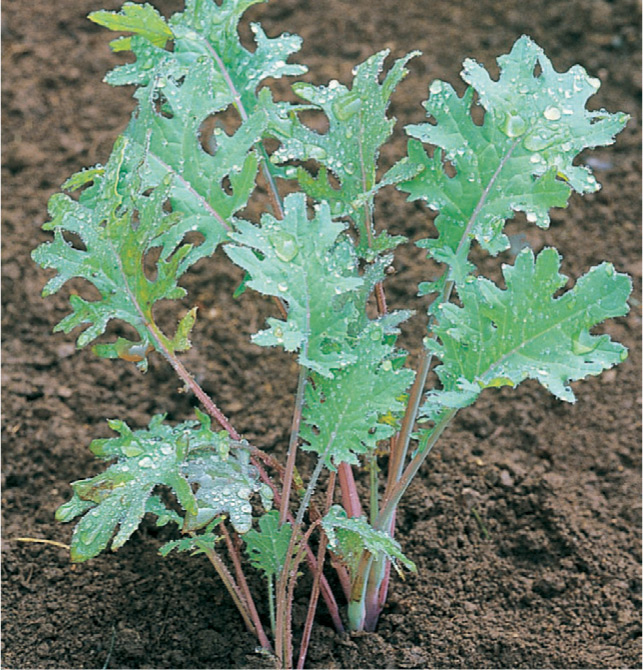
Kale, in particular, comes in an array of varieties, with some growing a few feet tall and others remaining as squat and sturdy as cabbage. For indoor growing, I tend to like the smaller varieties that still offer plenty of texture and color variation, like these:
‘Dwarf Blue Curled’: There are a few “dwarf” varieties, and they work well inside because they don’t take up too much space. This one, which takes about 55 days from seed to harvest, has a dense frill and a very slight bluish tint.
Curly kale stays small; look for dwarf varieties
‘Red Russian’: Thanks to its mild flavor, this is a nice choice for adding raw to salads. The color is stunning, with purple stems and dark reddish green leaves.
‘Red Russian’ kale
‘Lacinato’: Also known as Dinosaur, this variety seems to inspire intense devotion in its fans. I like it for the super durable leaves, which hold up nicely during cooking.
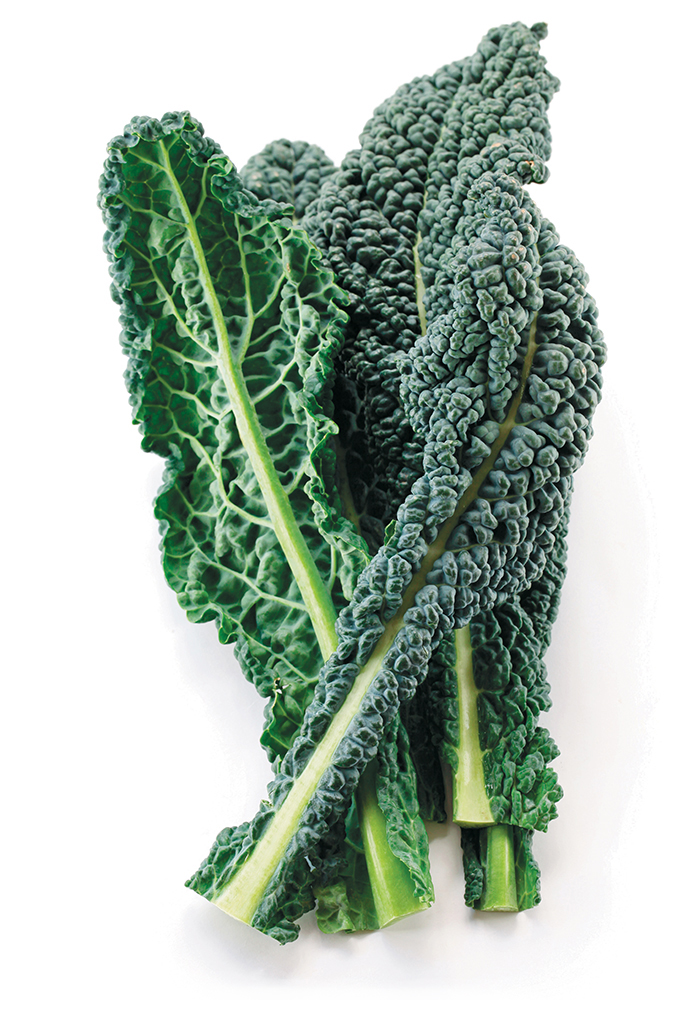
‘Lacinato’ (dinosaur kale)
With chard, I love the ‘Rainbow’ variety (also called ‘Bright Lights’) because the colors are so gorgeous. From neon yellow to delicate pink, the stems of the ‘Rainbow’ hold their colors even after cooking, making them a nice addition to dishes. Other varieties that are also good for indoor growing include:
‘Peppermint’: I wish this was a minty-tasting chard because the weirdness of that combination would be worth trying. But in actuality, it’s a variety that has pink and white striped stems. If you’re harvesting at “baby” stage, it’s only about thirty days from seed to harvest.
Orange or Yellow: Unlike other types of vegetables, chard doesn’t tend to have catchy names, apart from ‘Fordhook Giant’ or ‘Silverado’; instead, they’re identified by stem and vein color, but that can actually be helpful when choosing, since you can grow only orange, pink, red, or yellow varieties.
Yellow chard

‘Bright Lights’ chard
Even though you’re choosing smaller varieties of kale and chard, the plants still need plenty of room to stretch out, so this might be a good time to utilize a larger planter that you have on hand. I’ve attempted to seed one chard plant in a medium-sized pot and the results were mediocre; I had much better growth when using a large rectangular pot that fit well underneath my full-spectrum fluorescents.
When planting, aim for late spring or early fall. It’s always tempting to plant in the winter so that you’ll have chard in February, but even with plenty of light and warmth, the results tend to be spindly, and the germination is sluggish. Instead, planting in the early fall will allow the vegetables to establish before the cooler weather hits in earnest.
In terms of soil, standard indoor potting mix will work, and just make sure that there’s adequate drainage. You can also blend some compost into the soil for added nutrition.
In order to get a nice amount of moisture throughout the soil before planting, mix your soil with some water until it has a damp, but not soaked, consistency. You can determine adequate water level by grabbing a handful and squeezing—if water runs in a steady stream, then it’s too wet and you need to add more dry soil. If just a drop or two of water comes out, that’s perfect.
Put the soil in your container (if you’ve mixed it elsewhere), leaving about an inch on top from the edge of the container.
Another nice trick for getting more moisture into the plants is to soak your seeds in lukewarm water for a few hours before planting. This will help boost the germination process, particularly in houses that tend to be dry.
Sow two or three seeds in holes about half an inch deep and at least 5 inches apart. Cover lightly with soil, and then mist the soil until it’s moist but not saturated. Put the container in the sun or under a grow light.
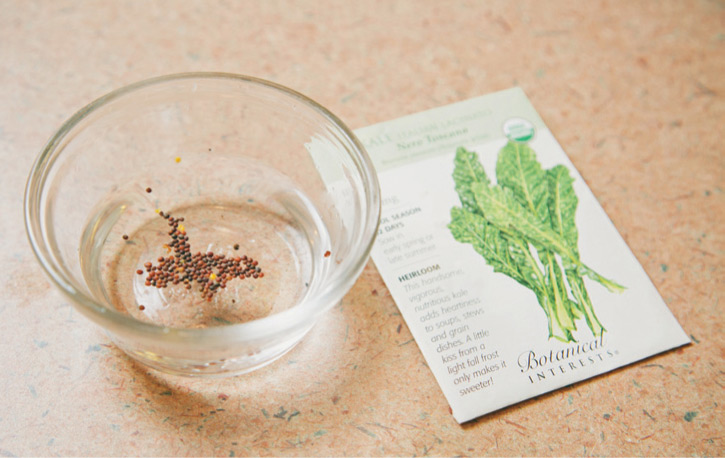
Soak kale or chard seeds in lukewarm water for a couple of hours before planting.
Here are some tips on getting your kale and chard from seed to harvest:
If growth seems slow, add some nutrients by mulching the top of the plants with compost, coir, even grass clippings or dried leaves. You can also add natural fertilizer such as a kelp blend.
Water when needed. Check the soil daily to see if it seems dry, and water if necessary. Don’t water automatically, since you don’t want the roots to stay damp continually, which can lead to rot.
Chard and kale both require good airflow, so don’t pack them too tightly together and put a small fan out to create breeze around them.
Maintain good airflow. Kale and chard are high in antioxidants, but only because they have to contend with wind when they’re outside, which creates stronger plant defenses. Mimic that natural environment by increasing airflow around the plants, and changing the “wind” direction occasionally. You don’t want airflow to be so strong that it’s making the plants flatten, but it should be robust enough that the plants need to work against it in order to grow heartier.
Some common problems with kale and chard and potential solutions:
There can be several reasons why germination is sluggish for kale or chard. Your house might be too cold or too hot, or the plant could be situated too far from a light source. Try moving the light closer to the container, and also re-mist the soil with water, then cover it with plastic wrap to create a mini-greenhouse environment.
Thin out the weaker plants by either plucking them from the soil or by cutting the small leaves close to the top of the soil. The stronger plants will then have more room to grow, and you can eat the leaves you’ve removed.
Kale and chard can be harvested at any stage of growth, from petite green up to full leaf. I tend to harvest my indoor varieties when the leaves are about the size of my palm, as opposed to the size of my forearm, which is when I harvest varieties grown outdoors.
When harvesting, cut low on the plant to get some of the stem, since this part can be chopped up and used in stir fries, or quickly steamed to maintain crunchiness. Be sure to avoid the inner parts of the plant when harvesting, since this will be where new growth occurs, and snipping these leaves will hasten the plant’s end.
Like lettuce, I tend to harvest kale and chard only when I’m about to eat it or juice it. If you need to store the leaves for a few days, though, simply put them in a plastic bag in your fridge’s crisper drawer, or in a glass container if you’re using the main part of the fridge. Since the higher shelves of a refrigerator aren’t as cold as the lowest shelf, I store them there so they can stay crisp for longer.
SPINACHTechnically, spinach can come under the same category as kale and chard, but I decided to tweeze it out into its own section because it has a few unique requirements. Also, to emphasize its awesomeness.
When I was a kid, spinach was my most hated vegetable, by a huge degree. This may have been because we never had Brussels sprouts, but mostly it was because the spinach we had was the canned, clumpy kind that smelled like old, dirty underwear. There was an acrid tang to the aroma that transferred into the taste, and there was literally no amount of money I could have been promised in exchange for eating it.
Then, around the time I stopped eating snack food as a meal, I found out about real spinach—the kind with tender leaves, and it looked like a plant instead of a greenish clot. These days, I love growing spinach in part because I’m still amused by my dietary turnaround. The plant is often so hearty that it can produce for months, and the flavor is delicate, especially when steamed. So, I grow it indoors during the winter for its nutritional prowess, but also as a nod to that super picky kid—I have so much time I have to make up for with spinach.
There are numerous varieties of spinach, but those designated as “baby leaf” tend to work best indoors because they’re meant to be harvested at a small size. The leaves will tend to have a mild flavor with a nice bit of crunch that pairs well with salad greens. Here are a few varieties to consider:
‘Catalina’: This kind is the most popular for indoor growing, and for good reason. The deep green oval leaves are very flavorful and the variety is designed to grow quickly.
Baby leaf spinach (‘Catalina’)
‘Emu’: Unlike varieties like ‘Catalina’, with oval leaves, this one has pointed leaves, which make for a nice contrast.
‘Emu’ spinach
‘Red Cardinal’: This is a fun option for a color change, since it has red veins and stems and dark green leaves. With this one, the good news is that it’s designed to be harvested at baby leaf stage, but the bad news is that it tends to have a shorter lifecycle than many other varieties.
Red varieties of spinach
‘Red Kitten’: If you want the red veins but crave a longer lifespan, go for this awesomely named variety; keep in mind, though, that it grows somewhat slower than ‘Red Cardinal’.
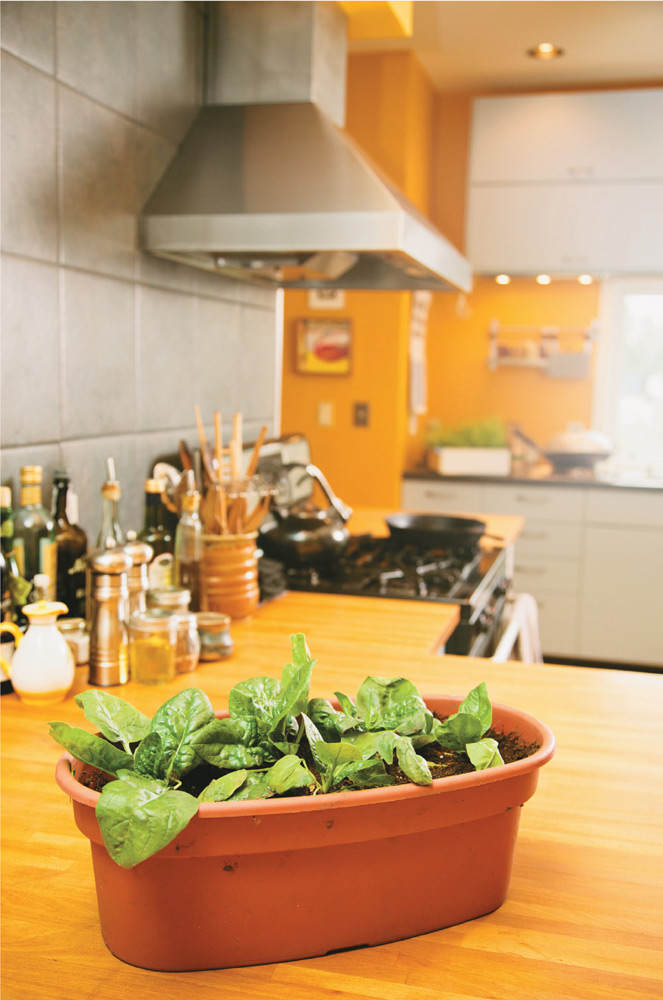
Spinach has a shallow root system, so you can use smaller pots if that’s handy for you. They should be at least 6 inches deep, so in some cases, you can use the leftover trays that you might have used for microgreens or pea shoots, just be sure to scrub them thoroughly and let them dry completely before you replant in them.
I tend to like rectangular pots because they fit well on my shelves under my fluorescent lights, but I’ve seen many configurations for spinach, from growing a single plant in an old plastic tub to combining spinach with herbs in a larger container.
Spinach appreciates cooler weather, so aim for planting in early fall if possible so that the plants can establish before any major temperature drops. At our farm, we experimented with planting spinach in October and then covering it with reemay, a landscape fabric that lets light in but keeps bugs out. Even in a tough Minnesota winter, the spinach did great and we were able to harvest in early spring, after it “woke up” from its hibernation. Similarly, you can keep it going in your house during the winter if you live in a chilly climate, but it’s best to get it germinating and growing before any major temperature variations.
In terms of soil, standard indoor potting mix will work, and just make sure that there’s adequate drainage by adding some sand, coir, or vermiculite. You can also blend some compost into the soil for added nutrition.
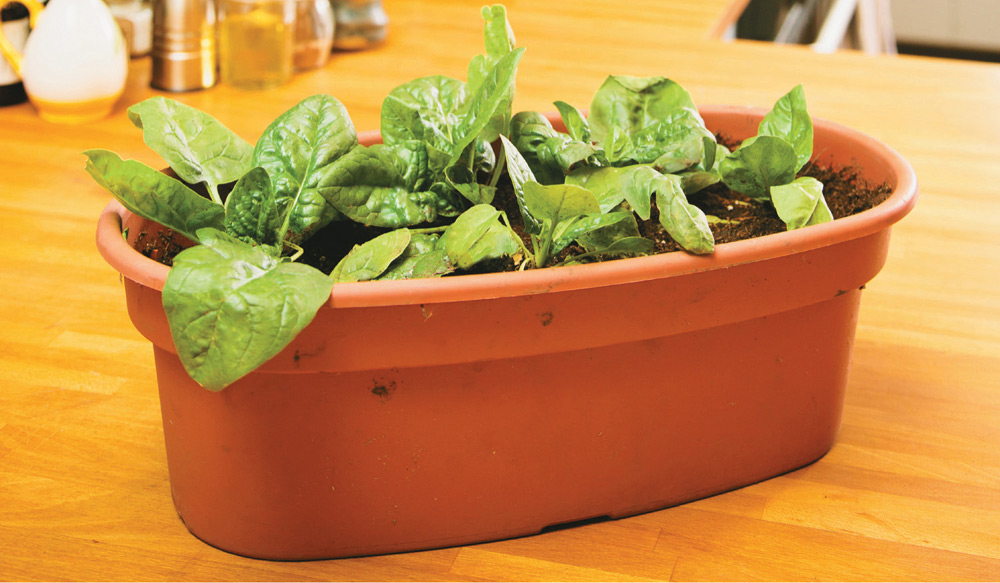
The plastic oblong planter is perfect for a nice little indoor spinach patch.
In order to get a nice amount of moisture throughout the soil before planting, mix your soil with some water until it has a damp, but not soaked, consistency. You can determine adequate water level by grabbing a handful and squeezing—if water runs in a steady stream, then it’s too wet and you need to add more dry soil. If just a drop or two of water comes out, that’s perfect.
Put the soil in your container (if you’ve mixed it elsewhere), leaving about an inch on top from the edge of the container.
Sow two or three seeds in holes about half an inch deep and at least 5 to 8 inches apart. Cover lightly with soil, and then mist the soil until its moist but not saturated. Put the container in the sun or under a grow light.
You should begin to see germination in about seven to fourteen days, depending on variety and growing conditions.
Here are some tips on getting your spinach from seed to harvest:
Watch the temperature. Spinach doesn’t do well in very warm conditions, so if your house is over 75 degrees, move the plant to a cooler spot.
Water when needed. Check the soil daily to see if it seems dry, and water if necessary. Don’t water automatically, since you don’t want the roots to stay damp continually, which can lead to rot.
Poke holes about 1/2 inch deep for spinach seeds and plant two or three seeds per holes.
Instead of planting spinach from seed in your containers, you can start it outdoors or in a greenhouse and then transplant the small spinach plants when they are strong enough.
This is called “bolting” and it’s a sign that the plant is nearing the end of its life. Most likely, the timeframe for your spinach got significantly shortened because the plant got too hot. If other plants aren’t bolting yet, move the planter to a cooler place and be sure to pick off any tall stems that look like they’re about to flower. You can also detect signs of bolting when the spinach leaves taste more bitter than they did previously.
Sometimes, several spinach plants in the same pot will germinate at different times, leaving “gaps” in the soil. Simply plant more seeds in those spaces, since they can catch up quickly. Since germination is usually fairly quick, they won’t be far behind those that were planted the week before.
Most likely, this is a sign of overwatering or of not enough nutrients. Try to “dry out” the plant for a day or two and when you resume watering, place the pot in a tray or sink filled with a few inches of water and remove it when you can see the soil on top begin to dampen. Sometimes, spinach pots can develop a “dead zone” inside where water flows around that area inside the pot, leaving it overly dry even though the soil on top shows adequate water.
If your spinach flowers that means it is bolting and it may already be too late to harvest it before the leaves become highly bitter. Some types of spinach, like the Malabar seen here, do have edible flowers.
Spinach can be harvested at any stage of growth, from petite green up to full leaf. If you’ve planted a baby leaf variety, harvest when the leaf is about 6 inches long.
When harvesting, cut low on the plant to get some of the stem, and be sure to avoid the inner parts of the plant when harvesting, since this will be where new growth occurs, and snipping these leaves will hasten the plant’s end.
Spinach will keep for about a week in the refrigerator if properly stored. Don’t wash the leaves until you’re about to eat them, and wrap the spinach in plastic wrap, squeezing out as much air as you can. Unfortunately, cooked spinach doesn’t store very well—it tends to turn into the glop I remember as a kid—but the plastic wrap tactic will at least keep your fresh spinach ready for cooking for a few days, if not longer.
Spinach leaves should be snipped off, not torn, near the base the stem. Take the outer leaves first to give the inner leaves a chance to grow.
Spinach is adaptable and tough and can be moved around as you need. Avoid too much direct sunlight and any rooms that are over 75 degrees Fahrenheit for extended periods of time. Try putting some on top of the refrigerator and reserve the more visible spots for plants that need more maintenance or are prettier.
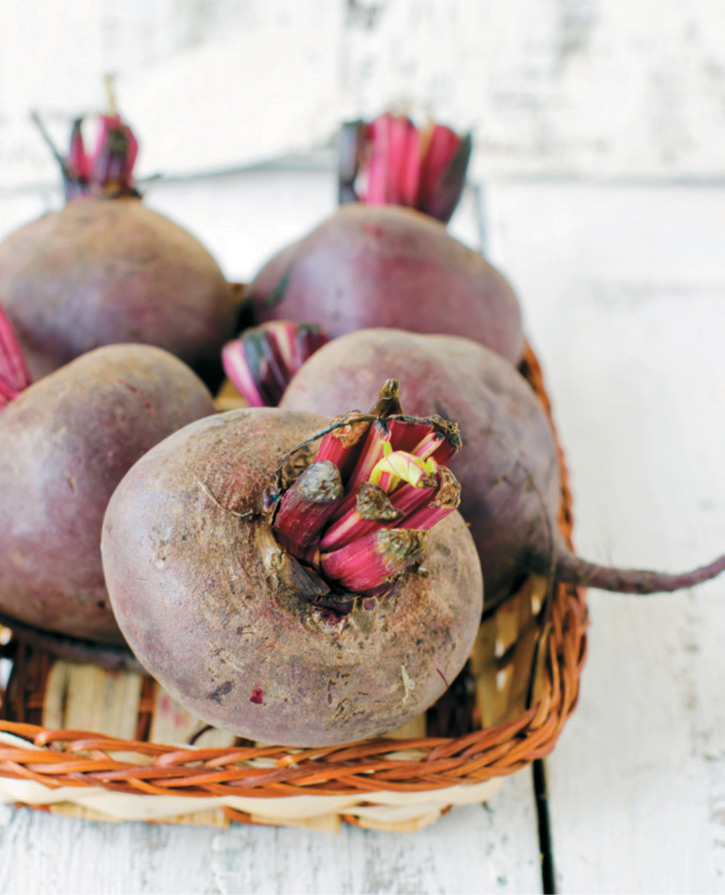
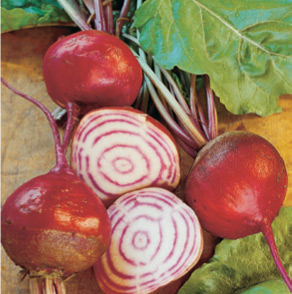
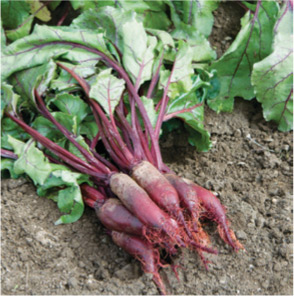
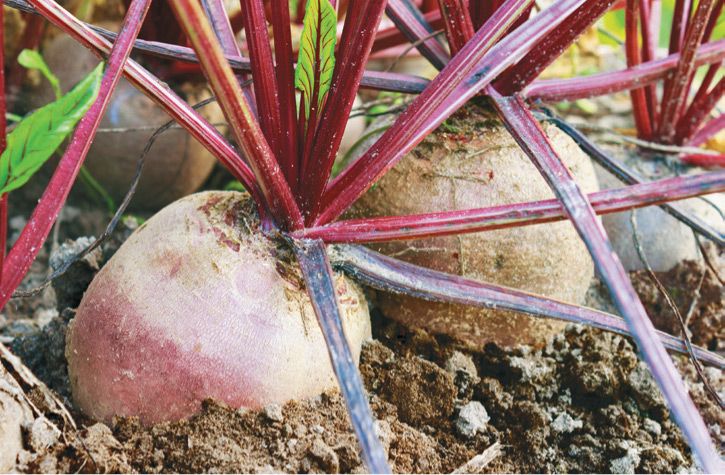
BEETSMuch like carrots and radishes, success with indoor growing for beets is often about variety selection. Root vegetables like these are all fairly similar in terms of root depth, so I tend to grow them in their own separate pots rather than trying to create a mini-farm in a single large container.
Beets are a fabulous addition to an indoor edible garden for many reasons. Nutritionally, they’re astounding, since they’re packed with potassium, iron, beta carotene, folic acid, and other vitamins and minerals. The ancient Romans used them as an aphrodisiac (not so surprising, since they contain significant amounts of boron, which is connected to the production of human sex hormones), and they’ve been used just as long for detoxification. Plus, you can eat the greens.
Beets are grown in-home most often as microgreens, but if you have the space and desire you can let them grow to maturity, too.
Because of their deep colors, beets also add a nice bit of variety to an indoor garden, especially one that might be leaning more toward greens like pea shoots and microgreens.
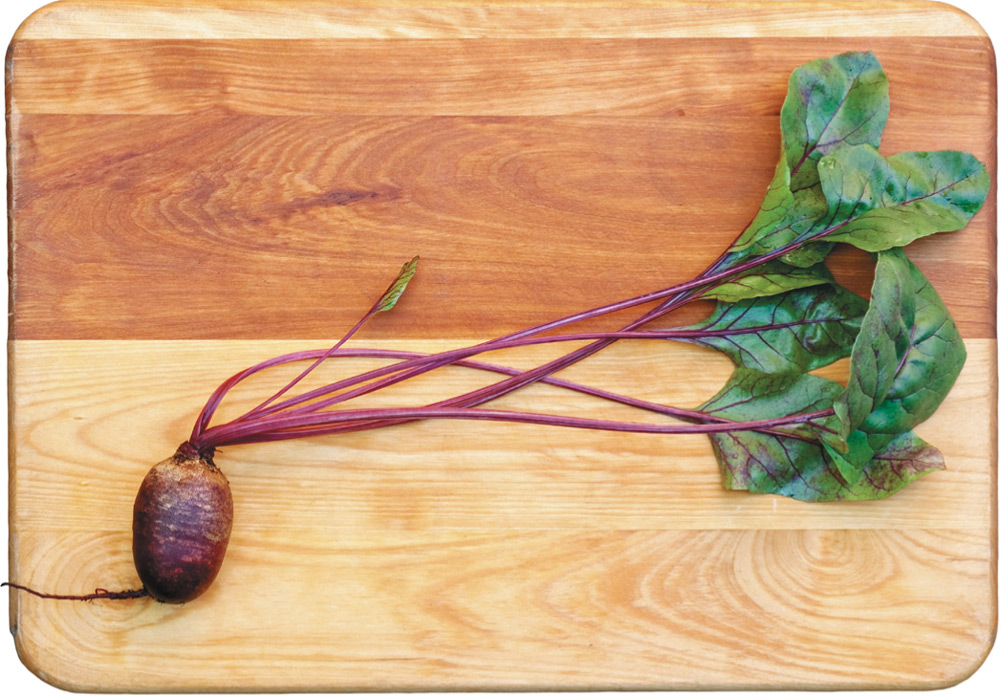
Personally, I don’t mind the dark red beets that stain cutting boards (and usually my shirt) when I slice into them for cooking. But some people avoid beets because they don’t want to deal with this dramatic juice. Fortunately, there are options that let you avoid the issue entirely.
One quick note on variety: sometimes, farmers sell “baby beets” that are about half the size of other beets and often have fully-formed leaves. These aren’t actually a type of beet, they’re simply standard beets that have been thinned out of a bed so that other beets can grow larger. They’re still delicious, just don’t try looking for them as a seed variety.
‘Chioggia’: This variety features pink-striped stems and an interior that has red rings, looking somewhat like a bulls-eye. They can grow fairly big, though, so if you’re trying to stick to smaller containers, opt for a more modest beet type.
‘Cylindra’: Also known as ‘Formanova,’ this beet forms a cylindrical, purple-tinged root that looks nothing like the beets that most people picture. It needs ample space, so if you want a candidate for your largest pot, consider this quirky variety.
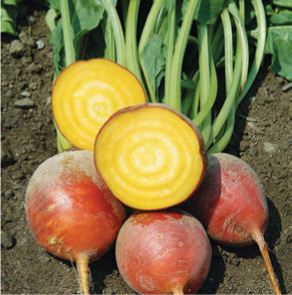
‘Touchstone Gold’: An orange-yellow exterior and bright yellow interior make this beet a beautiful addition to a garden. The tops can get tall, and the beet is only slightly smaller than a ‘Chioggia,’ but it’s worth creating more space for such a stunner.
‘Zeppo’: Here’s a smaller beet, and at fifty days from seed to harvest, it’s faster growing that many other varieties. They’re fairly dependable when it comes to germination, but keep in mind that you might get the red juice when cutting them.
Even with smaller varieties, beets need ample room to grow because their taproot (the thing that looks like a long rat’s tail) can extend quite a bit into earth. Because of that, use containers that are at least 16 inches deep.
You can opt for a rectangular container to mimic the look of beets in a field, or utilize a round pot, which looks cool when all the red-veined greens are standing up together. As with other crops, terra cotta pots are less ideal because they tend to draw moisture from the soil, but with a regular watering schedule, this is less important than it would be for something like lettuces.
When selecting a planter, make sure that it’s thoroughly cleaned if you’ve grown plants in it previously. Even with old pots, it’s possible to transfer diseases onto the new crop, and since beets are root vegetables, they would be more affected by any contaminants that leach into the soil.
Beets do well in loose soil, so you might consider a soilless mix like compost and sand mixed together, or at least putting some vermiculite in your potting mix to allow for more drainage. I’ve had success with an indoor potting soil mix combined with some vermiculite, and putting coir at the bottom of the pot.
Avoid using any larger materials when creating your soil mix, however. The beets will grow around even medium-sized rocks, resulting in some warped-looking vegetables.
Before seeding, add some fertilizer like a seaweed blend, or just a little compost tea, if you happen to create that at home or have that as an option at your local garden store. Compost tea works well for a wide variety of vegetables, especially for those that seem to be struggling. The solution has beneficial soil microbes that result from composted matter, and you only need a small amount for application. I often use either fish fertilizer or compost tea for stressed-out plants, or before seeding beets, because it provides a quick hit of nutrition without heavy fertilization.

Beets draw nutrients rather heavily so a little compost tea or other fertilizer is a good idea.
After creating your soil mix, fill your container and leave an inch of empty space at the top. Poke your finger into the planting medium where you’d like the beets to go, about half an inch deep. Space the seed holes about 3 inches apart, if not more.
Drop two to three seeds into each hole, since this will increase your chances of having at least one sturdy, hardy beet in each spot. If more develop, you can simply thin them out and let the strongest one keep growing. Sprinkle soil or vermiculite on top of the holes, being careful not to press down when filling, since compaction could hinder germination.
Water thoroughly, so that the planting medium feels very wet but not flooded. Place pot in an area with full sun.
Here are some tips on getting your beets from seed to harvest:
Water regularly—unlike some crops that should be watered when the soil is particularly dry, beets do well with a predictable watering schedule. This will help them to grow more quickly. Don’t overwater, though. If greens begin looking yellowish, let the plant dry out a bit.
Rotate your container if you have it in front of a window instead of under a light. Greens tend to lean toward the light source, which is fine if it’s directly overhead, but can be stressful on the plant if it’s always on one side of the pot.
Because of their broad leaves and tendency toward heliotropism, beets should be rotated by quarter- or half-turns regularly so they don’t lean.
At our farm, the beets always start out looking like a line of people trying to shop at a big box store the day after Thanksgiving. They’re constantly pushing each other for space, and very often, we need to thin them not just once, but two or sometimes three times, depending on how large they’re getting. Most likely, you’ll experience similar crowding, and when that happens, gently pull out the weaker and smaller beet greens, and add them to a salad. When they’re “harvested” at this stage, they’re considered microgreens.
Like carrots, beets do better when the greens are upright, so “hill up” the greens by adding more soil around them and forming a larger base for them until they stand up.
This can happen when too much nitrogen is in the soil. Most likely, you’ve been overfertilizing, so flush out some of the nitrogen by ceasing usage of that and watering regularly instead, making sure the pot has adequate drainage.
With farming, this happens often, because it’s an indication of uneven moisture levels. In other words, you get heavy rains, followed by near drought, and then heavy rains again. Beets are happiest with consistent water levels, and they split if they don’t have that. This issue is less common with indoor gardening efforts, because you can control the frequency and amount of watering. If you’re seeing splitting, look at your notes to see if you can refine your watering schedule.
Much like radishes and carrots, beets indicate when they’re ready to be picked by “shouldering,” which means they push up out of the soil with part of the vegetable showing. This is hugely helpful in determining the size of the beet.
If they aren’t shouldering, gently dig into the soil with your finger until you can feel the top of the beet, and this will give you an idea of the size. If they’re not ready, just replace whatever soil you’ve moved and check again in a few days. In some cases, beets will shoulder too early and begin to turn green, and if this happens, hill up the soil around the beet to prevent more of the beet being exposed.
Once they’re ready for harvest, just take hold at the base of the leaves and give a firm tug. It doesn’t take much effort, and they tend to come out easily.
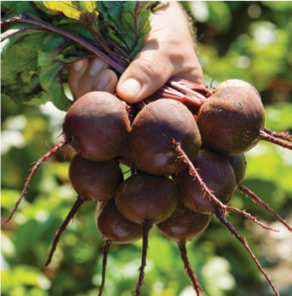
If the shoulders of your in-home grown beets get this big, you will have triumphed. It is not easy, but it can be done.
Beets store well for up to three weeks in the refrigerator, as long as you don’t wash them first, which can quicken spoilage. Also, clip the leaves and store them separately, also unwashed, in a plastic bag in the crisper drawer.
Don’t forget about the greens. Many gardeners grow beets just for the greens, which have an earthy flavor and are prepared and consumed in much the same way as spinach, chard, or any other rugged green (turnip, mustard, etc.).
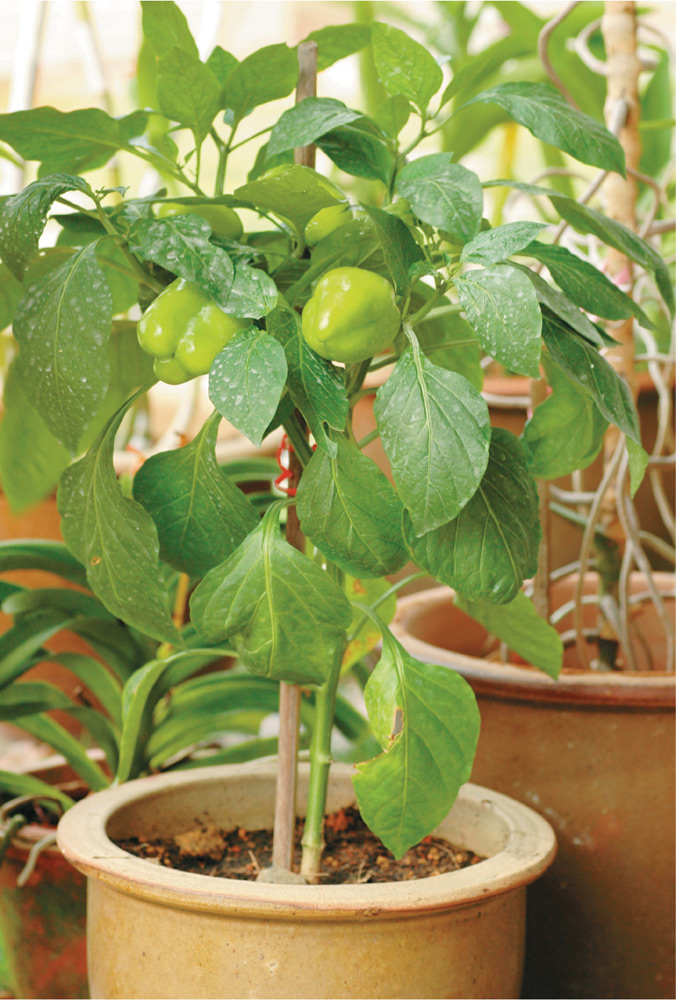
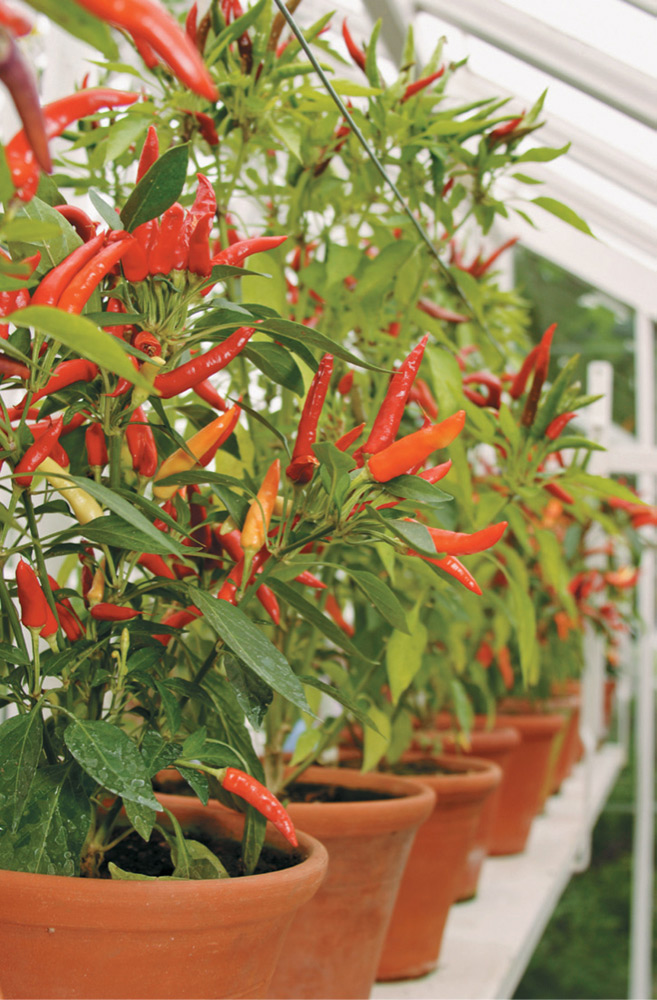
HOT PEPPERSIn my indoor growing ventures, I’ve had limited success with bell peppers, mainly because they require a higher degree of warmth and more light than everything else I’m growing.
As you may find with your own indoor gardening strategies, having one plant that demands more of your attention and is kind of a space-and-resources hog can make your gardening feel like it’s taking up more time than you want to give. Personally, I like to set my schedule for indoor gardening—more hours in the winter, barely any in the summer—and having one vegetable that throws it all off is a primary candidate for getting booted from the grow space.
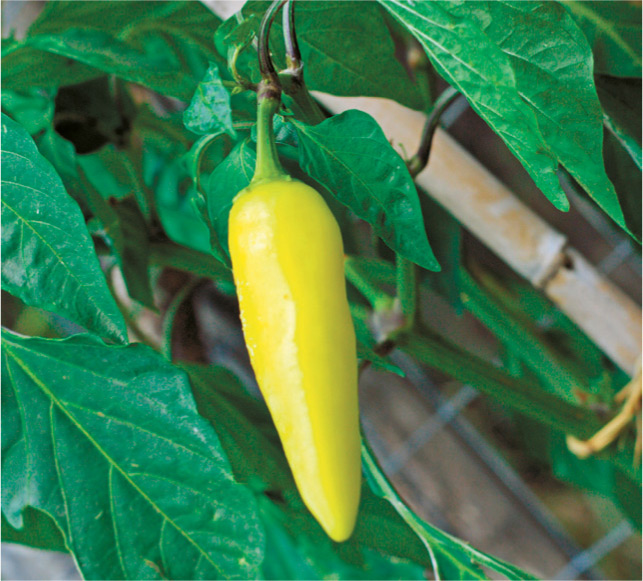
Hot peppers, on the other hand, are a different story. Some varieties grow to a nice, manageable size for a container, and although they do have unique needs when it comes to heat and watering, they’re easily maintained.
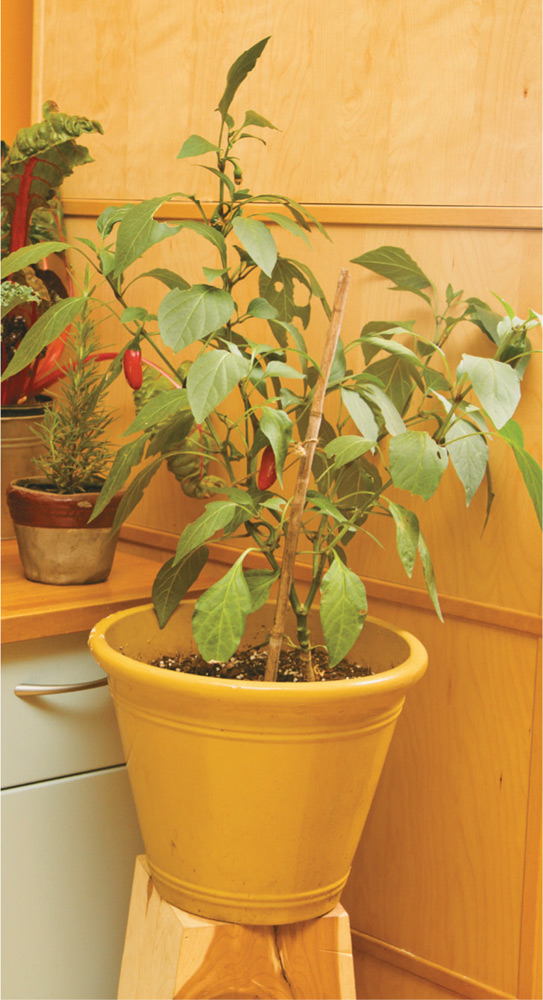
Hot chile pepper plants generally fare well indoors and are well proportioned for most indoor kitchen gardens.
Although it might seem that hot pepper plants have an especially shallow root system—they’re dishearteningly easy to knock over or pull out of the ground by accident—there are several varieties that rely on extending their roots fairly deep into the soil. That’s why it’s particularly important to choose a variety that’s better suited to indoor growing, unless you want to invest in larger containers. These tend to work well for an indoor garden:
‘Firecracker’: With this variety, peppers grow straight upward rather than hanging down, creating a firework-type of effect. Peppers turn from green to yellow to red while maturing.

‘Firecracker’ chile pepper
‘Habanero’: With a characteristic orange color and a very pungent aroma, this is one of the hottest peppers you can grow. If you’re sensitive to capsaicin, which gives peppers their heat, you may want to use gloves when harvesting and handling this one.

Habanero pepper
‘Hungarian Hot Wax’: Particularly good for making pickled peppers, this variety produces robust fruit that changes from yellow to red, and is spicy but not my-mouth-is-on-fire hot.
‘Hungarian Hot Wax’ pepper
Like many other plants, hot peppers will do better in plastic than in terra cotta pots, because the clay will dry out the soil mix faster than the plastic. Considering that the peppers will require more heat and moisture than many other plants you might be growing, using terra cotta will thwart your efforts.
When selecting a planter, make sure that it’s thoroughly cleaned if you’ve grown plants in it previously. Even with old pots, it’s possible to transfer diseases onto the new crop.
All indoor plants need attention when it comes to water, light, and heat, but hot peppers are especially finicky about these three factors. Make sure you have either a sunny spot by a south-facing window or adequate grow lights. The lights should be positioned only about 6 inches above the plant while it germinates, and should be left on for fourteen to sixteen hours per day.
Glazed ceramic pots work very well with pepper plants from a design standpoint.
In terms of soil, standard indoor potting mix will work, and just make sure that there’s adequate drainage by adding some sand, coir, or vermiculite. You can also blend some compost into the soil for added nutrition.
With hot peppers, you can speed up germination time by tweaking the planting process, starting with getting moisture into the seeds. Follow these steps:
Keep the container or bag in an area that’s warm but not hot. In my house, this is on a shelf under our butcher block that’s near the stove. If it’s cold in the house, I might use a germination mat and put the container on that.
Check the seeds after a few days, and if they seem puffed up then you’re ready to plant. Sometimes they might even be starting to sprout, which is a great head start.
In order to get a nice amount of moisture throughout the soil before planting, mix your soil with some water until it has a damp, but not soaked, consistency. You can determine adequate water level by grabbing a handful and squeezing—if water runs in a steady stream, then it’s too wet and you need to add more dry soil. If just a drop or two of water comes out, that’s perfect.
Put the soil in your container (if you’ve mixed it elsewhere), leaving about an inch on top from the edge of the container.
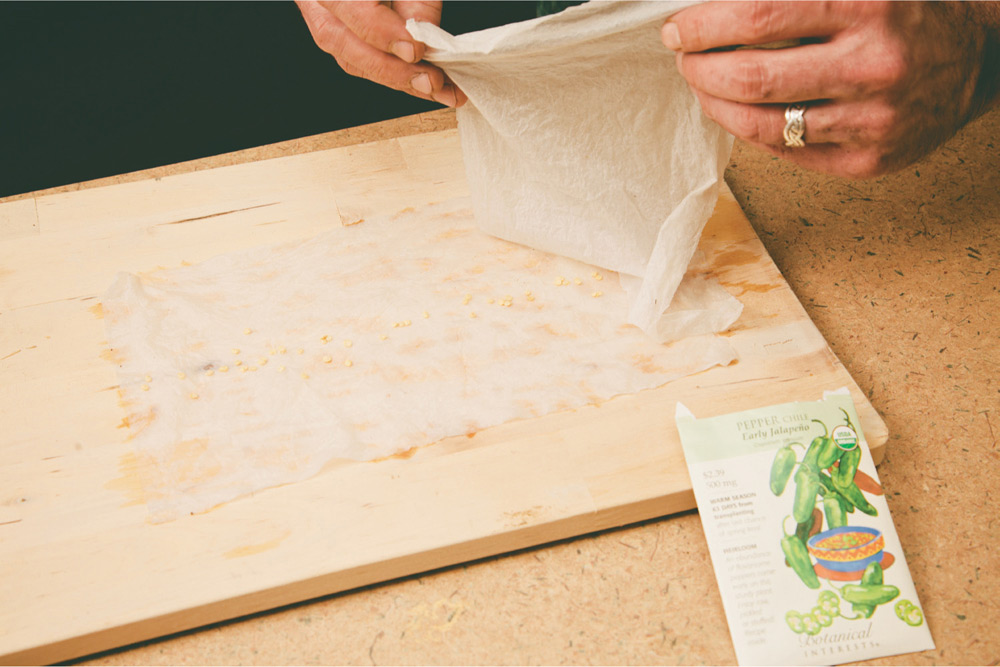
Dampen two paper towels and place your seeds in a single layer across one of them, putting the other dampened paper towel on top.
Sow each seed about half an inch deep and at least 2 inches apart. Cover lightly with compost, and then mist the soil until it’s moist but not saturated. Put the container in the sun or under a grow light.
You should begin to see germination in about one to six weeks, depending on variety and growing conditions.
Here are some tips on getting your peppers from seed to harvest:
Water thoroughly after the peppers germinate. Peppers thrive with regular watering, and you should mist or water when the soil is just beginning to look dry.
Check airflow so that there’s circulation, but not an indoor wind tunnel. For a few hours a day, turn on a small fan in the area, set on low. This will help to mimic outdoor conditions, but you don’t want to bring down the temperature of the room too much.
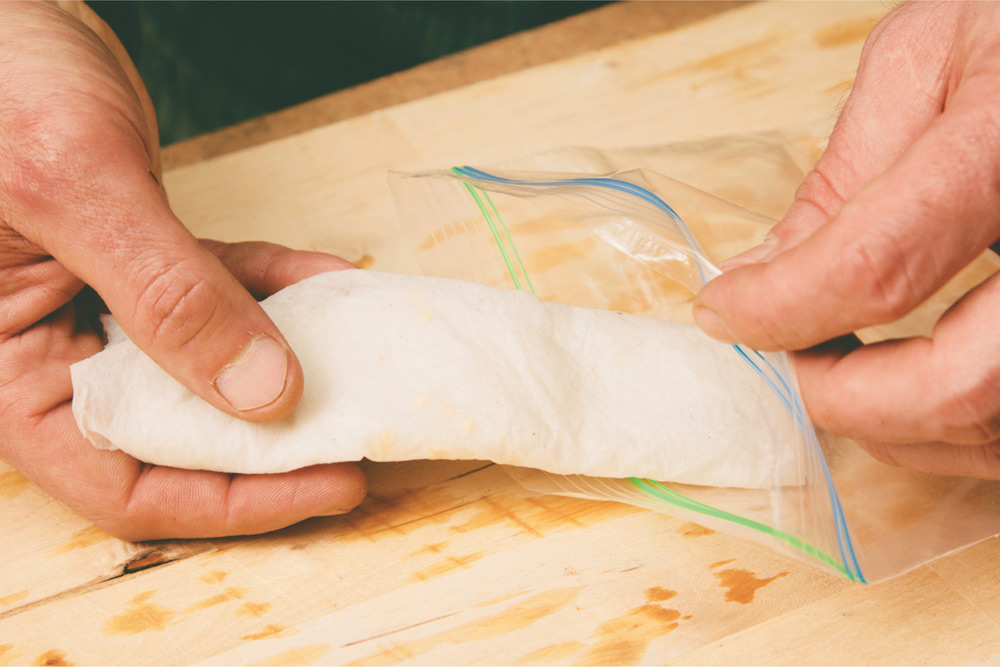
Put the seeds and paper towels into a plastic bag that can be sealed or a plastic container with a tight-fitting lid.
Check your seed packet for seed-to-harvest maturity dates first, since peppers can vary widely in terms of growth timeframes. If it’s off track, make sure that you’re not placing the plants near areas that experience temperature fluctuations, such as a countertop under a heating vent or an air conditioning vent. Even placing the plant near an outside door that brings in cold air occasionally can cause the plant to slow its growth.
Sometimes, pepper seeds can be fussy. In that case, it might be time to invest in a heat mat, which can be purchased at any garden store. These rectangular mats look like tiny heating pads, but they don’t get as hot. If I’m experiencing slow germination times, especially in the winter, I place the pot on this type of mat and wait a few days—usually, the mat will heat the soil enough to foster growth. The heat is so minimal that you can put the mat on any surface, too; I usually put mine on a wooden counter, without any fear of scorching it.
Picking chili peppers off your own indoor plant has got to rank as one of the happiest experiences of home gardening. Depending on variety, you’re likely looking at a cheery, brightly colored pepper that will taste amazing. Keep in mind that peppers will start off as green and then will gradually transition to a color if that’s part of the variety you’ve chosen. If you’re growing a type that stays green, you can check for “doneness” by gently squeezing the pepper—if it’s rock solid, then it’s not ready, but if it has some give to it, then you can harvest.
When red chili peppers are bright red, snip them as they are needed with scissors. Avoid plucking them off the plant.
The best way to harvest is to clip the pepper close to the stem, rather than plucking them off, which can sometimes yank the plant along with it.
Peppers will store nicely in the refrigerator for at least a week, especially if you don’t wash them first. They also dry exceedingly well with a food dehydrator or in the oven. When we have a bumper crop of peppers, I dry a bunch of them and then vacuum seal them to use later for chili or stew.
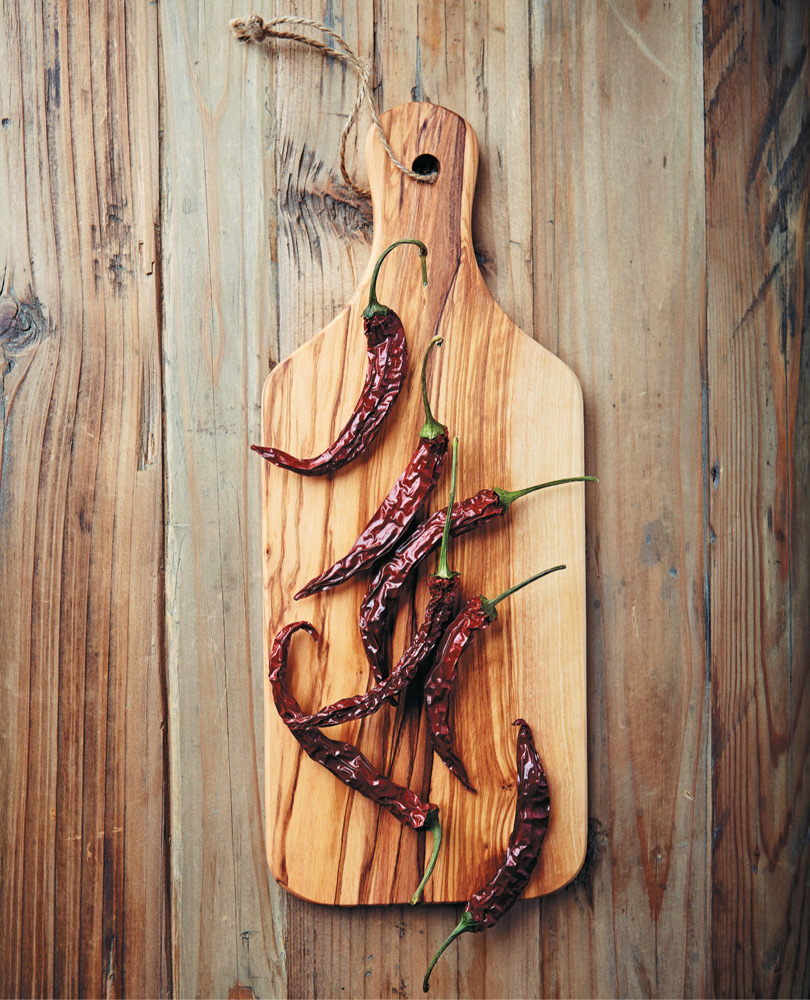
Red chili peppers, and many other types of peppers, dry readily in many environments, including most kitchens. They also look great, so don’t be afraid to have some fun using them in your décor.
 POTATOES
In many cases, potatoes grow so well outside and store so beautifully that growing them indoors is more of a jaunty experiment than a practical venture. However, I’m a fan of taking on any kind of experiment, especially if it’s jaunty.
Sometimes, indoor growing can be an advantage for potatoes, too. In our fields, we have to fight potato bugs on a yearly basis, and because we’re big believers in organic practices and natural pest management control, that tends to mean that I squish them instead of spray them. Bright orange and fat as woodticks, potato bugs leave me with stained hands and a slightly nauseated feeling. But at home, I can just enjoy watching the potato plant’s progress without the dread of “squashing day.”
Also, there’s a certain satisfaction that comes with knowing you’re growing potatoes in your basement. It feels like being a modern pioneer.
Potatoes, believe it or not, can be grown in pots indoors.
Farmers and gardeners rely on “seed potatoes” for planting, but that term doesn’t mean that these potatoes are any different than the type you eat. In fact, many farmers (including us) put aside their best potatoes during harvest—which often means the ones with the most eyes and seem especially firm and hearty—and use those for the next planting.
Theoretically, you could also go into the grocery store and choose a bag of potatoes and call those your seed stock. However, this is usually a lessideal solution because most potatoes, even many that are organic, are treated with anti-sprouting agents that extend their shelf life. Those supermarket potatoes might sprout at some point, but to grow the best potatoes possible, buy some potatoes that were specifically developed to be used as seed.
Because of their small size, fingerling potatoes can be a good indoor growing choice.
When researching your options (see Resources in the back for some choices), here are a couple factors to consider:
Keep in mind that depending on your state, you may not be able to order the potatoes during certain months. This is because seed potatoes rot quickly if they’re allowed to freeze, so seed companies won’t ship them to colder climates if there’s a chance that they’ll get spoiled.
Seed potatoes can run out once summer approaches. This makes sense, since most of these potatoes are harvested in early October and then are ordered by farmers and gardeners over the winter and early spring. By June, and sometimes even by April, the pickings get slim. So, plan ahead.
One pound of seed potatoes will result in about 10 to 15 pounds of potatoes. It doesn’t take much to make a pound of potatoes, so when ordering, lean toward the conservative side.
Much like other indoor crops, choosing smaller varieties tends to work well. I’ve had success with fingerling varieties like ‘Russian Banana’ and ‘French Fingerling’, as well as more petite options like ‘Mountain Rose’, ‘Rio Grande’, or ‘All Blue’.
Compared to other crops you might be growing indoors, potatoes take a long time, especially if you’ve got trays of fast-sprouting wheatgrass and microgreens in the mix as comparison. The quickest timeframe you can get is about seventy days, but usually, you’re looking at about four months. They don’t require much maintenance at all, so it’s not like you have to tweak your vacation schedule to grow them, but planning ahead is helpful so you can anticipate harvesting.
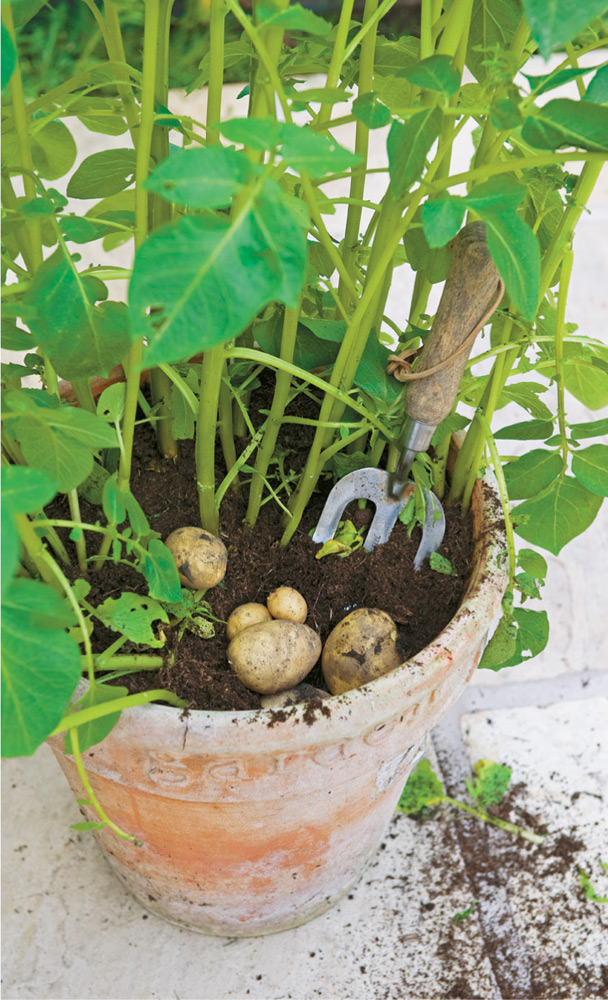
Here’s your chance to use your biggest pot or container. Some people have used 5-gallon buckets with holes drilled in the bottom, or special potato growing bags that are fashioned out of heavy felt that can be easily moved around.
Whatever you choose, make sure that there’s adequate drainage options, and that the pot is in an area where the water can drain easily. You’ll be using a fair amount of water during the initial watering period and when you do maintenance watering, so placing the pot in a spot where you have easy water access and a drain is helpful—for my setup, the area near my laundry sink in the basement has proved to be ideal.
The main preparation for seeding potatoes is cutting and sprouting. For some smaller potatoes with only one “eye,” this isn’t a necessary step, but for the majority of seed potatoes, this strategy helps prevent diseases and ensures a heartier crop. Here are the steps:
Wash potatoes to remove dirt and debris; this is an especially important step if buying non-organic potatoes, because you want to remove any pesticide residue before planting.
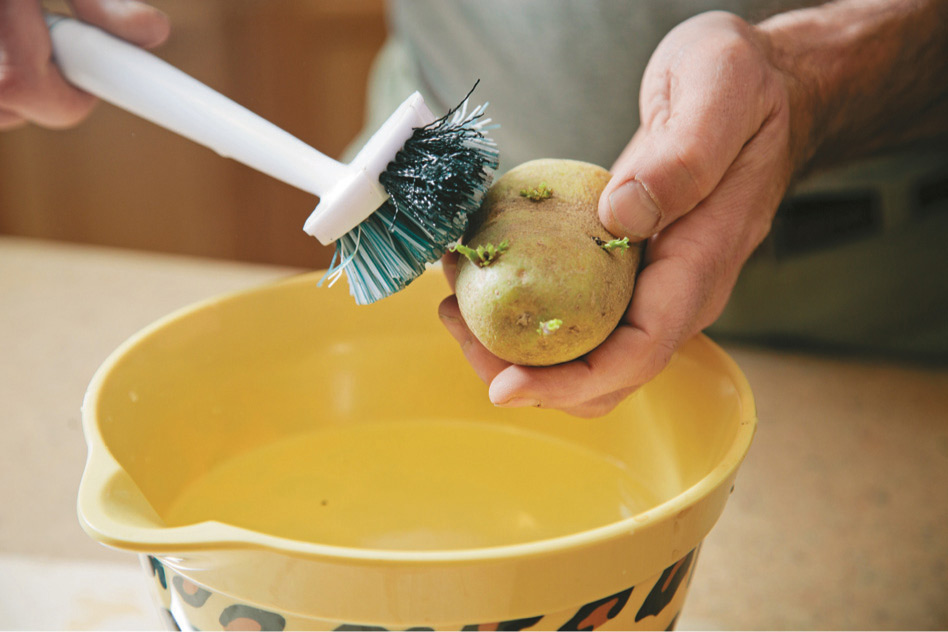
Wash the seedling potatoes well.

Cut the seedlings into small pieces.
Cut each potato into pieces that include at least one eye per piece. An “eye” is the indentation where a potato will sprout eventually.
Set potatoes aside for at least a week before planting. The cut side should be allowed to toughen up, in a process also called scabbing. The eyes will begin to sprout, and this is a sign that the potato is ready to plant.
Alternately, you can employ a method that’s often used for teaching kids about plant growth: put four toothpicks around the potato chunk, about halfway between top and bottom. Put the potato eye-side down in a glass jar of water, with the toothpicks preventing the potato from submerging completely. Put the jar in a sunny spot, and change the water if it begins to look cloudy. Roots will sprout in about a week. This method can speed up sprouting if that’s what you want, but you won’t get the scabbing that helps with disease control.
In terms of soil, you can use indoor potting mix for vegetables, and mix in vermiculite or sand to help with drainage. Resist any urge to include outdoor garden soil in the mix, even if it’s rich with compost and other nutrients. You don’t want to take the chance that you’ll bring in pests from outdoors.
Fill the pot or container about a third full of your soil mix. As the plant grows, you’ll need to keep adding soil, so it’s best to stay minimal with the amount at the beginning, even if it looks like the pot is mainly empty.
Place the potato chunks about 6 inches apart, and 3 inches deep, with root side down. Because the plants will need room to grow, it’s best to put the seed potatoes at least 6 inches from the edge of the pot as well.
Cover the potatoes with about 3 inches of soil, and water them thoroughly, until water begins running out of the drainage holes in the bottom.
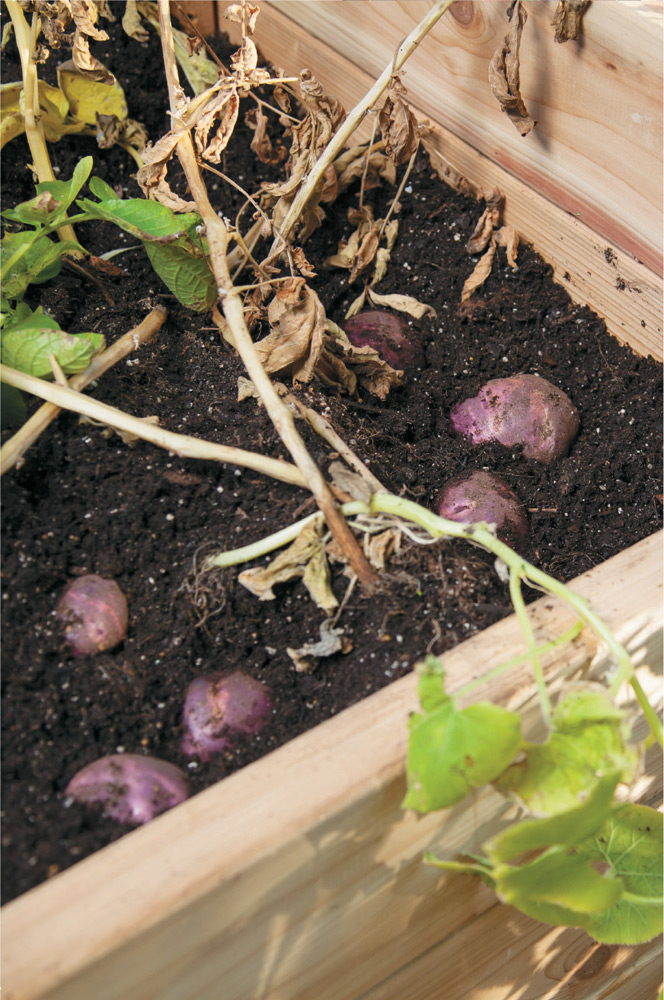
When the plant has grown about 6 inches above the surface (about one to three weeks after planting) add more soil to the pot without completely covering the new growth. When the stem reaches the level of the top of your pot, add soil again and hill it around each stem. This helps to ensure that the potatoes will grow more deeply under the soil and won’t be subjected to sunlight, which would cause them to turn green.
Green potatoes, while they sound colorful and charming, are mildly toxic because they contain a substance called solanine, which occurs when the plant feels threatened. The length of exposure to light, and the intensity of the light, can raise the level of solanine, with the highest concentration located in the potato’s skin. This whole process can happen when the potato grows too close to the soil surface, or is stored long-term in an area with even low light levels. If you don’t spot any green tint, you’ll know when solanine is present because your potatoes have a bitter aftertaste. Prevent the issue by being diligent about hilling up the potatoes so they’re well protected from light.
Keep the container well watered, but not soaking. The soil doesn’t have to be particularly damp, but you should have the potatoes on a consistent watering schedule to foster more growth.
If you’ve taken a chance on using supermarket potatoes instead of certified seed potatoes, you may be thwarted in your growing. Also, if you planted the seed pieces before they sprout, they’ll take longer to fully establish.
Evil takes many forms, and this is one of them. These are Colorado potato beetles, and you need to pick them off before they destroy your plants. You can squish them if you’re feeling resentful, or simply throw them into some soapy water, where they’ll expire. To make sure that you’ve gotten the eggs as well, cut up some basil leaves and let them steep in about a cup of water for a few days. Strain, put in a mister and thoroughly spray the leaves.
This is probably the only instance in growing when you want dead, dry leaves instead of vibrant green ones. If this is happening, then it’s likely that your grow space is too warm. Potatoes do best with cool nights of below 55 degrees, and even if you can’t achieve that in your house, move the potatoes to the coolest spot in the house to see if it helps.
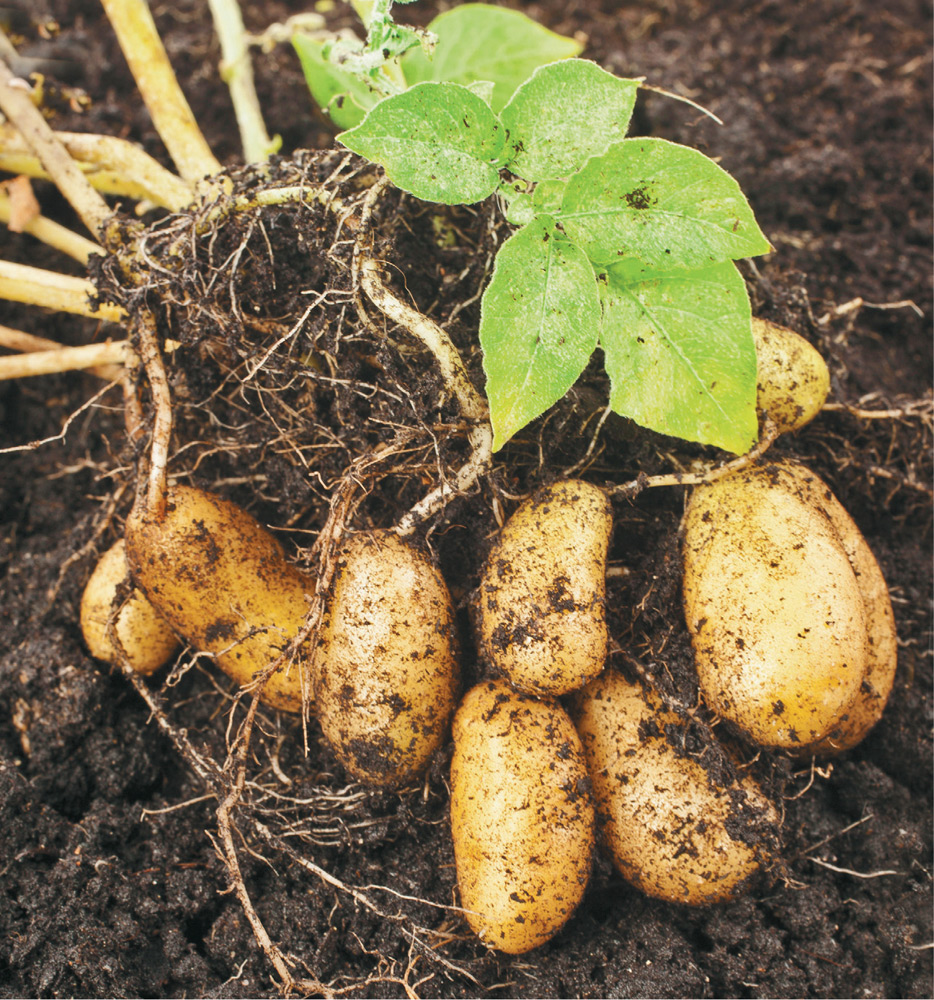
Depending on your potato variety, you’ll be able to harvest after two to four months from planting. If you harvest closer to two months, you’ll have “new potatoes,” which have a thinner skin than the mature stage. That means they don’t store for very long, but they do have a fresh, creamy taste that’s delicious.
You can tell when potatoes are ready because there are usually very small-looking potatoes on the vines/stems, and the stems themselves will dry up and look terrible. When I first started growing potatoes, I always thought I was doing something wrong, but then I’d get a gorgeous little crop. Then I learned that the stem dies off as part of the maturation process, and it’s about two to three weeks after they shrivel up that you can harvest the mature potatoes.
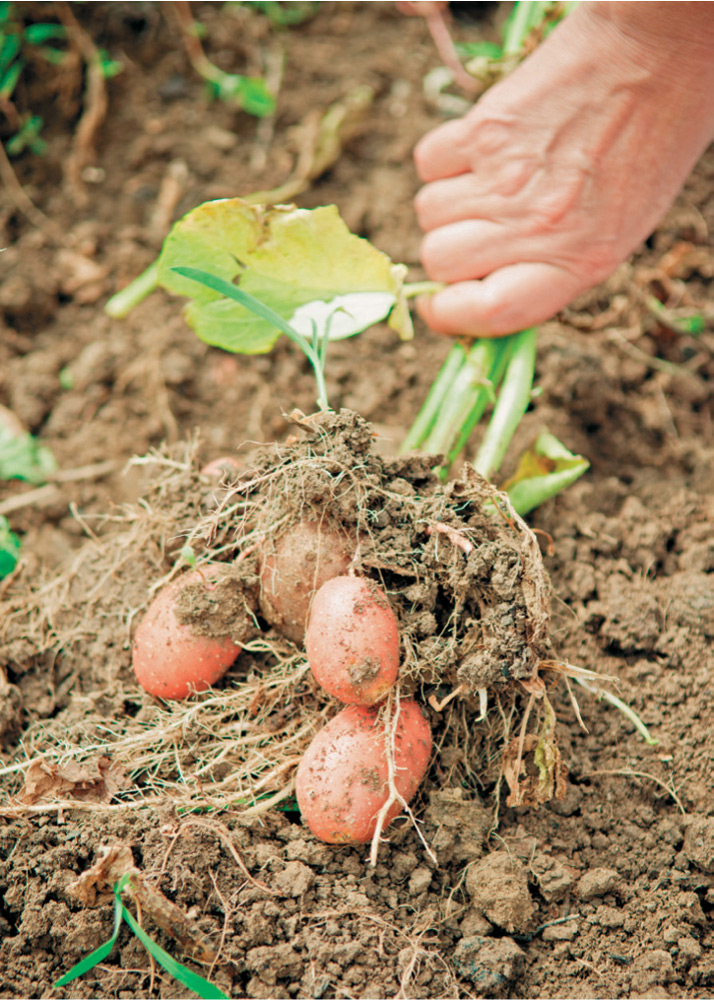
To dig them up, you can simply pull up on the stem and you’ll see a string of potatoes, as well as the original seed potato, also called the “mother.” This potato chunk will be soft and pretty gross and should be discarded. But the others can be collected and stored. Be sure to dig through the soil to make sure you haven’t missed any potatoes that may have dropped off during harvest.
Picking the potatoes can make a bit of a mess—if you can move your plant outdoors it’s not a bad idea.
If you plan to store potatoes for quite a while, place them in a dry spot out of direct sun, like in a shady patio or a garage. This will help them dry out before storage. Then place them in a cool, dry, dark place like a basement; usually, a mesh or burlap sack is ideal because it allows the vegetables to “breathe” while being stored.
No matter how long you plan on storing them, refrain from washing them between harvest and storage, and wash them only just before preparing them for cooking. This will keep the potatoes from potential rot while in storage.
TOMATOESI’ve saved tomatoes for last because, in many cases, they feel like an extra credit project. Some gardeners have insisted to me that you simply can’t grow tomatoes—viable, tasty ones, anyway—indoors because much of what they need is outdoors. For example: bees.
Pollination through the use of bees provides a major boost. After all, tomatoes are a fruit, and like many other fruits, they rely on cross pollination to increase the quality and abundance of the harvest. But you can game the pollination process (more on that later) if you’re truly dedicated to indoor tomatoes.
Usually, even though I am ridiculously in love with tomatoes, I tend to leave them out of my indoor garden because I find them fussy. But then, when I bring them back in, I do have that moment of elation that comes with seeing a tiny green tomato that will eventually transition into a bright little treat.
will do fine indoors if they get suitable amounts of light, wamth, moisture, and air movement.
I’d like to say that I’ve grown palm-sized, juicy slicer tomatoes that dangle like coconuts in my kitchen, even with the snow going sideways outside. But my attempts at larger tomatoes have sputtered, so instead I stick with what I’ve found the most successful: cherry tomatoes and small varieties. Here are some favorites:
‘Yellow Pear’: This is a cheery, bright yellow heirloom variety that makes for a nice contrast with red and orange cherry tomatoes; plus, its pear shape is delightful.
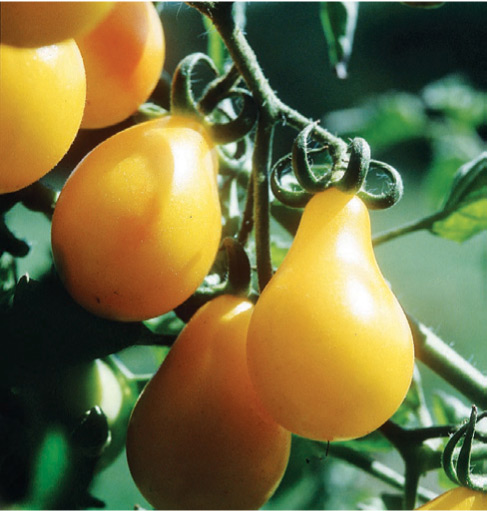
‘Yellow pear’ tomato
‘Pink Ping Pong’: named for the size of the fruit, this cherry tomato doesn’t actually get pink, but does have a slightly lighter reddish color.
‘Tommy Toe’: Originating from the Ozark mountains, this heirloom has high disease resistance and tends to yield copious amounts of tomatoes.
‘Alaska’: This is a nice pick for cooler climates, and it hails from Russia originally; an early producer, the tomato plant yields larger cherry tomatoes.
‘Cream Sausage’: A quirky tomato that’s fun to grow, because it’s bushy and so doesn’t need trellising; also, the tomatoes are long and come to a point at the end, so they resemble peppers.
There are so many more—tomatoes, particularly heirlooms, come in hundreds of varieties, each with their own distinctive characteristics.
One important note is to look at determinate versus indeterminate varieties. The former means that the plant has been developed to reach a specific height and number of tomatoes per plant. They tend to be bushier and therefore don’t need as much trellising or staking.
One drawback to determinates is that the tomatoes all ripen at the same time, so you don’t have the ongoing fruit development that you’d see with inderminates, which produce fruit until they’re killed by frost. Indeterminates are like the grab bag of the tomato world—you don’t know what you’re going to get in terms of height, fruit amount, or life cycle, but that’s part of the fun.
Tomatoes do well with plenty of space for root growth, so opt for large containers and pots. These bigger containers also give you an opportunity to do more with staking and trellising, which is important for healthy plant growth. I’ve seen some successful grow systems that use 5-gallon buckets, which are handy because they can be easily moved. Any smaller than that size and you’ll likely cramp the roots as they’re trying to establish.
At this point, do I even have to mention the importance of drainage? Or of drilling holes in those 5-gallon buckets? If my editor would have allowed it, I may have been tempted to title this book The Importance of Drainage: Indoor Growing for People Who Have Appropriate Pots for the Task. Seriously, though, by now I’m sure you get it—drainage is awesome.
For a trellis system, I’ve seen all kinds of strategies, from a yardstick stuck into the soil with twine holding the plant to an elaborate grid-type plastic trellis that allowed for intensive support and attached to a “self-watering” pot.
Many people on a budget (like myself) do well with the standard tomato plant cage, which is often under $10 (and sometimes under $5) at garden stores. This triangular or round cage is about 3 to 4 feet high, made of wire, and can easily be stuck into any planter. Because it has several concentric rings, you can weave your growing tomato stems inside of it and tie them gently to the rings or sides.
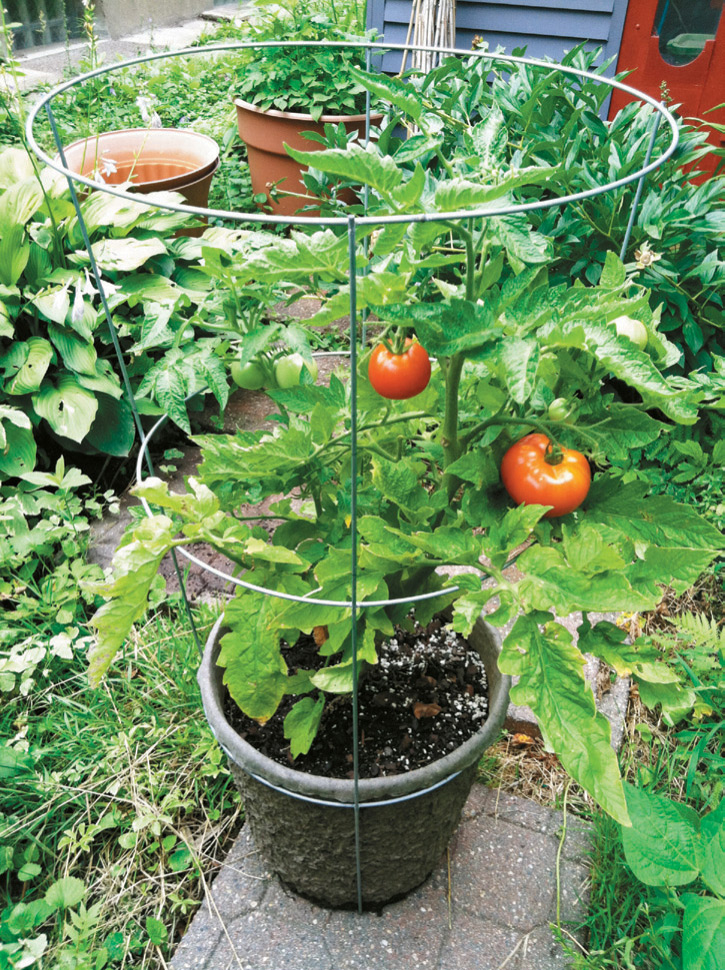
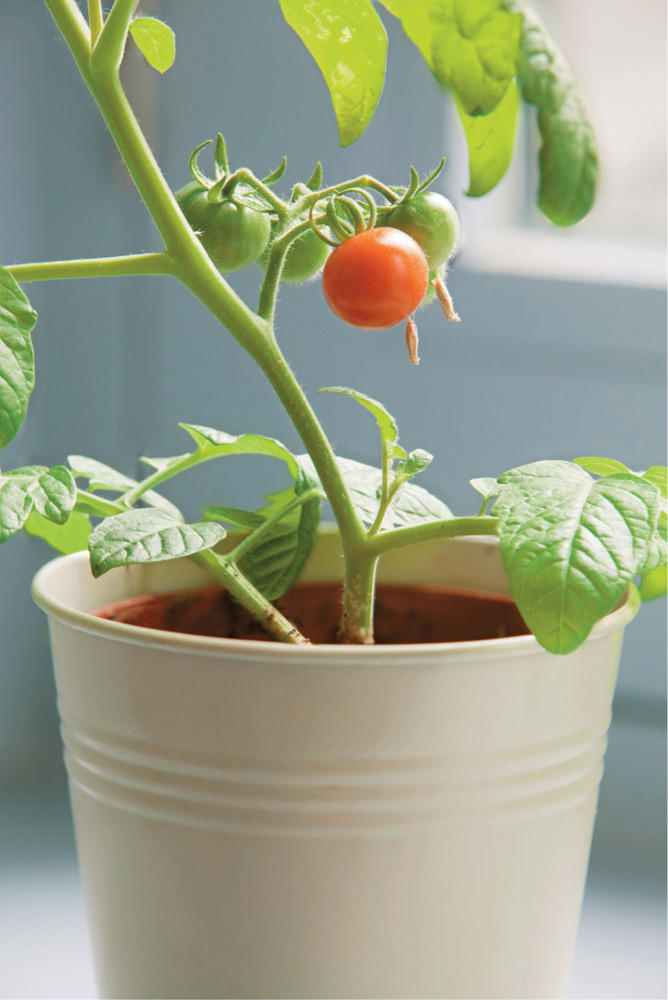
With its compact cage and self-watering pot, this small patio tomato is all set to move indoors.
Unless you have a greenhouse space that you can outfit with some serious grow lights, it’s best to utilize natural sunlight for tomatoes. This usually means finding the biggest south-facing window in your house and getting the tomatoes as close to full sun as possible. If you live in more southern climates, you may want to opt for an east-facing or even north-facing window.
If it’s the middle of winter and you’re barely getting enough sun yourself, then supplement the anemic natural light with some full-spectrum fluorescents. Dedicate at least two of these to your tomatoes, and place them close to the plants—usually no farther than a foot away.
In terms of soil, a good indoor potting soil will work, but be sure to increase the nutrient density with compost or other fertilizer. Also, help with drainage by putting some rocks or pebbles in the bottom of the pot so water won’t sit inside the soil, leading to root rot.
You have a couple choices with how to establish tomato plants. You can start them from seed, but keep in mind that this tends to take quite a while and indeterminate varieties will only begin flowering when they’re at least 3 feet high.
If you do begin from seed, consider using much smaller pots for the first stages of germination, since this will help to create a “root ball” and lead to a healthier, more robust plant. Simply put a seed into a small pot, about 2 inches deep, cover with soil, and water consistently until you see growth.
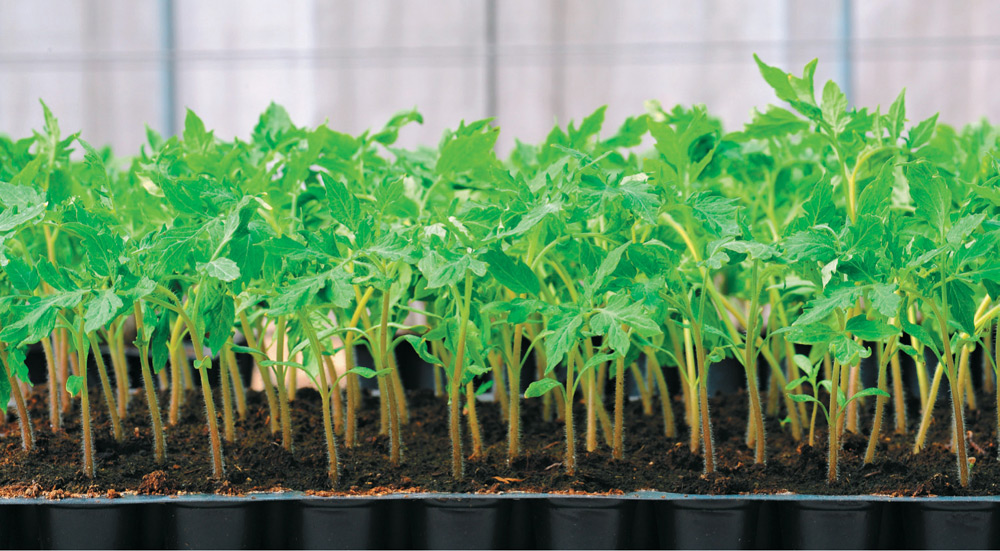
In-home tomato plants can be started indoors too.
As the plant begins to expand, transplant to a medium-sized container that will support the growth and put a small stick or ruler in the soil if you need to do a mini-trellis. After more growth, do one more transplant session to the larger container where you plan to have the plant for the rest of its life cycle. Each time you transplant be sure to water thoroughly—transplanting is often traumatic to a plant and it requires extra watering and care to recover from the shock.
You can also start your indoor tomatoes from cuttings, using outdoor plants at the end of the summer. Just snip a branch from a variety in your garden (or, with permission, someone else’s garden) and strip off all the leaves except one on top. Put the stem in a jar of water and place in a window that gets plenty of sun. Roots will begin to form from the lower part of the stem, and once you see a few inches of root growth, put the stems in the large container, burying most of them but leaving the top leaves exposed.
Finally, you can simply buy transplants from a garden center. I promise, this isn’t cheating. I like to call it a “head start” instead. Tomatoes take time, fertilization, water, and care to grow from tiny sprout to firmly established plant, and when I have a ton of other plants growing and just don’t want to take the time and effort to nurture tomato plants along, getting some healthy, beautiful transplants from my locally owned garden center seems like a perfect strategy.
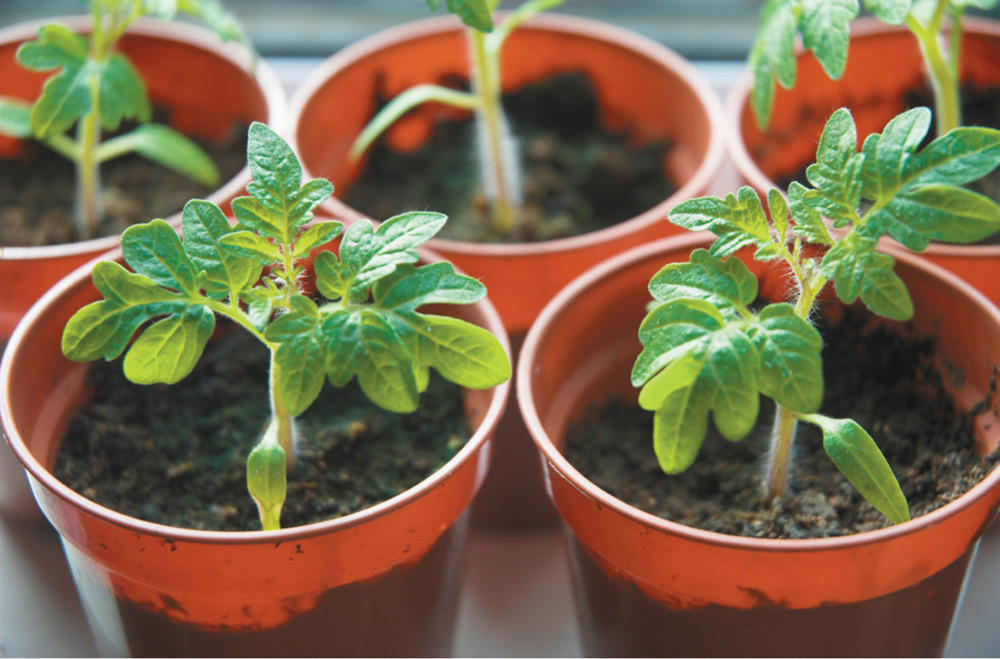
Tomato seedlings are cheap and reliable, but they are only available for a short time in the spring in most areas.
As the plants begin establishing and getting larger, here are some strategies for fostering more growth:
Hand pollination by gently shaking the plant’s flowers daily; some people go beyond this tactic and use a paintbrush to “vibrate” the flowers. Either method is helpful, because it mimics the action of a bee or other pollinator. It’s also fun to research different indoor pollination methods because people are very creative and come up with some surprising tactics, like using ostrich feathers, tuning forks set for middle C (seriously), or an electric shaver. Many people report particularly good results with an electric toothbrush, using the handle instead of the brush, because it shakes the flower as it dislodges the pollen.
Keep proper airflow. Also an aid to pollination, and a generally good health booster is air circulation, so make sure that your growing space has a fan directed toward it. I use a rotating fan since that replicates that occasional breezes that would occur outside, as opposed to setting a fan to blow directly on the plant at all times, which could cause stress eventually.
Create a natural day and night. Although tomatoes love sun, they also need to rest in order to grow properly, much like any other plant. So if you’re utilizing growing lights, be sure to simulate a day by turning lights on at sunrise and off at sunset. If you’re in northern climates during the winter, you may want to create a longer day for the tomatoes by extending your “day” for them by an extra few hours. This is where a timer can come in handy.
Water consistently. Just like they love sun, tomatoes also appreciate regular watering. The soil in your container should be damp but not soaked, and it’s likely that you’ll have to water every few days, depending on the dryness of your house’s air.
Watch for insects like aphids, spider mites, and whiteflies. These are common in indoor spaces and can cause serious damage to your tomatoes. Either place sticky insect traps near the tomatoes or employ a soapy spray that consists of mild soap (like Dr. Bronner’s) diluted in water and put into a spray bottle.
When tomatoes seem to be struggling, they rebound nicely with some fertilizer application, particularly kelp and bone meal. Tomatoes are “heavy feeders,” which means they need plenty of nutrients, and even with compost mixed into your soil, it’s likely you’ll have to add some fertilization along the way. When leaves begin to yellow, it’s often a major sign of either nutrient deficiency or overwatering.
This is called blossom-end rot, and although it looks fairly serious, it’s not a disease and can be controlled. The condition is sometimes caused by a calcium deficiency brought on by an uneven watering schedule. In the field, we see this problem when it rains heavily and then we’re hit by drought. Another factor might be excess nitrogen, so if you’re overfertilizing, you might see this form on several tomatoes. Fortunately, if you catch this early, you can correct the issue by keeping the soil at a consistent moisture level, and also by mulching—just cover the top of the soil with straw, available at any garden store, which helps to keep moisture in the soil.
Another major thorn in the side of tomato growers is this fungal problem, known as “blight.” For some home gardeners, blight takes out their tomato plants every season, and they try planting in new places to alleviate the issue. When growing indoors, it’s easier to spot blight early and try containment methods. First, make sure you’re not getting any water on the leaves or touching the plants when they’re wet. Don’t mist the plant, ever, as this will worsen the problem. Instead, pick off the affected leaves and destroy them. Increase air circulation to keep the leaves as dry as possible. If the issue is extensive, consider using a spray like copper fungicide, which is appropriate for use on organic plants. In addition to early blight, the spray also tackles powdery mildew, black spots, and downy mildew.
Here’s another indication of uneven watering. See the answer above for strategies that will help alleviate the problem.
Nothing could be easier—just pluck the ripe fruit and see if you can resist popping the fruit in your mouth immediately. Ripeness will depend on variety, but expect your tomatoes to go through several color variations as they ripen, from green to vibrant color.
Tomatoes do well on the counter for a few days, especially if you need them to ripen more, which they’ll continue to do even off the vine. Just don’t put tomatoes in the fridge (unless you’ve turned them into salsa) because it significantly impacts the texture and flavor of the fruit.
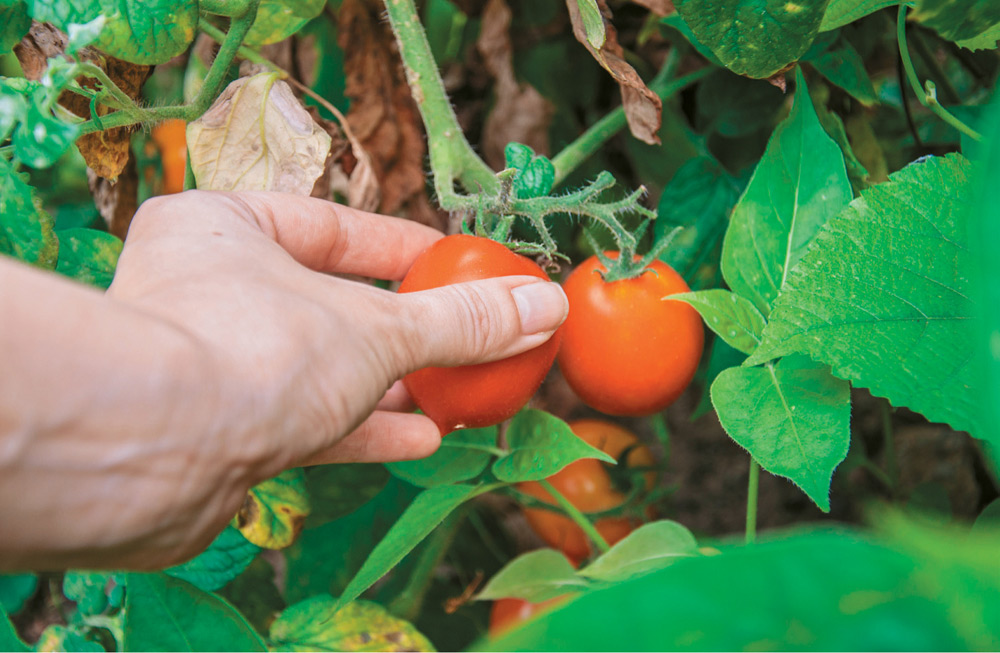
Picking tomatoes is easy: just twist and pull.
Vary Your Crop MixMuch like experimentation with herbs and microgreens, indoor crops can range widely, thanks to the breadth of varieties for each vegetable and fruit. After setting up a grow space and trying out a few favorites like carrots and radishes, you might explore the option of greater expansion.
In my experience, a success tends to kick off another scramble through seed catalogs, pondering whether I could nurture some dwarf fruit trees, for example, or edible flowers. Often, I broaden my experience by trying different varieties of a particular vegetable that’s flourished well in my setup. In addition to a ‘French Breakfast’ radish, for example, I might utilize a deeper pot and see if ‘Purple Plum’ radishes can thrive as well.
It’s also helpful to know that some vegetables are simply ill-suited for indoor growing on a small scale. They might be fine in a greenhouse, but that’s an environment with carefully controlled humidity and temperature, commercially available lights, plenty of maintained and directed airflow, and frequent applications of fertilizer. Also, greenhouse managers work full-time to tweak all these components based on what they observe for eight hours (or more) per day.
For most people, myself included, it’s far easier to stick to options that can be done on a smaller scale with minimal maintenance and cost. For many, that will mean tried-and-true crops like lettuces and carrots instead of field-loving options like cabbage, artichokes, or squash.
Fortunately, the varieties within the indoor-happy crops are wide ranging, from various spinach picks to heirloom cherry tomatoes. Start with a few that you’d love to see on your plate, and let the indoor growing venture expand from there.