This chapter discusses how to automate Tables using Visual Basic for Applications (VBA). VBA is a programming language you can use to extend Excel's functionality far beyond what Microsoft provides with the installed application. VBA allows you to automate complex or repetitive tasks. For example, you can use VBA to format a worksheet received daily from an outside source, pull data from a web page once a week, or build a complex function that can be incorporated into a worksheet formula.
The following are some examples of automating Excel Tables:
- You are building an application to be used by less experienced users, and you want to lock down the Table while providing a few simple functions for adding, editing, and deleting records.
- You want to provide functionality to edit groups of records in a user form, such as all the transactions for a single order (initial deposit, payment to factory, freight, duty, final payment, etc.).
- Your Table supports other workbook functionality, such as recording event information in a log, and you want to insert rows into the Table, update existing Table data, and find and retrieve existing rows in the Table.
- You want to audit a Table and display any data and consistency errors that need to be fixed.
To work through this chapter, it's best if you have at least a moderate level of experience programming, are aware of the Excel Object Model, and want to extend Excel's Table functionality beyond what is provided in the Excel application user interface.
Before you go any further in this chapter, it is important that you have a basic understanding of what objects are and how to use them when automating Excel using VBA. This section presents a brief review of objects and how to use them in the Excel environment. You can skip this section if you already have experience working with objects in the Excel VBA environment.
In the VBA environment, the Excel application presents the things you can access as the Excel Object Model. Consider these basic Excel objects:
- Application—The Excel application.
- Workbooks—A collection of all the workbooks currently open in the Excel application. A collection, in a generic sense, is a set of objects. In this case, the Workbooks collection is a set of individual Workbook objects.
- Workbook—A single workbook.
- Worksheets—A collection of all the worksheets in a workbook.
- Worksheet—A single worksheet or tab in a workbook.
- Cells—A collection of all the cells in a sheet.
- Range—A set of one or more cells on a single worksheet. The cells can be discontinuous. Any cell reference is a Range object.
Notice that the objects in this list correspond to specific things in the Excel application environment that you see when working with workbooks. This is true with any Object Model: Each object refers to a thing that exists (a workbook, a person, a place) and that has properties (a person's age, a place's address.)
Every object belongs to a parent object; for example, a Workbook object's parent is the Application object, and a Cell object's parent is a Worksheet object. One exception is the Application object, which has no parent; it is the highest-level object available when you're looking at the Excel Object Model. When describing the context of an object or method, these terms are often used:
- Parent—The object that exposes the object in question. For example, the Cell object's parent is the Worksheet object.
- Member—A property or method exposed by its parent. For example, the Cell object is a member of the Worksheet object.
Every object has members. A member can be a simple attribute, such as a cell's value, or it can be another object or collection of objects, such as the Workbook object's member Worksheets; the Worksheets object is a member of the Workbook object, and both have a number of properties and methods. A member can also be a method that does an action.
When referencing an object, you have to start with the highest-level parent. You find each subordinate object by typing the parent object followed by a period and then the child member. For example, to reference the value of cell A1 on "Sheet1" in the workbook "My Workbook.xlsx", you use the following VBA syntax:
Application.Workbooks("My Workbook.xlsm").Worksheets("Sheet1").Cells(1, 1).Value
|
NOTE Instead of using the cell reference A1, the example above uses 1, 1, with the Cells object translating to row 1, column 1. There are ways to use the A1 syntax, but we don’t cover them here. |
Be aware that the Excel Object Model exposes default objects depending on what application element is currently active. Many programmers take advantage of this and use shortcuts in their code. For example, the following syntax references cell A1 in whatever worksheet happens to be active when the code is executing:
Cells(1, 1).Value
While this syntax works, it is not considered good practice to use it unless you actually want to reference the active worksheet. However, in that case, we recommend using the ActiveSheet object to provide documentation to other developers that you did, in fact, intend to reference the active sheet:
Application.ActiveSheet.Cells(1, 1).Value
The one object that is implied throughout the Excel VBA environment is the Application object, and you can omit it with no problem. Therefore, the following references are non-ambiguous anywhere in the Excel VBA environment:
Workbooks("My Workbook.xlsm").Worksheets("Sheet1").Cells(1, 1).Value
ActiveSheet.Cells(1, 1).Value
And these references are just as non-ambiguous within Excel:
Application.Workbooks("My Workbook.xlsm").Worksheets("Sheet1").Cells(1, 1).Value
Application.ActiveSheet.Cells(1, 1).Value
You can assign a reference to any object to a variable as long as that variable is the same type as the object or is defined as a generic Object type. The primary reason for doing this is convenience. If you're referencing an object repeatedly, then setting a variable to reference that object can result in less code that is both easier to read and maintain. For example, you can assign the reference to "Sheet1" from above to a variable:
Dim TargetWorksheet As Worksheet
Set TargetWorksheet = Workbooks("My Workbook.xlsm").Worksheets("Sheet1")
Now the reference to A1 becomes:
TargetWorksheet.Cells(1, 1).Value
There are two things to note from this example. First, the Set keyword assigns the reference. VBA requires the use of the Set keyword when assigning references to objects. Also, the variable is a reference to the object, not a copy of the object. You can have any number of variables containing a reference to the same object instance.
|
NOTE You may have noticed that we’re now using the term object reference rather than just object. As you learn more about object-oriented programming, you will learn about objects, object instances, and object references. An object includes the Object Model (properties and methods that belong to it) and the code that governs how it behaves. An example of an object is the Worksheet object. An object instance is a specific instance of that object and includes the data and property values associated with that object instance. Worksheets “Sheet1” and “Sheet2” are examples of object instances; both are instances of the Worksheet object. A variable that references that object contains an object reference. |
When you define variables that reference objects, you must define a variable as the same type as the object being referenced or as a generic Object type. In general, you should use the generic Object type only if that same variable will be assigned references to other objects of different types; when you use a generic Object type, the VBA editor can't assist you with IntelliSense. (IntelliSense presents a list of an object's properties and methods as you enter the object reference followed by a period.)
For the rest of the discussion on automating Tables, we use the following references (objects):
- ThisWorkbook—The workbook in which the code is running. This is convenient when the only workbook being referenced is the one in which the code resides. ThisWorkbook is easier to work with than Workbooks("My Workbook.xlsm"), especially when the workbook name may change.
- Me—When the code resides in a worksheet's code module, Me is a convenient way to reference the Worksheet object in which the code resides.
CAUTION
Excel Online does allow Excel automation with VBA to exist in a file (when viewed in a browser), but it does not execute the code. Any code written behind a workbook is ignored when you open that workbook in the Excel Online application, but the code is retained.
Excel uses the ListObject object to expose a Table in the Excel Object Model. It is contained in the collection ListObjects, which belongs to the Worksheet object. Use this syntax to reference a specific Table on a worksheet:
ThisWorkbook.Worksheets("Sheet1").ListObjects("Table1")
|
TIP Name your Table something other than the default name. Doing so will help you both when writing your code and later, when you are looking at your code trying to figure out what you did. It will also be helpful to someone else looking at your code. |
Because ListObjects is a collection of Tables, you can also access it with an index number:
ThisWorkbook.Worksheets("Sheet1").ListObjects(1)
The index (or position) of a ListObject in the ListObjects collection is determined by the order in which the ListObject objects were created on the worksheet. The ListObject object can be assigned to a variable that has been defined as a ListObject type. The ListObject object has a number of properties and methods used to access and manipulate Tables. The following sections present the most commonly used of these properties and methods.
Table Part Properties
Five properties represent the main parts of a Table. Each of these properties is a Range object. Two additional properties or collections provide access to the rows and columns in a Table. Each collection provides access to all the ListRow and ListColumn objects in the Table. Each ListRow and each ListColumn object has properties and methods.
The Range property returns the entire Table, including the header and total rows. It is a Range object type. The property cannot be set.
The HeaderRowRange property returns the Table's header row. It is a Range object type. The property cannot be set. The range is always a single row—the header row—and extends over all Table columns. When the header row is disabled, this property is set to Nothing.
The DataBodyRange property returns the Table's body. It is a Range object type. The property cannot be set. The range is every row between the header and the total row and extends over all Table columns.
When a Table does not contain any rows, the DataBodyRange property returns Nothing (and ListRows.Count returns 0). This is the only case when the property InsertRowRange returns a Range object that can be used to insert a new row. When in this state, the Table appears to have one row, without any values in it. As soon as one cell in the Table is set to a value, InsertRowRange is set to Nothing, and DataBodyRange is set to the data rows in the Table.
The TotalRowRange property returns the Table's total row. It is a Range object type. The property cannot be set. The range is always a single row—the total row—and extends over all Table columns. When the total row is disabled, this property is set to Nothing.
The InsertRowRange property returns the Table's current insertion row. It is a Range object type. The property cannot be set. While this range was always the first free row below the Table in Excel 2003 (the row with the asterisk), it was partially deprecated in Excel 2007 and remains so in 2013. In Excel 2007 and later versions, InsertRowRange only returns the first data row and only when the Table does not contain any data. Otherwise, it returns Nothing and is effectively useless.
The ListRows property returns a collection of all rows in the Table's DataBodyRange. It is a ListRows object type that behaves very much like a Collection object and contains a collection of ListRow objects. The property cannot be set. Rows are referenced only by a one-based index number relative to the first row. An empty Table has no rows. The ListRows object's Add method is used to insert one new row at a time.
The ListColumns property returns a collection of all columns in the Table. It is a ListColumns object type that behaves very much like a Collection object and contains a collection of ListColumn objects. The property cannot be set. Columns are referenced by a one-based index number relative to the first column. A Table always contains at least one column.
Table Structure Properties
The following sections describe properties that you use to manipulate a Table's structure. All these properties are members of the ListObject object.
The ShowAutoFilter property returns or sets whether the Table's AutoFilter is enabled. It is a Boolean type. When it is set to True, the Table's AutoFilter is enabled. When it is set to False, the AutoFilter is disabled. This property is presented in the Excel user interface as the button DATA | Sort & Filter | Filter.
ShowAutoFilterDropDown Property
The ShowAutoFilterDropDown property returns or sets whether the Table's AutoFilter drop-down controls are displayed. It is a Boolean type. When it is set to True, the Table's AutoFilter drop-down controls are displayed. When it is set to False, they are hidden. If ShowAutoFilter is set to False, the ShowAutoFilterDropDown property cannot be changed. This property is presented in the Excel user interface as the button {TABLE TOOLS} DESIGN | Table Style Options | Filter Button.
The ShowHeaders property returns or sets whether the Table's header row is enabled. It is a Boolean type. When it is set to True, the Table's header row is enabled. When it is set to False, it is disabled. This property is presented in the Excel user interface as the check box {TABLE TOOLS} DESIGN | Table Style Options | Header Row.
The ShowTotals property returns or sets whether the Table's total row is enabled. It is a Boolean type. When it is set to True, the Table's total row is enabled. When it is set to False, it is disabled. This property is presented in the Excel user interface as the check box {TABLE TOOLS} DESIGN | Table Style Options | Total Row.
Table Style Properties
The following sections describe properties that you use to manipulate a Table's style. All these properties are members of the ListObject object.
The TableStyle property returns or sets the Table's style name. It is a Variant type. To change the Table's style, you set the value to the desired style's name as a string. When you assign a Table style to a Table, only the style elements defined in that style are applied; see Chapter 7 for more information. To determine a style's name, move the mouse curser over the desired style in the Table Styles gallery until Excel displays that style's name, as shown in the next figure.
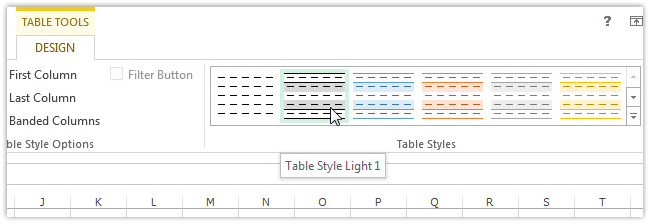
Determining a Table style's name.
This figure shows the Table's style displayed as "Table Style Light 1". To assign that style name to the StyleName property, you just remove the spaces:
ListObject.TableStyle = "TableStyleLight1"
|
NOTE The internal names of all built-in styles do not contain spaces even though the names displayed on the ribbon do contain spaces. |
The TableStyle property is presented in the Excel user interface as the array of buttons in the group {TABLE TOOLS} DESIGN | Table Styles.
ShowTableStyleColumnStripes Property
The ShowTableStyleColumnStripes property returns or sets whether the Table's odd columns are formatted differently than the even columns. It is a Boolean type. When it is set to True, the Table's odd columns are formatted differently than the even columns, as defined in the assigned Table style; the odd columns are formatted using the Table style's First Column Stripe settings, and the even rows are formatted using the Table style's Second Column Stripe settings. When ShowTableStyleColumnStripes is set to False, the Table's columns are not formatted using the assigned Table style. The ShowTableStyleColumnStripes property is presented in the Excel user interface as the check box {TABLE TOOLS} DESIGN | Table Style Options | Banded Columns.
Note that the default number of columns in each stripe is one, but you can change this to larger numbers for the First Column Stripe and Second Column Stripe elements independently. See Chapter 7 for more information.
ShowTableStyleRowStripes Property
The ShowTableStyleRowStripes property returns or sets whether the Table's odd rows are formatted differently than the even rows. It is a Boolean type. When it is set to True, the Table's odd rows are formatted differently than the even rows, as defined in the assigned Table style; the odd rows are formatted using the Table style's First Row Stripe settings, and the even rows are formatted using the Table style's Second Row Stripe settings. When the ShowTableStyleRowStripes property is set to False, the Table's rows are not formatted using the assigned Table style. This property is equivalent to the check box {TABLE TOOLS} DESIGN | Table Style Options | Banded Rows.
Note that the default number of columns in each stripe is one, but you can change this to larger numbers for the First Column Stripe and Second Column Stripe elements independently. See Chapter 7 for more information.
ShowTableStyleFirstColumn Property
The ShowTableStyleFirstColumn property returns or sets whether the Table's first column is formatted differently. It is a Boolean type. When it is set to True, the Table's first column is formatted as defined in the assigned Table style's First Column settings. When it is set to False, the Table's first column is not formatted using the assigned Table style. This property is presented in the Excel user interface as the check box {TABLE TOOLS} DESIGN | Table Style Options | First Column.
ShowTableStyleLastColumn Property
The ShowTableStyleLastColumn property returns or sets whether the Table's last column is formatted differently. It is a Boolean type. When it is set to True, the Table's last column is formatted as defined in the assigned Table style's Last Column settings. When it is set to False, the Table's last column is not formatted using the assigned Table style. This property is presented in the Excel user interface as the check box {TABLE TOOLS} DESIGN | Table Style Options | Last Column.
Other Table Object Properties
The following sections cover Table object properties to use in VBA. These are different than methods.
The Active property returns True if the active cell is within the Table's range, including the header and total rows; it returns False otherwise. It is a Boolean type. The property cannot be set.
The AlternativeText property returns or sets the Table's alternative text. It is a String type. Setting this property overwrites any previous value. This property is presented in the Excel user interface in the Alternative Text dialog box, which you access by right-clicking anywhere in the Table and selecting Table | Alternative Text. This property is displayed and edited in the Title text box.
The AutoFilter property is an AutoFilter object with its own properties and methods. It can be used to inspect the AutoFilter settings and reapply or clear the AutoFilter settings to the Table. It is not used to set filters; you use the Range object's AutoFilter method for that. Both the Table object's AutoFilter object and the Range object's AutoFilter method are covered in more detail later in this chapter.
The Comment property returns or sets the Table's comment. It is a String type. This property, which was added in Excel 2007, is presented in the Excel user interface in the Name Manager dialog box, which you access by selecting FORMULAS | Defined Names | Name Manager. The comment is displayed in the rightmost column, and you change it by editing the name.
The DisplayName property returns or sets the Table's name. It is a String type. When you assign a value to this property, the same restrictions apply as when you change a Table's name from the Excel user interface; for example, it can't already be in use, and it can't contain any spaces. This property, which was added in Excel 2007, behaves almost the same as the Name property, but with the DisplayName property, the name being assigned must conform to Table name restrictions, or an error occurs. This property is presented in the Excel user interface as the text entry box {TABLE TOOLS} DESIGN | Properties | Table Name.
The Name property returns or sets the Table's name. It is a String type. Unlike with the DisplayName property, when you assign a value to the Name property, Excel changes the name so that it follows the Table name rules. For example, it changes spaces to underscores and, if the name already exists, it appends an underscore followed by a number to the name. This property is presented in the Excel user interface as the text entry box {TABLE TOOLS} DESIGN | Properties | Table Name.
|
TIP To avoid problems, use the DisplayName property instead of the Name property to name a Table. The DisplayName property generates an error if the name is illegal or already defined elsewhere. On the other hand, Excel will mangle the value assigned to the Name property to make it legal, and thus the name may not end up being exactly what you intended. |
The Parent property returns the Table's parent. It is an Object type but is always a Worksheet object. The property cannot be set.
The QueryTable property returns the QueryTable object that links to a list server. It is a QueryTable object type. The property cannot be set. The QueryTable object exposes properties and methods that enable you to manipulate the Table.
The following code publishes an existing Table to a SharePoint server and names the published list "Register". It then recovers the QueryTable object for the Table and sets the Table's MaintainConnection property to True:
Dim Table As ListObject
Dim QueryTable As QueryTable
Dim PublishTarget(4) As String
Dim ConnectionString As String
Set Table = ThisWorkbook.Worksheets("Register").ListObjects("tblRegister")
PublishTarget(0) = "0"
PublishTarget(1) = "http://myserver/myproject"
PublishTarget(2) = "1"
PublishTarget(3) = "Register"
ConnectionString = Table.Publish(PublishTarget, True)
Set QueryTable = Table.QueryTable
QueryTable.MaintainConnection = True
The SharePointURL property returns the URL of the SharePoint list. It is a String type. The property is set when you create or maintain a SharePoint connection, and you can't change it. This property is presented in the Excel user interface as the button {TABLE TOOLS} DESIGN | External Table Data | Export | Export Table to SharePoint List. The following code publishes an existing Table to a SharePoint server by using SharePointURL and names the published list "Register":
Dim Table As ListObject
Dim QueryTable As QueryTable
Dim PublishTarget(4) As String
Dim ConnectionString As String
Set Table = ThisWorkbook.Worksheets("Register").ListObjects("tblRegister")
PublishTarget(0) = "0"
PublishTarget(1) = Table.SharePointURL
PublishTarget(2) = "1"
PublishTarget(3) = "Register"
ConnectionString = Table.Publish(PublishTarget, True)
The Slicers property returns the collection of Slicers associated with the Table. It is a Slicers object type that behaves very much like a Collection object and contains a collection of Slicer objects. The property cannot be set. You use the Slicers object to add, manipulate, and delete Slicers associated with the Table. Each Slicer object exposes properties and methods that enable you to manipulate of the Slicer. The Slicers property was added to the ListObject object in Excel 2013. This section provides examples that illustrate how to add, manipulate, and delete a Slicer for a Table.
In the following example, a Slicer is added and placed on the same worksheet as the Table. Note that adding a Slicer is not quite as straightforward as adding other objects to collections; you need to create a SlicerCache object at the same time for each Slicer:
Dim Table As ListObject
Dim SlicerCache As SlicerCache
Dim Slicer As Slicer
Set Table = ThisWorkbook.Worksheets("Register").ListObjects("tblRegister")
Set SlicerCache = ThisWorkbook.SlicerCaches.Add(Table, "Category")
SlicerCache.RequireManualUpdate = False
Set Slicer = SlicerCache.Slicers.Add(Table.Parent, ,
"tblRegisterCategory", "Category", 100, 400)
Note that the SlicerCache object is tied to the Table and the column being filtered. The Slicer itself is the visual representation of the Slicer cache and has a parent, a name, a caption, and a position; it also has a size, but the default size is used in the above example. The SlicerCache object's RequireManualUpdate property is set to False to avoid the "Out-Of-Date" message in the Slicer.
In the following example, the Slicer is configured to show the category "Expense" and hide the category "Income":
Dim Table As ListObject
Dim Slicer As Slicer
Set Table = ThisWorkbook.Worksheets("Register").ListObjects("tblRegister")
Set Slicer = Table.Slicers("tblRegisterCategory")
With Slicer.SlicerCache
.SlicerItems("Expense").Selected = True
.SlicerItems("Income").Selected = False
End With
In the following example, the Slicer is configured to show only one category. This technique is useful when there are many different values and you want only one of them:
Dim Table As ListObject
Dim Slicer As Slicer
Dim SlicerItem As SlicerItem
Set Table = ThisWorkbook.Worksheets("Register").ListObjects("tblRegister")
Set Slicer = Table.Slicers("tblRegisterCategory")
With Slicer.SlicerCache
.ClearManualFilter
For Each SlicerItem In .SlicerItems
If SlicerItem.Name <> "Expense" Then
SlicerItem.Selected = False
End If
Next SlicerItem
End With
In the following example, the Slicer's filter is cleared:
Dim Table As ListObject
Dim Slicer As Slicer
Set Table = ThisWorkbook.Worksheets("Register").ListObjects("tblRegister")
Set Slicer = Table.Slicers("tblRegisterCategory")
Slicer.SlicerCache.ClearManualFilter
In the following example, the Slicer is deleted. Note that the Slicer cache is also deleted when the Slicer is deleted:
Dim Table As ListObject
Dim Slicer As Slicer
Set Table = ThisWorkbook.Worksheets("Register").ListObjects("tblRegister")
Set Slicer = Table.Slicers("tblRegisterCategory")
Slicer.Delete
Table.ShowAutoFilter = False
Note that the Table's ShowAutoFilter property is set to False to hide the drop-down that remains after the Slicer is deleted. If the Table's AutoFilter was enabled when the Slicer was created, then this step isn't necessary. If the Table's AutoFilter was not enabled before the Slicer was added, then only the column being sliced has the AutoFilter drop-down control remain after the Slicer is deleted.
The Sort property returns the Table's Sort object. It is a Sort object type. The property cannot be set. The Sort object exposes properties and methods that enable the sorting of a Table. The Sort property was added in Excel 2007.
The following example sorts a Table by date and description:
Dim Table As ListObject
Set Table = ThisWorkbook.Worksheets("Register").ListObjects("tblRegister")
With Table
.Sort.SortFields.Add .ListColumns("Date").DataBodyRange,_
xlSortOnValues, xlAscending
.Sort.SortFields.Add .ListColumns("Description")._
DataBodyRange, xlSortOnValues, xlAscending
.Sort.Apply
.Sort.SortFields.Clear
End With
|
CAUTION On a protected worksheet, you cannot sort a Table unless all cells in the Table’s header and data body are unlocked or unless the worksheet is unprotected and then protected again. |
The SourceType property returns the Table's current source. It is an XlListObjectSourceType type. The property cannot be set. The following are XlListObjectSourceType constants:
- xlSrcExternal or 0—The source is an external data source, such as a Microsoft SharePoint Foundation site.
- xlSrcModel or 4—The source is a Power Pivot model.
- xlSrcQuery or 3—The source is a query.
- xlSrcRange or 1—The source is a Range object.
- xlSrcXml or 2—The source is XML.
The Summary property returns or sets the descriptive text used for the alternate text when the Table is published. It is a String type and was introduced in Excel 2010. Setting this property overwrites any previous value. This property is presented in the Excel user interface in the Alternative Text dialog box, which you access by right-clicking anywhere in the Table and selecting Table | Alternative Text. It is displayed and edited in the Description text box.
The TableObject property returns the Table's TableObject object. It is a TableObject object type. The property cannot be set. The TableObject object exposes properties and methods that enable you to manipulate the Table's objects. TableObject is an object built from data retrieved from a Power Pivot model. It was introduced in Excel 2013.
The XmlMap property returns the Table's XmlMap object, which provides access to the Table's XML schema map. It is an XmlMap object type. The XmlMap object exposes properties and methods that enable you to manipulate the XML map. The property cannot be set.
Other Properties
The following sections describe other common Table properties.
The ListColumn property is an item in the ListColumns property or collection. ListColumn is an object with a number of useful properties, including these:
- Range—References the cells in a column, including the header and total rows, if enabled.
- DataBodyRange—A Range object type that references the column's range, excluding the header row and the totals row. It is the intersection of the ranges represented by the ListObject's Range property and the ListObject's DataBodyRange range.
- Index—The relative index number of a column represented by the ListColumn object.
- Parent—The ListObject that owns a column.
ListColumn also has a useful method:
- Delete—Deletes the column from the Table.
Each ListRow object in a collection of rows has three commonly used properties: a Range property that references the cells in that row, an Index property that is the relative index number of that row, and a Parent property that refers to the ListObject that contains the row. The Row object also has one method, Delete, which deletes the row from the Table.
Table Object Methods
The following sections describe properties for performing actions with ListObject.
The Delete method deletes a Table, including all the Table's values, formulas, and formatting. Do not confuse this method with the Unlist method, which converts a Table to a regular range of cells and maintains the values and formulas in the Table.
The ExportToVisio method exports to and opens in Visio a dynamic PivotDiagram in a new drawing document. This method was added in Excel 2007. An error is generated if Visio is not installed on the same system on which the method is invoked. To export the Excel Table to Visio, the workbook must be saved with no pending changes.
The Publish method publishes the Table to a SharePoint service. It returns the URL of the published list on SharePoint as a string. Here is its syntax:
expression.Publish(Target, LinkSource)
Where:
- expression—A variable that represents a ListObject object.
- Target—A single-dimension Variant array that contains two to three elements: the URL of SharePoint server, the display name of the list, and, optionally, the description of the list.
- LinkSource—A Boolean that, when set to True, creates a new link to a new SharePoint list and that, when set to False, keeps the link to the current SharePoint list and replaces that list, or, if there is no current link, creates a new list on SharePoint without linking to it.
The Refresh method refreshes the Table from its external source, if linked. If the Table is not linked to an external data source, an error is generated. Any changes made to the Table since the last refresh are lost.
The Resize method changes the Table range to the range provided. The method takes one parameter, Range, which specifies the new Table range. If the header row is enabled, the new range must include at least one header row cell. If the header row is disabled, the new range must include at least one cell in the first data body range row. Columns can be added and removed from either end, and rows can be added and removed from the bottom. When you remove rows and columns, any existing data in the removed rows and columns remains but is now outside the Table. When you add rows and columns, any data in the additional cells is added to the Table. After resizing, structured references in formulas in cells no longer in the Table are converted to absolute standard cell referencing.
If a Table is linked to a SharePoint list, you can add and remove only rows. Trying to add or remove columns in a linked Table generates an error.
The Unlink method removes any external data link if it exists.
The Unlist method converts a Table to a regular range of cells. It is the equivalent of selecting {TABLE TOOLS} DESIGN | Tools | Convert to Range. Structured references in formulas are converted to absolute standard cell referencing.
Other Methods
The following sections describe more common methods used when writing code for Tables. These methods are often primary tools used when working with Tables in VBA. Having a basic understanding of how they work will help you write more robust and efficient code.
ListObject Object's Add Method
The ListObject object's Add method adds a new Table, using an existing list of data or another source. When you use an existing header, numeric values are converted to text, and any duplicate headers are made unique by appending integer values. Here is the syntax for this method:
expression.Add(SourceType, Source, LinkSource, XlListObjectHasHeaders, Destination, TableStyleName)
Where:
- expression—A variable that represents a ListObjects object.
- SourceType—Passes an XlListObjectSourceType constant that specifies the kind of source used to create the Table. It is optional. If omitted, xlSrcRange is assumed.
- Source—When SourceType is xlSrcRange, then pass a Range object that represents the range of data values to convert into a Table. It is optional. If omitted, the current selection is used. When SourceType is xlSrcExternal, pass an array of string values specifying a connection to the source, where the elements in the array are:
- 0—The URL of the SharePoint site
- 1—The SharePoint list name
- 2—The ViewGUID
- LinkSource—A Boolean value that indicates whether an external data source is to be linked to the ListObject object. If SourceType is xlSrcExternal, then the default is True, and this parameter does not need to be passed. If a value is passed and SourceType is xlSrcRange, then an error is generated.
- XlListObjectHasHeaders—Passes an XlYesNoGuess constant type (xlYes, xlNo, or xlGuess), which indicates whether the data being imported has column labels. If Source does not contain headers, Excel automatically generates headers. It is optional. If omitted, xlGuess is assumed. Note that this parameter's name should be HasHeaders but, when the method was implemented, the developers mistakenly used XlListObjectHasHeaders instead.
- Destination—Passes a Range object that specifies a single-cell reference as the destination for the top-left corner of the Table. An error is generated if the range refers to more than one cell. This parameter must be specified if SourceType is xlSrcExternal. It is ignored if SourceType is set to xlSrcRange. The destination range must be on the worksheet that contains the ListObjects collection specified by the expression. Columns are inserted before the destination range to fit the new list, preventing existing data from being overwritten. It is optional.
- TableStyleName—Passes the name of the style name to be applied to the Table when created. It is optional. If TableStyleName is omitted, the default style is applied.
This method returns a ListObject object that represents the new list object.
The following are the XlListObjectSourceType constants:
- xlSrcExternal or 0—The source is an external data source (for example, Microsoft SharePoint Foundation site).
- xlSrcModel or 4—The source is a Power Pivot Data Model.
- xlSrcQuery or 3—The source is a query.
- xlSrcRange or 1—The source is a range of existing data.
- xlSrcXml or 2—The source is XML.
The ListRows object's Add method inserts one new row into the Table at the position specified. Here is the syntax for the method:
expression.Add(Position, AlwaysInsert)
Where:
- expression—A variable that represents a ListRows object.
- Position—An Integer that specifies the relative position of the new row. The new row is inserted above the current row at that position. It is optional. If omitted, the new row is appended to the bottom of the Table.
- AlwaysInsert—A Boolean that specifies whether to always shift data in cells below the last row of the Table when the new row is inserted, regardless of whether the row below the Table is empty. If True, the cells below the Table are shifted down one row. If False, if the row below the Table is empty, the Table expands to occupy (append) that row without shifting cells below it; if the row below the Table contains data, those cells are shifted down when the new row is inserted.
The Add method returns a ListRow object that represents the new row.
ListRow Object's Delete Method
The ListRow object's Delete method deletes the Table row represented by the ListRow object.
ListColumns Object's Add Method
The ListColumns object's Add method inserts one new column into the Table at the position specified. Here's the syntax for this method:
expression.Add(Position)
Where:
- expression—A variable that represents a ListColumns object.
- Position—An Integer that specifies the relative position of the new column. The new column is inserted before the current column at that position. It is optional. If omitted the new column is appended to the right side of the Table.
This method returns a ListColumn object that represents the new column.
ListColumn Object's Delete Method
The ListColumn object's Delete method deletes the Table column represented by the ListColumn object.
Range Object's AutoFilter Method
You can use the AutoFilter method to create AutoFilter criteria for a column, clear the filter criteria for a column, or toggle the AutoFilter status for the range. To inspect the AutoFilter status and settings, use the ListObject object's AutoFilter property, which has the following syntax:
expression.AutoFilter(Field, Criteria1, Operator, Criteria2, VisibleDropDown)
Where:
- expression—An expression that returns a Range object.
- Field—The Integer offset of the field on which to base the filter from the left of the list, where the leftmost field is field 1. It is optional. If omitted, the AutoFilter status (enabled/disabled) is toggled for the entire range. Disabling the AutoFilter removes the AutoFilter drop-down controls.
- Criteria1—The criteria as a number, a string, or an array—for example, 20 or Expense. Use = to find blank fields. Use <> to find nonblank fields. To find multiple strings, use the Array function with an Operator value of xlFilterValues—for example, Array("Value 1", "Value 2"). The wildcard characters * (one or more characters) and ? (any single character) can be used. If the Operator is xlTop10Items, Criteria1 specifies the number of items, such as 10. When Operator is xlFilterDynamic, Criteria1 is an XlDynamicFilterCriteria constant. (See the description below.) It is optional. If this argument is omitted, the criteria for the column is cleared.
- Operator—Passes an XlAutoFilterOperator constant specifying the type of filter. It is optional. If omitted, then 0 is assumed, which has no value, and Crtiteria1 is treated as a simple value to find; in this case, if an array of values is passed in Criteria1, then only the last value is used. When omitted and Criteria1 is not specified, the effect is to clear the filter for the specified column.
- Criteria2—The second criteria as a number, a string, or an array. It is used with Criteria1 and Operator to construct compound criteria or when Operator is xlFilterValues and date and times are filtered. (See the description for xlFilterValues below for details on filtering date and time values.) It is optional.
- VisibleDropDown—Passes True to display the AutoFilter drop-down arrow for the filtered field and False to hide the AutoFilter drop-down for the filtered field. It is optional. If omitted, True is assumed.
If setting filter criteria, then the value returned is the Field value. If toggling the AutoFilter status, then True is returned.
These are the XlAutoFilterOperator constants:
- xlAnd or 1—Filters with a logical AND of Criteria1 and Criteria2. Both Criteria1 and Criteria2 are strings specifying a condition—for example, ">0" and "<100" for greater than zero and less than 100.
- xlBottom10Items or 4—Finds the lowest-valued items displayed, where the number of items is specified as a number or string in Criteria1—for example, 5 or "5", meaning the five smallest items. The column specified by Field must contain at least one number, or an error occurs.
- xlBottom10Percent or 6—Find the lowest-valued items displayed, where the percentage is specified as a number or string in Criteria1—for example, 20 or "20" for the items in the bottom 20%. The column specified by Field must contain at least one number, or an error occurs.
- xlFilterCellColor or 8—Finds the color of the cell where the color is specified as an RGB value in Criteria1.
- xlFilterDynamic or 11—A dynamic filter where the filter criteria is specified as an XlDynamicFilterCriteria value in Criteria1. A dynamic filter is one that changes depending on some other value, such as today's date or the average of the values in the column.
- xlFilterFontColor or 9—Finds the color of the font, where the color is specified as an RGB value in Criteria1.
- xlFilterIcon or 10—Finds the icon, where the icon is specified in Criteria1. Icons are retrieved from ActiveWorkbook's IconSets property. The IconSets property is a collection of IconSets objects where each IconSet is a collection of a series of icons, such as the "3 Arrows (Colored)" set. The example below retrieves the first icon in the "3 Arrows (Colored)" set:
ActiveWorkbook.IconSets(XlIconSet.xl3Arrows).Item(1)
- xlFilterValues or 7—Finds multiple values specified as an array in Criteria1 or Criteria2. Criteria1 is used when finding a simple list of values, such as "Value 1" and "Value 2". The values in the array must each be a string and must match exactly the displayed value if numeric; for example, if matching values displayed as "$25.00", the value passed must be "$25.00". Criteria2 is used when finding dates and times. When finding dates and times, the array is passed as an array of pairs of values, where the first value of each pair is a type of search and the second value is a date. The types of date/time searches are:
- 0—Finds items in the same year as the following paired date/time value.
- 1—Finds items in the same month as the following paired date/time value.
- 2—Finds items on the same date as the following paired date/time value.
- 3—Finds items in the same hour as the following paired date/time value.
- 4—Finds items in the same minute as the following paired date/time value.
- 5—Finds items in the same second as the following paired date/time value.
- Any number of search type and date/time value pairs can be passed. All search type values must be in odd positions in the array (1, 3, 5, etc.), and all date/time values must be in even positions (2, 4, 6, etc.). Any value passed for a search type that is not in the above list generates an error. Any value passed for a date/time value that is not a date/time value passed as a string generates an error. Any date/time value that can be entered in a cell and recognized as a date is valid. Below are some examples of Criteria2 values.
- Show all items in the year 2014:
Array(0, "1/1/2014")
- Show all items in the year 2014 when the current year is 2014:
Array(0, "1/1")
- Show all items in the month January 2014:
Array(1, "1/1/2014")
- Show all items on the day January 15, 2014:
Array(2, "1/15/2014")
- Show all items on the days January 15, 20, and 25, 2014:
Array(2, "1/15/2014", 2, "1/20/2014", 2, "1/25/2014")
- Show all items in the year 2013 and in the month January 2014:
Array(0, "1/1/2013", 1, "1/1/2014")
- Show all items in the same hour as 3 PM on January 15, 2014:
Array(3, "1/15/2014 15:0")
Array(3, "1/15/2014 3 PM")
- Show all items in the same minute as 3:01 PM on January 15, 2014:
Array(3, "1/15/2014 15:1")
Array(3, "1/15/2014 3:01 PM")
- xlOr or 2—Logical OR of Criteria1 or Criteria2. Both Criteria1 and Criteria2 are strings that specify a condition, such as "<0" and ">100" for less than zero or greater than 100.
- xlTop10Items or 3—Finds the highest-valued items displayed, where the number of items is specified as a number or string in Criteria1, such as 5 or "5", meaning the five largest items. The column specified by Field must contain at least one number, or an error occurs.
- xlTop10Percent or 5—Finds the highest-valued items displayed, where the percentage is specified as a number or string in Criteria1, such as 20 or "20" for items in the top 20%. The column specified by "Field" must contain at least one number, or an error occurs.
The following are XlDynamicFilterCriteria constants:
- xlFilterToday—Filters all date values equal to today.
- xlFilterYesterday—Filters all date values equal to yesterday.
- xlFilterTomorrow—Filters all date values equal to tomorrow.
- xlFilterThisWeek—Filters all date values in the current week.
- xlFilterLastWeek—Filters all date values in the last week.
- xlFilterNextWeek—Filters all date values in the next week.
- xlFilterThisMonth—Filters all date values in the current month.
- xlFilterLastMonth—Filters all date values in the last month.
- xlFilterNextMonth—Filters all date values in the next month.
- xlFilterThisQuarter—Filters all date values in the current quarter.
- xlFilterLastQuarter—Filters all date values in the last quarter.
- xlFilterNextQuarter—Filters all date values in the next quarter.
- xlFilterThisYear—Filters all date values in the current year.
- xlFilterLastYear—Filters all date values in the last year.
- xlFilterNextYear—Filters all values related to next year.
- xlFilterYearToDate—Filters all date values from today until a year ago.
- xlFilterAllDatesInPeriodQuarter1—Filters all date values in Quarter1.
- xlFilterAllDatesInPeriodQuarter2—Filters all date values in Quarter2.
- xlFilterAllDatesInPeriodQuarter3—Filters all date values in Quarter3.
- xlFilterAllDatesInPeriodQuarter4—Filters all date values in Quarter4.
- xlFilterAllDatesInPeriodJanuary—Filters all date values in January.
- xlFilterAllDatesInPeriodFebruary—Filters all date values in February.
- xlFilterAllDatesInPeriodMarch—Filters all date values in March.
- xlFilterAllDatesInPeriodApril—Filters all date values in April.
- xlFilterAllDatesInPeriodMay—Filters all date values in May.
- xlFilterAllDatesInPeriodJune—Filters all date values in June.
- xlFilterAllDatesInPeriodJuly—Filters all date values in July.
- xlFilterAllDatesInPeriodAugust—Filters all date values in August.
- xlFilterAllDatesInPeriodSeptember—Filters all date values in September.
- xlFilterAllDatesInPeriodOctober—Filters all date values in October.
- xlFilterAllDatesInPeriodNovember—Filters all date values in November.
- xlFilterAllDatesInPeriodDecember—Filters all date values in December.
- xlFilterAboveAverage—Filters all above-average values.
- xlFilterBelowAverage—Filters all below-average values.
While the ListObject, ListColumns, and ListRows properties provide access to the main parts of a Table, there are other ways to access parts of a Table, using the same structured referencing syntax described in Chapter 4. These forms of referencing can be more convenient, depending on programming style and preferences. The examples below assume the following: a Table named "tblRegister" on a worksheet named "Register" with column names "Date", "Description", "Category", and "Amount".

A sample Table.
To use a structured reference, use the Range object to retrieve the range described by the reference. The Range object is a child object of many Excel objects, including the Application and Worksheet objects. When you use Range with the Application object, the reference must have global scope. When you use Range with the Worksheet (or Sheet) object, the reference can have global or local (Worksheet) scope.
|
NOTE The scope of a name determines from where it can be accessed. A reference with global scope can be accessed from any object. A reference with local scope can be referenced only from the worksheet to which the specific reference refers. |
Table names have global scope, which means you can access them from any code module without qualifying the reference with the Worksheet object in which the Table resides. For example, this reference:
ThisWorkbook.Worksheets("Register").Range("tblRegister[Date]")
Is equivalent to:
Application.Range("tblRegister[Date]")
Range("tblRegister[Date]")
[tblRegister[Date]]
To support this convention, Excel enforces the rule that every Table in a workbook must have a unique name. This rule governs all globally scoped names, not just names of Tables.
|
TIP To reduce the probability of a name collision, an option is to preface all Table names with a common prefix—often referred to as “Hungarian notation” and described in Chapter 2—such as “tbl”. |
|
CAUTION Excel 2003 does not support structured references. There are also some differences between Excel 2007, 2010, and 2013 in terms of support for structured references. For more information, see the section “Forward and Backward Compatibility” in Chapter 2. |
You create Tables by using the ListObjects object's Add method. After you create a new Table, the ListObject object's DisplayName property is set to the new Table's name. The DisplayName property is used instead of the Name property because Excel is stricter about what can be assigned to the DisplayName property; instead of altering the name when it is not valid, Excel generates an error, which produces more predictable results than when using the Name property.
The following sections provide examples of creating Tables with four different sources: xlSrcRange (a range of existing data), xlSrcExternal (external data source), xlSrcModel (Power Pivot Data Model), and xlSrcQuery (query). The source type xlSrcXml (XML source) is not covered, but workarounds are shown.
Using a Range of Existing Data (SourceType Set to xlSrcRange)
This example creates a new Table, using an existing range of data with headers. The SourceType parameter is set to xlSrcRange:
Dim TableRange As Range
Dim Table As ListObject
Set TableRange = ThisWorkbook.Worksheets("Register").Range("A1").CurrentRegion
Set Table = ThisWorkbook.Worksheets("Register").ListObjects.Add(xlSrcRange, TableRange, , xlYes)
Table.DisplayName = "tblRegister"
Note that the fourth parameter, xlYes, tells Excel that the list of data has existing headers. In this example, the Table is named as soon as it is created; this helps you locate the ListObject later.
Using a Power Pivot Data Model (SourceType Set to xlSrcModel)
This example uses a TableObject to create a connection to a SQL Server database. The SQL table "Product" is added to the Power Pivot Data Model. The Table is placed into the worksheet "Sheet1" at cell "A1". Because the interaction is with the Data Model, the TableObject must be used instead of a ListObject with xlSrcModel passed for SourceType. Change the text "YourServerName" to the name of the desired SQL server. The database used is AdventureWorks2012:
Dim SQLConnection As WorkbookConnection
Dim TargetWorksheet As Worksheet
Dim Table As TableObject
Dim ConnectionString As String
Set TargetWorksheet = ThisWorkbook.Worksheets("Sheet1")
ConnectionString = "OLEDB;Provider=SQLOLEDB.1;Integrated Security=SSPI;" _
& "Initial Catalog=AdventureWorks2012;Data Source=YourServerName"
Set SQLConnection = ActiveWorkbook.Connections.Add2("FriendlyName", "Description", _
ConnectionString, "Product", 3, True)
With TargetWorksheet
Set Table = .ListObjects.Add(SourceType:=xlSrcModel, Source:=SQLConnection, _
Destination:=.Range("A1")).NewTable
End With
Table.ListObject.DisplayName = "tblNewTable"
The xlSrcModel constant was added in Excel 2013.
This next example assumes that the workbook already has a SQL Server connection with a table in the Power Pivot Data Model, and the objective is to pull the data out of the Data Model table into a new Excel Table. The source type is xlSrcModel and assumes that the Data Model table name is "Product". This example works only in Excel 2013:
Dim ModelSource As Model
Dim SourceTable As ModelTable
Dim TargetWorksheet As Worksheet
Dim Table As TableObject
Set TargetWorksheet = ThisWorkbook.Worksheets("Sheet1")
Set ModelSource = ThisWorkbook.Model
Set SourceTable = ModelSource.ModelTables("Product")
Set Table = TargetWorksheet.ListObjects.Add(SourceType:=xlSrcModel, _
Source:=SourceTable.SourceWorkbookConnection, _
LinkSource:=True, Destination:=DestinationSheet.Range("A1")).TableObject
Table.Refresh
Using an External Data Source or Query (SourceType Set to xlSrcExternal or xlSrcQuery)
This example uses a QueryTable object to create a connection to a SQL Server database. The Table "Product" is added to the worksheet "Sheet1" at cell "A1". Change the text "YourServerName" to the name of the desired SQL server. The database used is AdventureWorks2012:
Dim TargetWorksheet As Worksheet
Dim Table As QueryTable
Dim ConnectionString As String
Set TargetWorksheet = ThisWorkbook.Worksheets("Sheet1")
ConnectionString = "OLEDB;Provider=SQLOLEDB.1;Integrated Security=SSPI;" _
& "Initial Catalog=AdventureWorks2012;Data Source=YourServerName"
Set Table = TargetWorksheet.ListObjects.Add(SourceType:=xlSrcExternal, Source:=ConnectionString, _
LinkSource:=True, Destination:=DestinationSheet.Range("A1")).QueryTable
Table.CommandText = Array("""AdventureWorks2012"".""Production"".""Product""")
Table.CommandType = xlCmdTable
Table.Refresh BackgroundQuery:=False
Table.ListObject.DisplayName = "tblNewTable"
The xlSrcQuery constant was added in Excel 2007.
This example uses the SourceType of xlSrcExternal, which is used for any external data connection. Passing xlSrcQuery for the SourceType parameter produces the same result. Typically, xlSrcQuery is used for database connections, and xlSrcExternal is used for SharePoint connections. There is a lot of latitude in data connections.
|
CAUTION When using xlSrcExternal, you must specify the Destination parameter. When using a QueryTable object, you must set the CommandText and CommandType properties before refreshing the connection. |
Using an XML Source (SourceType Set to xlSrcXml)
By design, the ListObjects object's Add method with the xlSrcXml source type is supposed to create a ListObject object by using an XML file as the source. However, this method is unreliable, and there are no known working examples of using it. Two methods are recommended for importing an XML source file into a Table. The first is to import an XML file into a new, blank workbook:
Workbooks.OpenXML Filename:="C:\XML File Name.xml", LoadOption:=xlXmlLoadImportToList
The second is to import an XML file into the existing worksheet at the specified range:
ActiveWorkbook.XmlImport URL:="C:\XML File Name.xml", ImportMap:=Nothing, Overwrite:=True, _
Destination:=Range("A1")
|
NOTE In both of these examples, if the specified XML source doesn’t refer to a schema, Excel creates one based on what it finds in the referenced XML file. |
Table Information
The following examples assume that DataBodyRange is a valid Range object. If there are no existing rows in the Table (that is, if ListRows.Count equals 0), any reference to DataBodyRange generates an error.
Determining Whether a Table Exists
Determining whether a Table exists is not a straightforward operation. It requires some error handling because an error occurs when a Table name that doesn't exist is used with the ListObjects collection. The following code illustrates how to use error handling to determine whether a Table exists:
Dim Table As ListObject
Set Table = Nothing
On Error Resume Next
Set Table = ThisWorkbook.Worksheets("Register").ListObjects("tblRegister")
On Error GoTo 0
If Table Is Nothing Then
Debug.Print "Table does not exist"
Else
Debug.Print "Table exists"
End If
|
TIP Why set the object variable to Nothing before attempting to assign it a value? In the case above, it’s not necessary because VBA initializes every variable when it is defined with the Dim statement. But it’s included above as an example of writing robust code because, if an error occurs, the variable is not touched and, if it already contains a reference to another object, the following test will not produce the desired result. |
This example displays a Table's address and the Table's DataBodyRange address in the Immediate window:
Dim Table As ListObject
Set Table = ThisWorkbook.Worksheets("Register").ListObjects("tblRegister")
Debug.Print "Table's address: " & Table.Range.Address
Debug.Print "Table's data body range address: " & Table.DataBodyRange.Address
Determining the Number of Rows
You determine the number of rows in a Table by using the ListRows object's Count property:
Dim Table As ListObject
Set Table = ThisWorkbook.Worksheets("Register").ListObjects("tblRegister")
Debug.Print "Number of rows: " & Table.ListRows.Count
The Count property returns 0 if the Table is empty (that is, has one row ready for data entry and no data in any cells).
Determining the Number of Columns
You determine the number of columns in a Table by using the ListColumns object's Count property:
Dim Table As ListObject
Set Table = ThisWorkbook.Worksheets("Register").ListObjects("tblRegister")
Debug.Print "Number of columns: " & Table.ListColumns.Count
Determining Whether a Column Exists
Determining whether a column exists is not a straightforward operation. It requires some error handling because an error occurs when a column name that doesn't exist is used with the ListColumns collection. The following code illustrates how to use error handling to determine whether a column exists:
Dim Table As ListObject
Dim ListColumn As ListColumn
Set Table = ThisWorkbook.Worksheets("Register").ListObjects("tblRegister")
Set ListColumn = Nothing
On Error Resume Next
Set ListColumn = Table.ListColumns("Description")
On Error GoTo 0
If ListColumn Is Nothing Then
Debug.Print "Column does not exist"
Else
Debug.Print "Column exists"
End If
There are a few ways to add new rows to a Table. If you're adding one row, use the ListRows object's Add method, which returns a ListRow object that can then be used to add values to that new row:
Dim Table As ListObject
Dim NewRow As ListRow
Set Table = ThisWorkbook.Worksheets("Register").ListObjects("tblRegister")
Set NewRow = Table.ListRows.Add
With NewRow.Range
.Columns(1).Value = #1/1/2015#
.Columns(2).Value = "Transaction 20"
.Columns(3).Value = "Expense"
.Columns(4).Value = -75
End With
Note that in this example, the Position parameter was not passed to the Add method, which resulted in the new row being appended to the end of the Table. To insert the new row at a specific position in the Table, use the Position parameter.
To append more than one row to the bottom of a Table, it's more efficient to add the rows in one step than to invoke the ListRows object's Add method multiple times. In the next example, the total row is disabled, the new data is copied into the empty cells immediately below the Table, and the Total row is enabled; if the TotalRow is not disabled, the Table does not recognize the new rows and therefore does not expand to include them. The new data is copied from the range "A2:D11" on the "Data" worksheet:
Dim Table As ListObject
Dim NewValues As Variant
Set Table = ThisWorkbook.Worksheets("Register").ListObjects("tblRegister")
NewValues = ThisWorkbook.Worksheets("Data").Range("A2:D11").Value
Table.ShowTotals = False
With Table.DataBodyRange
.Resize(10).Offset(.Rows.Count).Value = NewValues
End With
Table.ShowTotals = True
To insert multiple rows into the middle of a Table, you use the Range object's Insert method to insert empty cells, and then those cells are filled with the new row data. In the next example, 10 rows of data are inserted after the existing row 2 (and before row 3):
Dim Table As ListObject
Dim NewValues As Variant
Set Table = ThisWorkbook.Worksheets("Register").ListObjects("tblRegister")
NewValues = ThisWorkbook.Worksheets("Data").Range("A2:D11").Value
With Table.DataBodyRange
.Resize(10).Offset(2).Insert Shift:=xlShiftDown
.Resize(10).Offset(2).Value = NewValues
End With
The following sections show different methods for deleting rows from a Table by using VBA. The method you use depends on how many rows you want to delete.
Deleting One Row
You use the ListRow object's Delete method to delete a single row:
Dim Table As ListObject
Dim ListRow as ListRow
Set Table = ThisWorkbook.Worksheets("Register").ListObjects("tblRegister")
Set ListRow = Table.ListRows(3)
ListRow.Delete
In this example, the variable ListRow is assigned the third ListRow object in the ListRows collection, and then the ListRow object's Delete method is invoked. Here is an alternative, shorter version of the example that does not require the ListRow variable:
Dim Table As ListObject
Set Table = ThisWorkbook.Worksheets("Register").ListObjects("tblRegister")
Table.ListRows(3).Delete
Deleting Multiple Rows
Deleting multiple rows at once requires use of the Range object's Delete method. In the next example, 10 rows are deleted, starting at row 3:
Dim Table As ListObject
Set Table = ThisWorkbook.Worksheets("Register").ListObjects("tblRegister")
Table.DataBodyRange.Resize(10).Offset(2).Delete
Deleting All Rows
The next example deletes all the rows in a Table:
Dim Table As ListObject
Set Table = ThisWorkbook.Worksheets("Register").ListObjects("tblRegister")
Table.DataBodyRange.Delete
|
CAUTION In this example, the DataBodyRange object is set to Nothing after the code completes. Any subsequent references to this object returns an error unless at least one row is added to the Table. |
Looping
The following sections show methods for looping through rows and columns utilizing Table objects. You could also accomplish this by using row or column numbers, which is beyond the scope of this book.
This example loops through all rows of the Table, adding each amount to the TotalExpenses variable for any row with "Expense" in the third column and printing the output to the Immediate window:
Dim Table As ListObject
Dim ListRow As ListRow
Dim TotalExpenses As Double
Set Table = ThisWorkbook.Worksheets("Register").ListObjects("tblRegister")
For Each ListRow In Table.ListRows
If ListRow.Range.Columns(3).Value = "Expense" Then
TotalExpenses = TotalExpenses + ListRow.Range.Columns(4).Value
End If
Next ListRow
Debug.Print "Total expenses: " & TotalExpenses
The following is an alternative method that uses the column names:
Dim Table As ListObject
Dim ListRow As ListRow
Dim TotalExpenses As Double
Set Table = ThisWorkbook.Worksheets("Register").ListObjects("tblRegister")
For Each ListRow In Table.ListRows
If Intersect(ListRow.Range, Table.ListColumns("Category").Range)_
.Value = "Expense" Then
TotalExpenses = TotalExpenses + Intersect(ListRow.Range, Table.ListColumns("Amount").Range).Value
End If
Next ListRow
Debug.Print "Total expenses: " & TotalExpenses
This example loops through the columns of a Table, printing each column's name to the Immediate window by using the ListColumns collection and a For/Each statement:
Dim Table As ListObject
Dim ListColumn As ListColumn
Set Table = ThisWorkbook.Worksheets("Register").ListObjects("tblRegister")
For Each ListColumn In Table.ListColumns
Debug.Print ListColumn.Name
Next ListColumn
One of the most powerful features of Tables is their ability to filter rows so that only the rows of interest are displayed. The Excel Object Model exposes the AutoFilter object (a child member of the ListObject object) and the AutoFilter method (a child member of the Range object), enabling complete control of the filtering process from VBA. You use the ListObject.AutoFilter object to inspect the current AutoFilter settings, refresh the AutoFilter, and clear the AutoFilter. You use the Range.AutoFilter method to set AutoFilter criteria.
Turning AutoFilter On and Off
You turn AutoFilter on and off by setting the ShowAutoFilter property to True (on) and False (off). The following example shows how to turn on the AutoFilter:
Dim Table As ListObject
Set Table = ThisWorkbook.Worksheets("Register").ListObjects("tblRegister")
Table.ShowAutoFilter = True
|
TIP Since AutoFilter is an object that is set to Nothing when the AutoFilter is disabled, any code that references any of the AutoFilter object’s properties and methods will generate an error if the AutoFilter is disabled. To prevent errors, check that the AutoFilter is enabled and access the AutoFilter object’s properties and methods only if it is. The code examples in this section demonstrate this check. |
|
NOTE You can also enable and disable the AutoFilter by repeatedly invoking the Range object’s AutoFilter method without any parameters. But using this technique alone only toggles the AutoFilter state and, without checking another property, does not provide any control if a specific state is desired. |
Determining the Filtering State
You use the AutoFilter object to determine whether the AutoFilter is enabled:
Dim Table As ListObject
Set Table = ThisWorkbook.Worksheets("Register").ListObjects("tblRegister")
If Table.ShowAutoFilter Then
Debug.Print "AutoFilter is on"
Else
Debug.Print "AutoFilter is off"
End If
If the AutoFilter is enabled, you use the AutoFilter object's FilterMode property to determine whether filtering criteria is in place:
Dim Table As ListObject
Set Table = ThisWorkbook.Worksheets("Register").ListObjects("tblRegister")
If Table.ShowAutoFilter Then
If Table.AutoFilter.FilterMode Then
Debug.Print "Filtering is active"
Else
Debug.Print "Filtering is inactive"
End If
Else
Debug.Print "AutoFilter is off"
End If
Determining Whether a Column Is Filtered
As shown in the following example, if the AutoFilter is enabled, you can use the Filter object's On property to determine whether a column has an active filter criteria. The Filter object is an item in the AutoFilter object's Filters property:
Dim Table As ListObject
Set Table = ThisWorkbook.Worksheets("Register").ListObjects("tblRegister")
If Table.ShowAutoFilter Then
If Table.AutoFilter.Filters(3).On Then
Debug.Print "Column 3 is being filtered"
End If
Else
Debug.Print "AutoFilter is off"
End If
You create (apply) filters one column at a time. You use the Range object's AutoFilter method to add and remove filter criteria. (The Range object's AutoFilter method is described earlier in this chapter.) When an AutoFilter criterion is applied, the header row is automatically enabled. The following are some examples, each of which begins with these lines of code and assumes that the Table has no active filter criteria:
Dim Table As ListObject
Set Table = ThisWorkbook.Worksheets("Register").ListObjects("tblRegister")
This example shows only rows with "Expense" in the third column:
Table.Range.AutoFilter Field:=3, Criteria1:="Expense"
This example shows only rows with "Expense" or "Income" in the third column:
Table.Range.AutoFilter Field:=3, Criteria1:=Array("Expense", "Income"), Operator:=xlFilterValues
This example shows only rows with values in the third column that start with "Transaction":
Table.Range.AutoFilter Field:=2, Criteria1:="Transaction*"
This example shows only rows with values in the fourth column that are greater than zero:
Table.Range.AutoFilter Field:=4, Criteria1:=">0"
This example shows only rows with "Income" in the third column and values in the fourth column that are greater than 100:
Table.Range.AutoFilter Field:=3, Criteria1:="Income"
Table.Range.AutoFilter Field:=4, Criteria1:=">100"
Reapplying the Active Filter Criteria
The visibility of rows in a filtered Table can become out of sync with the filter criteria as data is changed and new rows added. You can correct this situation by reapplying the active filter criteria, as shown in the following example:
Dim Table As ListObject
Set Table = ThisWorkbook.Worksheets("Register").ListObjects("tblRegister")
If Table.ShowAutoFilter Then
Table.AutoFilter.ApplyFilter
End If
You can clear one column's filter by using the AutoFilter method and specifying only the Field parameter. The following example clears the third column's filter criteria:
Dim Table As ListObject
Set Table = ThisWorkbook.Worksheets("Register").ListObjects("tblRegister")
Table.Range.AutoFilter Field:=3
Clearing All Column Filters
You can clear the filter criteria for all columns in one step without disabling AutoFilter by invoking the ShowAllData method, as shown here:
Dim Table As ListObject
Set Table = ThisWorkbook.Worksheets("Register").ListObjects("tblRegister")
If Table.ShowAutoFilter Then
Table.AutoFilter.ShowAllData
End If
Hiding Drop-Down Controls by Column
You can hide AutoFilter drop-down controls in specific columns. The following example illustrates how to hide the AutoFilter drop-down control in the Table's second column:
Dim Table As ListObject
Set Table = ThisWorkbook.Worksheets("Register").ListObjects("tblRegister")
If Table.ShowAutoFilter Then
Table.Range.AutoFilter Field:=2, VisibleDropDown:=False
End If
Custom Routines
The following sections provide some custom routines to make your projects a little easier. More robust versions of these routines and a number of other routines plus useful utilities and code libraries are available at www.exceltables.com.
The following function inserts an array of values into a Table and returns the new rows as a range. If a row is specified, then the values are inserted above that row; otherwise, the values are appended to the bottom of the Table. The function also maps columns of values to columns in the Table by using the ColumnAssignments parameter. See the comments in the routine for more details on the parameters.
Public Function BulkInsertIntoTable( _
ByVal Table As ListObject, _
ByVal Values As Variant, _
Optional ByVal Position As Long = -1, _
Optional ByVal ColumnAssignments As Variant _
) As Range
' Insert an array of values into a Table. Optionally specify the row before
' which the new rows are inserted. Optionally specify how the columns are
' assigned. The new rows in the Table are returned as a Range.
'
' Syntax
'
' BulkInsertIntoTable(Table, Values, Position, ColumnAssignments)
'
' Table - A Table object.
'
' Values - A single value, a single dimension array of values, or a two
' dimension array of values.
'
' Position - The row number before which the new rows are inserted. Optional.
' If omitted then the new rows are appended to the end of the Table.
'
' ColumnAssignments - A single dimension array of integer values specifying
' which Table column receives what column of values in the Values parameter.
' Each element in the array is a column number in the Table. The position of
' the element in the array corresponds to the column in the Values array.
' Optional. If omitted then the values are placed in column order starting in
' the first Table column. For example, passing Array(2,3,1) results in this
' column mapping:
'
' Values column 1 is placed in Table column 2.
' Values column 2 is placed in Table column 3.
' Values column 3 is placed in Table column 1.
Dim Calculation As XlCalculation
Dim ScreenUpdating As Boolean
Dim Result As Long
Dim TwoDimensionArray As Boolean
Dim WorkArray As Variant
Dim Column As Long
Dim SourceColumn As Long
Dim TargetColumn As Long
Dim ShowTotals As Boolean
Dim InsertRange As Range
' Exit if no values to insert
If IsEmpty(Values) Then Exit Function
Calculation = Application.Calculation
Application.Calculation = xlCalculationManual
ScreenUpdating = Application.ScreenUpdating
Application.ScreenUpdating = False
' Normalize Values parameter - must be a two-dimension array
On Error Resume Next
Result = LBound(Values, 2)
TwoDimensionArray = Err.Number = 0
On Error GoTo 0
If Not TwoDimensionArray Then
If Not IsArray(Values) Then
Values = Array(Values)
End If
ReDim WorkArray(1 To 1, 1 To UBound(Values) - LBound(Values) + 1)
For Column = 1 To UBound(WorkArray, 2)
WorkArray(1, Column) = Values(Column - 1 + LBound(Values))
Next Column
Values = WorkArray
End If
' Normalize Position parameter
If Position < 0 Then
Position = Table.ListRows.Count
End If
Position = Application.Max(1, Application.Min(Position, Table.ListRows.Count + 1))
' Save total row setting and disable total
ShowTotals = Table.ShowTotals
Table.ShowTotals = False
' Insert the new rows
If Table.ListRows.Count > 0 And Position <= Table.ListRows.Count Then
Table.DataBodyRange.Resize(UBound(Values)).Offset(Position - 1).Insert Shift:=xlShiftDown
End If
If Table.ListRows.Count > 0 Then
Set InsertRange = Table.DataBodyRange.Resize(UBound(Values)).Offset(Position - 1)
Else
Set InsertRange = Table.InsertRowRange.Resize(UBound(Values))
End If
If IsEmpty(ColumnAssignments) Or IsMissing(ColumnAssignments) Then
InsertRange.Value = Values
Else
For TargetColumn = LBound(ColumnAssignments) To _
UBound(ColumnAssignments)
SourceColumn = TargetColumn - LBound(ColumnAssignments) + 1
If ColumnAssignments(TargetColumn) >= 1 And _
ColumnAssignments(TargetColumn) <= _
Table.ListColumns.Count Then
InsertRange.Columns(ColumnAssignments(TargetColumn)) _
.Value = Application.Index(Values, , SourceColumn)
End If
Next TargetColumn
End If
Set BulkInsertIntoTable = InsertRange
' Restore the total row setting
Table.ShowTotals = ShowTotals
Application.Calculation = Calculation
Application.ScreenUpdating = ScreenUpdating
End Function
Repairing Formatting and Formulas
Normally, a Table maintains the same formatting and formulas across all rows, excluding the header and total rows. When the formatting or formula is changed in a cell in a Table's column, Excel applies that new formatting or formula to the entire column. The formatting and formulas are automatically applied to new rows as they are added.
A Table's formatting or formulas can become inconsistent when you're manually editing formatting or applying different formulas in the same Table column. You can fix the Table column by reapplying the formatting to the entire column plus one additional row at the bottom. (The total row must be disabled to make this adjustment.) You can fix a formula (convert the column back to a calculated column) by applying the formula to the entire column.
The routine below accomplishes this by using the Table's Resize method. First, the Table is resized to be just one row. Next, the formatting and formulas are cleared from all Table rows from row 2 down to the last row plus one row. Finally, the Table's range is set back to what it was. This final step instructs Excel to apply the formatting and formulas in the first row to all rows below the first row. The result is a consistently formatted Table, using the first data row as the template for all other rows. The code assumes that there is at least one row of data in the Table:
Public Sub RepairTable( _
ByVal Table As ListObject _
)
' Repair the Table's formatting and formulas by making them consistent down the
' entire length of each column.
'
' Syntax
'
' RepairTable(Table)
'
' Table - A Table object (ListObject object).
Dim RowCount As Long
Dim ListColumn As ListColumn
Dim ShowTotals As Boolean
RowCount = Table.ListRows.Count
If RowCount < 2 Then Exit Sub
With Table
ShowTotals = .ShowTotals
.ShowTotals = False
.Resize .HeaderRowRange.Resize(2)
For Each ListColumn In .ListColumns
With ListColumn.DataBodyRange.Resize( _
Application.Max(RowCount, 1)).Offset(1)
If Left(.Rows(1).Formula, 1) = "=" Then
.Cells.Clear
Else
.Cells.ClearFormats
End If
End With
Next ListColumn
.Resize .HeaderRowRange.Resize(1 + RowCount)
.ShowTotals = ShowTotals
End With
End Sub
Copying a Table Style to a New Workbook
There is no easy way to copy a Table style from one workbook to another. The following sample code copies the Table style assigned to the Table named "tblRegister" to the workbook "Destination Workbook.xlsx":
Sub ExportTableStyle()
Dim Source As Workbook
Dim Target As Workbook
Dim Table As ListObject
Set Source = ThisWorkbook
Set Target = Workbooks("Destination Workbook.xlsx")
Set Table = Source.Worksheets("Register").ListObjects("tblRegister")
Target.Worksheets.Add Before:=Target.Worksheets(1)
Table.Range.Copy Target.Worksheets(1).Range("A1")
Target.Worksheets(1).Delete
End Sub
Retrieving an Access Crosstab Query
In Excel there is no native way to return a crosstab query from Access. In essence, a crosstab query is a type of SELECT query that pivots specified fields across columns and aggregates in the intersection of row and column fields. You can think of it as a PivotTable in an Access query.
In the following example, GetCrosstabQueryFromAccess uses an ADO (ActiveX Data Objects) method to create a crosstab query from a table that resides in a known database table. These three routines utilize this same example code to return the query into a Table:
- "TestCrosstabQuery1"—Returns a crosstab query into a new worksheet
- "TestCrosstabQuery2"—Returns a crosstab query into an existing Table and overwrites header values
- "TestCrosstabQuery3"—Returns a crosstab query into an existing Table but does not overwrite header values
All the routines in this example utilize a constant that expresses the SQL statement needed for the crosstab query.
|
NOTE This example uses a reference to “Microsoft ActiveX Data Objects 6.1 library”. To set this, you select Tools | References in the Visual Basic Editor, enable this reference, and click OK. |
Const TestSQL As String = “TRANSFORM Sum(tblSampleData.Total) AS SumTotal “ & _
“SELECT tblSampleData.Region “ & _
“FROM tblSampleData “ & _
“GROUP BY tblSampleData.Region “ & _
“PIVOT Format([Date],””mmm””) In “ & _
(""Jan"",""Feb"",""Mar"", ""Apr"",""May"",""Jun"", ""Jul"",""Aug"",""Sep"", ""Oct"",""Nov"",""Dec"");"
Sub TestCrosstabQuery1()
'Bring crosstab query into a new table created on a new worksheet
Call GetCrosstabQueryFromAccess(TestSQL)
End Sub
Sub TestCrosstabQuery2()
'Bring crosstab query into an existing table
'Overwrite headers with field names
Call GetCrosstabQueryFromAccess(TestSQL, True, ThisWorkbook.Worksheets("Query").ListObjects("qryCrosstab"))
End Sub
Sub TestCrosstabQuery3()
'Bring crosstab query into an existing table
'Do not overwrite headers
Call GetCrosstabQueryFromAccess(TestSQL, False, ThisWorkbook.Worksheets("Query").ListObjects("qryCrosstab"))
End Sub
Sub GetCrosstabQueryFromAccess( _
ByVal SQL As String, _
Optional ByVal OverwriteHeaders As Boolean, _
Optional ByVal Table As ListObject _
)
Dim DataConnection As ADODB.Connection
Dim DataRecordset As ADODB.Recordset
Dim DestinationSheet As Worksheet
Dim DestinationTable As ListObject
Dim DestinationRange As Range
Dim ShowTotalRow As Boolean
Dim ShowHeaderRow As Boolean
Dim ColumnHeader As Long
'Make sure database is found
If Dir(ThisWorkbook.Path & "\SampleDatabase.accdb", vbNormal) = vbNullString Then
MsgBox "Database not found", vbExclamation, "Whoops!"
Exit Sub
End If
'Create and open connection
Set DataConnection = New Connection
Set DataRecordset = New Recordset
DataConnection.CursorLocation = adUseClient
DataConnection.ConnectionString = "Provider=Microsoft.ACE.OLEDB.12.0;Data Source=" & _
ThisWorkbook.Path & "\SampleDatabase.accdb"
DataConnection.Open
'Get the recordset via query
Set DataRecordset = DataConnection.Execute(SQL)
'Set destination table
If Table Is Nothing Then
'Use a new table created on a new worksheet in the active workbook
Set DestinationSheet = ActiveWorkbook.Worksheets.Add(After:=ActiveSheet)
Set DestinationRange = DestinationSheet.Range("A1").Resize(DataRecordset.RecordCount + 1, _
DataRecordset.Fields.Count)
DestinationSheet.Activate
DestinationRange.Select
Set DestinationTable = DestinationSheet.ListObjects.Add( _
SourceType:=xlSrcRange, _
XlListObjectHasHeaders:=xlYes, _
Destination:=DestinationRange _
)
Else
'Use existing table passed to routine, which assumes the Table columns
'already match the query field results
Set DestinationTable = Table
If Not DestinationTable.DataBodyRange Is Nothing Then DestinationTable.DataBodyRange.Delete
DestinationTable.InsertRowRange.Insert
End If
'Save header/total row status
ShowHeaderRow = DestinationTable.ShowHeaders
ShowTotalRow = DestinationTable.ShowTotals
DestinationTable.ShowTotals = False
DestinationTable.ShowHeaders = True
'Copy recordset to table
DestinationTable.DataBodyRange(1, 1).CopyFromRecordset DataRecordset
'Get column headers
If OverwriteHeaders Or Table Is Nothing Then
For ColumnHeader = 0 To DataRecordset.Fields.Count - 1
DestinationTable.HeaderRowRange(1, ColumnHeader + 1) = DataRecordset.Fields(ColumnHeader).Name
Next ColumnHeader
End If
'Close recordset from database
DataRecordset.Close
'Set table header/total rows how they were originally
DestinationTable.ShowTotals = ShowTotalRow
DestinationTable.ShowHeaders = ShowHeaderRow
End Sub
This section is for experienced .NET developers. It assumes that you are able to create and compile a .NET Visual Basic or C# project.
Accessing the ListObject with a .NET solution is very similar to doing so in VBA. This section provides examples in both Visual Basic and C# using the .NET framework to check whether a Table exists. Each solution is built as an Excel COM add-in, although the logic could be applied to many other situations and projects. These projects are available for download at www.exceltables.com.
Each example below has two code parts: the TableExists function and a custom ribbon button click event handler. Both routines reside in a Ribbon (Visual Designer) class called MyRibbon. The button name on the ribbon is "button1". The code presents the user with an input box to enter a Table name and then presents a message box with the result True if the Table exists in the active workbook or False if it does not exist. The code does very little error handling.
|
NOTE The code examples below were created in Visual Studio 2012 with Visual Studio Tools for Office (VSTO). |
The following reference must be included to reference the Excel Object Model in the project:
Microsoft.Office.Interop.Excel
This reference is created when the project is specified as an Excel add-in. The following steps detail how to set up a new project for the code examples below:
1. Create a new project in Visual Studio. Select Templates | Language | Office/SharePoint | Office Add-ins | Excel 2013 Add-in.
2. Add a new ribbon item to the project. Select PROJECT | Add New Item, select Ribbon (Visual Designer) and change the name to "MyRibbon", and then click Add.
3. Set the ribbon to "Custom". In the Properties pane, expand the ControlId group and change the ControlIdType from "Office" to "Custom".
4. Add a ribbon button. From the Toolbox, drag a ribbon button onto the ribbon group.
5. Open the "MyRibbon" class. Right-click MyRibbon in the Solution Explorer and select View Code.
6. Copy the appropriate sample code from below. Copy the code below for the desired language into the solution's MyRibbon class. (In C# projects, the default name is "MyRibbon.cs", and in Visual Basic projects, the default name is "MyRibbon.vb".)
|
TIP You expose the Excel application with the property Globals.ThisAddin.Application. |
Finding Whether the Table Exists by Using C#
The following code is contained in the ribbon class MyRibbon, in a project named "TableExample_C":
using System;
using System.Collections.Generic;
using System.Linq;
using System.Text;
using System.Windows.Forms;
using Microsoft.Office.Tools.Ribbon;
using Excel = Microsoft.Office.Interop.Excel;
namespace TableExample_C
{
public partial class MyRibbon
{
private void button1_Click_1(object sender, RibbonControlEventArgs e)
{
// Set variables
var xlApp = Globals.ThisAddIn.Application;
var xlBook = xlApp.ActiveWorkbook;
const string Prompt = "Enter a Table name to check if it exists in the active workbook:";
// Get table name
var CheckName = xlApp.InputBox(Prompt, "Table Exists");
// Run TableExists function, notify user
bool bExists;
bExists = TableExists(CheckName, xlBook);
MessageBox.Show(bExists.ToString(), "Result", MessageBoxButtons.OK);
}
public static bool TableExists(string TableName, Microsoft.Office.Interop.Excel.Workbook WKB)
{
try
{
// Loop through all worksheets in the specified workbook
foreach (Excel.Worksheet WKS in WKB.Worksheets)
{
// Loop through all Tables in the iterated worksheet
foreach (Excel.ListObject LO in WKS.ListObjects)
{
if (LO.DisplayName == TableName) return true;
}
}
// In case no Table names match
return false;
}
catch
{
// If an error occurred, default to false
return false;
}
}
}
}
Finding Whether the Table Exists by Using VB
The following code is contained in the ribbon class MyRibbon, in a project named "TableExample_VB":
Imports System.Windows.Forms
Imports Microsoft.Office.Tools.Ribbon
Imports Excel = Microsoft.Office.Interop.Excel
Public Class MyRibbon
Private Sub Button1_Click(sender As Object, e As RibbonControlEventArgs) Handles Button1.Click
Try
'Set variables
Dim xlApp As Excel._Application = Globals.ThisAddIn.Application
Dim xlBook As Excel.Workbook = xlApp.ActiveWorkbook
Const Prompt As String = "Enter a Table name to check if it exists in the active workbook:"
'Get table name
Dim CheckName As String = xlApp.InputBox(Prompt, "Table Exists")
'Run TableExists function, notify user
Dim bExists As Boolean = TableExists(CheckName, xlBook)
MessageBox.Show(bExists.ToString(), "Result", MessageBoxButtons.OK, MessageBoxIcon.Information)
Catch ex As Exception
MessageBox.Show("An error occurred.", "Whoops!", MessageBoxButtons.OK, MessageBoxIcon.Exclamation)
End Try
End Sub
Public Function TableExists(ByVal TableName As String, WKB As Excel.Workbook) As Boolean
Try
'Loop through all worksheets in the specified workbook
For Each xlSheet As Excel.Worksheet In WKB.Worksheets
'Loop through all Tables in the iterated worksheet
For Each xlTable As Excel.ListObject In xlSheet.ListObjects
If xlTable.DisplayName = TableName Then Return True
Next
Next
'In case no Table names match
Return False
Catch ex As Exception
'If an error occurred, default to false
Return False
End Try
End Function
End Class