Now that you have had fun with Ganache, let's try to create a transaction on the Rinkeby network. You may notice a problem here—unlike Ganache, where you get 10 accounts each with a 100 ETH balance, here you get nothing. You have to create an account by default. Creating 10 accounts is easy. But what about the balance? Each account you created on the Rinkeby network with Geth software comes with a balance of 0 ETH. But sending money requires well, money, to pay the transaction fee.
In the Ethereum production blockchain, you get ETH from the cryptocurrency exchange or from mining. But in the Rinkeby network, you get money by begging. And here's how to do it.
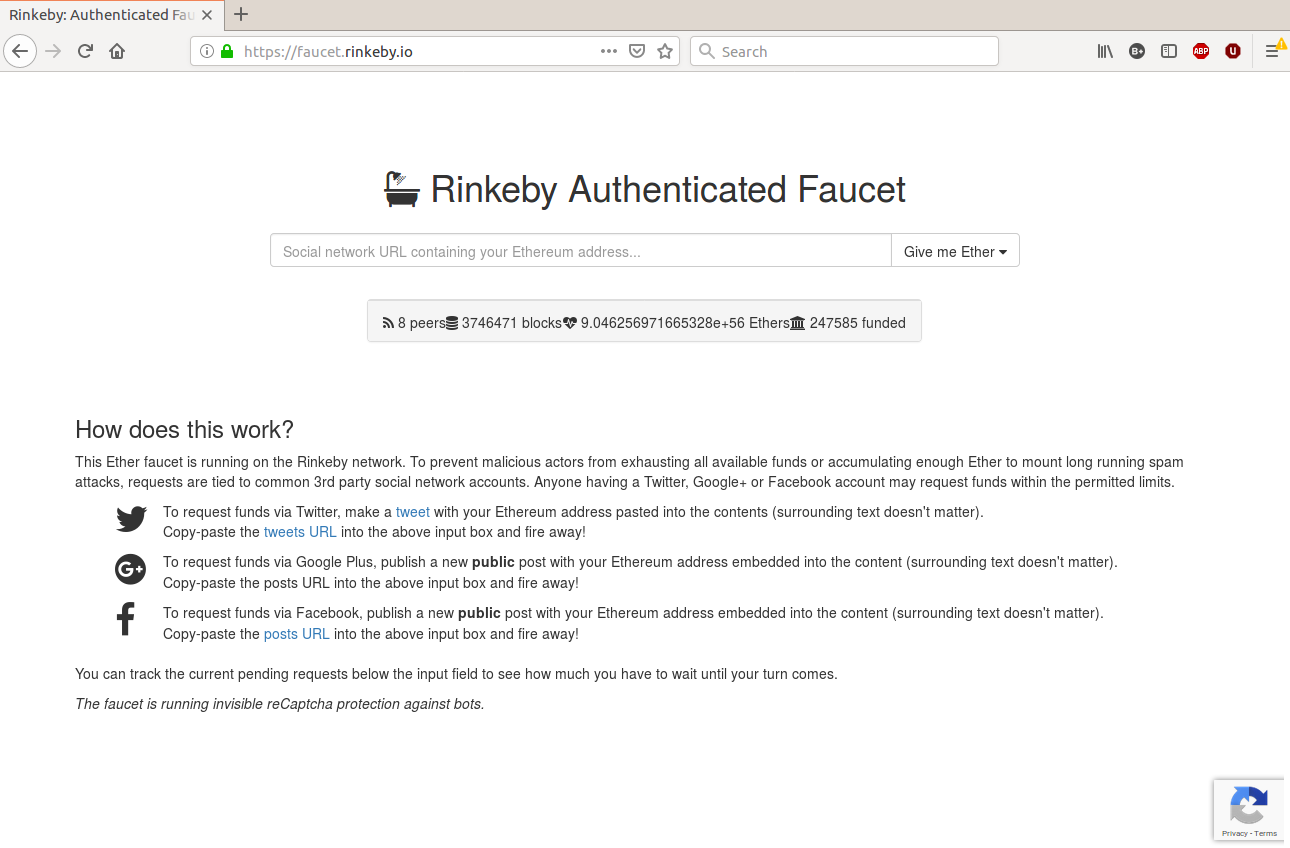
Go to https://faucet.rinkeby.io/, and then, using one of the social media platforms, such as Twitter, Google+, or Facebook, you create a post containing your public address in the Rinkeby network. Then, post your social media post in the form on the Rinkeby faucet website. You have three options: 3 ethers in 8 hours, 7.5 ethers in 1 day, or 18.5 ethers in 3 days:
To make sure you got the balance, you can check the balance from the Geth software. Sync it first. As I said before, this process could take a long time, perhaps several hours, or one night in my case:
$ ./geth --rinkeby
After your local blockchain node is fully synced with the Rinkeby network, kill the geth process first and launch geth again, but with different flags:
$ ./geth --rinkeby --verbosity 0 console
Execute this command inside the geth console:
> web3.eth.getBalance('0x28f5b56b035da966afa609f65fd8f7d71ff68327')
3000000000000000000
Change this address to your address. You should get some ETH from the faucet.
Assuming you have the ETH already, you can create a transaction in the Rinkeby network. Here is the script to send ethers in the Rinkeby network. You can refer to the code file on the following GitLab link for the full code: https://gitlab.com/arjunaskykok/hands-on-blockchain-for-python-developers/blob/master/chapter_04/send_money_rinkeby.py:
from web3 import Web3, IPCProvider
from web3.middleware import geth_poa_middleware

# Change the path of geth.ipc according to your situation.
w3 = Web3(IPCProvider('/opt/data/ethereumdata/geth.ipc'))

w3.middleware_stack.inject(geth_poa_middleware, layer=0)

...
...

nonce = w3.eth.getTransactionCount(Web3.toChecksumAddress(from_account))

transaction = {
  'to': Web3.toChecksumAddress(to_account),
  'value': w3.toWei('1', 'ether'),
  'gas': 21000,
  'gasPrice': w3.toWei('2', 'gwei'),
  'nonce': nonce
}

signed = w3.eth.account.signTransaction(transaction, private_key)
w3.eth.sendRawTransaction(signed.rawTransaction)
Change the account receiver's address, your private key encrypted file location, your password, and the geth.ipc file location according to your situation.
Remember that our private key is encrypted in a file. So we read that file, and then unlock it with a password. Remember, you should not embed the password in the code directly. Then you can check your destination account's balance in the geth console after waiting a couple of minutes:
> web3.eth.getBalance('0x99fb2eee85acbf878d4154de73d5fb1b7e88c328')
100000000000000000
You send a transaction by signing it with a private key. This is the most versatile way to create a transaction in Ethereum. But there is another way, which involves using just a password.
You can use a private key like this:
signed = w3.eth.account.signTransaction(transaction, private_key)
w3.eth.sendRawTransaction(signed.rawTransaction)
Or, instead, you can use a password when signing a transaction, as follows:
w3.personal.sendTransaction(transaction, password)
Using password can only be done when you control the node because it requires an encrypted private key file. I have created a couple of accounts in my Ethereum node. I can only use a password when signing a transaction for these accounts only. But with a private key, I can use any account.