
How about a Cake Bombe for a grand show-off dessert? The cake lesson here is a Joconde sponge, a super flexible sheet that can be shaped and moulded all sorts of ways. Here it’s filled with my favourite combination of rhubarb and custard, but I’m sure you can come up with all sorts of flavours for the filling!
Makes one bombe cake
Prep: 1 hour, plus chilling at least 4 hours, ideally overnight
Bake: 8–10 minutes
Oven: 210°c (fan)/230°c/450°F/Gas Mark 8
300ml (10fl oz) double (heavy) cream
1 tsp vanilla bean paste
30g (1oz) icing (confectioners) sugar
300g (101⁄2oz) rhubarb
50g (13⁄4oz) caster (superfine) sugar
50ml (2fl oz) water
1 tbsp cornflour (cornstarch)
100ml (31⁄2fl oz) milk
100ml (31⁄2fl oz) double (heavy) cream
1 tsp vanilla bean paste or the seeds scraped from 1 vanilla pod
3 egg yolks, large
45g (11⁄2oz) caster (superfine) sugar
1 tbsp cornflour (cornstarch)
5 whole eggs, large
185g (61⁄2oz) ground almonds
185g (61⁄2oz) icing (confectioners) sugar, sifted
40g (11⁄2oz) butter, melted and cooled
50g (13⁄4oz) plain (all-purpose) flour, sifted
5 egg whites
25g (1oz) caster (superfine) sugar
Mini white chocolate cigarillos
White and pink chocolate curls
Electric stand or hand mixer
Two 30 × 35cm (12 × 14in) baking trays 1cm (1⁄2in) deep
Baking (parchment) paper
Small, medium and large pans
Cling film (plastic wrap)
1 litre (20fl oz) Pyrex glass bowl
15cm (6in) pastry cutter
1 First make the vanilla cream. Place the double cream, icing sugar and vanilla bean paste into a large bowl and whisk until the mixture forms soft peaks. The consistency should be soft but not runny. Cover the vanilla cream with cling film and store in the fridge until later.

2 Next make the rhubarb filling. In a small bowl or cup mix together the water and cornflour. Cut the trimmed rhubarb stalks into 1.5cm (1⁄2in) chunks and place into a medium pan with the caster sugar. Heat the rhubarb gently, stirring occasionally until the sugar dissolves and the rhubarb is softened, only just still holding together. Pour in the water and cornflour and continue to heat until the mixture comes to the boil and thickens. Remove from the heat and transfer to a clean bowl. Cover with cling film, easing it down the sides of the bowl so it is in contact with the rhubarb filling and allow to cool to room temperature.

3 For the custard, measure the milk and cream into a large pan, add the vanilla bean paste and whisk to combine. Place the egg yolks into a large jug and add the caster sugar and cornflour. Whisk it up straight away until even.
4 Now heat the milk/cream in the pan until it’s just below boiling point. Take it off the heat and pour it over the egg yolks in the jug a little at a time whilst whisking continuously. This stops the egg from scrambling and ruining your custard. Once all the milk/cream has been added pour the whole lot back into the pan.
5 Heat it over a gentle heat whilst whisking the whole time. The mixture on the base of the pan will cook faster and thicken so keep whisking – this will stop it getting lumpy. Heat whilst whisking (I think you’ve got the gist now!) until the custard is nice and thick. Take it off the heat and transfer it to a clean bowl and contact cover with cling film.

6 On to the Joconde sponge. Preheat the oven to 210*C (fan)/230*C/450*F/Gas Mark 8, and line the baking trays with baking paper.
7 Place the whole eggs, ground almonds and icing sugar in a large bowl and whisk until the mixture is extremely thick and volumised – it takes about 8–10 minutes so keep going. Unlike the cake mixture for a Swiss Roll this mix will not quite make it to falling in ribbons, but very nearly!
8 Add a great big dollop of the whisked mixture to the melted butter and mix together really, really well. Return this to the bowl of whisked egg and almonds and fold the two together. Sift over the flour and fold in fully.

9 Now whisk the egg whites until they go foamy. You will need a scrupulously clean bowl and whisks – any speck of grease and the whites won’t whisk up properly. Add the caster sugar a spoonful at a time whilst whisking until the whites will stand in firm peaks. So much whisking!

It’s easiest to make this sponge with an electric mixer as so much whisking is involved – either a stand mixer or a hand mixer will do the trick.
10 Take a third of the whipped egg whites and quickly beat into the almond mixture until it’s evenly combined. Add the rest of the egg whites and this time fold in until the whites have been fully incorporated into the mixture.

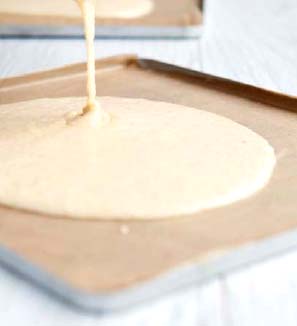
11 Divide the mixture between the two baking trays. Instead of trying to spread the cake mixture simply tilt the trays gently to ease the mixture into the corners.
12 Bake each tray one at a time in the oven for 8–10 minutes until lightly golden brown on the top, very gently springy to the touch but not dried out. The crust should not be sticky to the touch. Remove from the oven, keeping them in the trays, and allow to cool fully. Once cooled you can cover them with a clean tea towel if you’re not using them right away.
13 Line your 1 litre Pyrex glass bowl with cling film. Cut a large sheet of cling film, place your fist into the centre, gather the film around it loosely, place your fist in the bottom of the bowl and unwrap the cling film, allowing a good overlap around the bowl edge. Repeat with a second layer.

If your cake lining splits don’t panic! If the gap between a split is minimal don’t worry it will still hold together. If the gap is wide then patch in a piece from the excess cake you cut away. No-one will ever know.
14 Lay out a sheet of cling film on the work surface, slightly bigger than the sheet of sponge. Carefully take one sheet of cake out of the tin and flip it face down on the cling film. Release the paper from the edges of the cake, and then begin to peel off the paper, working from each edge into the centre. If you peel from one end it’s likely to rip the sheet. Lift the sheet taking care to support it, using the cling film to help you ease it into the bowl. I won’t kid you it’s a tricky business, slowly and gently is the key. Shape the cake to the bowl, allowing the sheet of cake to pleat where it needs to, easing it with the cling film. Once it’s in carefully remove the film you used to help. Take a sharp pair of scissors and trim away the cake level with the top of the bowl. Gently press the pleats towards to the sides of the bowl to flatten a little.

15 Now for the assembly. Place half of the vanilla cream into the base and smooth level with the back of a spoon.

16 Gently stir the cooled rhubarb and add a little at a time on top of the cream, until it is all used up.

17 Beat the custard well with a spoon and add three quarters on top of the rhubarb and smooth it level.

18 Add the remaining custard to the leftover vanilla cream and fold through until it is evenly combined to create a custard cream for covering the bombe later. Set to one side. Remove the second sheet of cake from the tin and loosen the paper at the edges. Cut out two 15cm (6in) circles using a pastry cutter and gently peel away from the backing paper.

19 Carefully lift the first cake disc and place it onto the top of the bombe, sitting on the custard. Apply a thin layer of the custard cream on top of the cake disc. Place the second disc on top of the custard cream. Press gently on the cake circle to level. Reserve the remaining custard cream, storing it in the fridge for later.

20 Gather together the overhanging cling film from around the bowl pulling it over the cake circles tightly all the way around to seal in the cake. Flip the bowl over onto a plate to invert it and place in the fridge to chill for a minimum of 4 hours but ideally overnight.
21 Once chilled, turn the bombe over again and peel away the cling film. Invert onto a serving plate and carefully remove the bowl. Unwrap the clingfilm and discard. Use the remaining custard cream to coat the outside of the entire cake, using a palette knife to smooth. For decoration add a double layer of mini white chocolate cigarillos around the base and top with some white and pink chocolate curls. Chill until you’re ready to serve. After all that hard work you deserve a great big slice!
