We can navigate to the Build folder of our application here and click on it to open our XCode project:
- On the left-hand side of the screen, you should see Unity-iPhone as one of the items you can select. Click on it and you should see Unity-iPhone in the center and Identity and Type on the right:

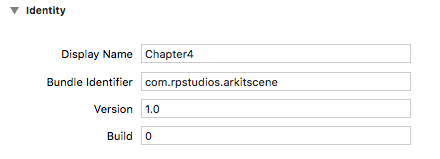
- Check to make sure the Identity is correct. Display Name for me is Chapter4, with the Bundle Identifier as com.rpstudios.arkitscene:

- Now, on Signing, you need to look and make sure that the Automatically manage signing checkbox is checked and your Team has your email address attached to it. The Signing Certificate is extremely important, as you will not be able to compile or send to the simulator properly. If you don’t, you have to register for an Apple Developer account at developer.apple.com:

- Scroll down and look for Linked Frameworks and Libraries. AVFoundation should be set from Optional to Required. I’ve noticed that when it is set to Optional, the linker fails to work properly:

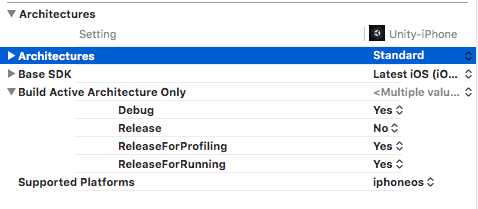
- Locate Architectures, because we need to change from the default to Standard. This is due to there being different architectures and iOS doesn’t utilize ARM anymore:

- Now, you can click on Build and attach your iPhone 6 or above to your Mac computer. Build and then run it on the device. It will ask you to trust the app on your phone, so follow the instructions to give trust.
- Click on the app on your phone and voila! It will load and you can play with the app.