Now that OpenCV has been download, it is time to do the same for CMake, as both of these files are integral to continuing properly.
This is only the case if you decided to go with the source direction instead of the binaries method, so I will touch on these steps a little as well.
Downloading CMake is a rather quick and painless process, regardless of whether you are using Linux, macOS, or Windows. Since I want to build with Windows, I will showcase the steps with that particular OS in mind.
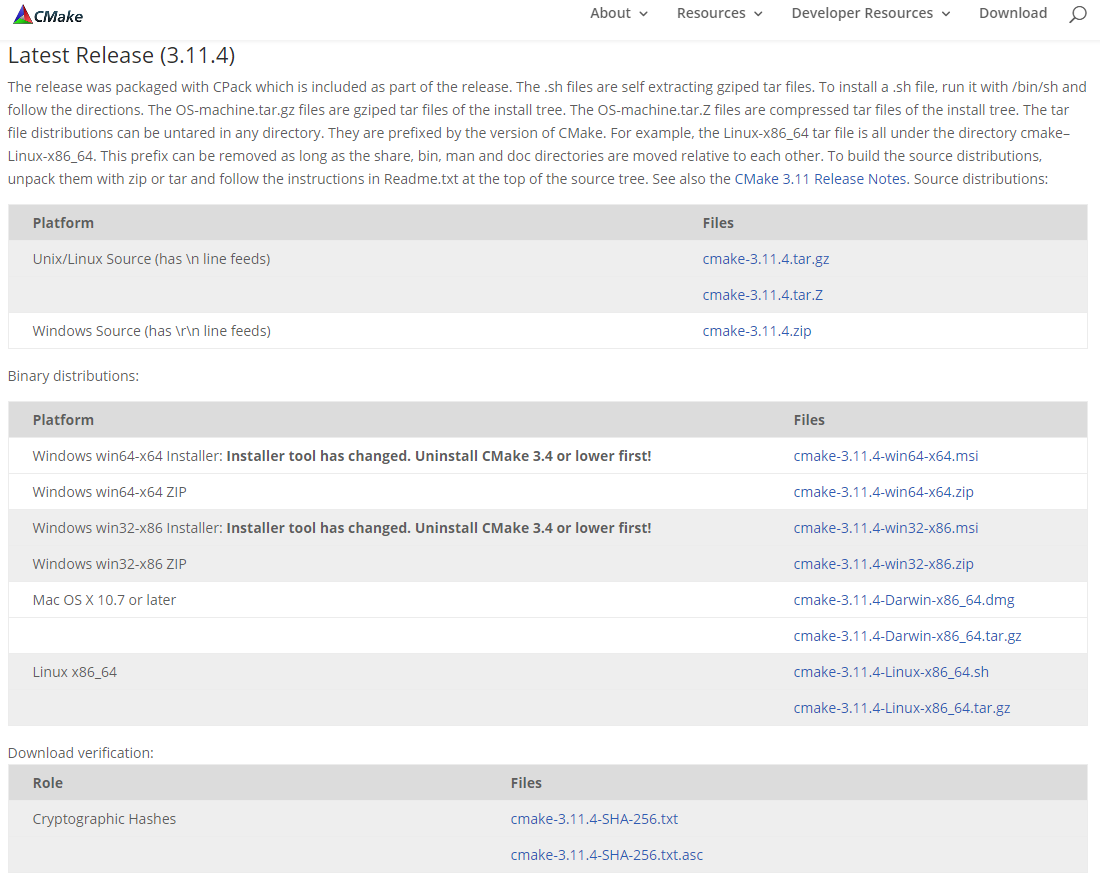
- Go to CMake.org; click on download latest, and scroll down to latest release to download CMake:

- Double-click on CMake to run the setup wizard:

- Put a check mark in the License Agreement block and click Next:

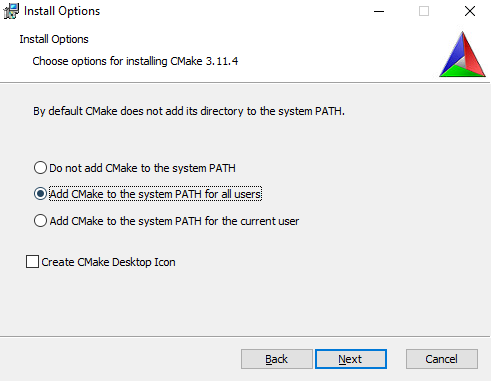
- Make sure to Add CMake to the system PATH for current or all users, depending on your preference. Just make sure that it is set to the system path before clicking Next:

- Click Next to install CMake to whatever folder you want:

- To install CMake, it requires elevated privilges, so if you have UAC enabled and don't have admin rights, make sure you have someone nearby that can give you access to install:

- Installation will take a few minutes to complete:

- Click Finish to complete the installation process:
