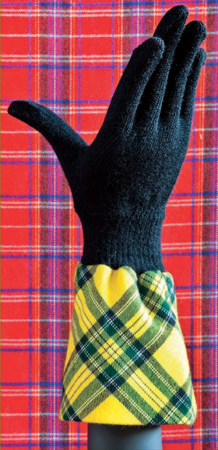
LOVE THE GLOVE

I ride a scooter, and even in the summer my hands get cold while I ride, so I’m always buying knit gloves from the 99-cent store to keep in my seat compartment. Now, since we all know that accessorizing is more fun than eating in bed while watching a movie, I thought I would take my simple, inexpensive gloves and spruce them up a bit. Give them some “glove love,” so to speak. I had a blast dreaming up ways to turn my cheap hand warmers into attention-grabbing accessories, and I’m sure you’ll come up with tons more ways to make your gloves special. And if you ever see me scooting down the street with argyle arms, please wave hello!


Image

FANCY BIAS CUFF KNIT GLOVES

To make these gloves, I recommend using a fabric that contrasts with your -winter coat so you’ll really wow passersby with your haute hands.

YOU’LL NEED

½ yard of fabric (I like to use plaid)

Scissors

Sewing machine

Matching thread

Iron and ironing board

Pair of knit gloves

Straight pins

HERE’S HOW

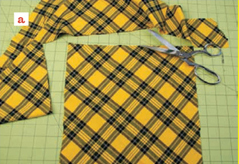
 1  Cut a 12-inch by 12-inch square of the fabric you’ve chosen on the bias.
Image

HINT

Cutting on the bias is when you place your fabric at a 45-degree angle instead of straight up and down, and then cut out your shape.

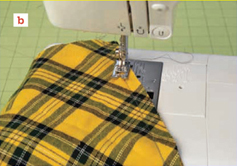
 2  Sew 2 ends of the fabric square together to create a tube.
Image

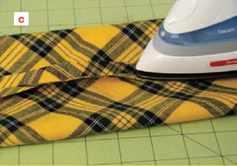
 3  Press the seam open. People won’t see the seam, but pressing it will make it a little more comfortable.
Image

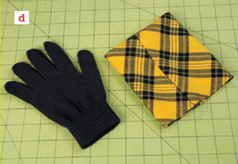
 4  Fold the tube in half inside of itself, matching the raw ends, seams on the inside.
Image

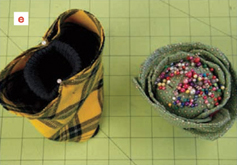
 5  Place the glove inside the tube, with the opening of the glove and the raw ends of the tube at the same end.

 6  Pin the glove and raw ends together with 2 straight pins.
Image

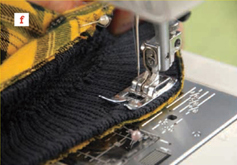
 7  Stitch your cuff to the glove, stretching the opening of the glove so that you can fit your hand inside.
Image

 8  Flip the cuff right side out.


Image

BUTTON CLUSTER GLOVES

You know how every time you buy a new shirt it comes with a couple of extra buttons? Well, I can’t ever seem to throw them out, so I’m always on the lookout for ways to put them to use. This is one of my favorites, and I think the results are glovely.

YOU’LL NEED

1 pair of knit gloves in a color you like

Buttons in colors that match the gloves

Needle and thread in a color that matches the gloves

HERE’S HOW

 1  Arrange half of your buttons in a pattern you like on the top of one of your gloves.

 2  Re-create the pattern on your other glove, then sew the buttons in place.

 3  Use the finished glove as a template to sew the buttons on your first glove. Enjoy!


Image

WINNING HAND DOMINO GLOVES

One day I found a pair of old gloves in a drawer and thought, Why not dress them up with some dominoes? Then I started wondering what else I might want to sew some dominoes onto. A scarf? The end of a curtain? A sweater for my friend’s cat?

YOU’LL NEED

16 dominoes (8 per glove)

Drill with 1/16” drill bit

Small piece of scrap wood

Pair of black knit gloves

Needle

Black thread

HERE’S HOW

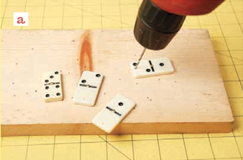
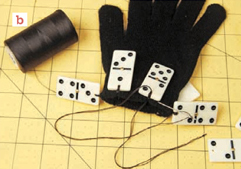
 1  Drill a small hole at 1 end of each domino. Use the scrap wood to protect your work surface.
Image

 2  Sew the dominoes onto the opening of your gloves individually, tying off each as you go around the mouth of the glove. This way there won’t be thread connecting the dominos, so your gloves will easily stretch over your hand.
Image

 3  Have fun looking like a dominotrix!


Image

SWEETER SWEATER GLOVES

How many sweaters do you have in your drawer that you really should toss, but don’t because you think you might wear them again? My guess is at least three. Well, I’ve got a way to make more room in your dresser and put those sweaters to use!

YOU’LL NEED

Sweater you really should toss

Scissors

One pair of knit gloves

Straight pins

Sewing machine with matching thread

HERE’S HOW

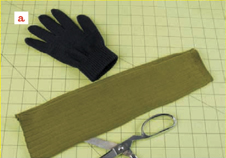
 1  Cut off the sleeves of the sweater in a length you like.

 2  Pull the cut-off sleeves up your arms by the cuffs. The cuffs should be tight enough to keep in place on your upper arms, but if they’re not, pinch them and see how much you will need to take them in. Also see how much, if any, you will have to take in the-sweater sleeves at the wrist (you don’t want them too baggy).

 3  If you need to take in the sleeves, gather the extra material along the seam of the sweater and stitch, then cut off the excess.
Image

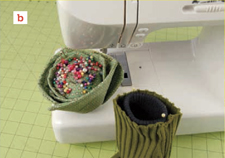
 4  Turn the sleeves inside out and place the gloves in the end that you cut off, matching up the openings. (The fingers of the gloves should be pointed toward the sweater cuff end.)

 5  Place a couple of straight pins in the openings to hold the gloves in place.
Image

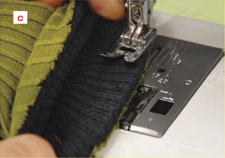
 6  Sew the raw edge of the sleeve to the opening of the glove using a ½-inch seam allowance. Make sure to stretch the fabric while you’re sewing so that the glove opening will stretch when you put it on.
Image

 7  Turn the sleeves right side out.


Image

ARGYLE SOCK GLOVES

I dig kneesocks! I like the length, the colors, and the argyle patterns, and I often wear them to bed on cold nights so my toes, feet, and calves stay toasty. One night I thought, If these superlong socks can keep me warm up to my knees, then why not sew them to some gloves that’ll keep me warm up to my elbows? I whipped these up the very next day.

YOU’LL NEED

1 pair of long argyle socks

Scissors

1 pair of knit gloves

Straight pins

Sewing machine with matching thread

HERE’S HOW

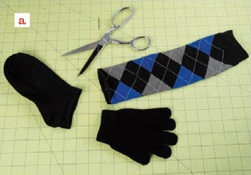
 1  Cut off the foot of the socks and trim the remaining tubes to a length you like. I wanted my gloves to end at the elbow, so I measured up to my elbow and cut the socks accordingly.
Image

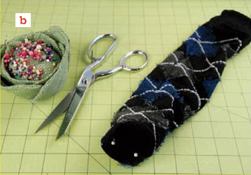
 2  Turn the socks inside out and place the gloves in the end that you cut off, matching up the openings. The fingers of the gloves should be pointing toward the part of the sock that will meet your elbow.

 3  Place a couple of straight pins around the openings to hold the gloves in place.
Image

 4  Using a ½-inch seam allowance, sew the opening of the sock to the opening of the glove, stretching the fabric of your glove opening as you work.

 5  Turn the sock right side out and start warming up immediately.