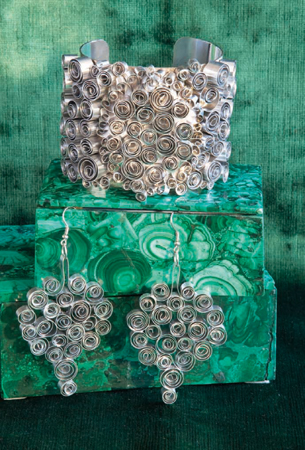
1 Cut up aluminum flashing into 25 strips, each ¼ inch wide and 5 inches long.
2 Grab 1 end of a strip with the regular pliers and curl it around the needle-nose pliers until you get to the center of the strip. Now grab the other end of the strip and curl it in the opposite direction (the curls should form an S). This hides the sharp edges so you can wear your bracelet without worrying about poking somebody.
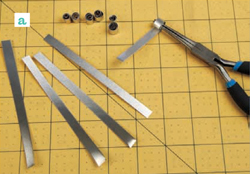
3 Make as many curly S’s as you need for your design.
HINT
4 Glue your curly S’s on the cuff with E-6000 glue.
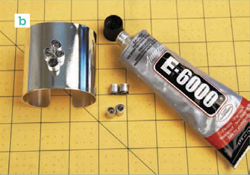
1 Follow steps 1 through 3 for making the bracelet.
2 Cut 2 more strips of flashing. Fold 1 strip in half, then curl each end around the needle-nose pliers, twisting each end in the opposite direction, stopping about ½ inch from the center of your strip on both sides. This is the top of your earring. Repeat for the other strip to make your other earring top.

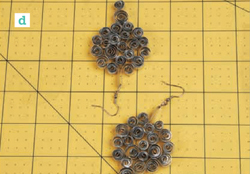
3 Glue a few curly S’s to the curls on the tops of your earrings, and keep adding S’s until you’ve achieved your desired shape.
4 When the glue has dried, loop a jump ring through the tops of each earring, add earring wire, and put on your new jewelry.
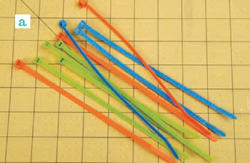
1 Bend and secure a zip tie, creating a loop any size you like, and cut off the loose end. This will be your bracelet’s first link and will determine the size you cut your other zip ties.
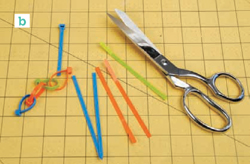
2 Slip the end of another zip tie through the finished link, and keep it going until you have enough to fit around your wrist.
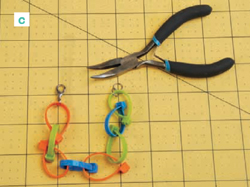
3 Add a jump ring to 1 of your end links with pliers.
4 Add a jump ring with a lobster claw closure to the other end link.
1 Measure your wrist and add 1½ inch for the ideal length of your bracelet (mine was 9 inches long).
2 Cut the measuring tape into 4 pieces, each the length that you calculated in step 1.
3 Zigzag-stitch the pieces together, long edge to long edge, side by side.
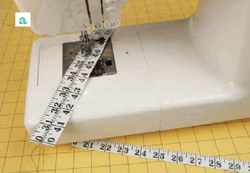
4 Fold each short end over ½ inch in opposite directions and straight-stitch the folds in place, making sure to backtack.
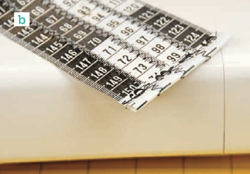
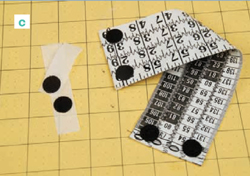
5 Stick your Velcro sticky dots on the ends of your bracelet where you folded the edges over, and you’re ready to go.
1 Make a copy of your image using a laser copier. (You may have to go to Staples for a laser copy.)
2 Cut out your image in the shape of an oval, circle, or square.
3 Trace your image onto a piece of aluminum flashing in permanent marker, then cut out the shape using heavy-duty scissors or tin shears.
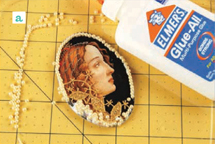
4 Glue your image to the aluminum flashing with some Elmer’s.
5 Apply tiny dabs of glue around the edge of your image and add a pearl border. Use a toothpick to spread your glue and push the pearls into place.
6 Glue a bit of lace on the image to give it some texture, and glue on some beads and/or a rhinestone or two just for kicks.
7 Go outside to finish this project!
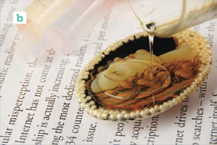
8 Mix a small amount of resin, following the instructions on the package carefully.
9 Put down some cardboard to protect your work surface, place your water bottle lid on the cardboard, and balance the cameo on the lid.
10 Pour resin over the cameo, making sure it spreads all the way to the edge. Let the cameos dry overnight.
DON’T WORRY
11 Check the underside or your cameo for drips and scrape off any excess with an X-ACTO knife. Your cameo is now ready for action.
12 To complete the bracelet, glue the cameo to the metal cuff with a generous amount of E-6000. Let the glue dry, then wear it out only if you plan on being the life of the party!
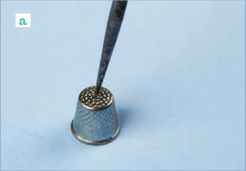
1 Place your thimbles with mouths down on your workspace. Poke a hole with the awl in the top of each thimble, just big enough for a pin to fit through.
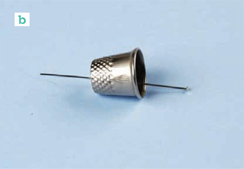
2 Poke a flathead pin through the top of each thimble, with the head catching where your fingertip would be. Cut and curl the pointed end of the pin into a loop with needle-nose pliers.
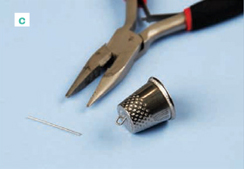
3 Thread a jump ring through the loop and attach the thimble to your bracelet chain.
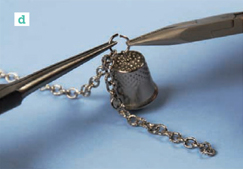
4 Continue adding thimbles until your bracelet is clanking away.
5 Add your lobster claw at one end of your chain with a jump ring, then add an extra jump ring at the other end of your chain to complete the clasp.
1 Cut 2 lengths of ribbon, each 11 inches long.
2 Cut 2 pieces of netting, each 2 inches by 8 inches.
3 Lay your ribbon pieces on your sewing machine side by side, with one overlapping the other ¼ inch.
4 Sew the ribbons together, leaving 1½ inches at each end unsewn.
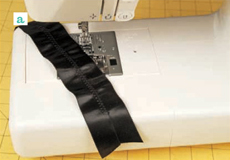
5 Center the netting on top of the ribbon piece and stitch it on.

6 Fold a pleat in each end of the bracelet where the netting ends. Pin the pleats in place and stitch across them.

7 Add a Velcro dot to each end of the bracelet, one on the outside and one on the inside.
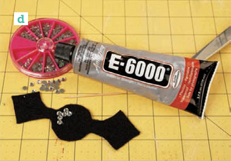
8 Determine how big and what shape you want the decoration on your cuff to be and cut it out of the heavy black felt.
9 Using a toothpick and E-6000 glue, fill in your decorative piece with rhinestones. Let the glue dry.
10 Glue the decorative piece on top of the netting in the center of your cuff with E-6000 and let dry.
1 Enlarge and trace the patterns provided onto aluminum flashing with a fine-point marker, and cut the flower shapes out with tin shears or heavy-duty scissors, making sure to dull sharp points by cutting them off.
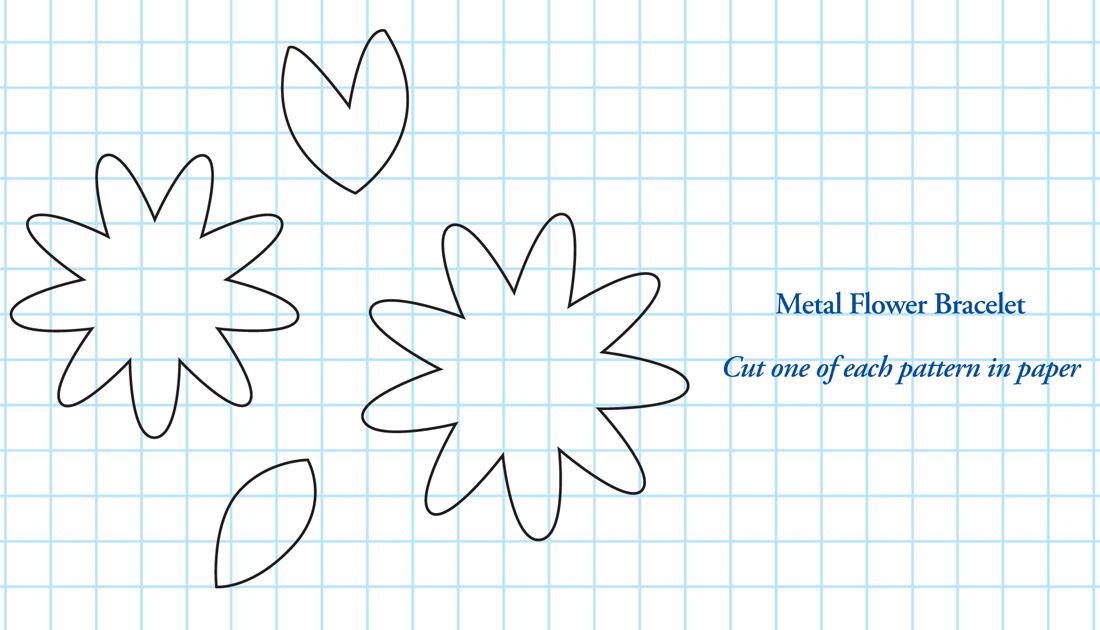
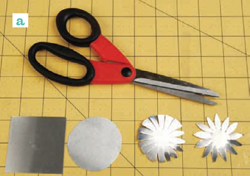
2 Layer the flower shapes, and glue them together with E-6000 to make your flowers.
3 With wire cutters or a Dremel, remove the shanks from the back of your buttons. Use pliers to hold the buttons while you do this!
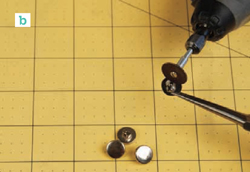
4 Glue a button in the center of each flower and let dry.
5 Arrange the flowers on the metal cuff.
6 Glue the flowers to the cuff with E-6000. Use clear tape to hold the flowers in place while they dry.
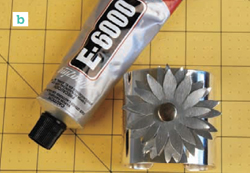
7 When the glue is dry, remove the tape and admire your new jewelry.
1 Cut off the tips of the marker caps to make them into hollow tubes. Try to cut them all the same size.
HINT
2 Tie a knot with a loop in the middle of your cord exactly at the 1-yard mark.
3 Put 1 end of your cord through 1 end of a cap tube and the other end of the cord through the other end and pull until the string is taut.
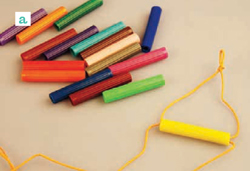
4 Position the knot so it’s centered against the side of the first tube.
5 Repeat steps 3 and 4 until you’ve used all of your caps.

6 Once the last cap is in place, tie your cord in a very secure knot, centered against the middle of the last cap.
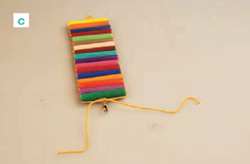
7 String on the lobster claw closure and tie another knot so it stays in place.
8 Cut the excess cord and tuck the ends inside the last cap (you might want to dab some glue on the ends to keep them in place) or let the strings hang loose for a more casual look.