Although Office Admin Center and Exchange Admin Center provide everything you need to work with Exchange Online, there may be times when you want to work from the command line, especially if you want to automate tasks with scripts. Enter Windows PowerShell.
Windows PowerShell is built into Windows and Windows Server. Windows PowerShell supports cmdlets, functions and aliases. Cmdlets are built-in commands. Functions provide basic functionality. Aliases are abbreviations for cmdlet names. As cmdlet, function and alias names are not case sensitive, you can use a combination of both uppercase and lowercase characters to specify cmdlet, function and alias names.
Although Windows PowerShell has a graphical environment called Windows PowerShell ISE (powershell_ise.exe), you'll usually work with the command-line environment. The PowerShell console (powershell.exe) is available as a 32-bit or 64-bit environment for working with PowerShell at the command line. On 32-bit versions of Windows, you’ll find the 32-bit executable in the %SystemRoot%\System32\WindowsPowerShell\v1.0 directory.
On 64-bit versions of Windows and Windows Server, a 64-bit and a 32-bit console are available. The default console is the 64-bit console, which is located in the %SystemRoot%\System32\WindowsPowerShell\v1.0 directory. The 32-bit executable in the %SystemRoot%\SysWow64\ WindowsPowerShell\v1.0 directory and is labeled as Windows PowerShell (x86).
With Windows 8.1 or later, you can start the PowerShell console by using the Apps Search box. Type powershell in the Apps Search box, and then press Enter. Or you can select Start and then choose Windows PowerShell. From Mac OS X or Linux, you can run either Windows 7 or later in a virtual environment to work with Windows PowerShell.
In Windows, you also can start Windows PowerShell from a command prompt (cmd.exe) by typing powershell and pressing Enter. To exit Windows PowerShell and return to the command prompt, type exit.
When the shell starts, you usually will see a message similar to the following:
Windows PowerShell
Copyright (C) 2012 Microsoft Corporation.
All rights reserved.
You can disable this message by starting the shell with the –Nologo parameter, such as:
powershell -nologo
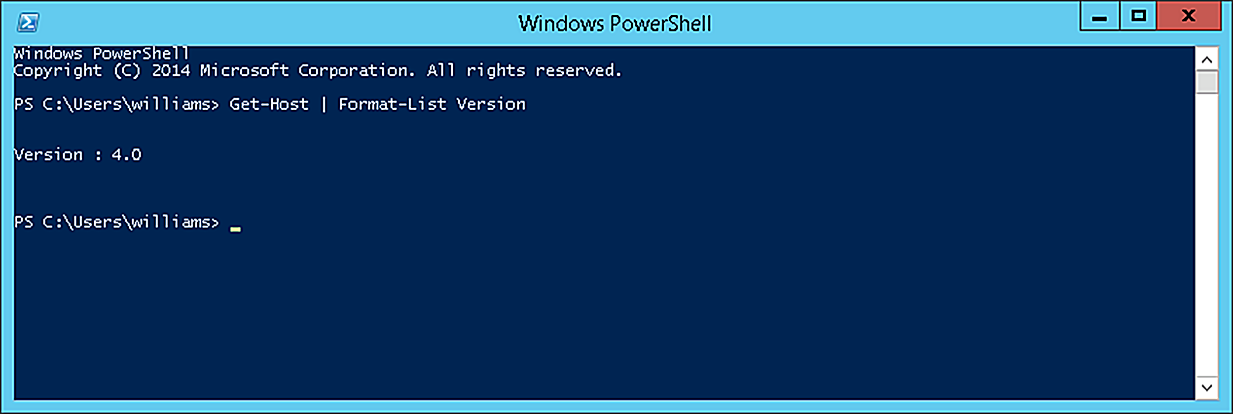
By default, the version of scripting engine that starts depends on the operating system you are using. With Windows 8.1 and Windows Server 2012 R2, the default scripting engine is version 4.0. With Windows 10 and Windows Server 2016, the default scripting engine is version 4.0. To confirm the version of Windows PowerShell installed, enter the following command:
Get-Host | Format-List Version
Because you can abbreviate Format-List as FL, you also could enter:
Get-Host | fl Version
NOTE Letter case does not matter with Windows PowerShell. Thus, Get-Host, GET-HOST and get-host are all interpreted the same.
Figure 1-8 shows the PowerShell window. When you start PowerShell, you can set the version of the scripting engine that should be loaded. To do this, use the –Version parameter. In this example, you specify that you want to use PowerShell Version 3.0:
powershell -version 3
NOTE Windows can only load available versions of the scripting engine. For example, you won’t be able to run the version 5.0 scripting engine if only PowerShell Version 4.0 is available.
FIGURE 1-8 Use the PowerShell console to manage Exchange remotely at the prompt.
By default, the PowerShell window displays 50 lines of text and is 120 characters wide. When additional text is to be displayed in the window or you enter commands and the PowerShell console’s window is full, the current text is displayed in the window and prior text is scrolled up. To temporarily pause the display when a command is writing output, press Ctrl+S. You can then press Ctrl+S to resume or Ctrl+C to terminate execution.
When you run Windows PowerShell, a default working environment is loaded automatically. The features for this working environment come primarily from profiles, which are a type of script that run automatically whenever you start PowerShell. The working environment also is determined by imported snap-ins, providers, modules, command paths, file associations, and file extensions.
To start Windows PowerShell without loading profiles, use the –Noprofile parameter, such as:
powershell -noprofile
Whenever you work with scripts, you need to keep in mind the current execution policy and whether signed scripts are required. Execution policy is a built-in security feature of Windows PowerShell that controls whether and how you can run configuration files and scripts. Although the default configuration depends on which operating system and edition are installed, policy is always set on either a per-user or per-computer basis in the Windows registry.
You can display the execution policy currently being applied, using the Get-ExecutionPolicy cmdlet. The available execution policies, from least secure to most secure, are:
By default, when you set execution policy, you are using the LocalMachine scope, which is applied to all users of the computer. You also can set the scope to CurrentUser so that the execution policy level is only applied to the currently logged on user.
Using Set-ExecutionPolicy, you can change the preference for the execution policy. Normally, changes to execution policy are written to the registry. However, if the Turn On Script Execution setting in Group Policy is enabled for the computer or user, the user preference is written to the registry, but it is not effective. Windows PowerShell will display a message explaining that there is a conflict. Finally, you cannot use Set-ExecutionPolicy to override a group policy, even if the user preference is more restrictive than the policy setting. For example, you can set the execution policy to run scripts regardless of whether they have a digital signature and work in an unrestricted environment by entering:
set-executionpolicy unrestricted
When you change execution policy, the change occurs immediately and is applied to the local console or application session. Because the change is written to the registry, the new execution policy normally will be used whenever you work with PowerShell.
When you are working with Windows PowerShell, you can get a complete list of cmdlets and functions available by entering get-command. The output lists cmdlets and functions by name and associated module.
Another way to get information about cmdlets is to use Get-Help. When you enter get-help *-*, you get a list of all cmdlets, including a synopsis that summarizes the purpose of the cmdlet. Rather than listing help information for all commands, you can get help for specific commands by following Get-Help with the name of the cmdlet you want to work with, such as:
get-help clear-history
Because Windows PowerShell V3 and later use online and updatable help files, you may see only basic syntax for cmdlets and functions when you use Get-Help. To get full help details, you’ll have to either use online help or download the help files to your computer. For online help, add the –online parameter to your Get-Help command, such as:
get-help get-variable –online
You can use the Update-Help cmdlet to download and install the current help files from the Internet. Without parameters, Update-Help updates the help files for all modules installed on the computer. When you are working with Update-Help, keep the following in mind:
You can override these restrictions using the –Force parameter.