A Nose for Photography
Here is a quick tutorial on what is arguably the most important part of posing. This is not a cheap trick per se, but an approach that will actually help you make more money because you’re flattering your clients with light.
Ask almost anyone if there’s a facial feature they’d like to change and most will say, “My nose.” Now, noses are useful appendages, but they can be physically problematic. They precede us into a room, light up when we’ve had too much wine, and tend to take the brunt of a sunburn.
Unless your subject is in profile, most anyone’s nose will not present a photographic problem—it’s the shadow cast by your main light that will make or break your portrait.
I tend to rack my main light quite high, about 30 percent higher than the height of my model whether standing or sitting. This usually means 24 to 36 inches above the subject, based on the height of the source light, not the top of any modifier like a softbox or umbrella. There are exceptions to this “rule,” of course, but the idea is to create a shadow that will follow the inside line of the cheek and curve under the cheek at the bottom. In most circumstances, it must also illuminate the eyes and under the brow, creating a graceful line that helps move the viewer’s eyes through the image.
If the main light is set too far to the side of the camera, the shadow will fall over the cheekbone, and it will look like your subject has a big schnoz. If the main light is positionted too close to the camera, the subject’s face might look flat.
Let’s take a look at six classic main light positions and how they affect the nose shadow.
Broad Light
When the subject is angled away from the camera and lit from the side facing the camera, “broad” light results. Note that the nose shadow creates a triangle of light on the far cheek while using the curve of the model’s eyebrow as a compositional element. The shadow falls far enough onto the cheek to frame the nose while the transition shadow along the edge of her face creates contour.
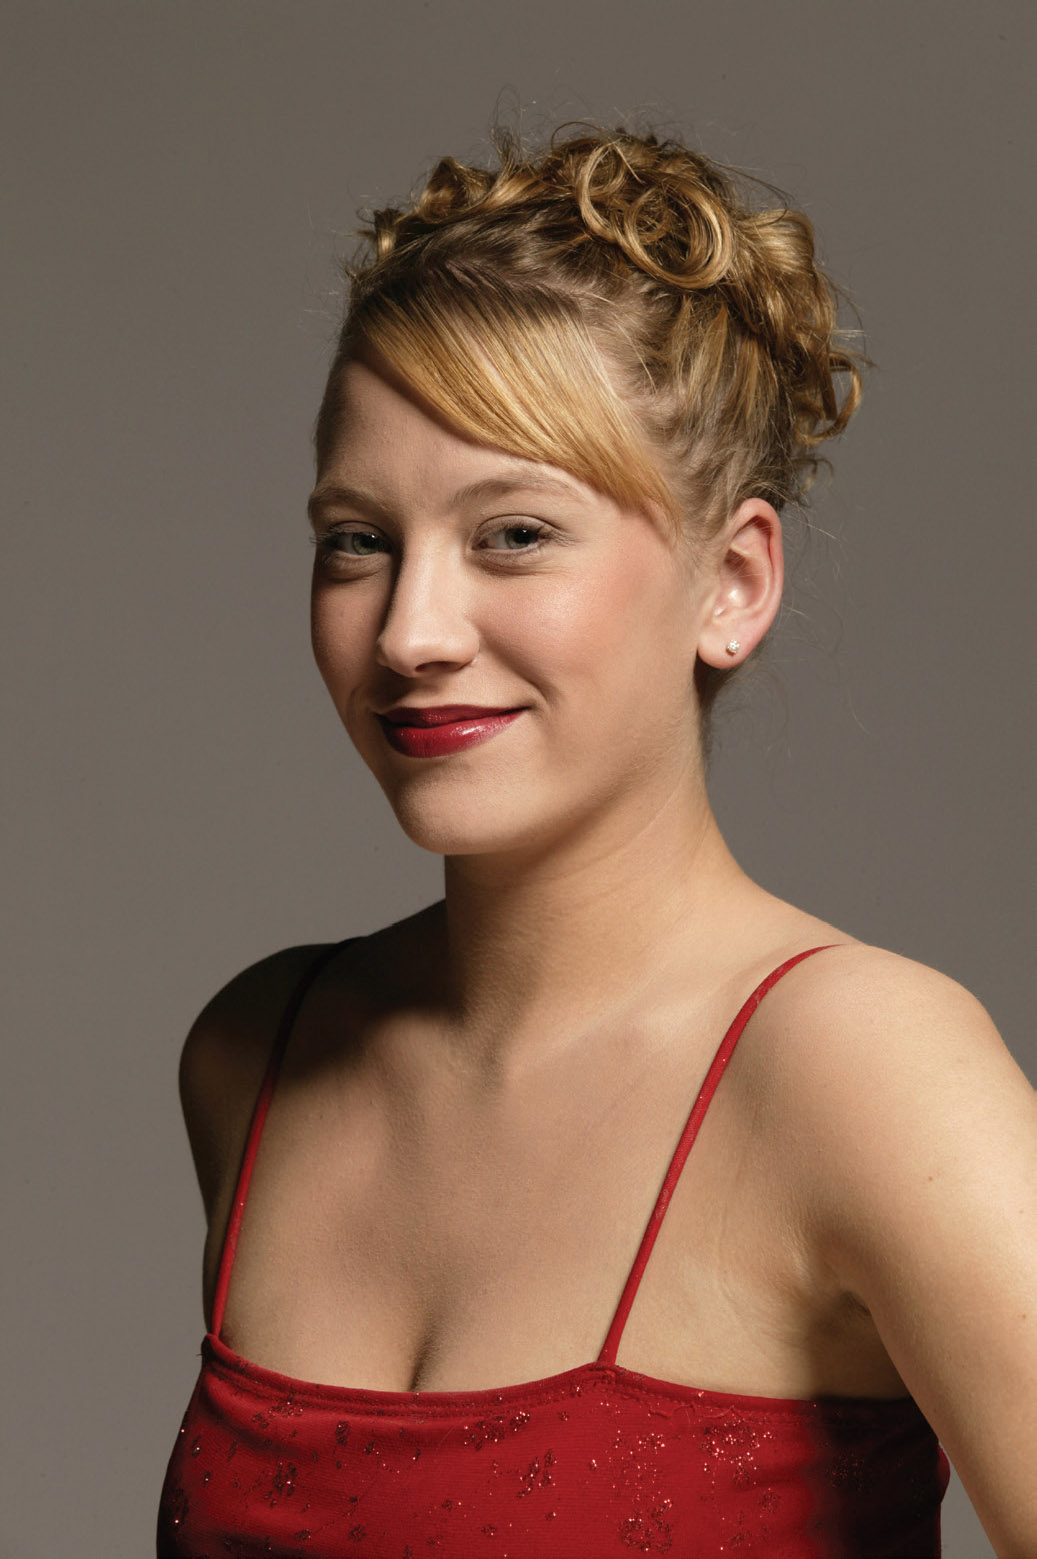
Broad light.
Short Light
Set your main light on the other side of the subject, with her face turned away from the camera, and illuminate the side of the face away from the camera to produce “short” light. The angle is much the same as that used in broad lighting, with a triangle of light forming on the shadowed cheek. In this case, the diagonal shadow of the subject’s head, falling across her neck and chest, directs the viewer’s eyes to her face.
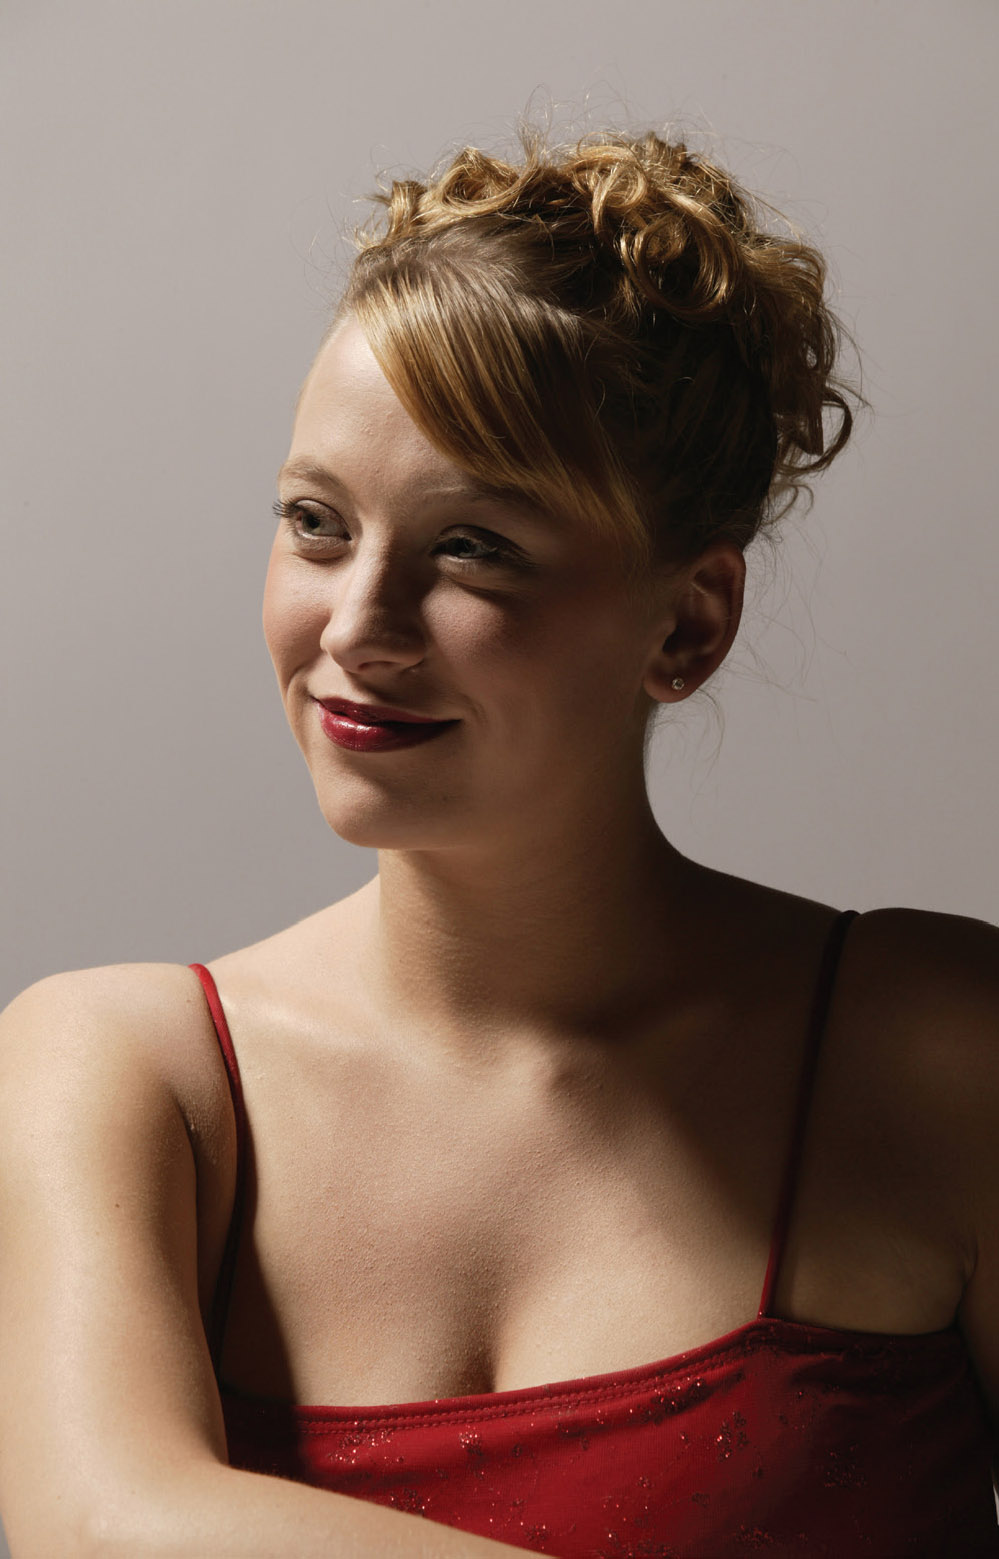
Short light.
Loop Light
Loop light is probably the most popular lighting approach used these days. In this setup, the main light is positioned so the nose shadow barely kisses the side of the nose, forming a loop from the eyebrow line to where it curves off the tip of the nose. The undersides of both eyebrows carry light, while the shadow on the side of the subject’s head and shoulder give the figure a three-dimensional appearance. Even if you add fill to the shadow from a collapsible reflector, dimensionality will be retained.
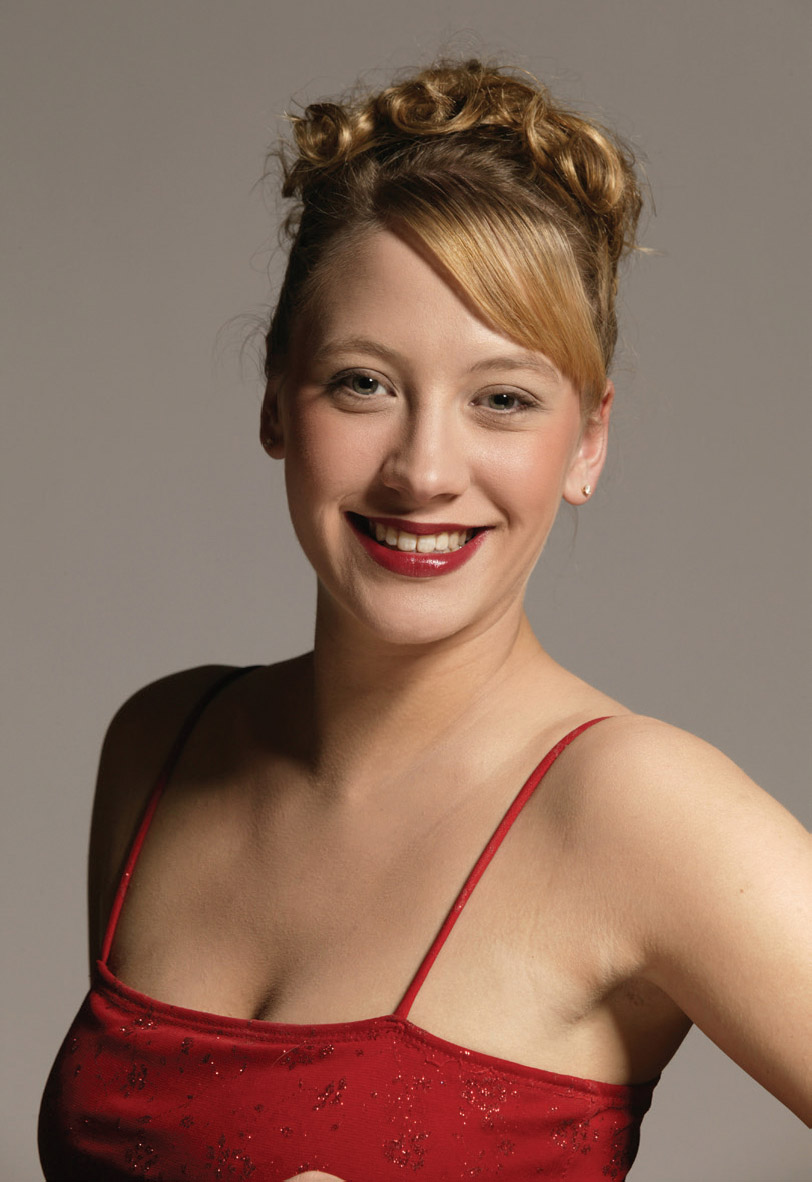
Loop light.
Closed Loop Light
When the main light is moved a few inches to camera right, the nose shadow lengthens but still follows the curve of the model’s cheekbone. The shadow on the side of the nose is thicker, and a triangle of light is formed when the shadow from her nose meets the transition-zone shadow on the side.
Many photographers, including many instructors, mistakenly refer to this as “Rembrandt” light because of the triangle of light on the cheek. While it’s similar, it’s not totally correct, as you’ll see in a moment.
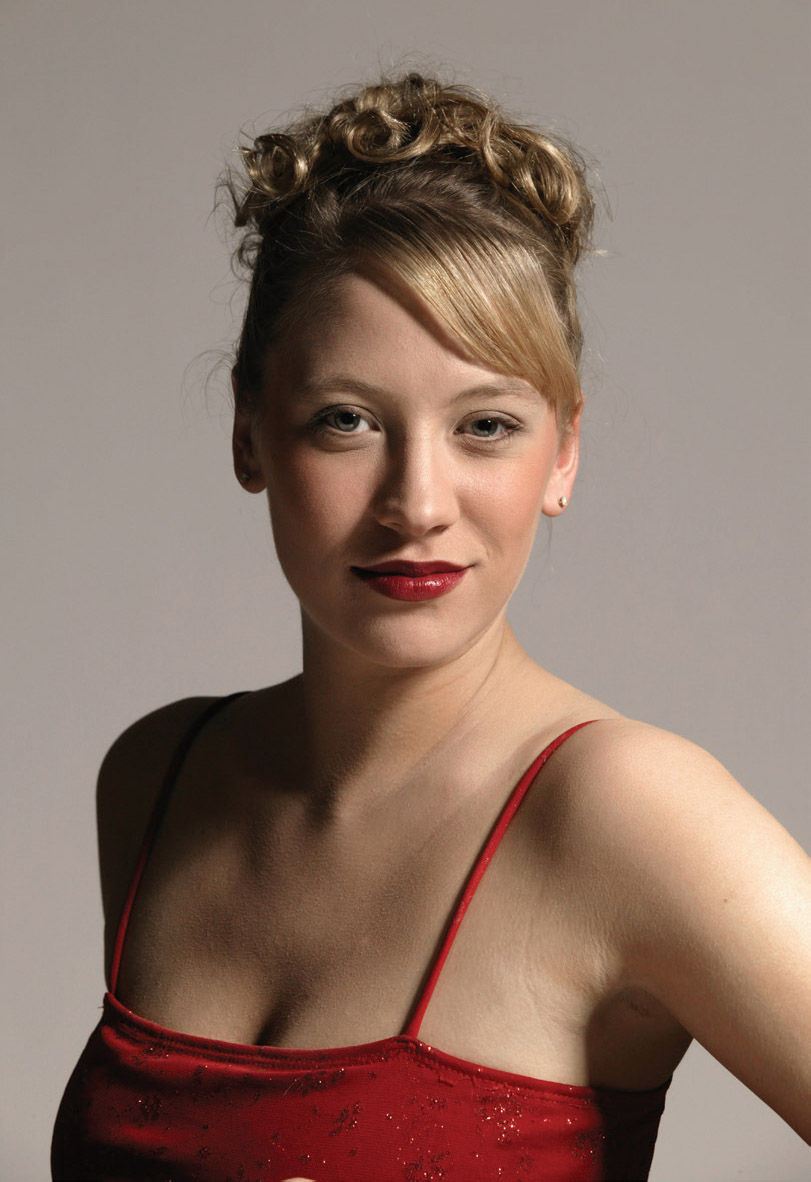
Closed loop light.
Rembrandt Light
Legend has it that Rembrandt van Rijn painted while light entered his garret from a small skylight. If you look at his most famous paintings, you can find many painted as though with high-source, closed loop lighting. There are also many painted with a much darker, more brooding light like that which would come from an even higher source. Man in a Gold Hat and Portrait of an Old Man in Red are two perfect examples of this light, a signature trick of Rembrandt’s.
Place the main even higher, perhaps another 2 feet above the subject. You’ll see one eye become hidden by shadow, the other grazed by the source. The shadows across the body become correspondingly longer.
Because of its drama, Rembrandt lighting is a great tool to have at your disposal when you want to produce images that indicate power or deep thought, especially with a darker background.
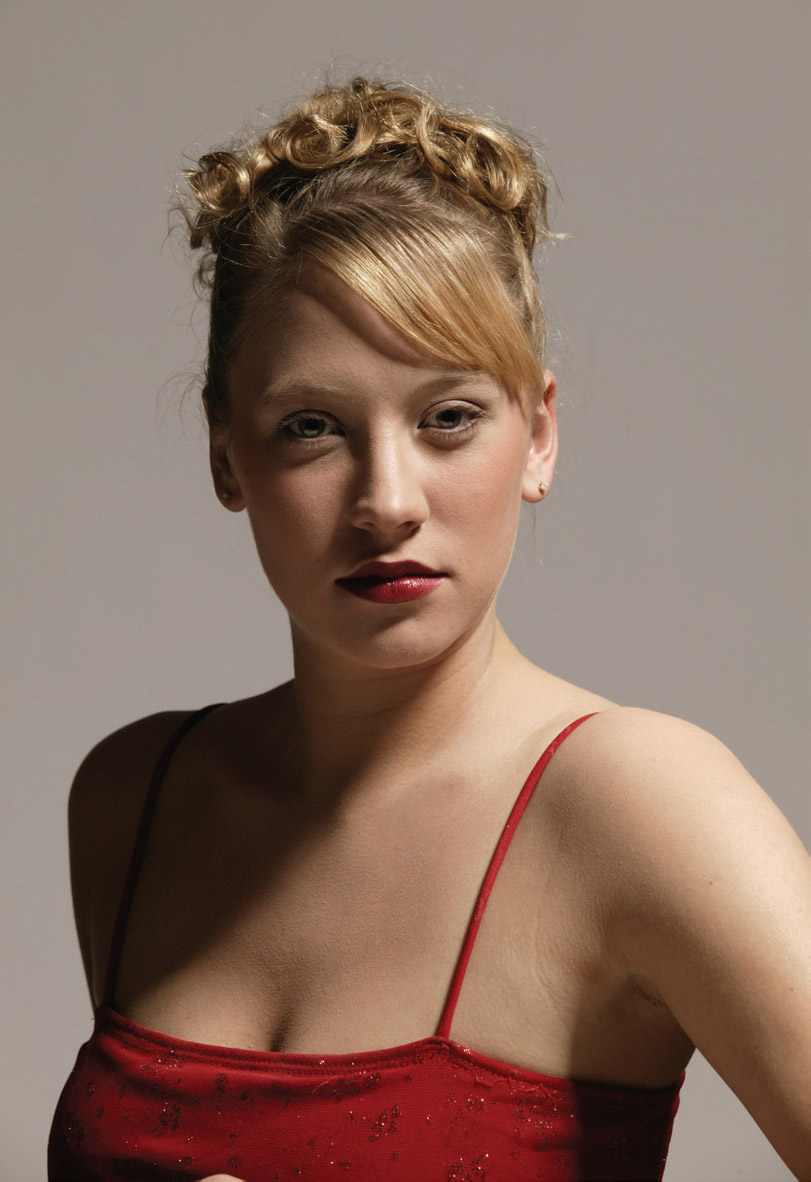
Rembrandt light.
Butterfly Light
Butterfly light is perhaps the most beautiful light for women. In this setup, the main light is placed directly over the axis of the lens so that the nose shadow falls straight down toward the upper lip. The shape resembles a butterfly in flight, hence the name.
The face is lit symmetrically, with equal light falling on both cheeks. The actual height of the main light is up to you but, in my opinion, should not be so high that the shadow falls onto the lip itself.
This lighting pattern is also known as “Dietrich” light, after the actress Marlene Dietrich (who insisted she be lit in this manner for every shot, even profiles, because it showed her cheekbones so well) and “Paramount” light, after the studio that employed her.
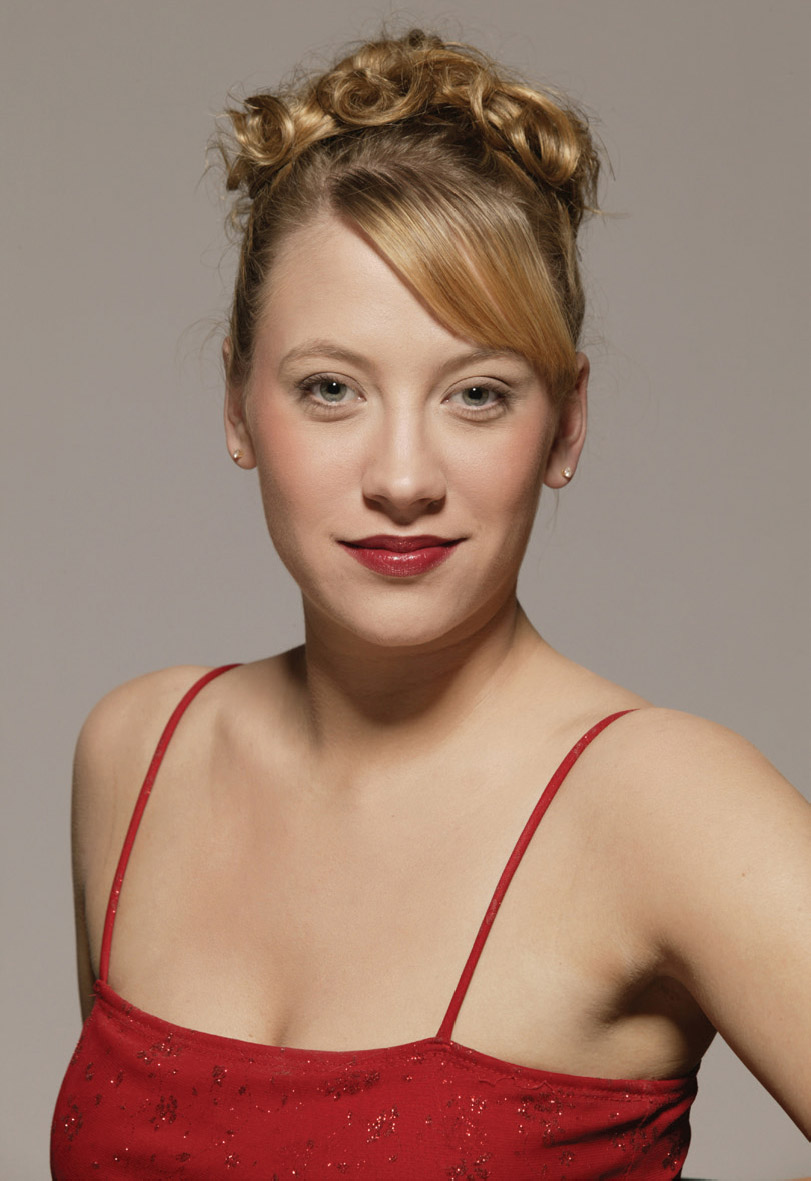
Butterfly light.
To get a good idea of how these styles might work for you, I’d suggest you work with a friend or model and try each one of them. Compare the images when you’re done. I think you’ll easily see how just moving the main light can alter the look of your subject and how you can use these classic lighting pattens to your best advantage.
Always pay attention to the nose shadow. Your clients may not be able to do anything about their noses, but you can.