Imagine that your subject is standing in the middle of a circle that’s 12 feet in diameter and that you have a light placed just above the lens of the camera, aimed at the subject from 6 feet away. Within the 180 degrees that half a circle encompasses, you’ll have approximately 120 of them, 60 degrees left of center and 60 degrees right of center, wherein the strength of the light falling on the subject will be exactly the same, provided the light is placed in an arc around the subject, no more and no less than 6 feet away from it. The contrast will change, certainly, because the shadows will be more pronounced, but the three zones of light—the specular highlight, diffused highlight, and transition zone—will remain the same relative densities as the amount of space they occupy changes over the arc. In other words, if the exposure of the main light to the subject is f/8 at 0 degrees, it will be f/8 at 60 degrees, even though the highlight-to-shadow structure will be different.
Positioning the Meter
Many people, myself included, have said that the proper position of the light meter determines the correctness of exposure. Indeed, there’s a reason why incident light meters utilize a plastic dome to see the light before it hits the meter’s sensor, and that reason is undeniably easy to understand: the shape of the dome mimics the shape of the face, and that shape reads the strength of light and shadow relative to a face and gives you a correct and proper f-stop for your camera. It makes no difference what color of skin you’re working with because a correctly metered light will be a perfectly exposed light.
So, what is the correct position of the meter’s dome? In the vast majority of circumstances, the place to hold the meter is directly under the subject’s chin and aimed at the camera. This guarantees the meter reads the three zones of light with an equal balance. The result, if your meter is calibrated, is an exposure that’s so perfect you can go straight to proofs without tweaking Levels at all. When you’re using a calibrated light meter, the amount of time you’ll save is enormous. You will be confident enough with your metering techniques to avoid shooting RAW files entirely, if that’s something you aspire to.
RAW and JPEG
Let’s step back just a minute. RAW files are the digital equivalent of a film negative, allowing you up to 2 stops, up or down, in exposure compensation. RAW files are a digital gift, please don’t misunderstand me, because in tough shooting situations they can really save your bacon. Each RAW file is essentially worthless by itself and must be “processed” via digital software before it can be used as a JPEG, TIFF, or any other format.
As you know or can imagine, the amount of time to process a large batch of RAW files could be enormous. Imagine a wedding photographer who shoots 2000 to 3000 shots, even more, in RAW format, over the course of the big day. Given that each shot may take 3 to 4 minutes to tweak, plus the time necessary to process the files into a TIFF or JPEG format (this depends on the speed of your computer), you can see how much time you might save if you nail the exposure, in JPEG format, coming out of the gate.
If your feel you must shoot RAW, set your camera to shoot both large JPEG and RAW files at the same time. When you download, separate the RAWs and JPEGs into separate folders. Look at the JPEGs first. If you find JPEGs that need to be tweaked, use the RAW files to do so. If the JPEGs are fine, trash the RAW files or just burn them to a file disc to perhaps be accessed later. Your time savings will be enormous.
Foolproof Metering
Metering for correct exposure in the studio is easy. I’ve photographed a few test images just to show you how foolproof it can be.
Let’s begin with the light set at 0 degrees to the lens axis, or directly over the lens. I used a simple parabolic reflector as a modifier for this test. It’s rather contrasty, but it will demonstrate the principle nicely. You’ll note there is a full range of tones, from the bright whites of the subject’s teeth through the shadows of her hair.
The correct position of the light meter, in at least 90 percent of all situations, is directly under the subject’s chin and aimed directly at the lens. This will guarantee the meter will read all three zones of light and deliver an average reading that will give you a proper representation of those zones.
At 22.5 degrees from the center, the angle of incidence begins to change. You may have been taught in photo class that the “angle of incidence equals the angle of deflection,” and this is absolutely true. The meter angle stays the same, straight-on to the camera, but you begin to see some changes in the specularity of the light because it’s now aimed at different planes on the face and reflects directly into the camera from them.
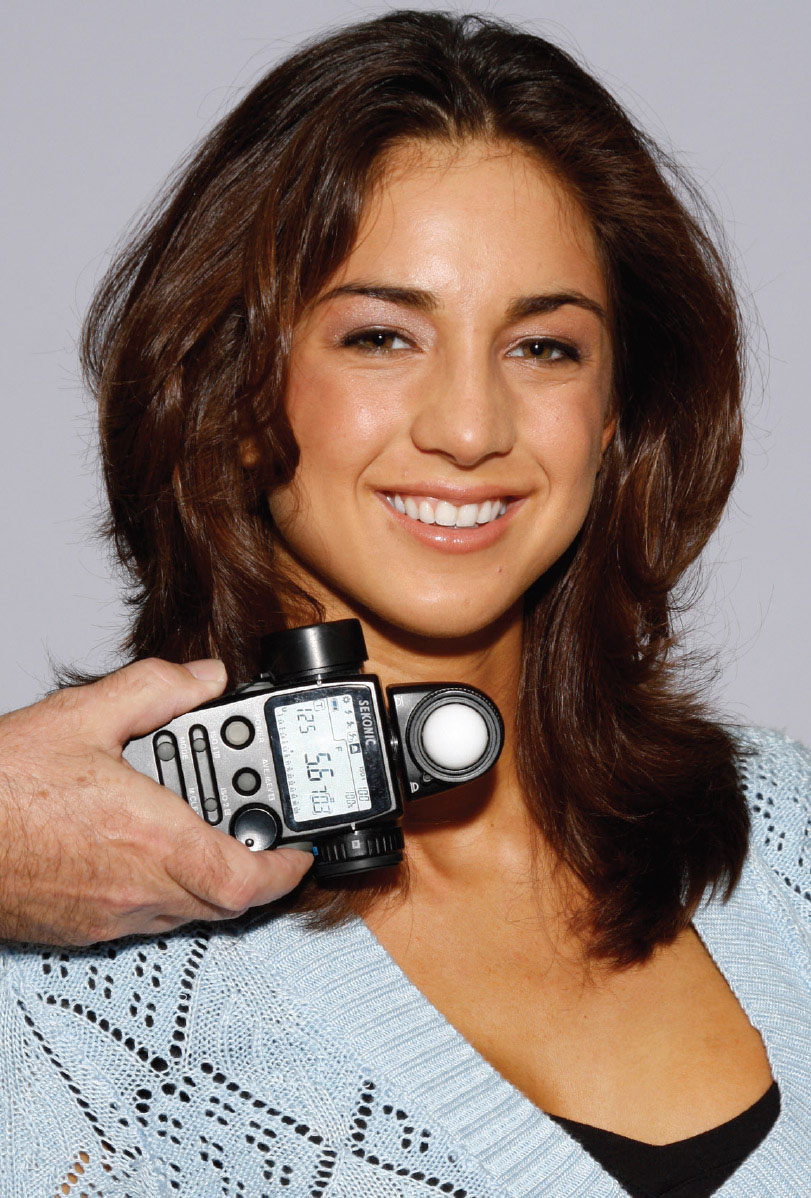
Place the light meter under the subject’s chin and ensure it is aimed directly at the lens.
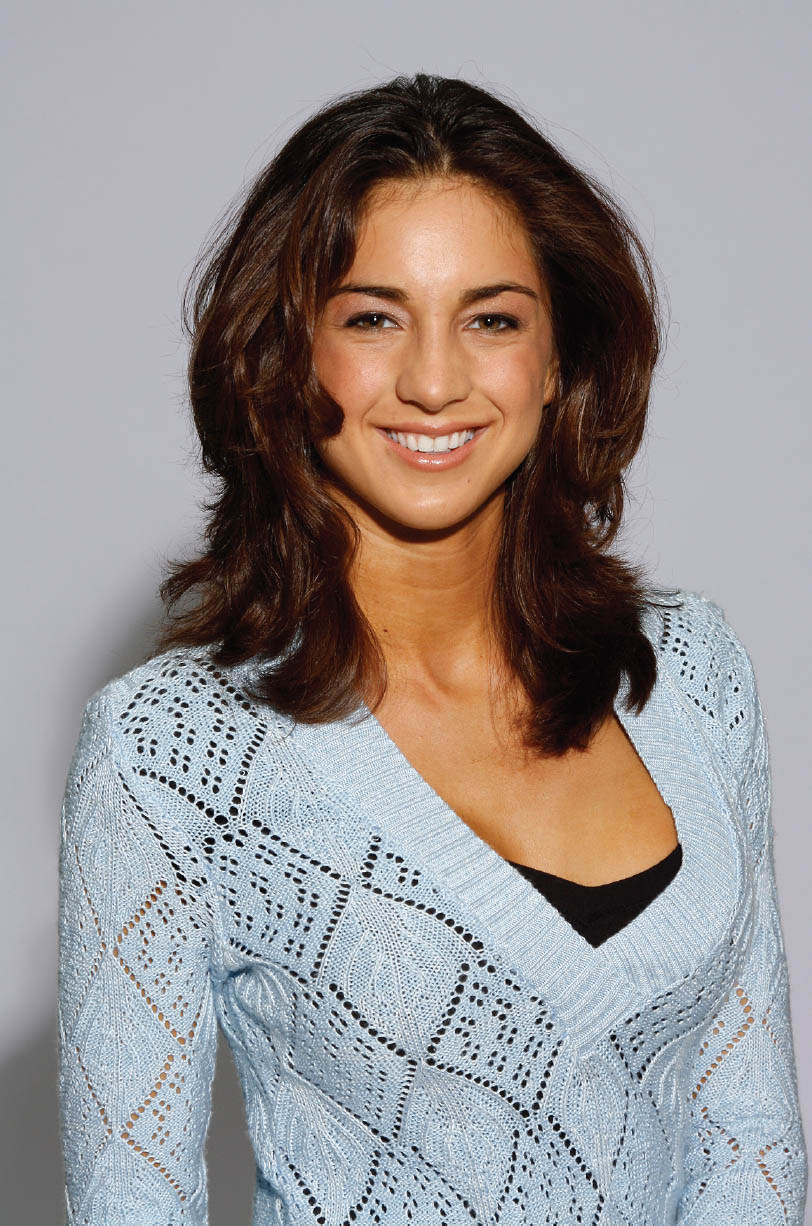
Here, the parabolic light was placed at 0 degrees (directly above the lens axis).
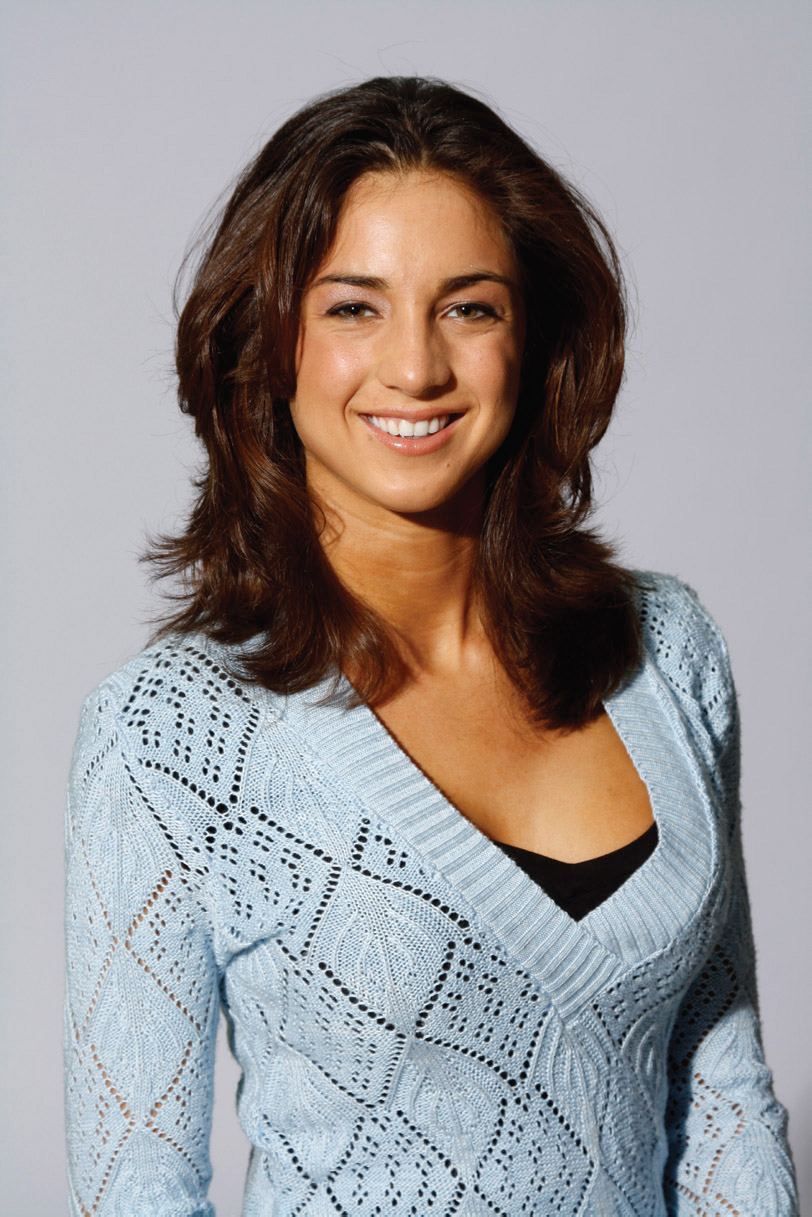
Here, the parabolic light was placed at 22.5 degrees from the center.
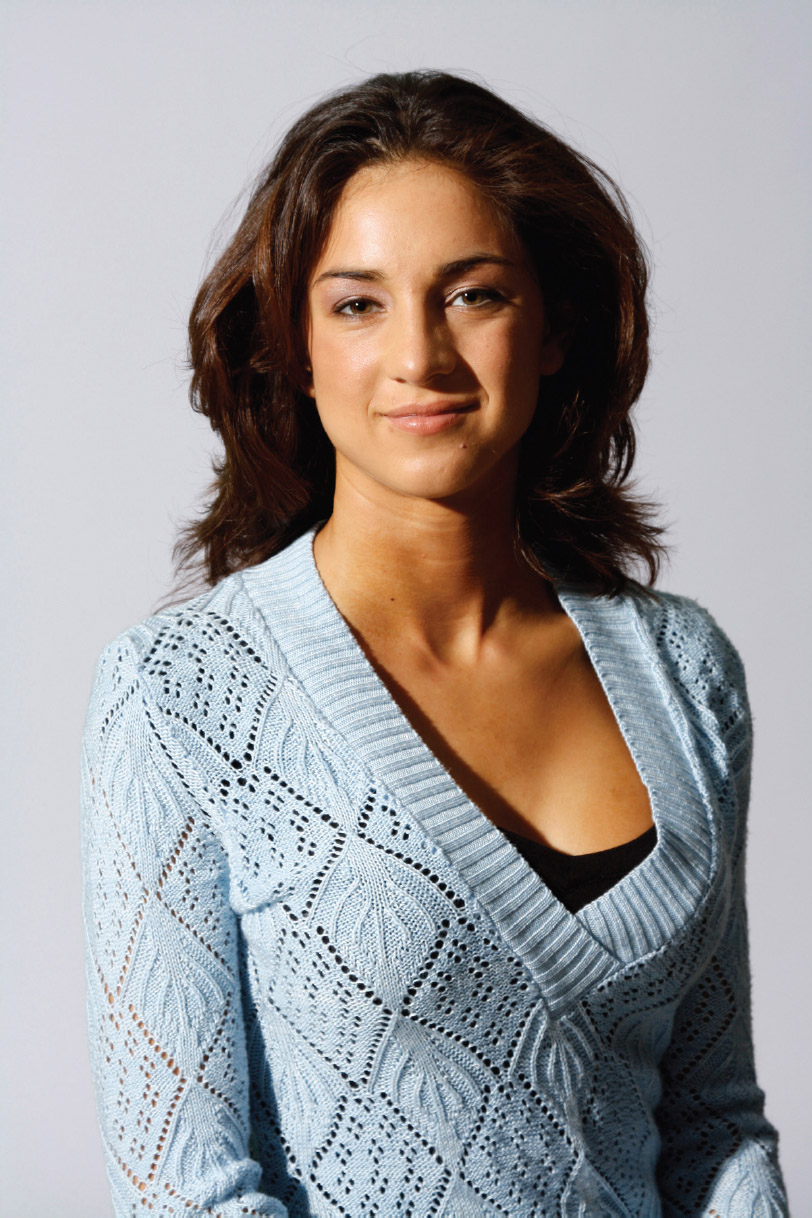
For this image, the parabolic light was positioned at 45 degrees from the center.
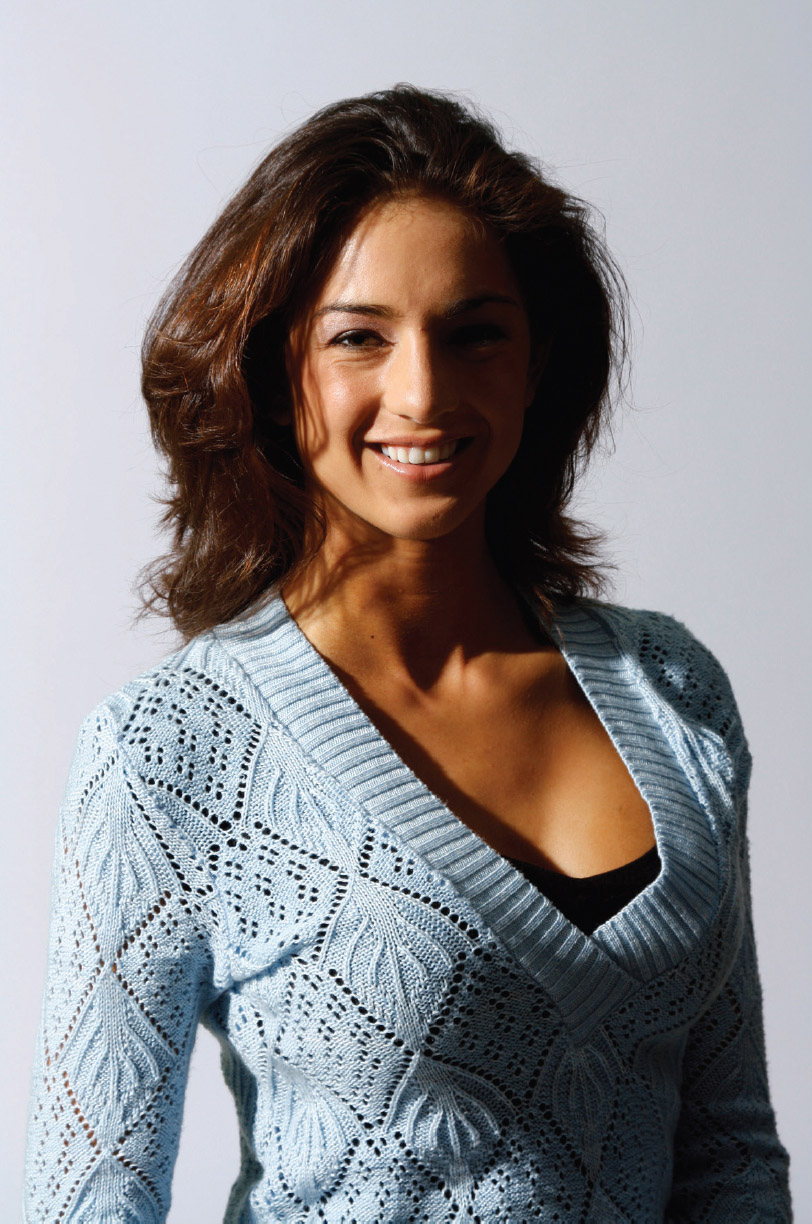
The parabolic light was positioned at an extreme 60 degrees.
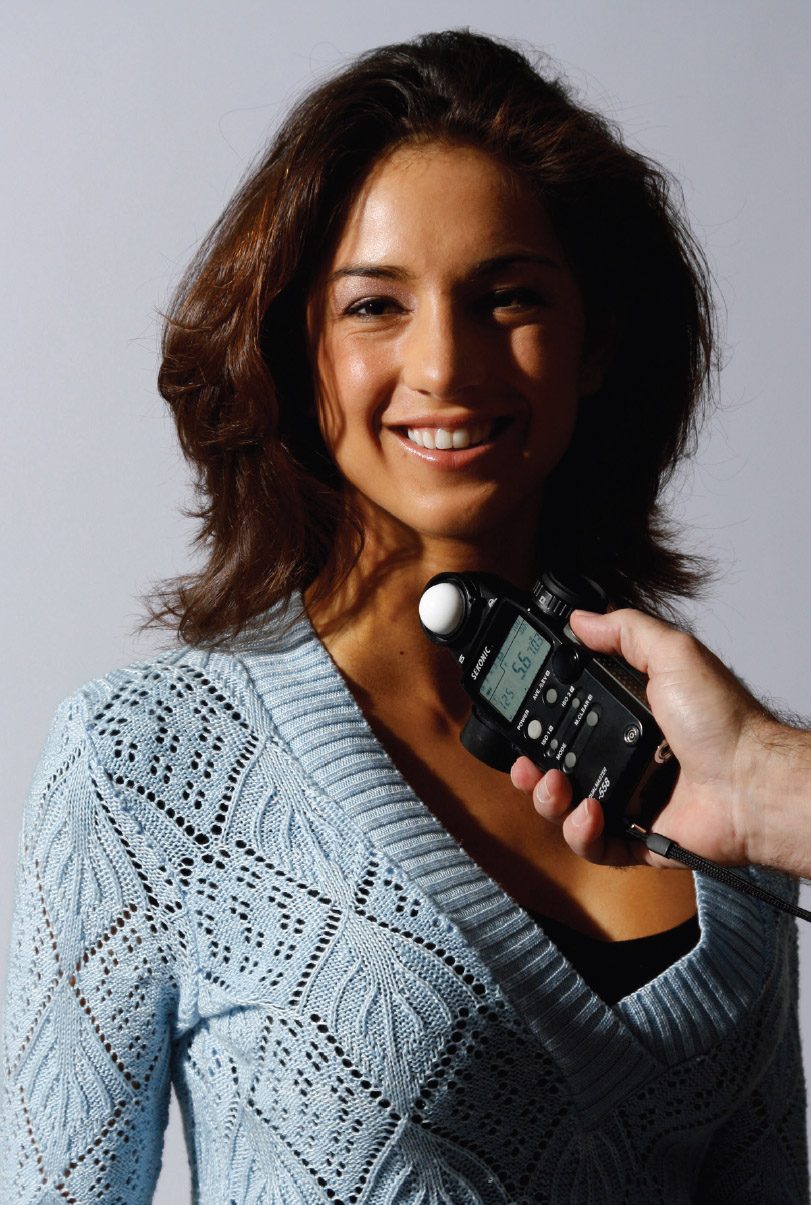
What happens when the meter is aimed at the light? Note the difference in highlights and shadows in this image versus the two previous portrait examples.
At 45 degrees, the shadows deepen because there is no fill on the shadow side. The exposure, measured with the meter aimed at the camera, still produced a perfect exposure when the strobe generator was adjusted to the target exposure (f/10 for this example).
At 60 degrees, which is farther than most attractive portraits will tolerate, a reading taken with the meter’s dome aimed at the lens still yields a beautiful result. Shadows and highlights are properly represented, even though the image is very contrasty.
So, what happens if we aim the meter at the light? At 60 degrees, what can the difference be, after all? Interestingly, the difference can be quite major. When you aim the meter at the light, you will only measure the brightest part of the light, not the average of highlights and shadows we’ve been measuring so far. With the meter aimed at the light, note the difference in shadow density and highlight brilliance, as compared to the effects shown in previous examples. The inference is clear: the vast majority of circumstances do not require the meter to be aimed at the light. Aiming the meter’s dome at the camera will produce more consistent results almost all of the time.
Adding Fill Light
The easiest way to add fill light to your image is to bring in a white bookend (or any other kind of white reflector) to add light to the shadow side. I’ve never been a fan of adding another light as fill. I much prefer a fill card of some kind because it will not add any shadows of its own. Be advised that, even at 3 feet away from the subject, the extra light that bounces in will affect the overall exposure.
In this case, introducing the bookend added ⅓ stop of light to the overall exposure, which meant I had to either take the exposure down at the source (as I would recommend) or move the main light straight back a few inches if I wished to maintain the ratio I’d set up. This image, metered with the dome aimed at the camera, is a perfect example of how bounced fill can open up (lighten) shadows without looking at all like a second source of light.
When metering the hair light, place the meter close to the subject and aim the dome at the light. If you’re using a parabolic/grid combo, meter the light at the part of the body the camera can see, not the center of the grid unless it’s aimed at that part of the body. In other words, the light will be strongest in the center, but if the center is not what the camera sees, don’t meter there.
To meter the background light, first look through the camera and determine where in the background you want the light to equal whatever your target f-stop is. You can also just stick your head in front of the lens and take a look. Draw a visual bead on that part of the background, walk up to it, and place the meter flat against the backdrop. Take the reading and adjust the power or position as necessary.
Metering a profile is different. It’s one of the few times you’ll need to aim the meter at the light rather than the camera. This assumes that the light is coming from in front of the profile (and from the side, relative to the camera). When the light is coming from any direction less than the 60 degrees we previously discussed, you can meter, with confidence, with the dome facing the camera.
With the light coming from 90 degrees to the side, if we were to measure its strength with the meter aimed at the camera, the amount of shadow would throw off the accuracy of the reading, causing a poor exposure.
Once you’re satisfied with the reading and f-stop, set and meter any other lights you wish to use. I added a hair light and a background light, both powered to the same f-stop as the main light, and brought in a white bookend to open up the shadows on the subject’s back and hair.
Of course, there are always options at your disposal. For a dramatic variation, I removed the bookend fill card, significantly deepening the shadows, then asked my model to turn her head to a ¾ position. The result? Beautiful, if I do say so myself.
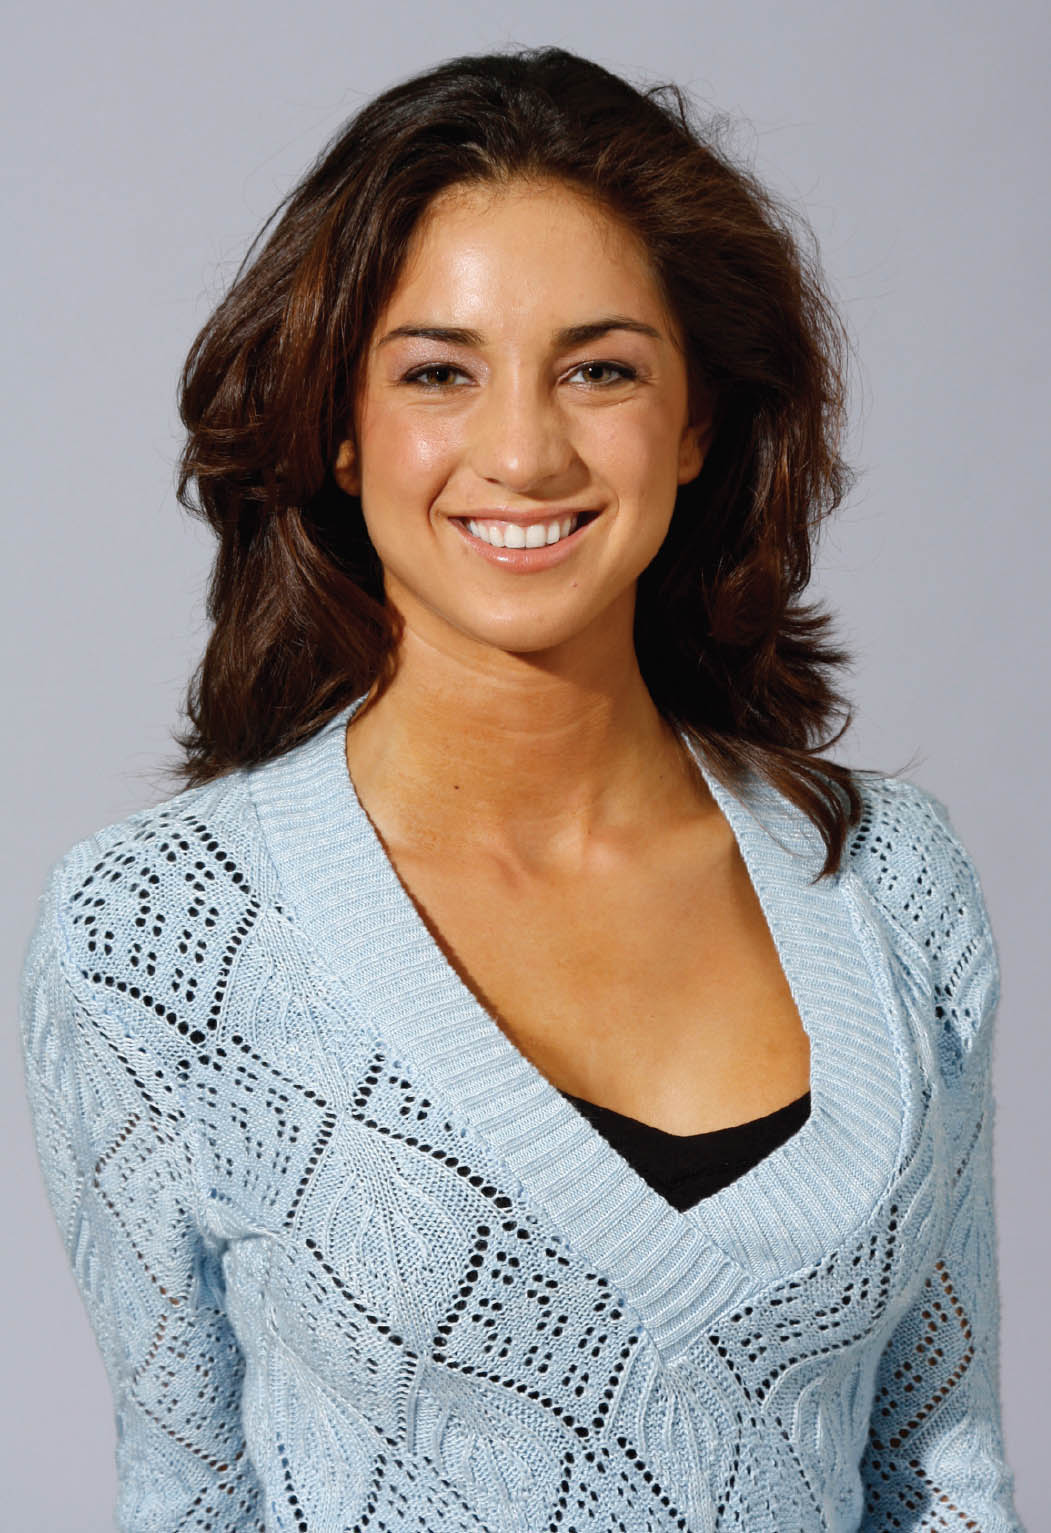
Here, a bookend was used for fill. It added ⅓ stop of light to the overall exposure.
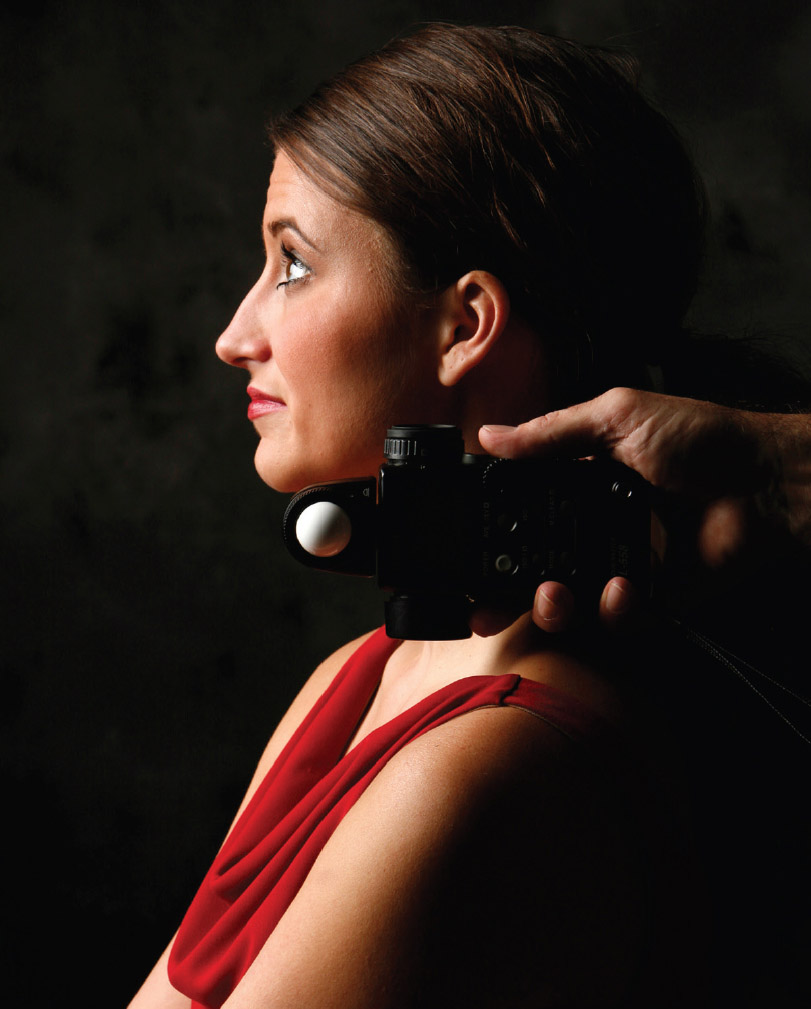
When the light is placed at 90 degrees, the angle is too extreme to take a meter reading with the dome aimed at the camera.
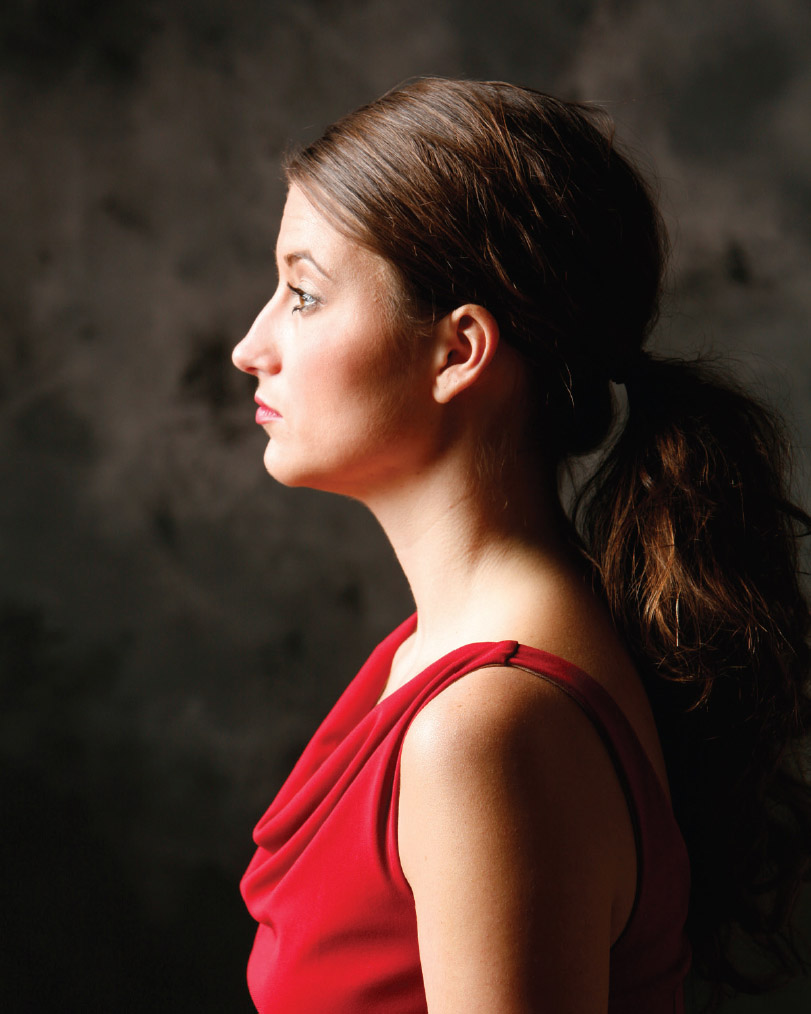
A poor exposure is the result of faulty meter positioning.
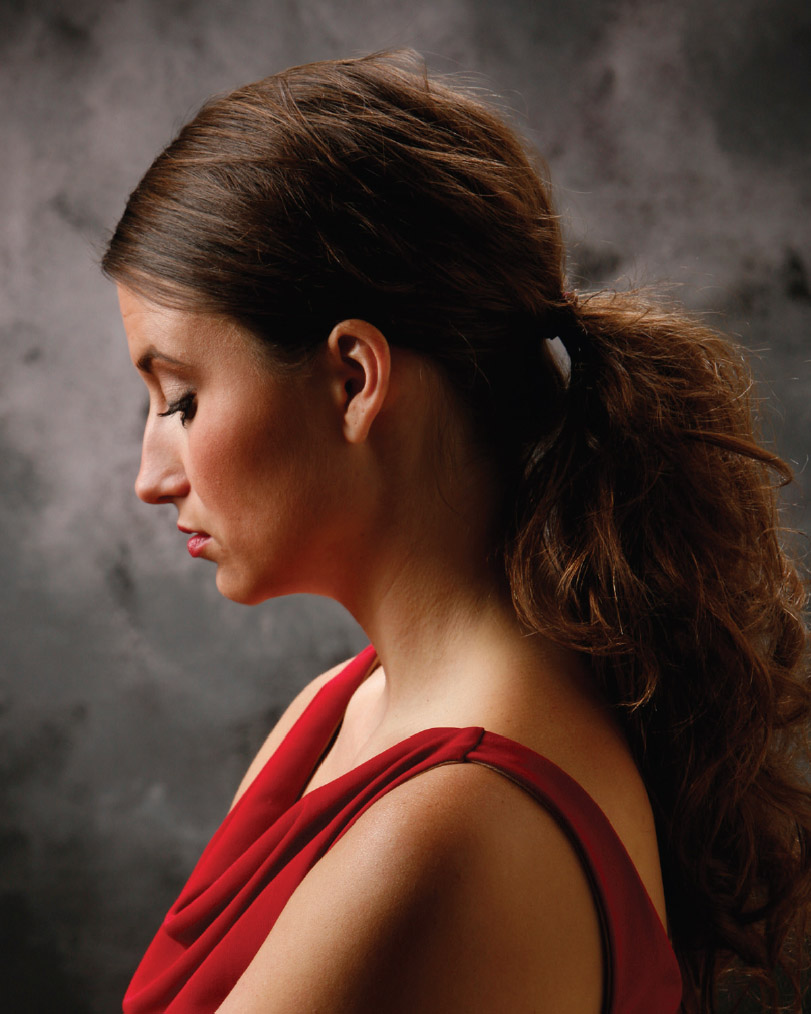
Once you’ve placed your main light and established an accurate meter reading, you can add any other lights you need and meter them to ensure a correct exposure.
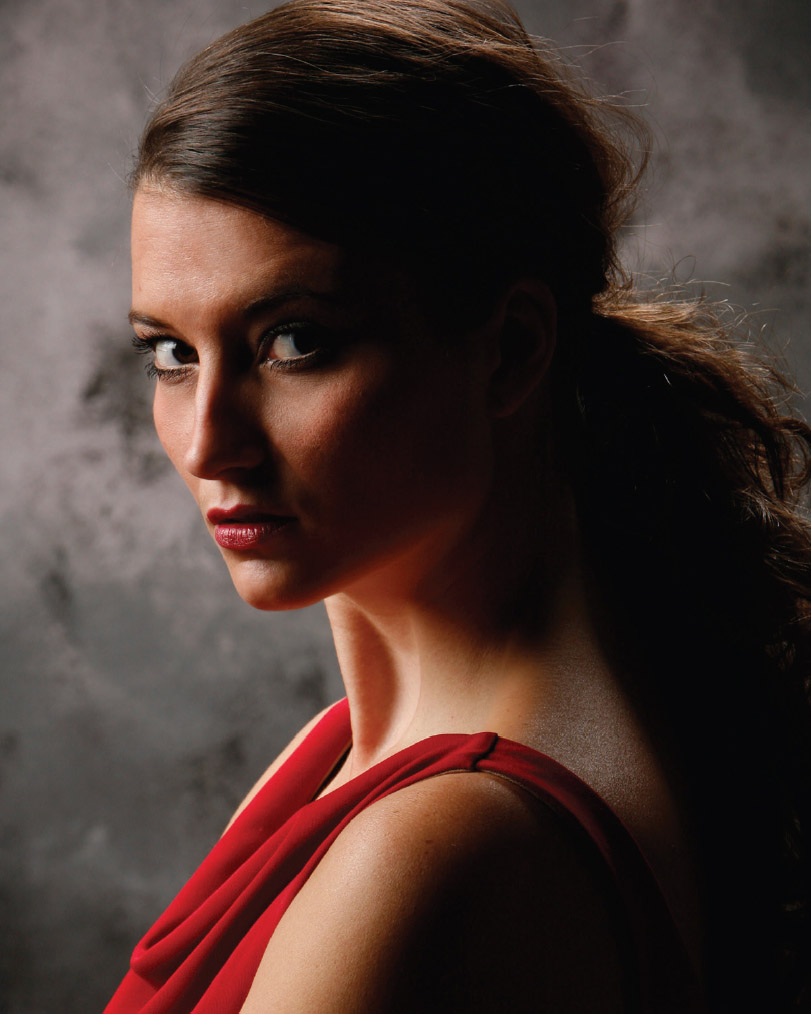
Here is a dramatic variation of the previous image. I removed the fill card to ensure deeper shadows and had the model turn her head for a ¾ presentation.