13. CUT YOUR BACKGROUND IN HALF
Just as you should vary the look of your main and hair lights with softboxes, grids, or other modifiers, you should do the same with the background light. Many photographers settle in to a lighting routine, especially with their background light. After all, its only purpose is to add dimension to the image, so why spend additional time fiddling with it?
Think of each light modifier as a “personality.” Strong or weak, hard or soft, each modifier is a tool to help you shape your subject into what you see in your mind’s eye.
I’ve written many times about how valuable white foamcore panels are as gobos or reflectors. Here’s a simple technique to create a background light modifier from a sheet of foamcore that will baffle both clients and peers. It’s got a low price going for it, too, which is nice (thanks, Carl).
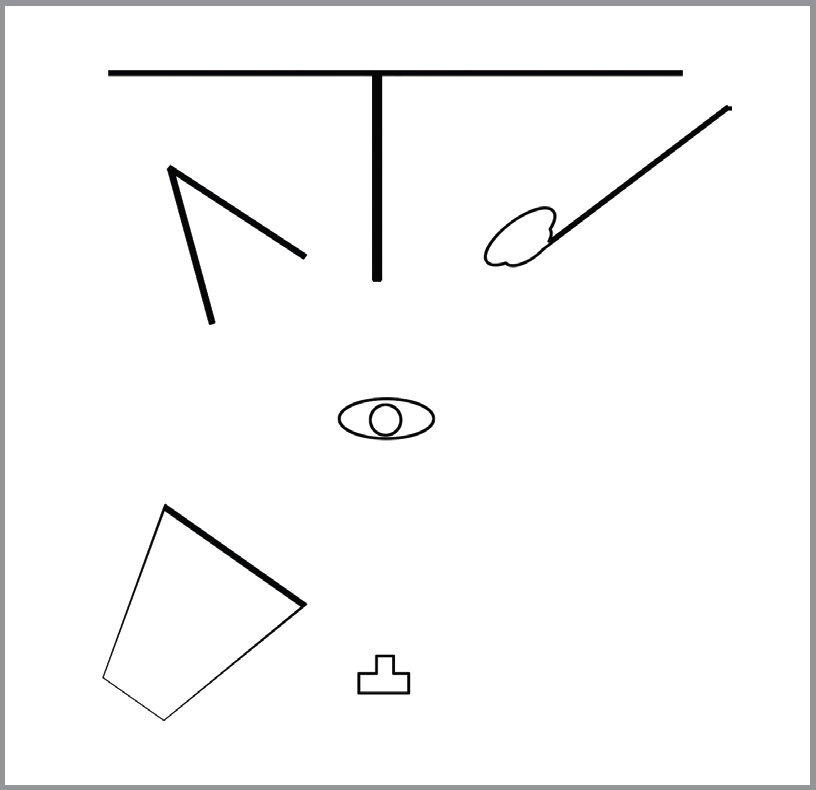
I began by setting my main light, a large softbox in this case, about 4 feet from my subject. I was working in close quarters for this shot and didn’t have the luxury of a wide-open space. Also, I wanted a soft wraparound light that would fall off quickly as it crossed the planes of my model’s face and body.
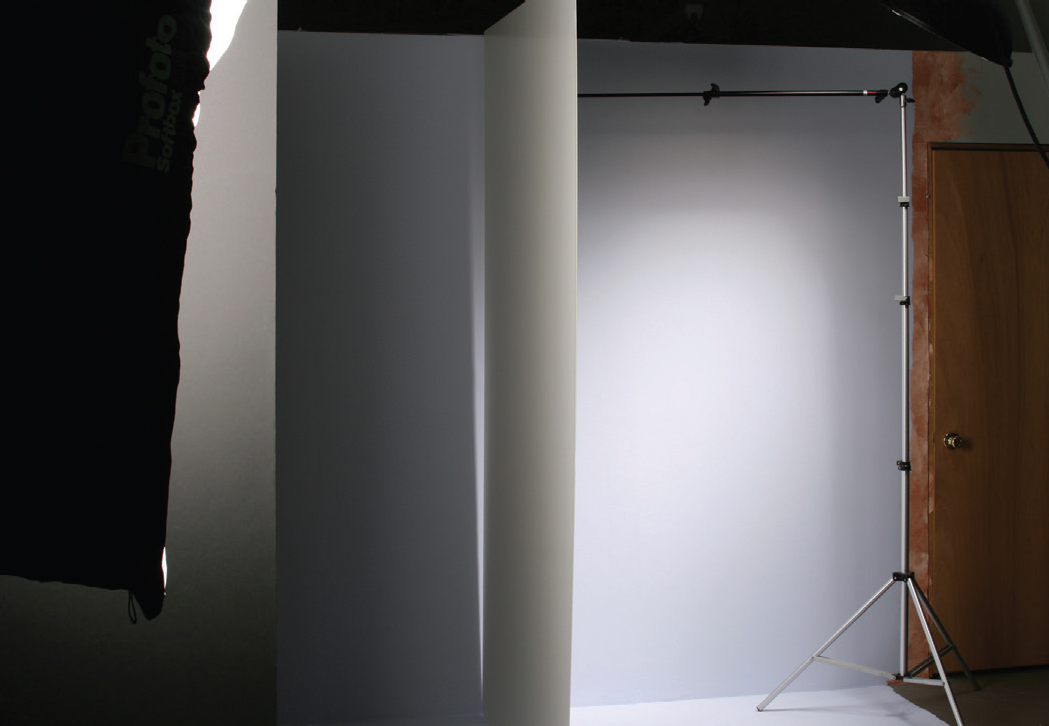
The main light itself was less than 6 feet from the background. Due to that short distance, I knew it would light the background more brightly than I wished. To solve that problem, I moved a black foamcore bookend to block about half the main light’s output from reaching the background wall.
Here’s the trick: I balanced a 4×8-foot sheet of foamcore against an Avenger accessory arm directly behind where my model would be standing. The sheet was butted up perpendicular to the wall and as close to it as possible.

Something as simple as a sheet of foamcore can be a terrific accessory.
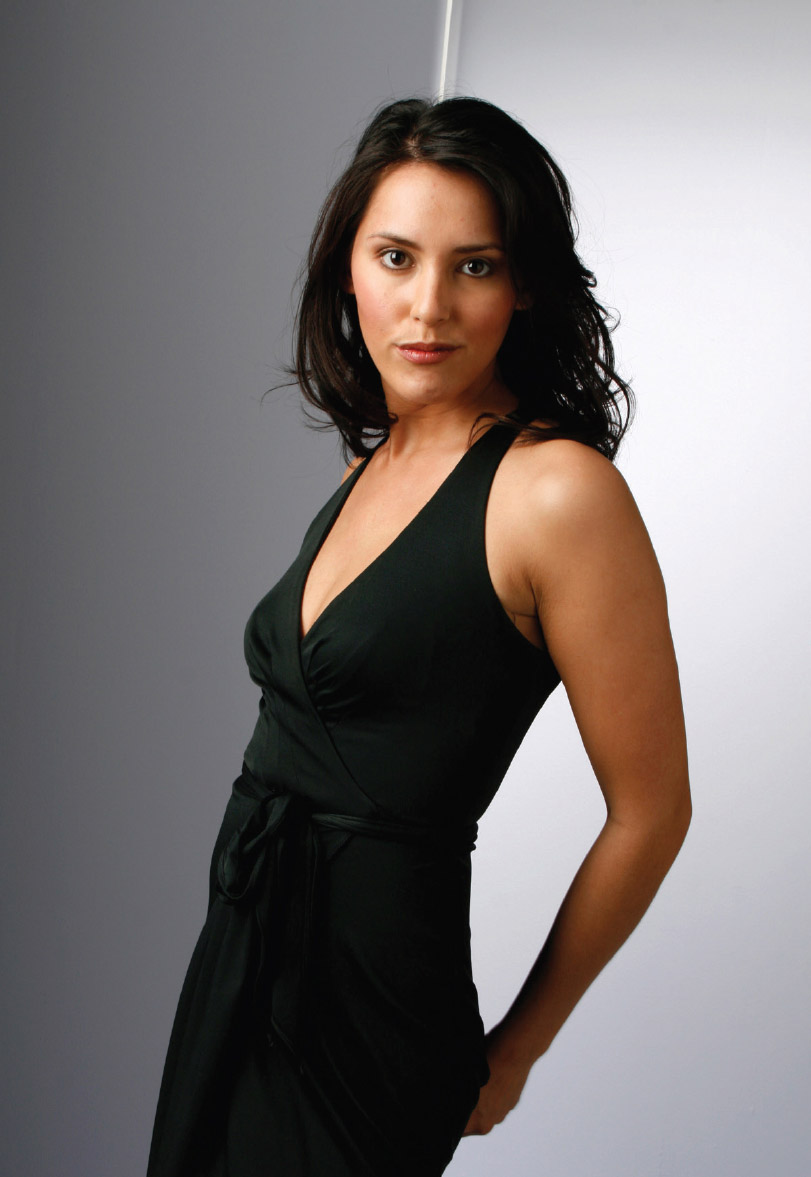
To light the background, I used a strobe in a beauty dish that was fitted with a 25-degree grid. (Most any reflector and grid will do if the light it throws suits your vision.) I aimed the light directly at the point where the foamcore panel met the wall, and from a high angle. The foamcore kept the background light from spreading across the back of the set.
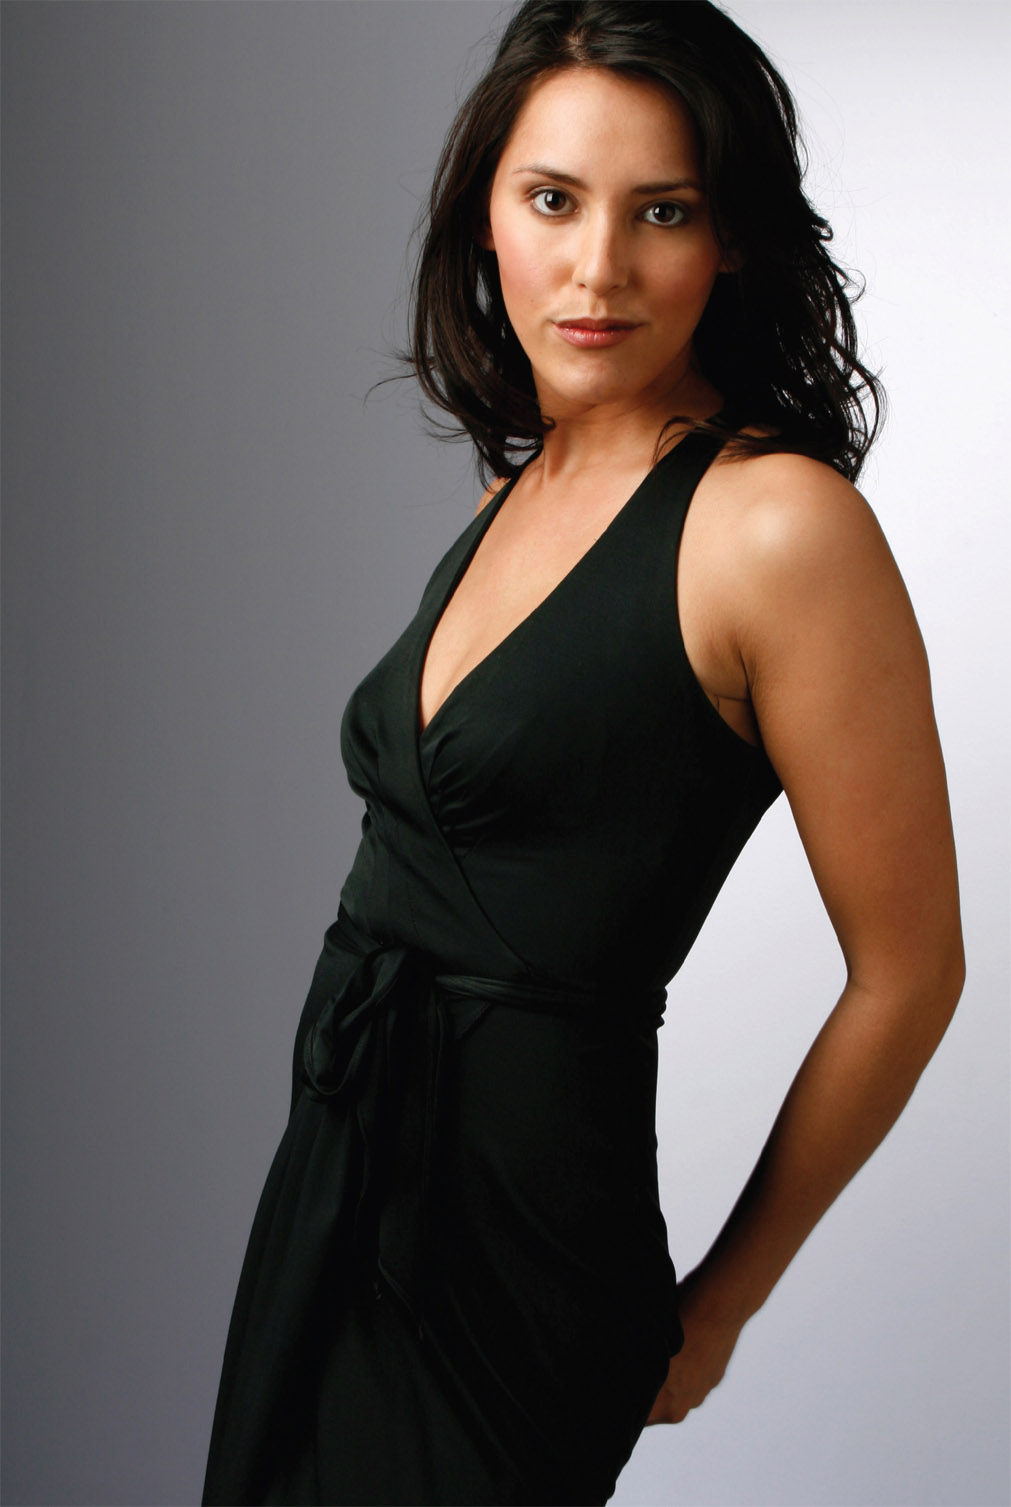
I knew that the top of the 4×8-foot foamcore panel would be seen behind the model, so I planned in advance to crop slightly into the top of the image, to hide the gobo. It’s important to pay attention to how your model is moving because the gobo needs to be held at the very top of the subject. If it isn’t, you may be forced to crop more deeply than you’d like.
I used a 4×8-foot panel. I keep several of these around in case I need another bookend. Foamcore is also available in 4 and 5-foot lengths (with a 4-foot depth); those lengths are easier to find in many markets and work just as well—even better, actually, if you wish to include airspace above the model’s head. They are easy to rig, too. Just clamp the sheet to a light stand, as high as possible behind the model. Another clamp placed lower on the stand will help keep the sheet vertical. Use the model’s body to block the stand and gobo.

Obviously, this is a very simple setup.
The thinnest part of a model’s body is the neck, and this can present a visual problem if you want her to pose with a tilted head. If you have room, place the model several feet farther in front of the gobo. Such positioning makes the model appear much wider than the gobo. In this position, your model can make more exaggerated movements without giving away the trick.

Cut the barrier to fit or plan on cropping.

A subtle crop makes for a perfect shot.