A vignette can be a lighter area around an image (like a fade to white), but most vignettes have historically been darker. In olden days, when such things were done in a place called a darkroom, a technician working with a film negative and enlarger would obscure the important areas of an image with a tool or his or her fist while adding more light to the edges to create a darker border. Today, there are a number of ways to produce the effect using Photoshop or other image-editing software.
Here’s a way to do it while the shot is being made. It’s more organic to produce the effect in-camera than to do it in post-production and, unlike a darkroom print or even most Photoshop vignettes, it will not affect anything but the foreground. Because the light is close to the subject, its effect on the background in most cases is non-existent or, at most, negligible.
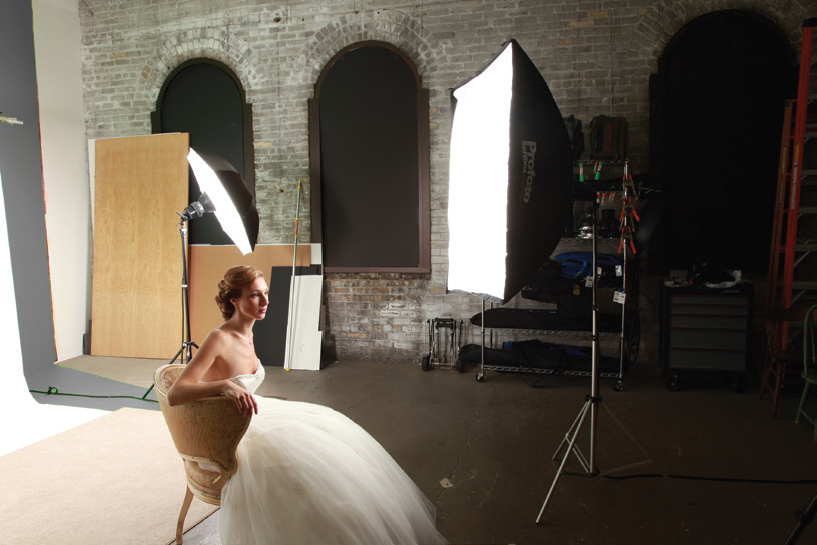
A straight-on softbox illuminates evenly.
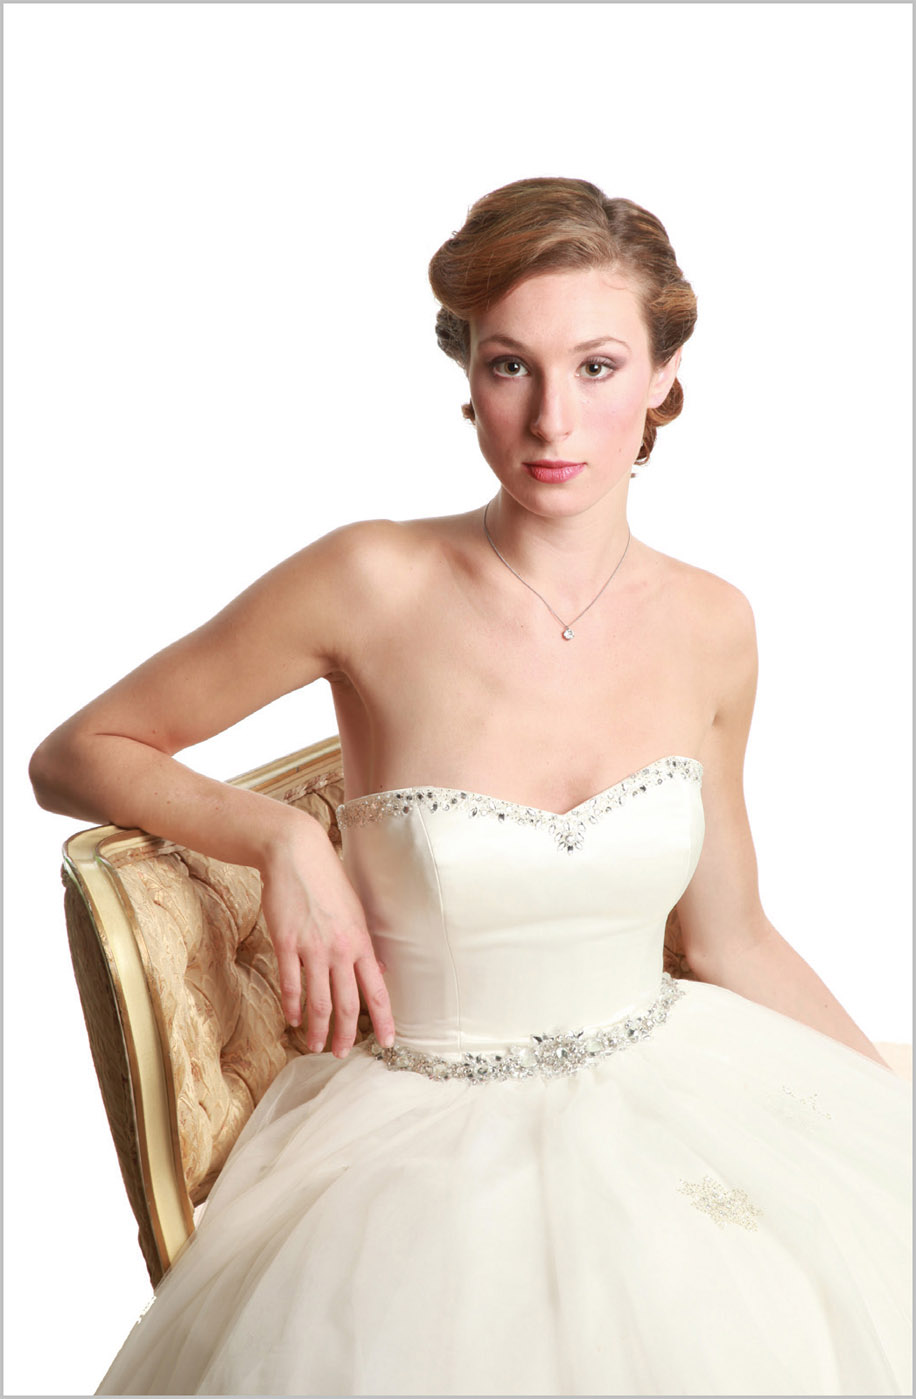
Straight out of the gate, it’s a beautiful high key portrait.
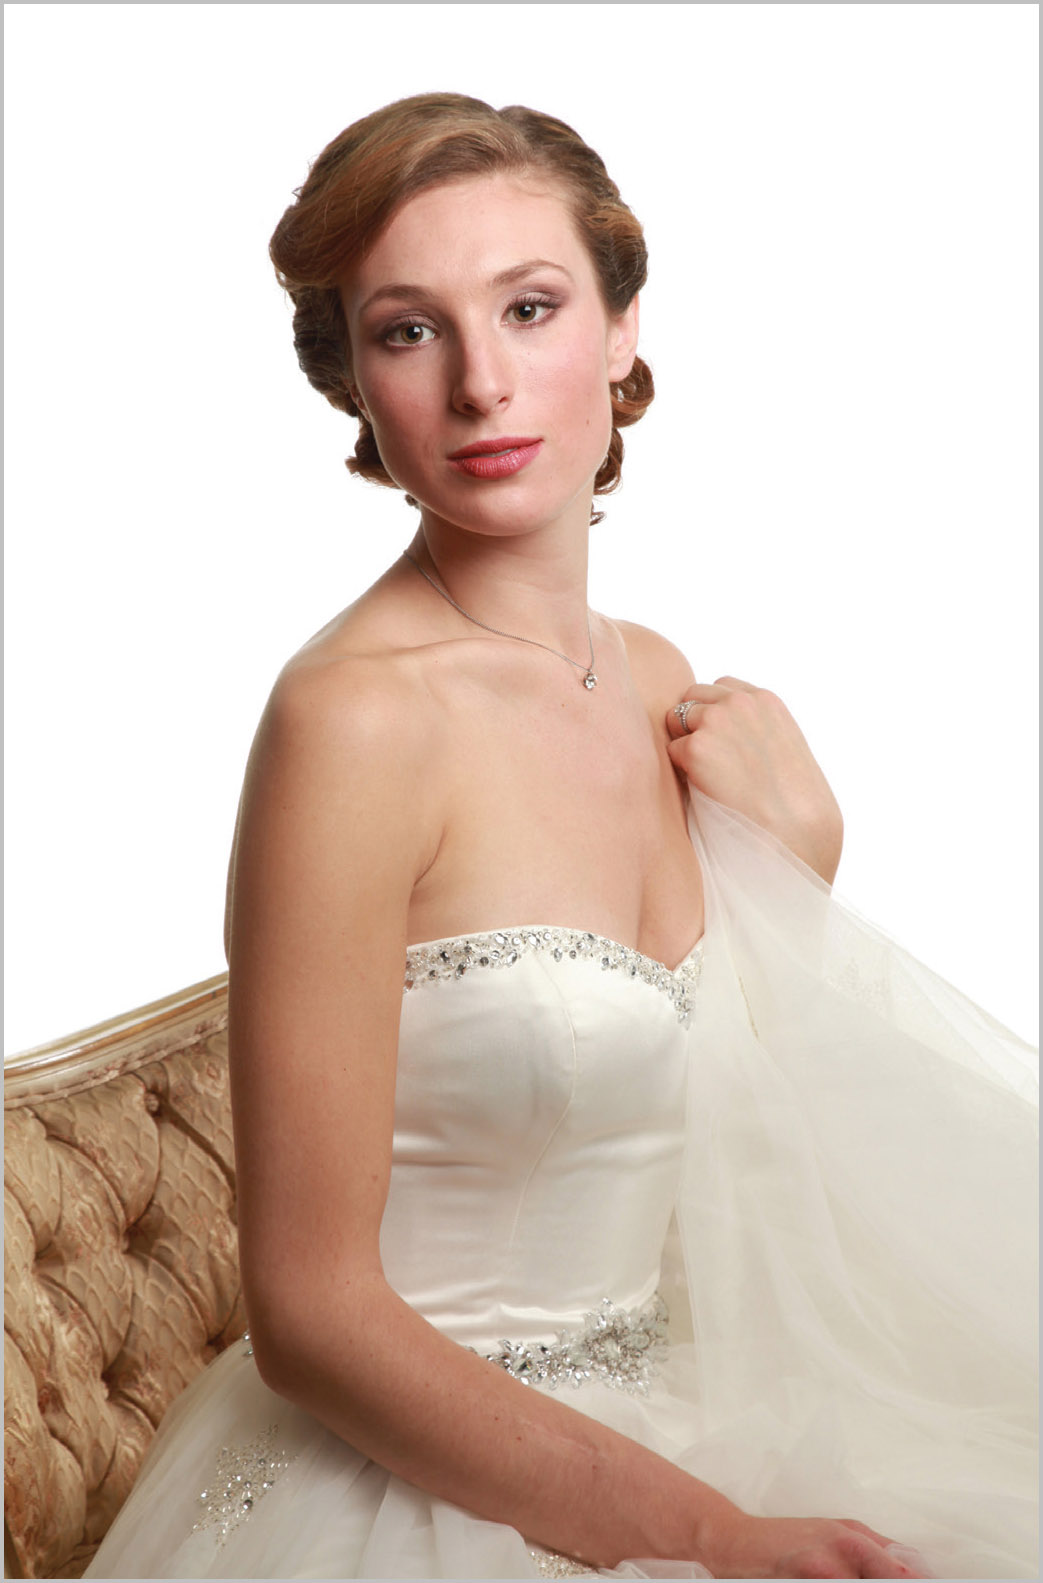
I cropped the image in the camera to get a subtle vignette.

Even a minor tilt will change the evenness of the light.
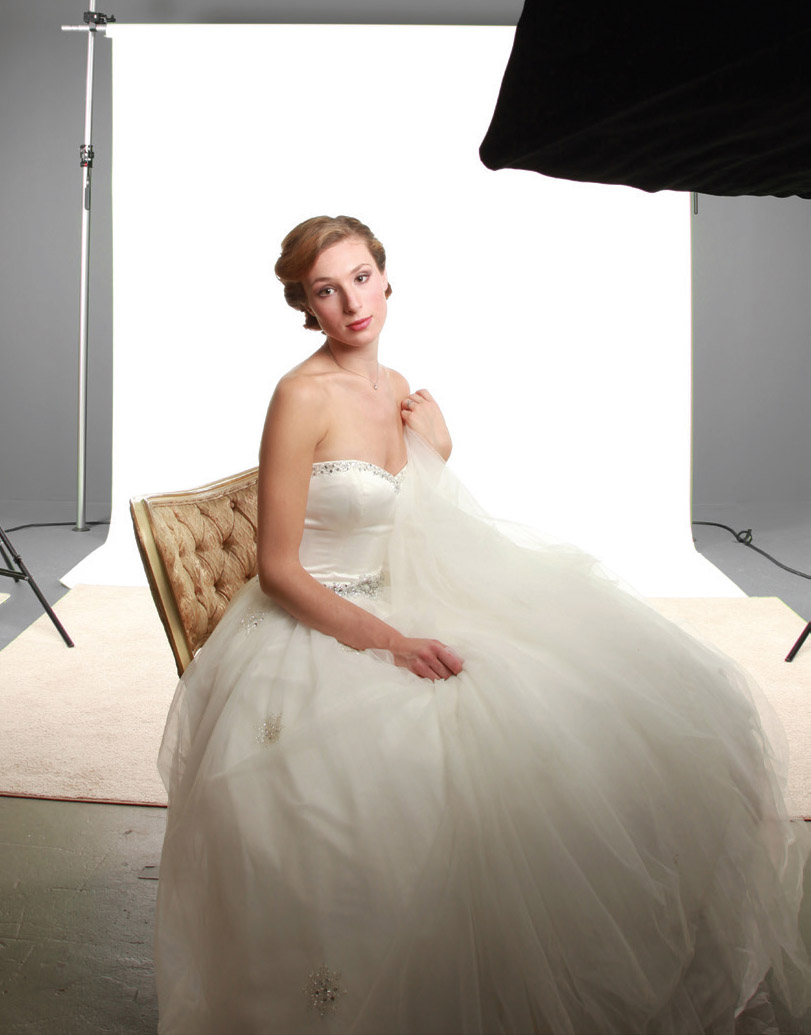
This uncropped image shows the range of the vignette.
I started this high key bridal portrait in a typical way, by flooding the white sweep with light from two strobes with umbrellas. My main light, a strobe behind a 3×4-foot softbox, was powered to be 1 f/stop less than what the background measured. The result is a beautiful and traditional bridal portrait.
To give the image a little more mystery and, frankly, to do something subtle that most of my competition could not easily figure out, I tilted the softbox up approximately 20 degrees. This did nothing to change the direction of the light, only its spread. It was still at the exact same angle to the subject but was now feathered to shadow as it traveled down the frame.
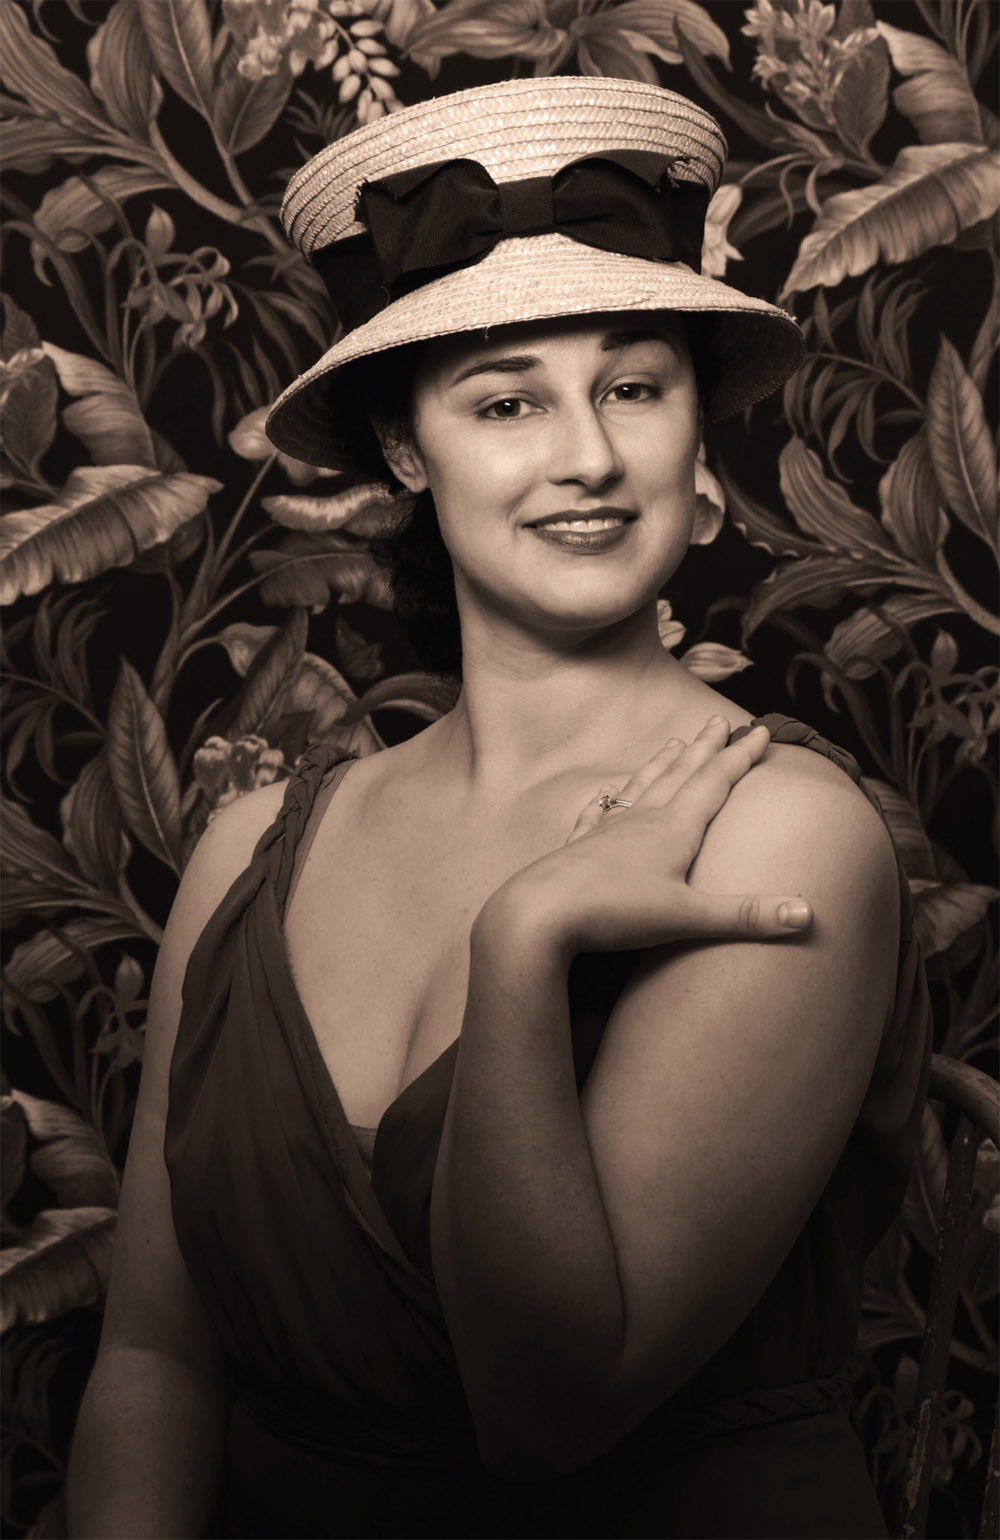
Point the box at the ceiling to get a more dramatic effect.
The final capture is an exercise in subtlety. The delicate falloff of the light not only adds visual appeal but helps keep her face as the focus of attention.
You can, of course, change the distance from the light to the subject as well as the angle of it to increase or decrease the effect. In the next example, I increased the angle of the softbox and moved it closer to the subject. I explained this in my book Christopher Grey’s Vintage Lighting as follows: “I used one medium softbox for the light, setting it very close to my subject, and angling it steeply toward the ceiling. The bottom of the box was less than 3 feet from the model and just slightly higher than the top of her hat. I could easily see where the light fell off, and I used that line to create a vignette that began at her bust, darkening as it went down.” The sepia tone was just for effect.
I am a strong advocate of learning whatever tricks you can to get the jump on your competition. This is one of them.