Return with me now to those thrilling days of yesteryear.
Once upon a time, you may have heard, there were no computers. Those of us who wished to do double or multiple exposures with complete control over the final composition had to rely on pretty archaic methods to keep track of where things were. Drawing on the camera’s ground glass with Magic Marker or grease pencil was the most popular method, but it was messy and inaccurate (and darn tough to do on a 35mm viewfinder).
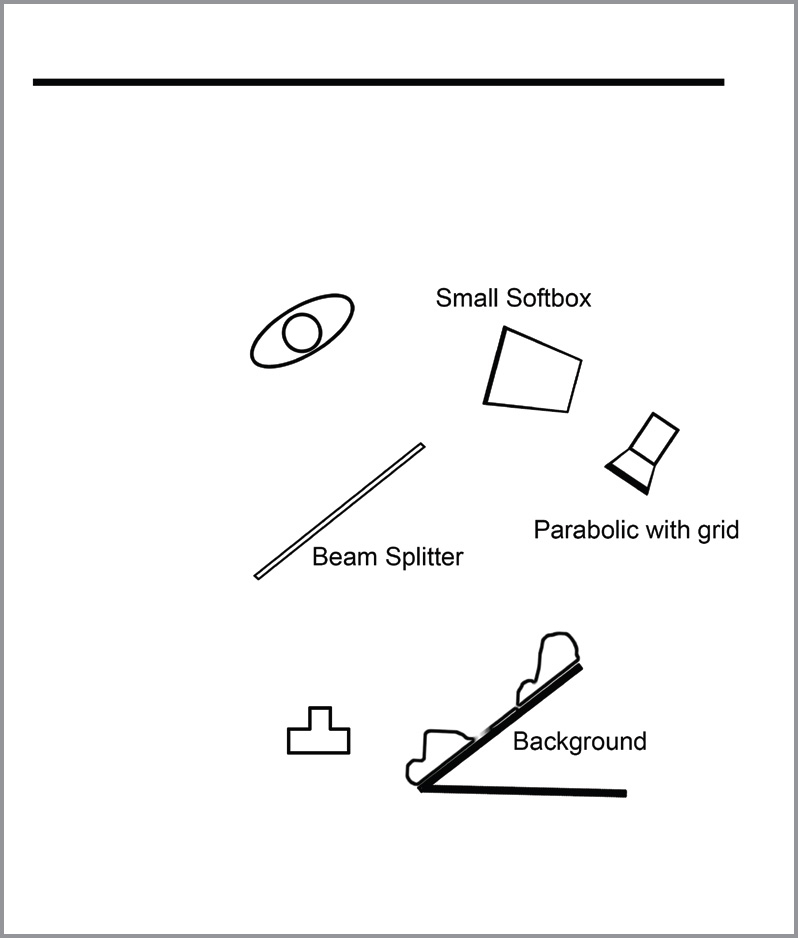
This setup looks more complicated than it actually is.
Although their needs were different, Hollywood filmmakers had already faced that dilemma. Movies featuring ghosts or spirits, such as the very popular Topper series, left audiences marveling and laughing at the antics of the recently deceased, and partially visible, George and Marion Kerby.
Hollywood technicians, with the help of a staggering amount of money, developed machines and gadgets to control double exposure and composition. Many were not really double exposures, but a way to photograph two scenes at once. These devices, called “beam splitters,” were based on the simple premise that splitting the beam of light along the lens axis would allow a second axis to be introduced, producing a controllable double exposure. In its simplest form, a sheet of glass mounted at a 45-degree angle in front of the camera could allow the capture of whatever was in front of the camera as well as what was reflected in the glass. In effect, Topper’s ghosts were never in the scene with Mr. Topper but were photographed on a separate set off to the side. It was their reflections in the glass that were recorded, creating the illusion that everything happened in front of the camera.
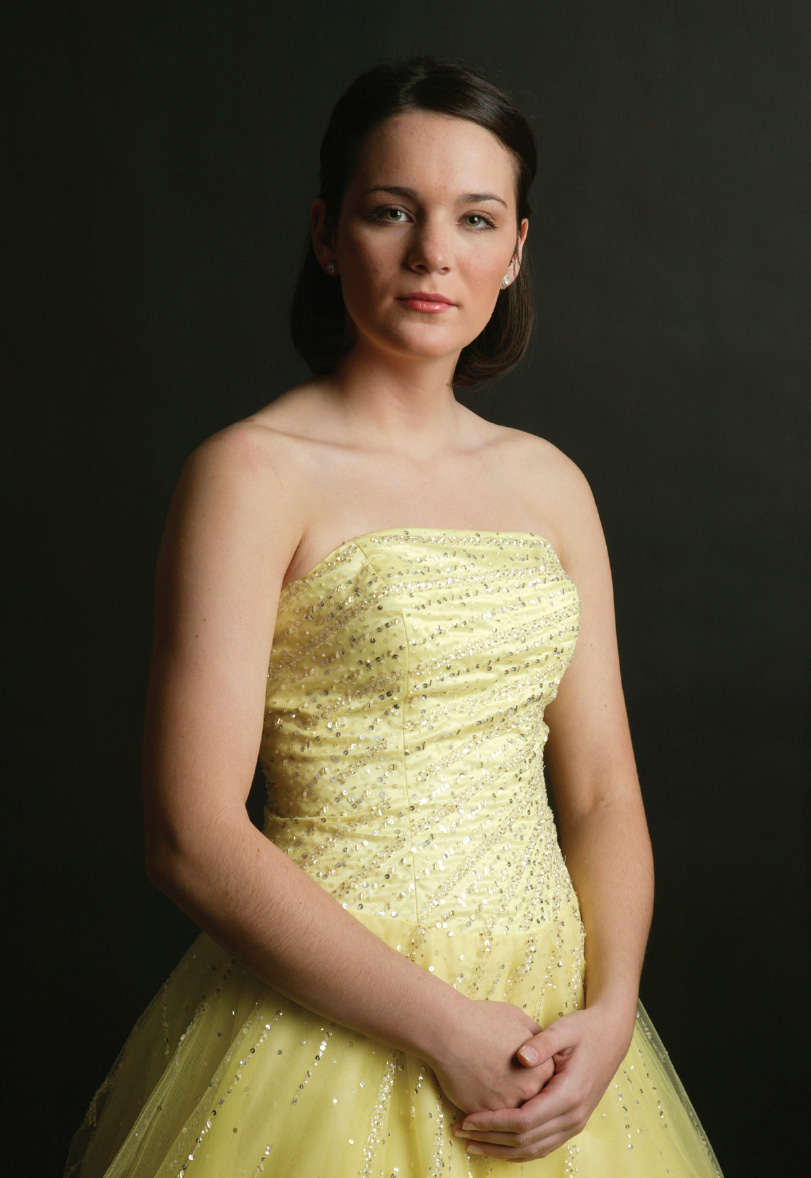
Simple lighting and a dark background.
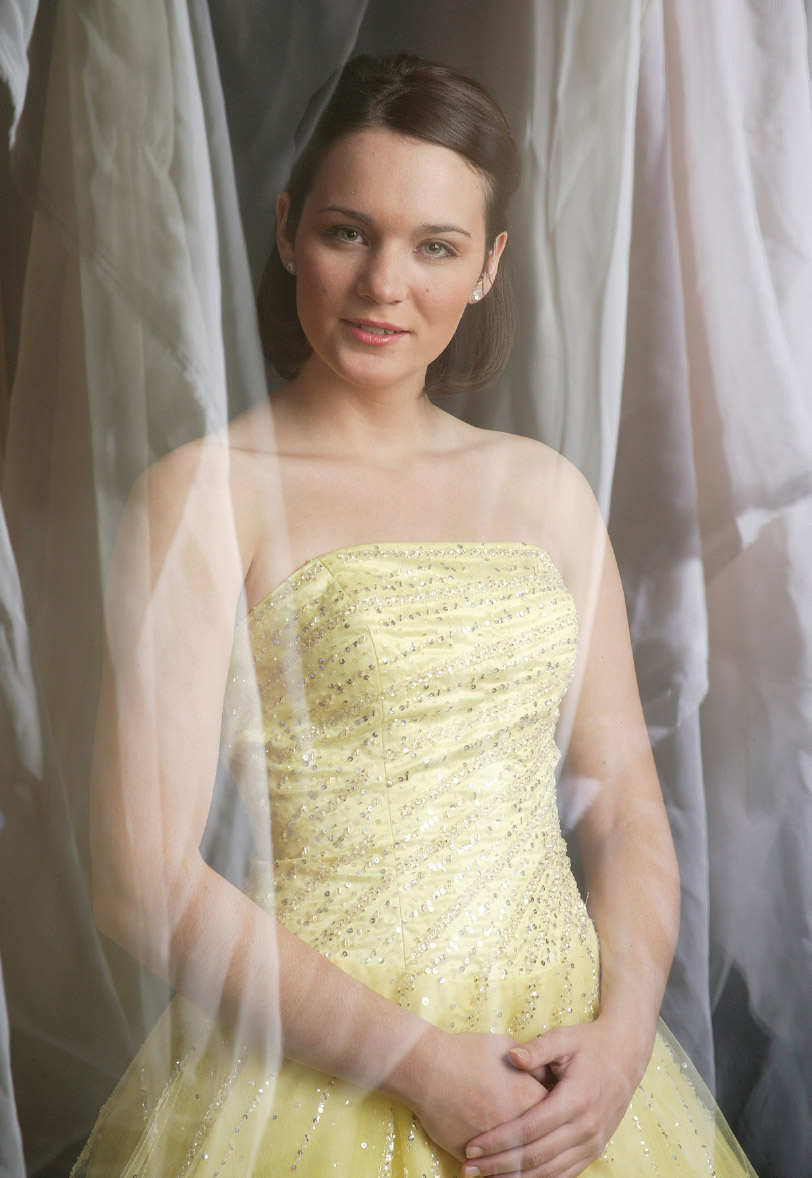
The model appears to be both in front of and behind the curtain.
Setting up a split-beam photograph is pretty easy. I had a 20×24-inch sheet of clear acrylic plastic left over from a broken frame. I clamped it to an Avenger accessory arm and hung it a couple of feet in front of the camera. I placed a black bookend behind and to the right of the camera, matching the 45-degree angle to that of the plastic and draped some curtain material over it. I knew that the light fabric would wash out the tones of the model, so I left a depression in the middle of the fabric, skimming light over it from the side using a standard parabolic reflector.
My model was also positioned before a dark background and lit very simply by a 2×3-foot softbox.
One important note is that neither glass nor acrylic will reflect 100 percent of the light it receives (glass reflects more than acrylic). The exposure of the reflected scene must be increased in order to register properly. Practice will certainly help, but it might be better to shoot tethered to the computer, at least until you get the hang of it, so that you can see the results without the inconsistencies of a camera’s LCD. To get this effect, I found I had to increase the exposure on the curtain material by 2 full stops.
Once I had the exposure figured out, it was a simple matter to move the camera so the model’s head was centered in the depression I’d left in the fabric. The lack of light in the depression left her skin tones looking almost “normal.”
This is a very interesting technique. Notice how the lightness of the fabric softens the dark background and also how she seems to be both in front of and behind the fabric. One benefit of the beam-splitter trick is the lack of negative-density exposure increase in overlapping areas, like you would expect in traditional double exposures.
Next, I moved a vase of silk flowers into the studio and onto a high stool. I wanted a full exposure with quick falloff, so I moved what had been the fabric light around to the front of the camera and fitted it with a 20-degree grid, aimed at the center of the floral arrangement.
I also changed the modifier on the main light to a beauty bowl to get a snappier, harder shadow. I added a hair light so the model’s dark hair wouldn’t merge with the dark background.
After a couple of quick test images, mostly to check the LCD to determine if the reflections were in the right places, we shot. Notice how the light from the gridspot falls off along the top of the image.
The beam-splitter trick is wonderful for more dramatic imagery, too. Profiles and ⅞ front poses look great.
You can create your own backgrounds on your studio printer or through a lab. For the shot on the facing page, I first made a 13×19-inch print of late-winter ice sludge on semi-gloss paper, mounted it on a piece of foamcore with spray adhesive, and moved it into the reflective field until I liked it. I let it go slightly out of focus, just for effect.
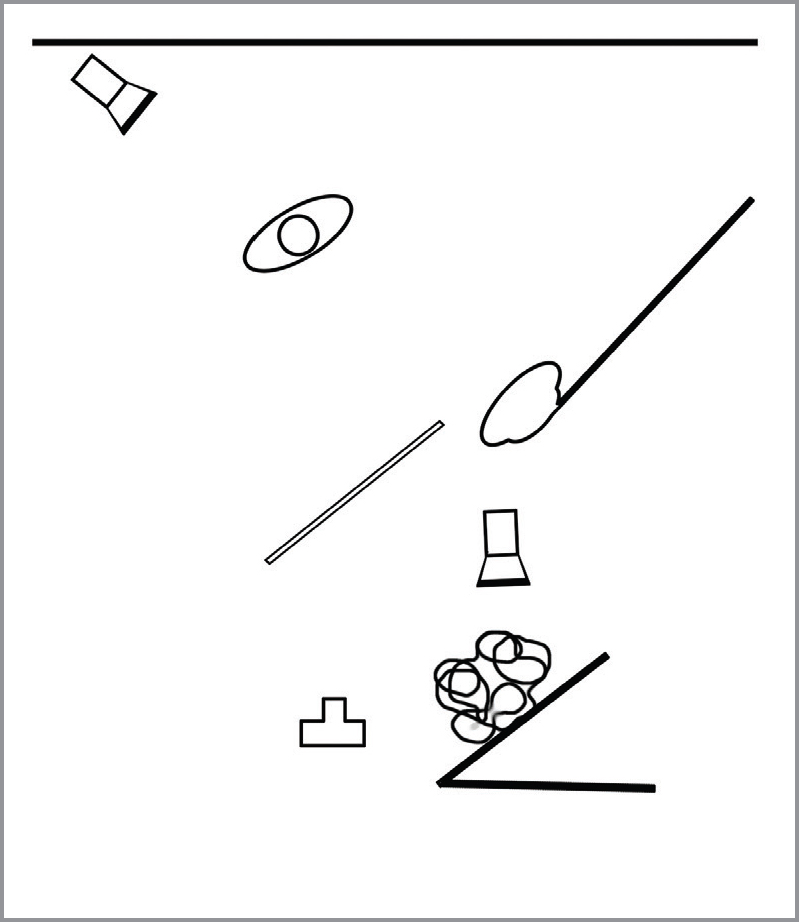
Note the lighting changes.
If you want the background and foreground to be equally in focus, set them both at equal distances from the camera. Be sure to add the distance between the camera and the sheet of glass into the equation.
Use a large enough sheet of glass or acrylic so that you won’t have to crowd it to get the composition you want. Too small a piece and you’ll fight to keep your reflection out of the picture.
A zoom lens is extremely helpful because it’s difficult and time consuming to move everything just because you want to get in closer.
Finally, make sure the glass is clean and that no light is falling on it.
So there you have it: Another cheap trick in your gadget bag, and a doggone cool one, too.
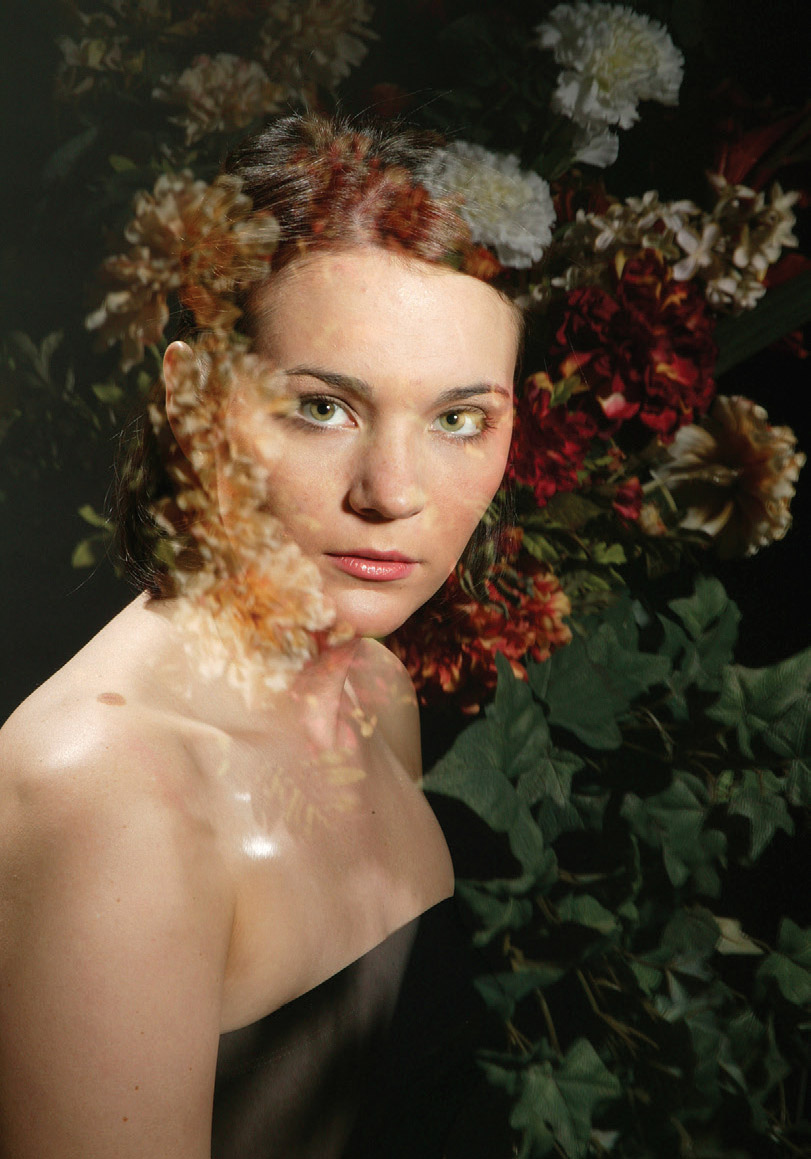
A beam splitter produces images that speak of fantasy and mystery.
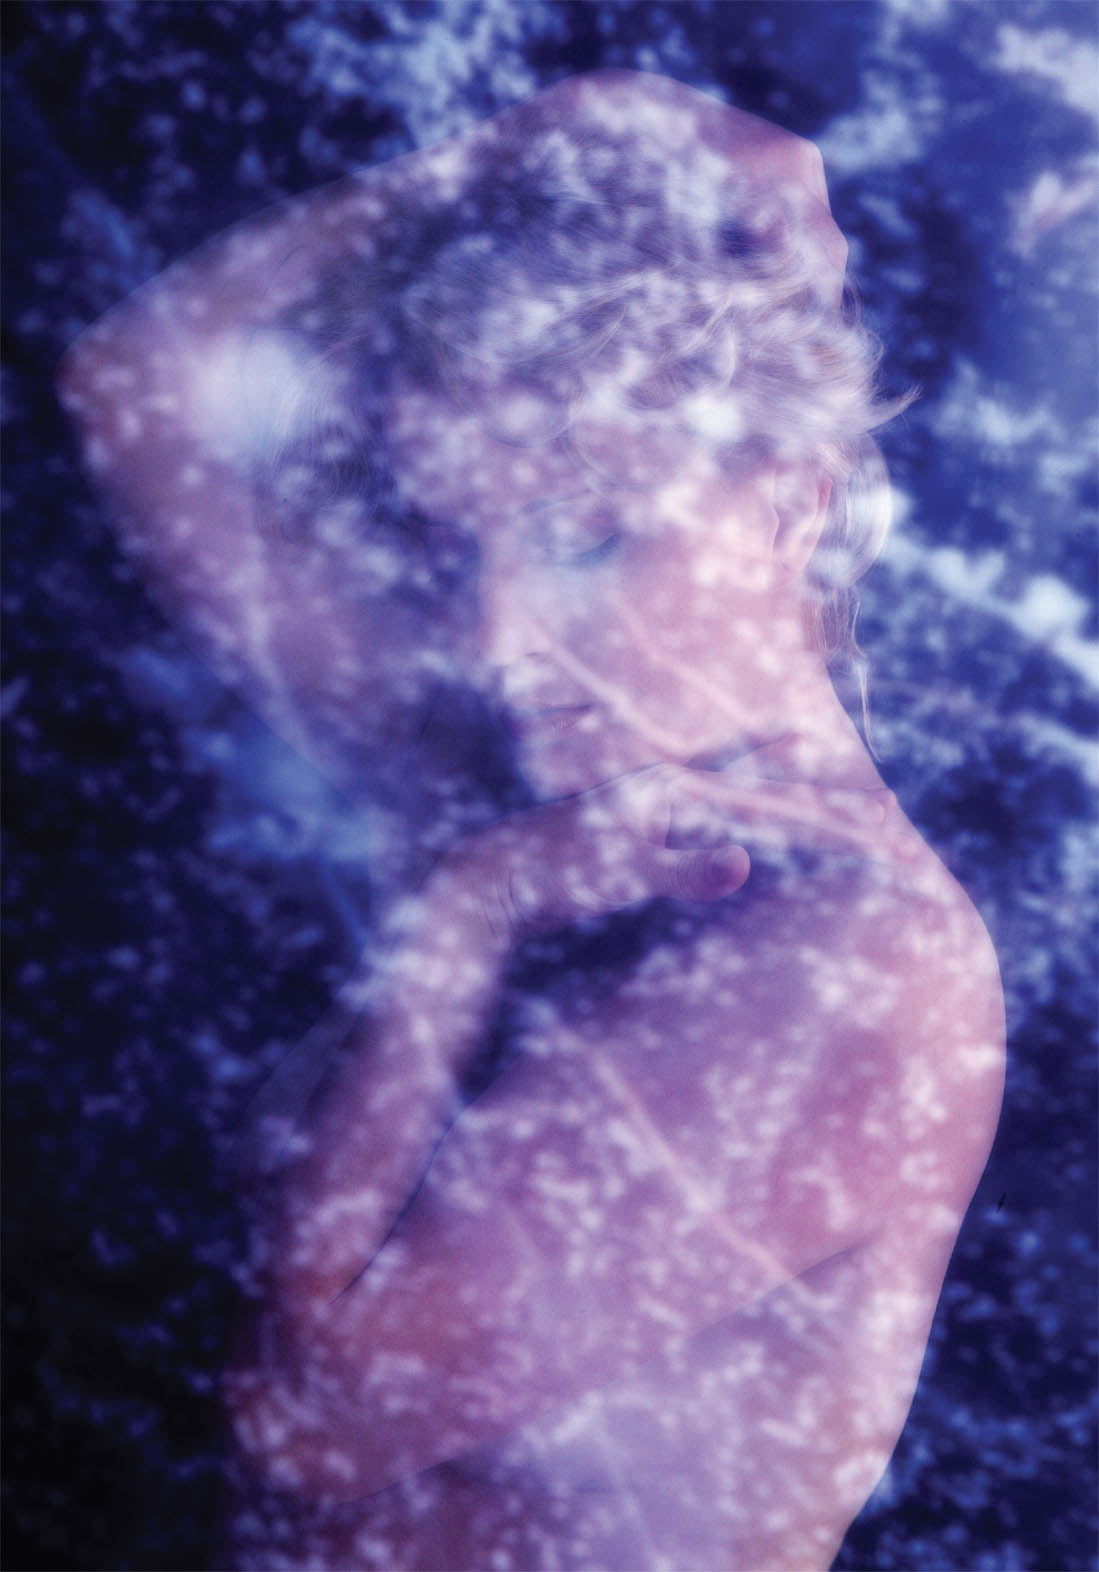
Another wonderful mix of fantasy and mystery.