Occasionally you will require pieces of data to be rendered in a more readable manner. A common example to go through using our Eventgen data is with HTTP status. Computer engineers are often familiar with HTTP status codes as three-digit numbers. Business analysts or more casual users may not know the meaning of these codes and require a text-based description to comprehend the search results. In Splunk, you can enrich event data using Lookups, which can pair numbers or acronyms with more understandable text descriptions found in a separate file.
A lookup table is a mapping of keys and values Splunk can search, allowing for the displaying of more meaningful information at search time. Having the Lookup execute at search run time also optimizes the need to index verbose descriptions that consume additional index space. This is best understood through an example:
- From the Destinations app, click on Settings and then Lookups:

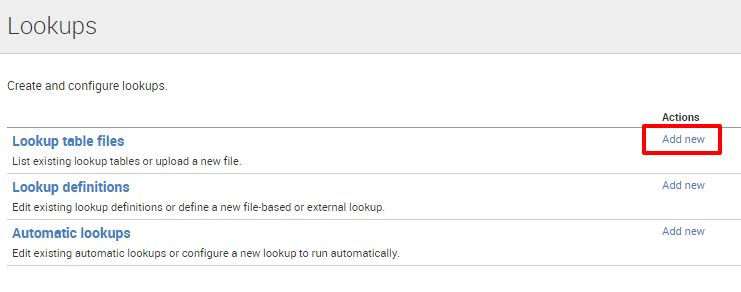
- In the Lookups page, click on the Add new option next to Lookup table files, as shown in the following screenshot:

- In the Add new page, make sure that the Destinations app is selected
- Then, using the following screenshot as your guide, in Upload a lookup file, browse and choose the following: C:splunk-essentials-masterlabschapter05http_status.csv
- Finally, type in http_status.csv in the Destination filename field
- Click on Save to complete:

The new Lookup table file path will now appear in the Lookup Table Files page. Change the permission so that all apps can use it and it will now appear as Global. The entries in the Lookup table files should be similar to the following screenshot:
Now that we have told Splunk where to access the Lookup file, it is time to create the Lookup definition:
- In the Lookups page, click on the Add new option next to Lookup definitions:

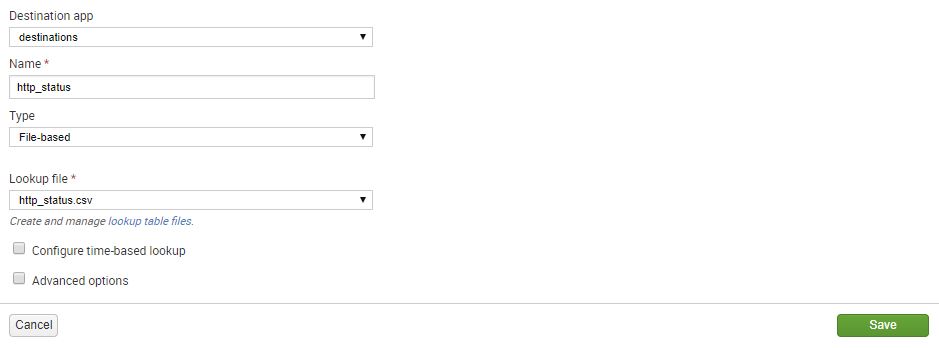
- Once again, make sure that this is being saved in the context of the Destinations app.
- In the name field, type in http_status.
- Leave the Type as File-based. In the Lookup file dropdown, look for the http_status.csv file and select it.
- Leave the remaining checkboxes blank:

- Save the definition.
- The new Lookup definition will now appear in the Lookup definitions page. Change permission sharing to Global by allowing All Apps to have permissions, and assign Read access to Everyone and Write access to the admin user.
To now use the new Lookup:
- In the Destinations app search bar, type in:
SPL> eventtype=destination_details | top http_status_code
- The result will show the http_status_code column with the raw status code values, as well as the counts and percentage of total for each. Extend the search by using the lookup command:
SPL> eventtype=destination_details
                  | top http_status_code
                  | rename http_status_code AS status
                  | lookup http_status status OUTPUT
                    status_description, status_type
- Look at the following output. The steps you took give you a meaningful output showing the description and type of the status codes by using the Lookup:

Adding the Lookup is good for a first step, but for it to be repetitively used by casual users, the Lookup needs to happen automatically when searches including http_status_code are run. To do this, take the following steps:
- Go back to Settings and then the Lookups page.
- Click on Add new next to Automatic Lookups:

- Complete the form with the following information. Leaving the second column under Lookup output fields blank defaults the display name of the fields to what is in the file. Click on Save when you're done:

- Click on Permissions and change the sharing permission to Global by clicking on All Apps, giving everyone Read access and admins Write access; then click on Save.
Let's see how these changes help:
- Go back to the Destinations app search bar and type in the following search:
SPL> eventtype=destination_details status_type=Redirection
You have now filtered your search using values from the Lookup information without invoking the lookup command explicitly in the SPL.
- Notice that the search output will match all events where http_status_code equals 301 or 302.