Most raw data that you will encounter will have some form of structure. Just like a CSV (comma-separated value) file or a web log file, it is assumed that each entry in the log corresponds to some sort of format. Splunk makes custom field extraction very easy, especially for delimited files. Let's take the case of our Eventgen data and look at the following example. By design, the raw data generated by Eventgen is delimited by commas. Following is a example of a raw event:
2018-01-18 21:19:20:013632, 130.253.37.97,GET,/destination/PML/details,-,80,- 10.2.1.33,Mozilla/5.0 (iPad; U; CPU OS 4_3_3 like Mac OS X; en-us) AppleWebKit/533.17.9 (KHTML, like Gecko) Version/5.0.2 Mobile/8J3 Safari/6533.18.5,301,0,0,317,1514
Since there is a distinct separation of fields in this data, we can use Splunk's field extraction capabilities to automatically classify values of data into fields, which can then be used for easy searching and filtering:
- In your Destinations app Search page, run the following search command:
SPL> index=main sourcetype=access_custom
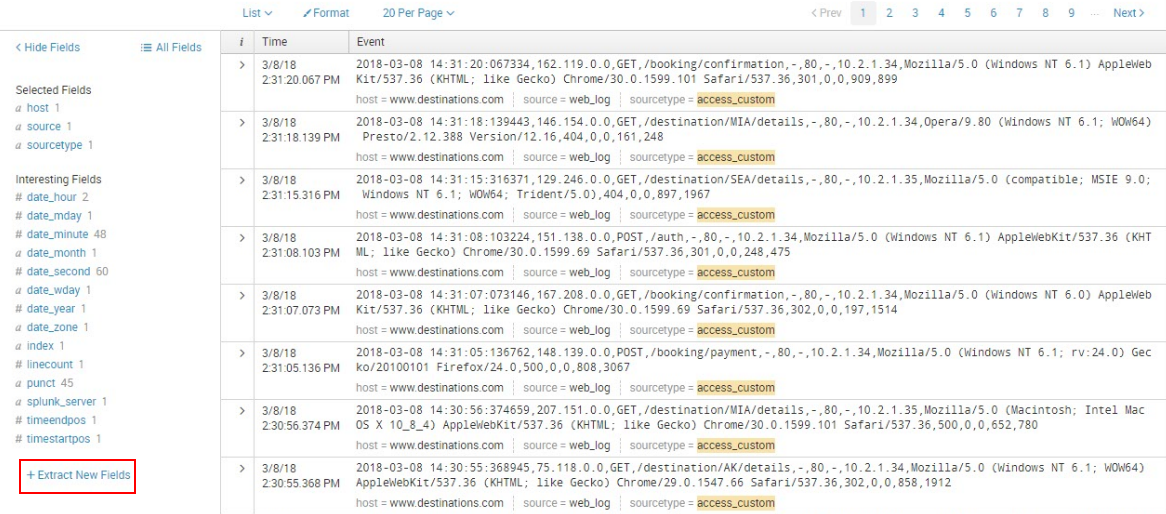
The sourcetype access_custom refers to a type of file format that is generated by a server as it creates a web log file. After the data populates from running the preceding search, click on the Extract New Fields link in the left column of the page, as shown in this screenshot:
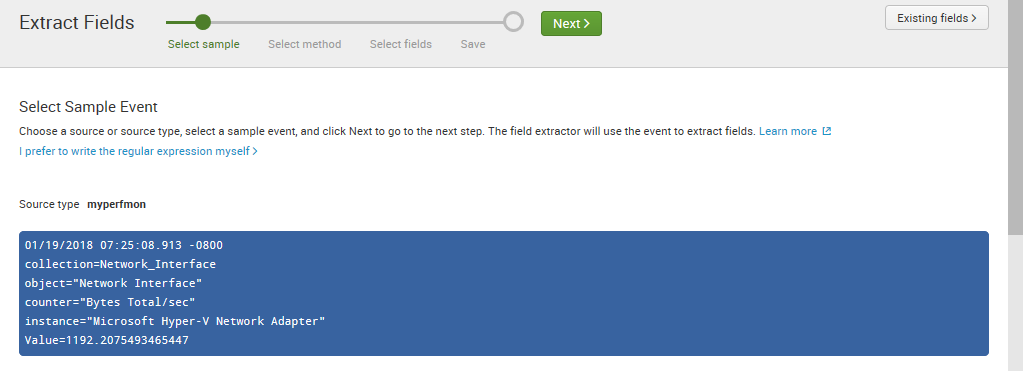
- In the resulting Extract Fields page, select one of the events that is shown in the _raw events area. Try to select the entry with the longest text. As soon as you do this, the text will appear highlighted at the top of the page, as per the following screenshot:
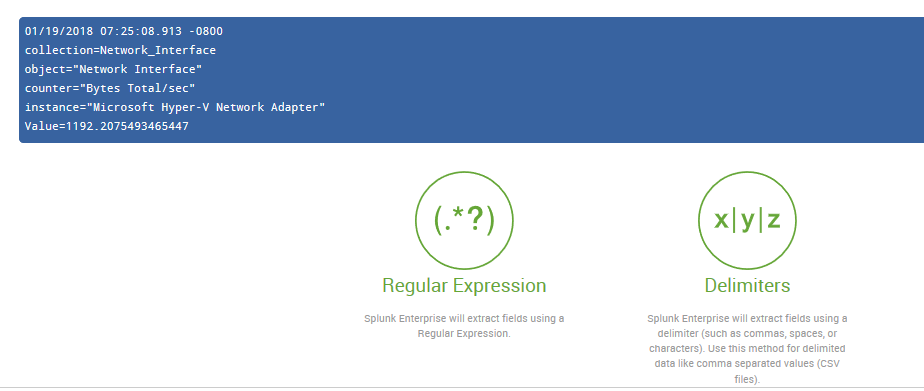
- Click on the Next button to proceed. In the page that appears, click on the Delimiters icon, which will turn blue after clicking on it, as indicated in the following screenshot:
- Click on Next. On the next page, click on the Comma delimiter as shown in this screenshot:

As soon as you select the Comma delimiter, Splunk will automatically allow you to modify each field and add a label to it.
- Click on the pencil icon for each field to input the label. When you're done, click on the Rename Field icon.
Provide names for the remaining fields using the following guide. These fields will be needed in future chapters. You can skip those that are not included in the following list:
-
- field1: datetime
- field2: client_ip
- field3: http_method
- field4: http_uri
- field8: server_ip
- field9: http_user_agent
- field10: http_status_code
- field14: http_response_time
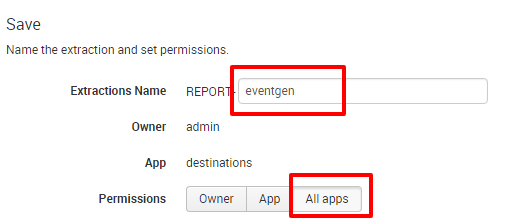
When you have completed the preceding task, click on Next to proceed. In the next window, label the Extractions Name as eventgen and select the All apps permission type. Refer to the following screenshot:
- Click on Finish to complete the process. Now that you have extracted new fields, these will be readily available in your search queries.
- In the resulting screen, click on Explore the fields I just created in Search:

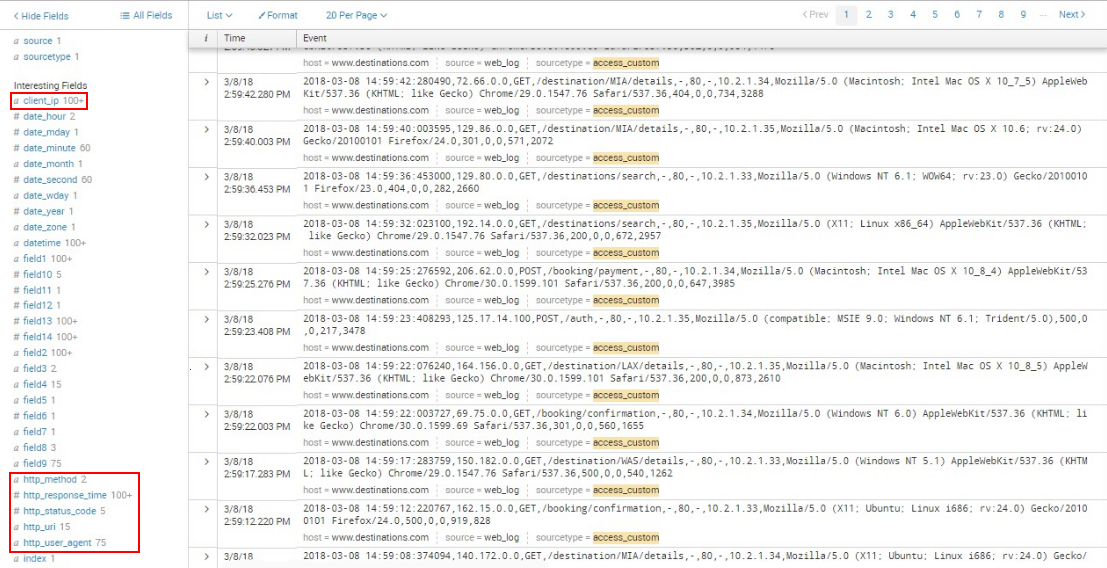
When the events appear, the field names you just entered will appear in the fields list:
As mentioned earlier, additional configurations added to Splunk after installation are contained in .conf files. Check out these files to see where the configurations you just created now live at the filesystem level:
$SPLUNK_HOME/etc/apps/destinations/local/props.conf
$SPLUNK_HOME/etc/apps/destinations/local/transforms.conf
When using custom datasets and/or advanced configurations for parsing data, the entries will reside in these files, which all work together from sourcing data to loading it and reporting on it properly. There is a significant amount of online document related to these files.
- TIME_PREFIX
- TIME_FORMAT
- LINE_BREAKER
- SHOULD_LINEMERGE
- MAX_TIMESTAMP_LOOKAHEAD
Complete documentation for props.conf can be found here: https://docs.splunk.com/Documentation/Splunk/latest/Admin/Propsconf.
In the next chapter, you will learn how to use these new fields to filter search results.