In the previous sections, you first created panels by running searches and then saving them as dashboard panels. You then started to modify the visualization in each panel. This is one way to build a dashboard. However, you may first want to see the visualization before adding it to a dashboard. We will use that method in this real-time dashboard exercise:
- Let's start with a search command in the Destinations app to begin creating the dashboard:
SPL> index=main http_uri=/booking/confirmation http_status_code=200
     | stats count
- Select Real-Time | 1 hour window in the Time Range preset and run the search.
- Click on the Visualization tab to switch to visualization mode:

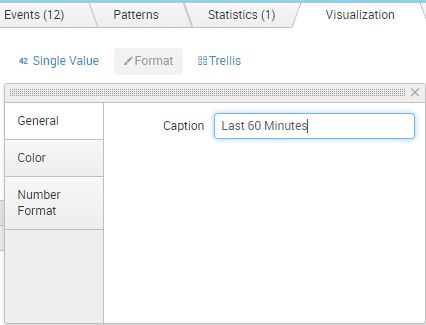
- Click on the Format dropdown.
- In the Caption field, type Last 60 Minutes:

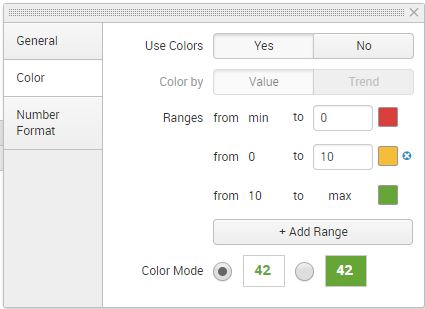
- In the Color tab, click on Yes to Use Colors.
- Arrange the color ranges to match the following screenshot:

- Changes are automatically applied. Close the Format Visualization window by clicking on the X in the upper-right corner.
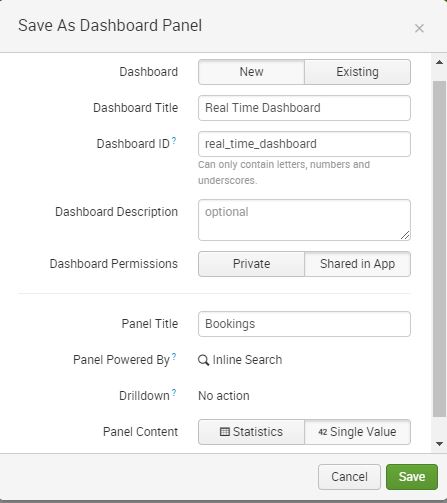
- Click on Save As | Dashboard panel.
- Select New dashboard and fill in the following information:

- Click on Save.
- Click on View Dashboard.
The panel you just created is set to Real Time search and will continuously update as long as the page is in view and you have not exceeded your real-time search quota.