BEACH
The Beach Biome is a narrow stretch of sandy land found along coastlines at the edges of ocean biomes. The sand at the water’s edge slopes smoothly into the water; underwater you’ll also find clay, dirt, and gravel blocks. Beneath the sand itself you will find sandstone, similar to deserts; the sandstone prevents sand from falling into any caves below. The turtle is the only passive mob that can spawn on beaches. Sugar cane is the one plant that grows at the water’s edge of beaches.
See also: Stone Shore Biome, Snowy Beach Biome.

The Beach Biome generates between land biomes and ocean biomes.
BIOMES
The scientific meaning of the word biome is used to refer to the collection of flora and fauna that live in a particular environment. These environments are often also categorized by rainfall, temperature, and humidity, among other factors. Different scientists, over time, have categorized Earth biomes in slightly different ways.
In Minecraft, biomes are similar to the general scientific biomes: Each biome has a specific range of temperatures, may or may not have rainfall, and may spawn mobs or plants unique to that biome. Many Minecraft biomes are named for biome types established by biologists, such as Taiga, Desert, Tundra, and Savanna. Overall, Minecraft has five primary categories of in-game biomes:

Minecraft’s land biomes range in topographical height and geography, temperature, humidity, and flora and fauna. Sky, leaf, and grass colors also change with the biome.
1. Snowy: Snowy Tundra and two variants, Ice Spikes and Snowy Mountains.
2. Cold: Mountains (and variants like Gravelly Mountains), Taiga (and variants like Giant Spruce Taiga), and Stone Shore.
3. Medium/Lush: Plains, Forest, Swamp, Jungle, River, Beach, Mushroom Fields, Mushroom Fields Shore, and the End, along with variants.
4. Dry/Warm: Desert, Savanna, Badlands, the Nether, and variants.
5. Aquatic: Warm Ocean, Lukewarm Ocean, Ocean, Cold Ocean, Frozen Ocean, and variants.
Minecraft’s aquatic biomes consist of ten ocean biomes, each individualized by different temperatures and the types of flora and fauna it supports.
See also: Biomes, Aquatic.
Flora and Fauna
Flora and fauna is a term used to describe the natural plant species (flora) and animal species (fauna) that live in a geographical area. The term biota is used when other types of living organisms like fungi are included.
BIOMES, AQUATIC
Minecraft’s ocean biomes are large bodies of water, ranging from hundreds to thousands of blocks wide. Oceans reach a water surface level of y=63, and their depths range from around fifteen blocks deep (ocean floor at around y=45) to about thirty (ocean floor at around y=32) in Deep Ocean variants.
There are five ocean temperature levels and two deepness levels, and these combine to make a total of ten ocean biomes: Warm and Deep Warm Oceans, Lukewarm and Deep Lukewarm Oceans, Oceans and Deep Oceans, Cold and Deep Cold Oceans, and Frozen and Deep Frozen Oceans. The ten biomes vary also in terms of water color, flora (seagrass, sea pickles, kelp), fauna (fish, dolphins, drowned, squid, guardians, elder guardians), and generated structures (ocean monuments, shipwrecks, underwater ruins, coral reefs). Ocean monuments spawn only in Deep Ocean variants.

You can see where a warmer ocean biome meets a colder ocean biome by the change in color.
Ocean floors are typically gravel, with some patches of clay, dirt, or sand, and can feature underwater ravines and caves. The floor rises and falls, with some hills rising up to the surface as islands. You will also find bubble columns in oceans, created by magma blocks, which can pull a swimmer or boat underwater.
In addition to the ocean biomes, there are a few other “watery” biomes, like River and Beach. These aren’t included in the game’s definition of aquatic biomes, but are in this book!
See also: Biomes, Ocean, Ocean Floor, and individual entries for Beach, Cold Ocean, Frozen Ocean, Frozen River, Lukewarm Ocean, Mushroom Field Shore, River, Snowy Beach, Stone Shore, Swamps, and Warm Ocean.
BLACK TANG
The black tang is one of Minecraft’s common tropical fish named for a real-life fish. It uses the gray flopper color and pattern.
In real life, the black tang is entirely black and is one of the rarest of the tang fish. Tangs in general are sometimes called doctorfish, surgeonfish, or unicornfish, because of the sharp, knife-like spines near their tail fins, which they can use against their enemies.
See also: Blue Tang, Yellow Tang, Tropical Fish.
BLUE ICE

Blue ice is one of the three types of ice in Minecraft (excluding the magical and temporary Frosted Ice that is produced by Frost Walker-enchanted boots.) You can find it in Frozen Ocean Biomes, at the bottom of icebergs, or in standalone clumps or outgrowths. You can also craft blue ice with nine blocks of packed ice. Blue ice is even more slippery than packed ice and doesn’t melt when it is near torches or other light sources. Traveling by boat on blue ice is currently the fastest way to travel in Minecraft.

Blue ice naturally generates in clumps in Frozen Ocean Biomes.
See also: Ice, Frozen Ocean.
BLUE TANG/BLUE DORY
The blue tang is one of Minecraft’s named tropical fish and uses the gray-blue flopper color and pattern scheme.
In real life, the blue tang is a member of a family of tropical fish called tangs, surgeonfishes (or doctorfishes), and unicornfishes, known for sharp spines by their tail, used for defense.
The blue dory tropical fish is found only in the Bedrock Edition, and appears to be the counterpart to the Java Edition’s blue tang, as the blue tang doesn’t appear in the Bedrock Edition. The famous animated film fish, Dory, is a blue tang tropical fish. The Bedrock Edition blue dory uses the Minecraft gray-sky sunstreak pattern.

Top, blue tang (JE); Bottom, blue dory.
See also: Black Tang, Yellow Tang, Tropical Fish.
BOATS
Besides swimming, boats are the de facto transport of aquatic Minecraft. They’ve been a part of Minecraft since the Java Edition Alpha and have been continually under improvement. Gone are the days when boats broke at the mere sight of a lily pad. Today, boats have paddles, fit two, and on ice offer the fastest travel speeds in Minecraft. (On water, they are about as fast as minecarts.) Other great things about boats include:

 If you fall while you are in a boat, you usually will not take any damage.
When you’re in a boat, your hunger level stays the same.
You can catch mobs in boats—they won’t leave the boat by themselves. This means boats are great for catching and transporting villagers and mobs.
Fun fact: Boats are entities in Minecraft because they are moving objects. That means they have health (about 2 hearts) and their health even regenerates.
See also: Swimming.
BREATHING UNDERWATER
When you slip below the water surface, your heads-up display (HUD) will show a new status line for your oxygen level. This is your oxygen bar, a row of ten bubbles. Your oxygen level (and number of bubbles) will decrease the longer you stay underwater. Once you have no oxygen left (after about fifteen seconds), you will start taking drowning damage at one heart per second.
There are several ways to keep breathing and avoid drowning while you are swimming underwater.
See also: Drowning, Underwater Survival.
Turtle shell helmet: A turtle shell helmet gives ten seconds of underwater breathing. |
|
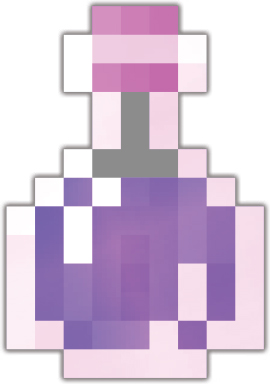
Potion of Water Breathing: This potion gives three (or eight, for the extended version) minutes of water breathing. |
|
Conduit Power: An activated conduit provides continual water breathing while you are under its effects. |
|
Respiration enchantment: A helmet enchanted with Respiration will give you an increased time to breathe underwater. |
|
Bubble column: You can refresh your oxygen levels in a bubble column. |
|
Sponge: You can use a dry sponge to soak up dozens of blocks of water around you and create a breathing space. Depending on where you are, the water remaining around you will usually fill in again, quickly. |
|
Doors, banners, gates (JE): Place one of these to create a pocket of space to get oxygen in an emergency. Be careful in placing these, however, as you’ll need a two-block space for placing them. The gate will need to be at the top of a two-block-high space to create the air at your head level. A banner only creates the air pocket in its upper half. |
|


As soon as you go underwater, your oxygen level bar, with ten bubbles, shows in your HUD above your hunger bar.

Placing a door creates two blocks of air you can breathe while underwater.
BUBBLE COLUMNS
Bubble columns are created when magma blocks or soul sand blocks are placed in water, with only source water blocks above. Either of these blocks will generate a 1x1 block wide column of bubbles above it that can either push or pull objects at about fifteen blocks per second. Magma blocks generate a whirlpool bubble column, which can pull entities and items down. If you are in a boat over a whirlpool column, your boat will start shaking violently, and you can be pulled down if you don’t get out of the whirlpool quickly.
Soul sand blocks generate an upward bubble column and can push mobs and items to the surface. The higher a bubble column reaches, the faster the object goes, and the column can even throw the player up out of the water by about a block. The appearance of a bubble column indicates that an underwater ruin or ravine lies below. A ravine might have a dozen bubble columns where lava at its depth has turned to magma.
You can use a bubble column to quickly regenerate your oxygen level. Another popular use for bubble columns is for transport systems and player elevators.
See also: Project: Bubble Column Elevator.


Magma blocks create a bubble column that pulls objects down to it; soul sand bubble columns push objects to the surface.
PROJECT: BUBBLE COLUMN ELEVATOR

Bubble columns are an amazingly fast way to move up and down in Minecraft. You can easily make elevators to get up and down from the tops of mountains or high cliffs and move quickly between the levels of your base. The up elevator uses soul sand to push you up, and the down elevator uses a magma block to pull you down.
This elevator uses light blue blocks to indicate the Going Up elevator and lime green blocks for the Going Down side. You can use whichever blocks you like and construct the platforms as large or small as you like.
What You’ll Need
17 prismarine brick blocks for the central column
54 light blue glass blocks for three walls of the up elevator, including the bottom entrance
54 lime green glass blocks for three walls of the down elevator, including the bottom exit
6 signs
1 dirt block (temporary)
2 buckets of water
2–3 temporary or dirt blocks
2 kelp
1 soul sand block
1 magma blocks
Additional decorative blocks for the top and bottom levels (I’ve used an additional eight prismarine brick blocks, twenty-five light blue concrete blocks, and twenty-five lime green concrete blocks.)
Step by Step
1. Place the central prismarine brick block that will be the center column for the elevators. This will be the back wall for the two elevators.

2. On one side, place the two side walls for the “Going Up” side of the bottom level using four light blue glass blocks. The blue color will help indicate that this is the Up side.

3. On the opposite side, place four lime green glass blocks as side walls for the “Coming Down” part of the bottom level. The green color will indicate that this is the Down side.
4. Build these bottom level walls to be three blocks high.

5. On the “Going Up” side, place three signs on the outer blocks of one wall, as shown.

6. Do the same for the “Coming Down” side of the bottom level.

7. Place a temporary dirt block between the outer glass blocks at the top of the “Going Up” side. This is to help you place a block in the next step.

8. Place three glass blocks and one prismarine brick block as shown to be the base of the walls of the enclosed “Going Up” elevator.

9. Remove the temporary dirt block.

10. Now do the same on the “Coming Down” side of the elevator: First, place a temporary dirt block on one outer glass block.

11. Add three glass blocks to form the base of the outer and side walls of the elevator and remove the dirt block.

12. Build up the walls of the two elevators to the level you want. I’ve added fourteen block levels to make the entire elevator seventeen blocks high.

13. Build out a platform at the top of the elevators. Use your additional decorative blocks. I’ve used lime concrete for the Down side and light blue concrete for the Up side, and prismarine brick between the sides.

14. Place one bucket of water at the tops of each of the two elevator sides. This water will flow down the length of each elevator tunnel.

15. At the bottom level of each of the elevators, make sure the bottom block is grass or dirt. Plant kelp on the bottom block. Do this on both sides.

16. Now, you can wait for the kelp to grow to the top water block in each elevator, or manually place kelp all the way to the top. As the kelp grows into each flowing water block above it, the water block changes into a source block. (The bubble columns only work with source blocks.)

17. Once the kelp has grown to the top, return to the bottom level and break the kelp stalk. Do this on each side.

18. On the Going Up side, replace the bottom block of the elevator with a block of soul sand. You will see bubbles start to rise from it.

19. On the Coming Down side, replace the bottom block of the elevator with a magma block. Here you’ll see bubbles begin to flow down to the magma block.

20. Finish the bottom layer with decorative blocks as you like. I’ve used lime concrete for the Coming Down side and light blue concrete for the Going Up side.

21. Check out your elevator! Step into the blue Going Up side. It goes fast and you’ll even bounce into the air a bit! Move out onto the platform when you arrive. Drop into the green Down side. Press forward as you get to the bottom, so you can hop out of the elevator before spending much time if any on the magma block. (If you find yourself stuck on a magma block, press Shift, or sneak, to avoid taking damage.)

BUCKET OF FISH
Fill a bucket with water, right-click it on a swimming fish mob, and you’ll have a bucket of (one) fish. Right-click your bucket of fish to release it along with the water. There are four “types” of buckets of fish: bucket of cod, bucket of salmon, bucket of pufferfish, and bucket of tropical fish. When you pick up a tropical fish, the bucket in your inventory will show what type of fish you have: if its one of the twenty-two named fish, like a black tang, you’ll see its name. If it is one of the thousands of other patterns of tropical fish, it will show its pattern and colors, like “glitter, blue.” However, the icon for the item bucket of tropical fish always shows a clownfish.

TIP: To name a live fish mob, place the bucket of that fish in an anvil and add the name. If you are collecting tropical varieties, this can help you keep track of and identify what you’ve caught so far.
See also: Tropical Fish, Fish.
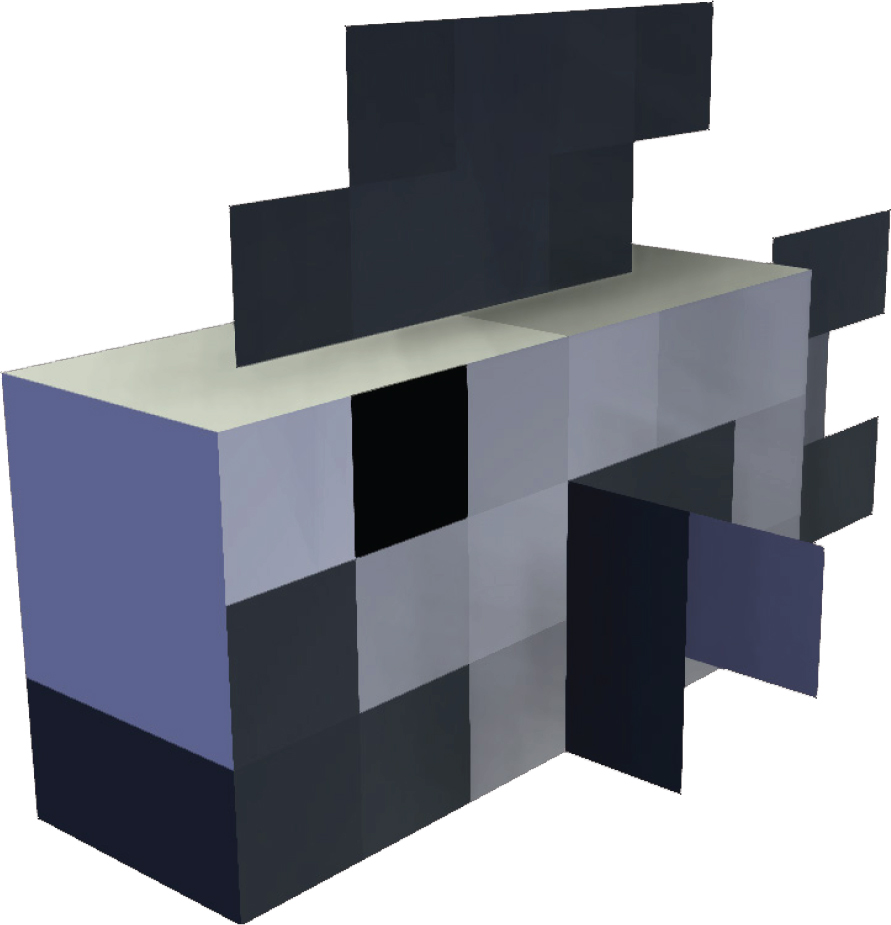
BURIED TREASURE
Buried treasure is a randomly generated loot chest found in beaches and more rarely underwater on the floor of the ocean. The chest is usually buried or covered by a block of sand or gravel, but sometimes stone or ore. You can find buried treasure by using buried treasure maps, which are found in shipwreck map chests and underwater ruins chests.
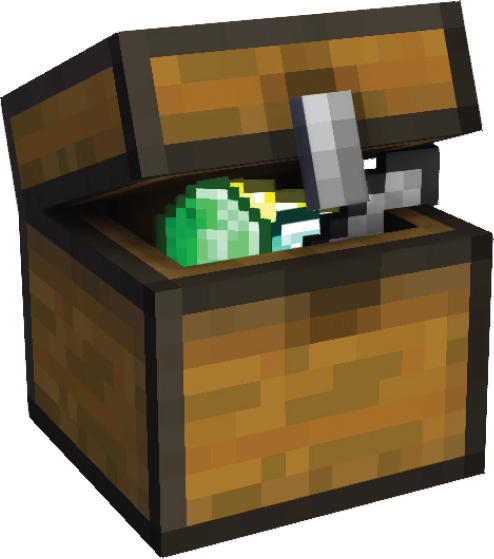
The types of loot you can find in a buried treasure chest include hearts of the sea, diamonds, emeralds, iron, gold, prismarine crystals, iron swords, leather tunics, TNT, cooked cod, and salmon. Additionally, in the Bedrock Edition, you have a chance to find chainmail armor, leads, name tags, music discs, cake, potions of Water Breathing and Regeneration, books and quills, and bottles o’ enchanting.
See also: Buried Treasure Map, Shipwrecks, Underwater Ruins.
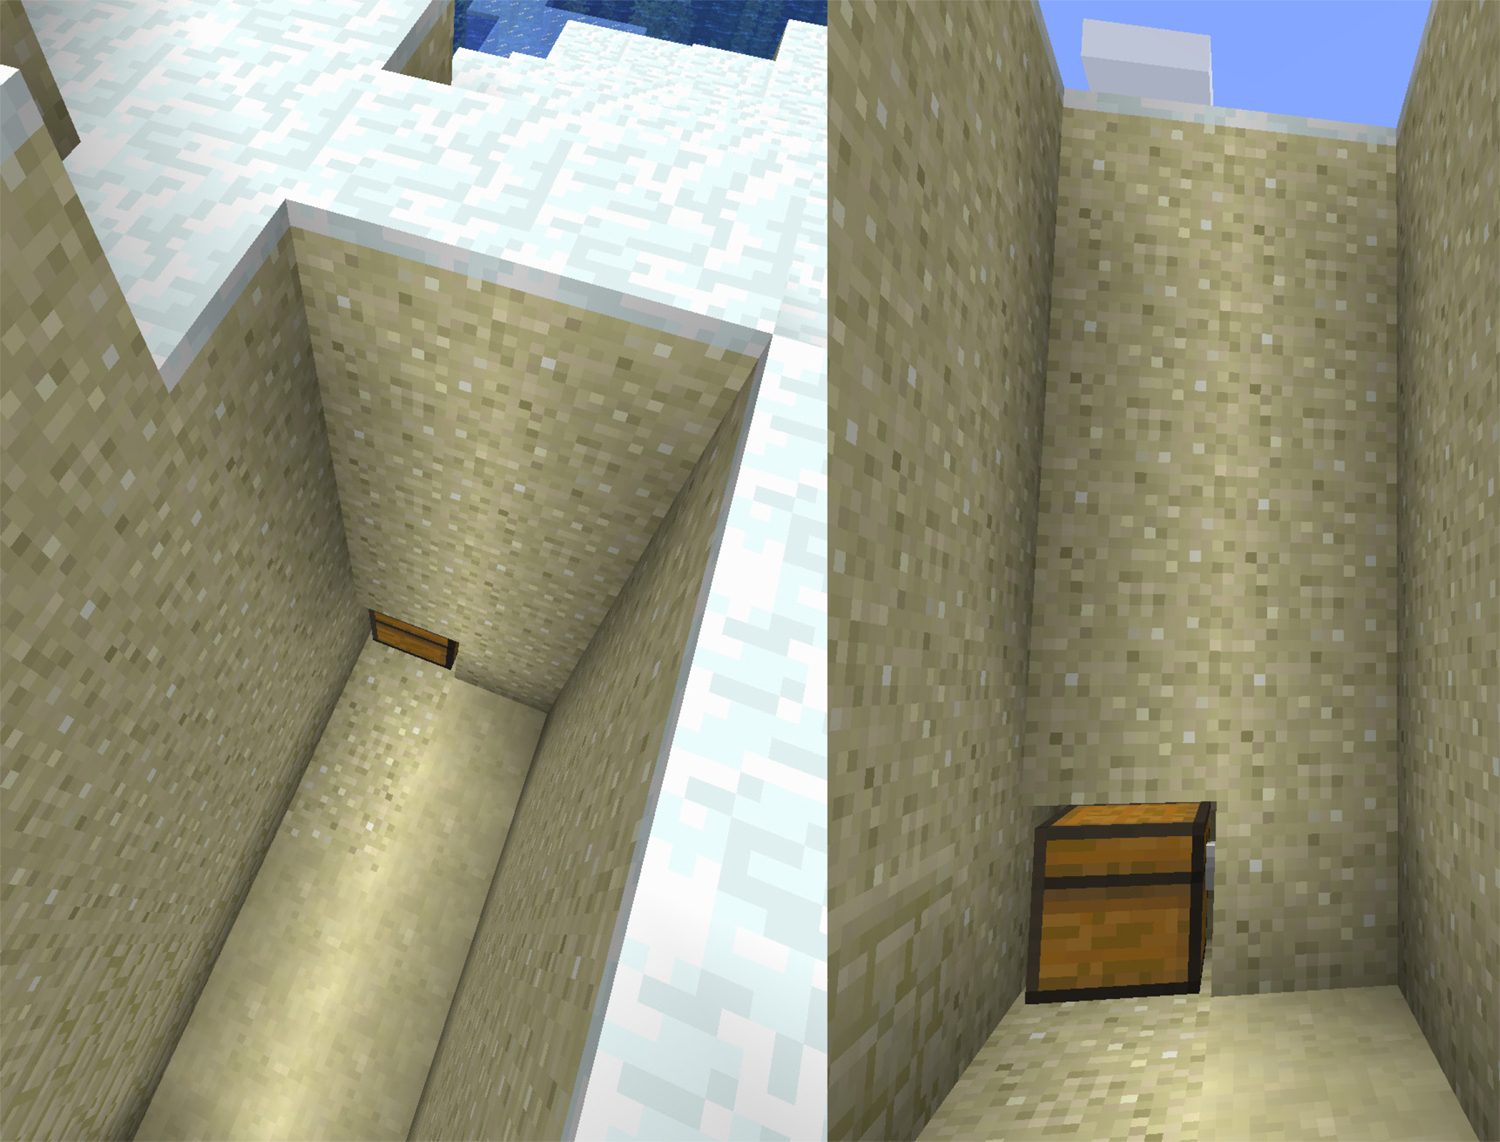
Buried treasure chests may be more than a few blocks beneath the surface.
BURIED TREASURE MAP
The buried treasure map is a type of explorer map. It shows where single chests of loot are buried in the Minecraft world, along ocean beaches and coastlines. You find them in shipwreck map chests and in chests of underwater ruins. As with any explorer map, a buried treasure map shows the general area and layout of the treasure’s location and a white marker indicates where you are. If you’re unsure about how to use an explorer map, see the entry Explorer Map.
Even with a map, finding buried treasure can be difficult. The red cross covering the treasure is big, and the map doesn’t give you exact coordinates, so it’s easy to dig near the loot chest, but not near enough. To get as close to the treasure as possible, try to match your white marker so that the tip just projects from the bottom of the red X.
If you find map chests that are near each other (for example, an underwater ruin chest near a shipwreck map chest), the maps will often point to the same treasure. So to find more treasure, travel further!
See also: Explorer Map, Shipwrecks, Underwater Ruins, Buried Treasure.

To get close to the buried treasure, position the white marker showing your location right under the red X so that the tip is just pointing out.
East South North West
To find your direction, use the sun, which always moves from east to west. Look at the sun so that your cursor is at the bottom edge of the sun. Wait a moment, and whichever way the sun is moving points to the west. To double-check, face in that west direction and make sure that the sun is going down.

BUTTERFLYFISH
The butterflyfish (or in BE, butterfly fish) is one of Minecraft’s tropical fishes named for a real-life fish. In Minecraft’s color and pattern scheme, it is a white-gray brinely (see page 157).
IRL (In Real Life): Butterflyfish are a group of more than 100 tropical fish that live in coral reefs; many are known for being brilliantly colored and patterned with hues of red, orange, yellow, blue, black, and white.
See also: Ornate Butterflyfish, Tropical Fish.