Chapter Six
More HTML Tags
T
his chapter covers some other interesting and helpful HTML tags and how they work. We will begin the chapter by looking at how the “List” tags work in HTML.
Ordered and Unordered List
We often create a list of items that we want to buy, keep track of, or use as reference to explain how something works. These items are usually in form of a list because they are written in a specific type of order, usually from top to bottom. You might have visited an online store where the features of a product are listed in either an ordered form or unordered form. Ordered can be 1, 2, 3… and so on, while unordered form could be bullet points e.g. •
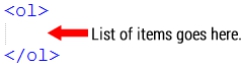
To create a list of items in ordered or unordered form in HTML, the <OL
> tag or the <UL
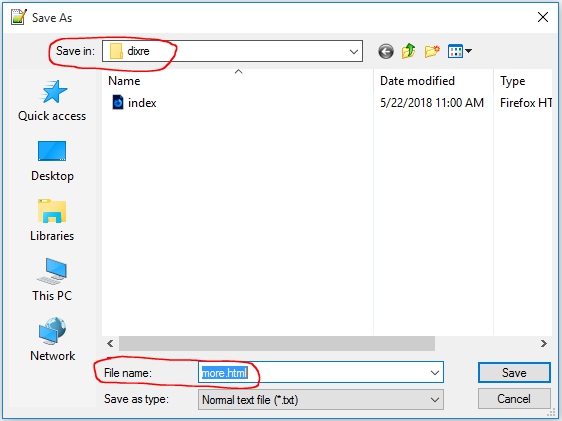
> tag can be used respectively. To see how these tags work, the first step is to create a new file in Notepad++ text editor. The new file can be saved in the same project folder where we initially saved our first HTML file “index.html”. In case you wish to save your work in a different folder, make sure you save it correctly so that you can easily access it when you need to open your work. Chapter 4 covers the process of creating a new HTML file, always refer to the chapter in case you encounter any challenge with creating new HTML files. Figure 6.0 shows the folder where the new file “more.html” is saved. In case your project folder name is different, try to save your new file in the project folder you created.
Figure 6.0: Dixre project folder.
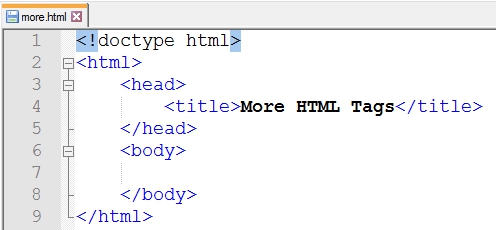
Figure 6.1 shows how the new “more.html
” file looks like.
Figure 6.1: New HTML codes written in more.html
file.
If you have successfully created your new file, write the same HTML code similar to what is on Figure 6.1.
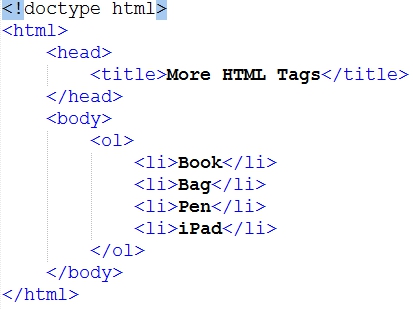
Let's add an ordered list to the new file. Figure 6.2 shows how to create an ordered list in HTML. Follow along by writing the same HTML codes in your text editor. We will be going into the details on how the <ol
> tag works.
Figure 6.2: Ordered list items.
From Figure 6.2, observe that some <li
> tags were wrapped inside an <ol
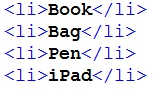
> tag. Think of it this way, we just created a list of items:
And we decided to display those items in an ordered form:
NOTE:
The opening and closing <li> tags are used for wrapping each item in a list. Think of the <li> tag as a list tag.
To see how these items will be displayed on a web browser, go back to the folder where you saved your “more.html
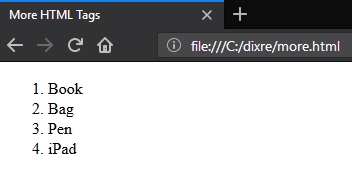
” file. Try opening the file with any web browser of your choice. Figure 6.3 shows the new ordered list items displayed on a web browser.
Figure 6.3: Ordered list items displayed on a web browser.
The ordered list tag <ol
> displays each of its list item <li
> in numerical order i.e. 1, 2, 3…and so on. Next, let's see how unordered list works.
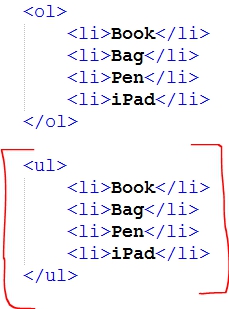
By making a slight change to the ordered list items we initially created, we should have the unordered list items ready. Figure 6.4 shows a new unordered list items added below the ordered list tag.
Figure 6.4: Unordered list items highlighted.
From Figure 6.4, observe that the only difference between the ordered list and the unordered list is that the list items <li
> were wrapped inside the <ol
> tag. For the unordered list, the <li
> tags were wrapped inside an unordered list <ul
> tag. Whichever kind of list items you desire to create, you are going to have to list your items within these pairs of tags <li
></li
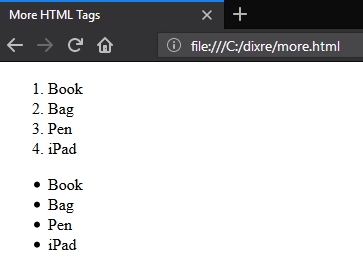
>. Figure 6.5 shows both the ordered list and the new unordered list items displayed on a web browser.
Figure 6.5: Ordered and Unordered list items displayed on a web browser.
NOTE:
You may not always have to use the <ol> tag and the <ul> tag at the same time. Both tags were used to show how they differ from each other.
DIV Tag
Unlike the previous tags we've used before, the <div
> tag does not have a specific meaning. It is mostly used for grouping other HTML tags. There will be more explanation on this when we start working on HTML layouts. But for now, let's have a general idea on how the <div
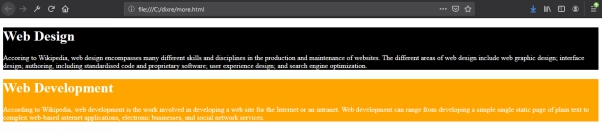
> tag works. Let's say we want to display a group of news articles with their headlines, just like what we have on Figure 6.6.
Figure 6.6: Sample articles displayed on a web browser.
We can achieve something like this by wrapping both the <h1
> tag and the <p
> within a <div
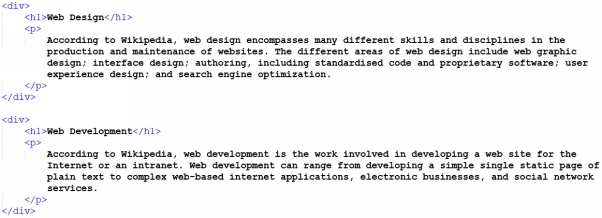
> tag. Figure 6.7 shows the HTML code that can be used to achieve this.
Figure 6.7: HTML codes for sample articles.
This HTML code was written inside the same file more.html which we initially created.
NOTE:
The previous HTML codes we wrote was removed.
You can create a new file and write the new code in Figure 6.7 or better still, maintain the same file and write the new code after the unordered list tags we had created. Both options will work.
NOTE: The text used within the <p> tags where gotten from Wikipedia (you can write anything within the <p> and <h1> tags). Just make sure the tags are used appropriately.
After writing the code, refresh your web browser, or open the file from the folder where you saved the new code you wrote and you should see something similar to what we have on Figure 6.6.
You might be wondering how these tags are grouped. The only way we can see the differences between the two groups of <div
> tags we just created is to apply some CSS to them i.e. Cascading Style Sheet. CSS is a topic for another chapter, so don't be too concerned about how the modifications made on Figure 6.8 works. In a future chapter, we will get to discuss in depth about how to work with CSS.
Within the opening <div
> tags, use the space bar on your keyboard to give a single space and then add the new CSS code similar to what is on Figure 6.8.
Figure 6.8: Inline style-sheet applied to a <div
> tag.
Make the changes on the opening <div
> tags by adding a “style“ attribute to it. Also observe the spaces and semi-colons “;” on each of the CSS properties we used (background-color and color). Try viewing the same page on a web browser. Figure 6.9 shows what the page should look like on a web browser.
NOTE:
A detailed explanation will be made on HTML attributes as we progress.
Figure 6.9: Background and text color applied to HTML elements using inline styling.
Figure 6.9 shows the differences between the two groups of <div
> tags that we worked on with the help of some CSS we applied. This simple example may provide a better idea on how <div
> tags work. But in case you are still having difficulty understanding how the <div
> tag works, just hold on for a chapter ahead where we will be working on HTML layouts. By then you should be comfortable using <div
> tags.
Block Level Elements and Inline Elements
Before we consider the next set of tags, it is important to highlight the differences between block level elements and inline elements in HTML. You may hear about them or use these groups of elements as you write more HTML codes. Therefore, an understanding on how they work is important.
NOTE: HTML elements are a collection of both opening and closing tags with some contents in between them. Figure 6.10 highlights some examples of HTML elements.
Figure 6.10: Examples of HTML elements.
All the HTML tags that we have used so far such as the <p
> tag etc. can be grouped into either inline or block elements. What differentiates both elements is that, a block element occupies the entire width of its container, while an inline element only takes up space based on the length of the content it contains.
NOTE:
There are more block elements in HTML than inline elements. Examples of block elements in HTML are the header one to six tags (<h1></h1> to <h6></h6>), paragraph <p> tags, <div> tags etc. Meanwhile, an example of an inline tag in HTML is the <span> tag which will be discussed in the next section.
We are going to apply some CSS to some new sets of block and inline elements in our HTML file to clearly see the differences between both elements. Add the new HTML codes on Figure 6.11 to any of your HTML files. “more.html” file will be used in this case.
Figure 6.11: CSS Rules Applied to Block and Inline Elements.
Figure 6.12 shows how the new HTML elements will look like on a web browser.
Figure 6.12: <h1
> and <span
> elements displayed on a web browser.
By now, you should be able to tell the difference between block level elements and inline elements.
SPAN Tag
Just as we had used the <div
> tags to group some HTML elements such as the <p
> and <h1
> tags and apply some CSS to them, the <span
> tag can also be used for styling a specific set of contents within a HTML tag.
Let's start by adding a <span
> tag in between some text within the first <p
> tag we initially added to the “more.html” file. Figure 6.13 shows the new <span
> tags added within the paragraph in our first <div
> tags.
Figure 6.13: <span
> tag added within a <p
> tag.
What happens when you add a <span
> tag within your <p
> tag? nothing. When you refresh the same page on a web browser, nothing happens. To see the effect of the new <span
> tag that was added, apply some CSS to it, something similar to what we did for the <div
> tag. This time, instead of using the background-color property, a color property will be used. Adjust your HTML code to look like what we have in Figure 6.14.
Figure 6.14: A CSS color property is added to the highlighted <span
> tag.
NOTE: You shouldn't be too concerned about how the CSS codes we have been using works as noted earlier. We are only using CSS here to highlight some important points. We would discuss more on CSS in another chapter.
After making the new changes, you should have something similar to Figure 6.15.
Figure 6.15: The newly styled <span
> tag within a <p
> is displayed on a web browser.
Summary
In this chapter, we did a lot with some new HTML tags. As we progress, other new HTML tags will be introduced. In the next chapter, you will be learning about how to add some images to your web pages using the image tag.