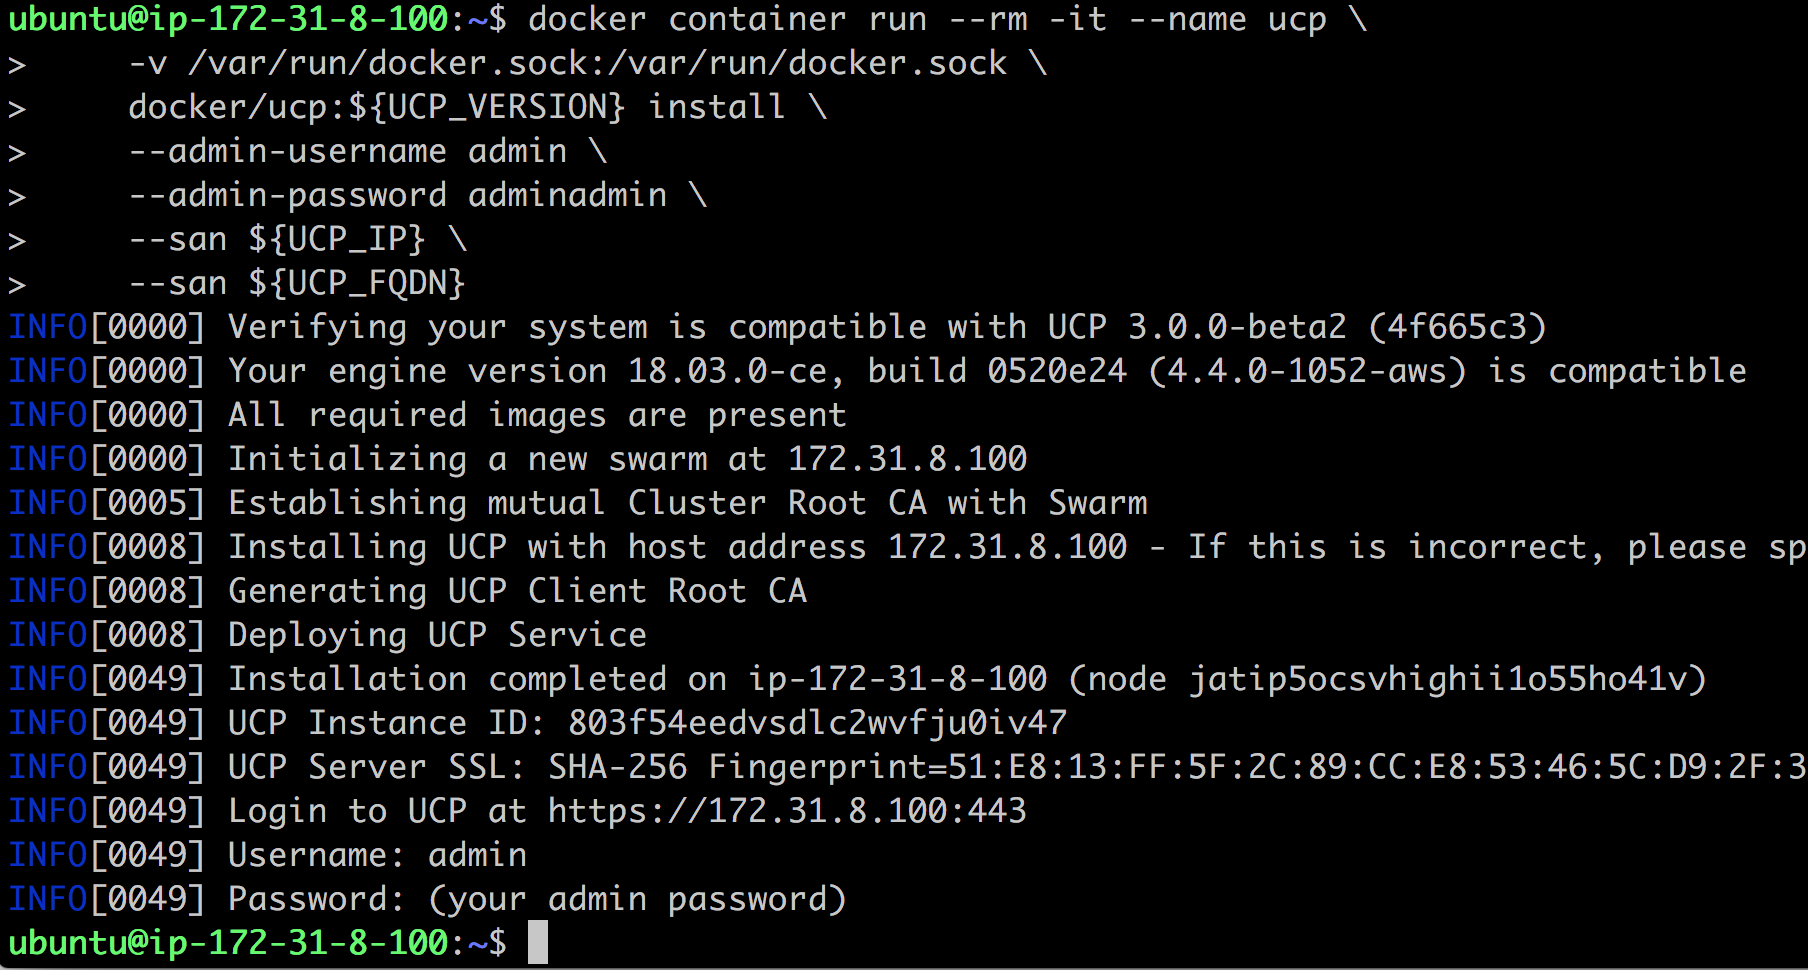
We need to set a few environment variables, as follows:
$ export UCP_IP=<IP address>
$ export UCP_FQDN=<FQDN>
$ export UCP_VERSION=3.0.0-beta2
Here <IP address> and <FQDN> are the public IP address and the public DNS name of the AWS EC2 instance we're installing in UCP.
After that, we can use the following command to download all the images that UCP needs:
$ docker run --rm docker/ucp:${UCP_VERSION} images --list \
    | xargs -L 1 docker pull
Finally, we can install UCP:

Now we can open a browser window and navigate to https://<IP address>. Log in with your username, admin, and password, adminadmin. When asked for the license, upload your license key or follow the link to procure a trial license.
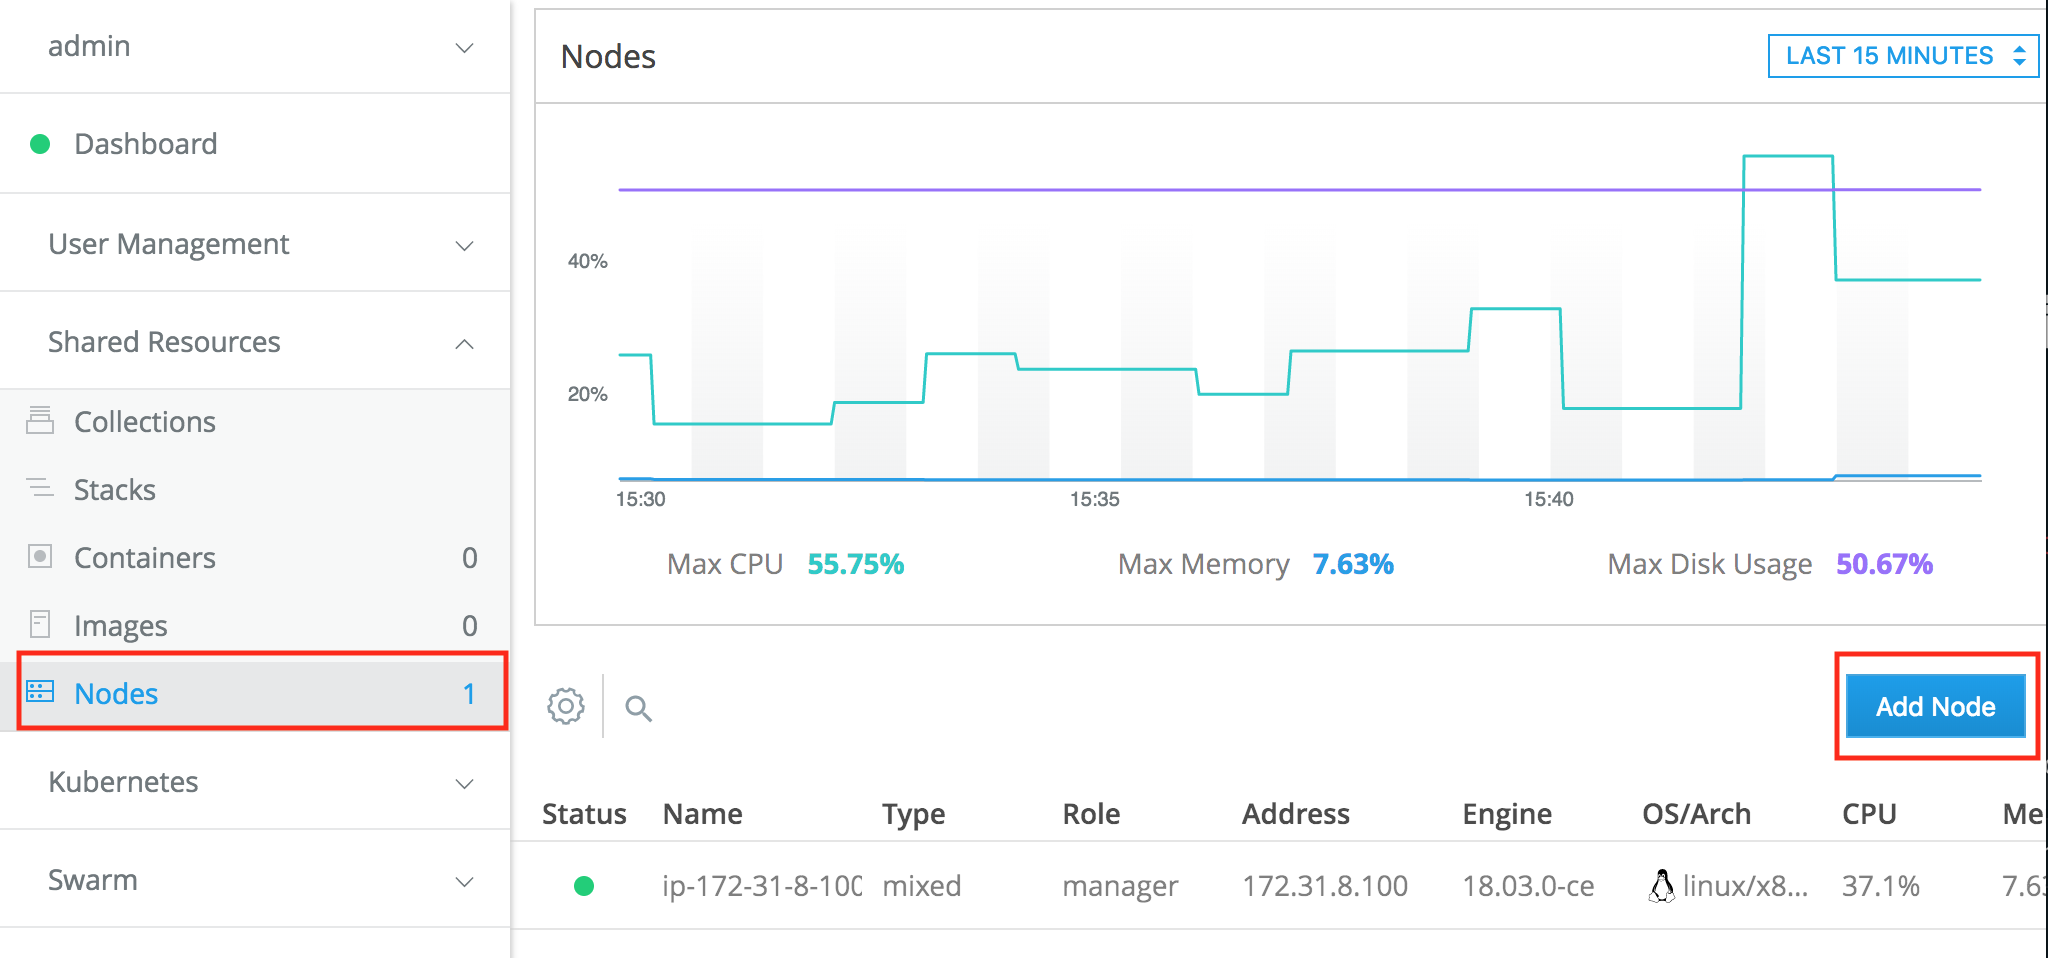
Once logged in, on the left-hand side under the Shared Resources section, select Nodes and then click on the Add Node button:

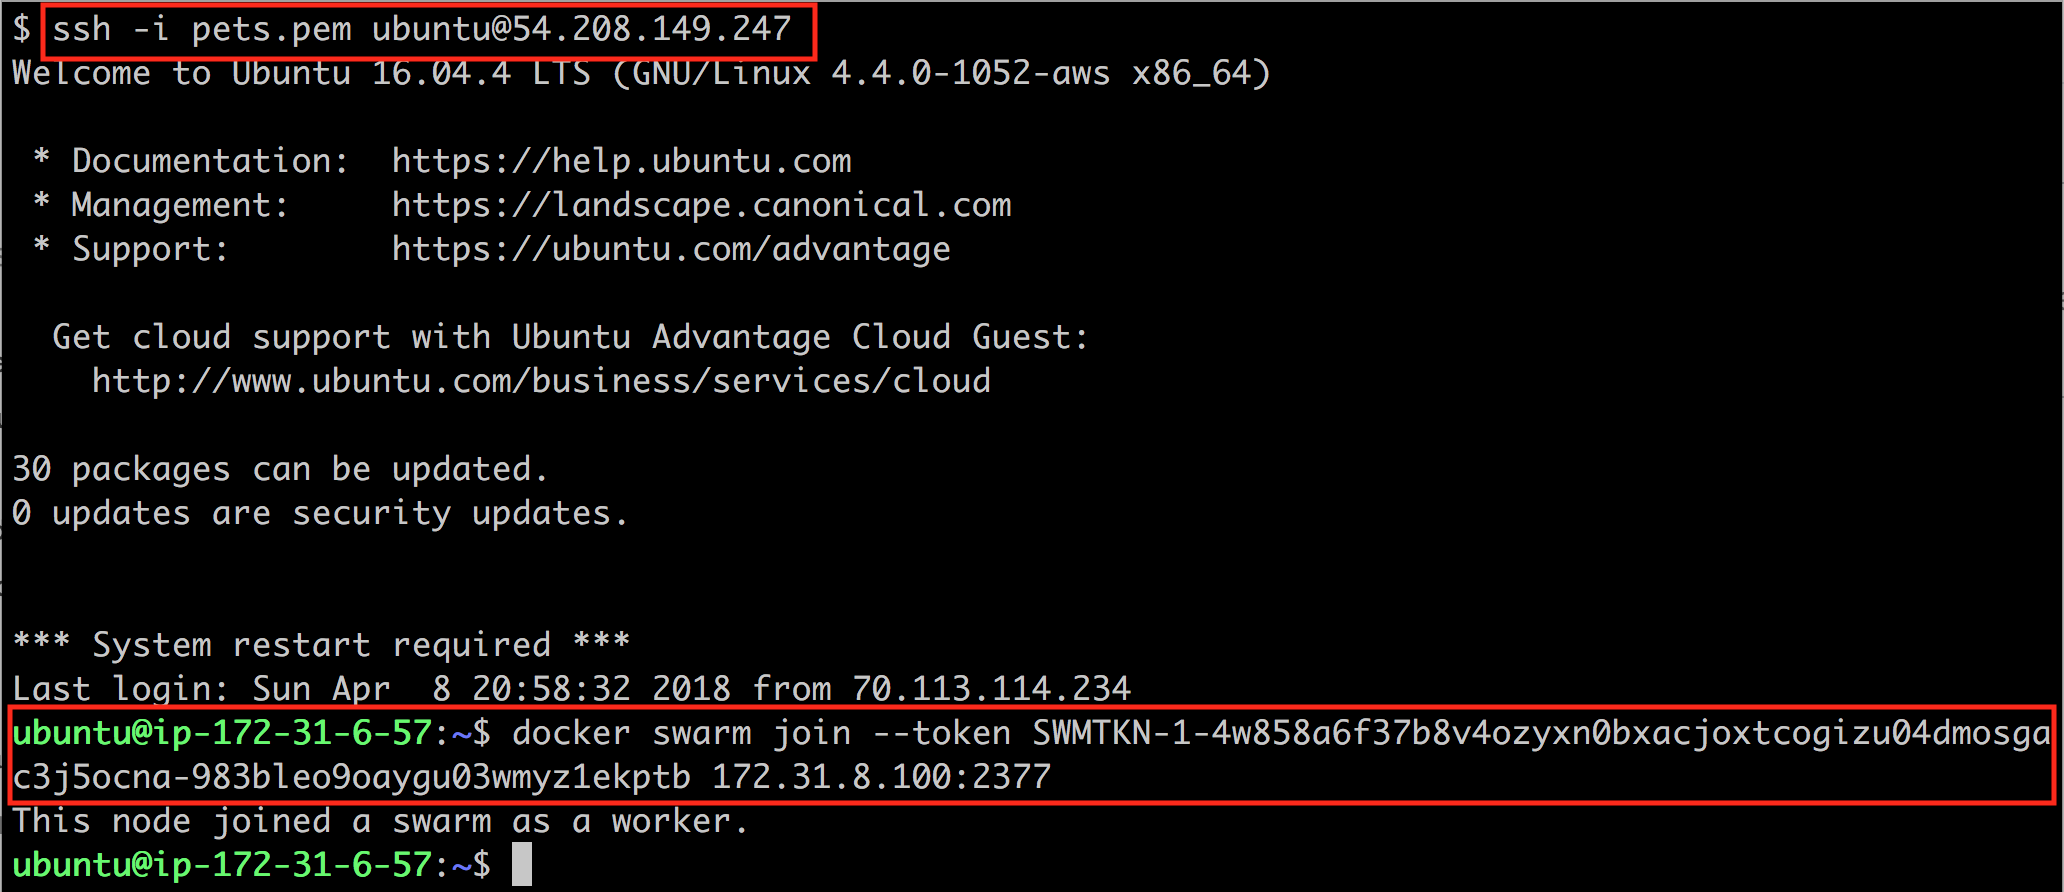
In the subsequent Add Node dialog box, make sure that the node type is Linux and the node role, Worker is selected. Then copy the docker swarm join command at the bottom of the dialog box. SSH into the other two VMs you created and run this command to have the respective node join the Docker Swarm as a worker node:

Back in the web UI of UCP, you should see that we now have three nodes ready, as shown here:

By default, worker nodes are configured so that they can only run the Docker Swarm work load. This can be changed in the node details though. In this, three settings are possible—Swarm only, Kubernetes only, or mixed workload. Let's start with Docker Swarm as the orchestration engine and deploy our pets application.