Intermediate Projects
Geometric Pillow

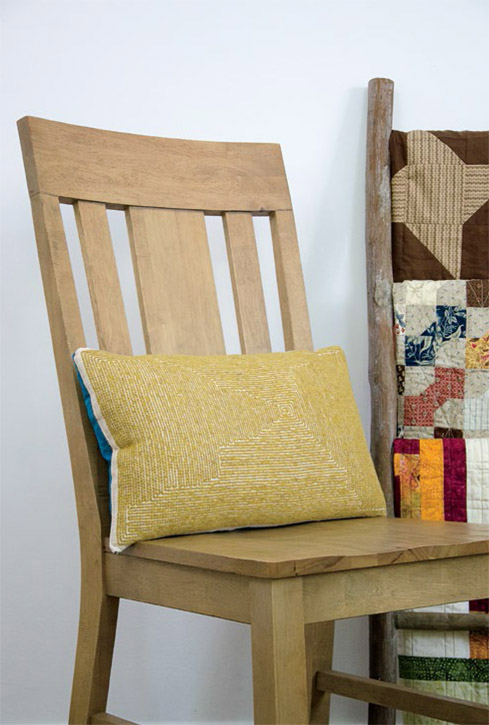
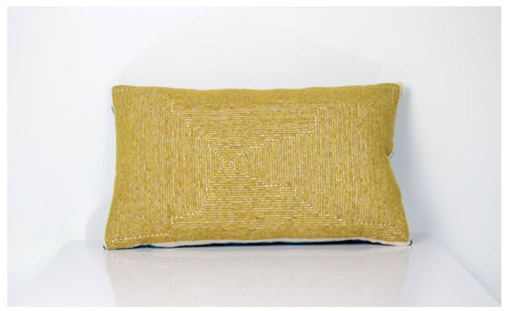
Until now, we’ve taken advantage of the pile and embroidery sides of punch needle. This pillow, however, takes advantage of the negative space when skipping rows with Fine punch needles. I used a #8 Fine Oxford Punch Needle for a luscious pillow. Backed with a bright blue backing, this pillow is sewn and stuffed to make a standard but quick-to-stitch throw pillow.
FINISHED SIZE
20 × 10 in. (50.8 × 25.4 cm)
TOOLS AND MATERIALS
› 26 in. (66.0 cm) square piece of monk’s cloth (24 threads/inch)
› Oxford Punch Needle in size #8 Fine to achieve a ½ in. (1.3 cm) pile height
› Approximately 220 yd. (201.2 m) worsted weight yarn in gold
› 21 × 11 in. (53.3 × 27.9 cm) backing fabric
› Matching thread
› Sewing machine or sewing needle
› Fiberfill
› Scissors
INSTRUCTIONS
- - - - - - - - - - - - - - - - - - - - - - -
Getting Started
1. This pillow does not have a template to trace. Instead, trace an outline on your monk’s cloth, taking care to trace your marking tool over each hole to guarantee a straight line. Create a rectangle to measure 20 × 10 in. (50.8 × 25.4 cm).
2. Beginning at the bottom right corner, begin punching up the shorter side, skipping every other hole. It is important to watch your flat embroidery stitches, as these will face out. When you reach the top of the rectangle, turn the tool 90 degrees and punch along the longer edge of rectangle. Continue in this method until four total rounds of punching have been worked.
3. Now, begin improvising your stitches. Work small sections, rotating the tool 90 degrees to create sharp edges. Follow the photo for reference. When one area is full, simply begin another, working side to side, center out, and outside in. Work until entire rectangle is filled in.
Finishing
1. When finished, remove the cloth from the frame and lay flat with the pile side facing upward. Iron with steam to flatten.
2. Using your scissors, trim the base cloth around the design with a 2 in. (5.1 cm) seam allowance all the way around.
3. With right sides of fabric and punched piece facing and using a zipper foot on your sewing machine, sew a ½ in. (1.3 cm) seam around sides and bottom of pillow, leaving a small opening.
4. Turn pillow right side out. Stuff with fiberfill. Hand or machine sew the small opening closed.
Golden Rainbow Wall Hanging
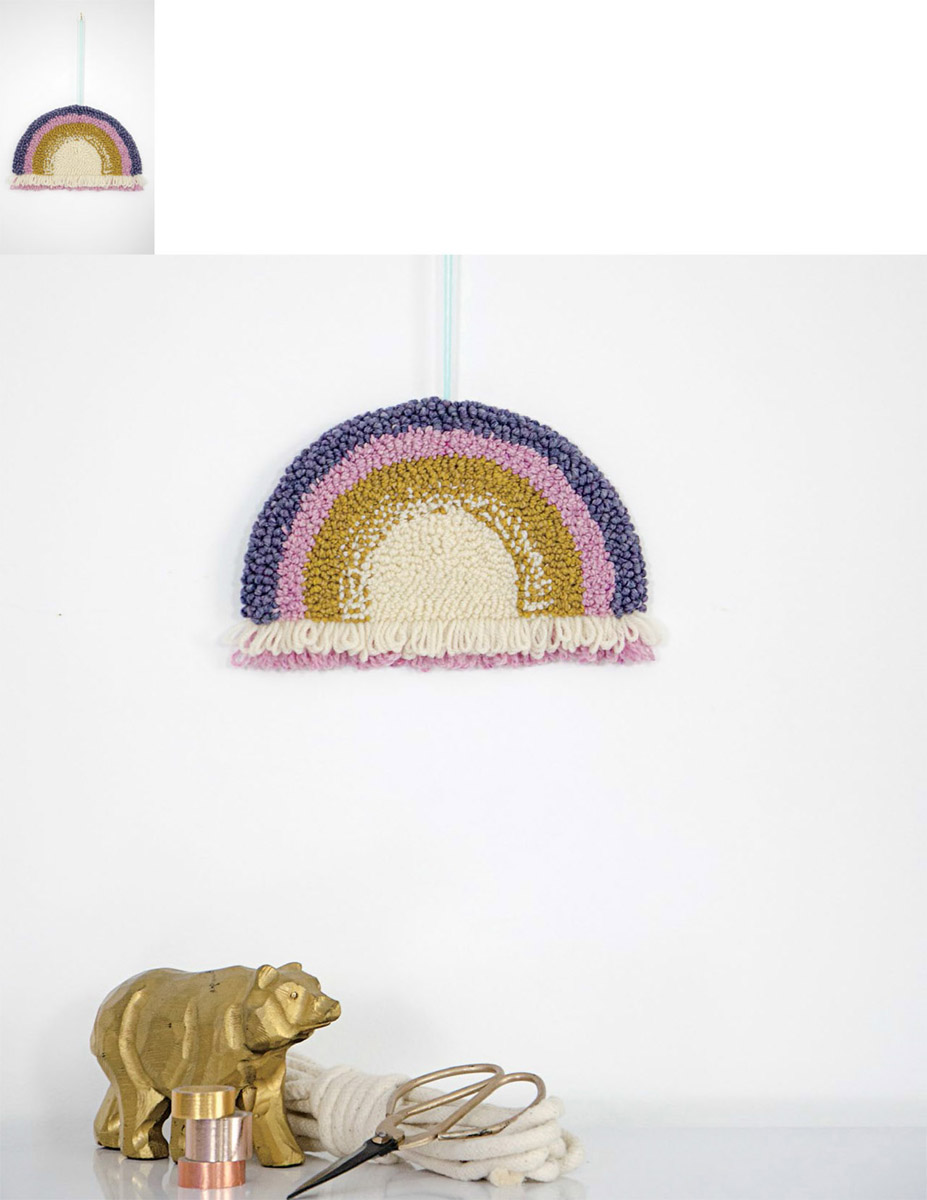
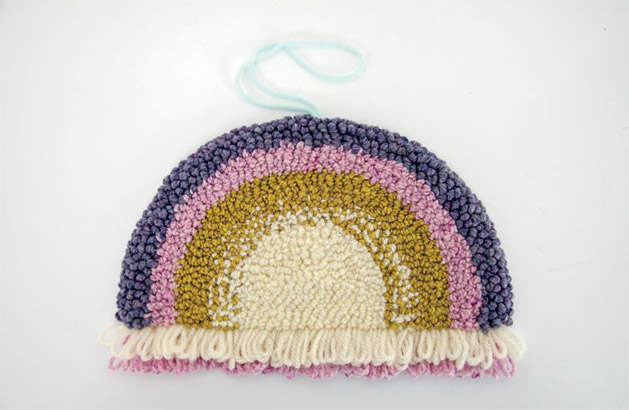
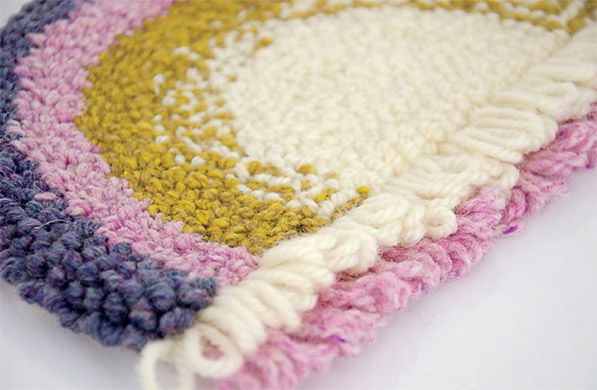
A small, whimsical wall hanging, this piece uses multiple strands of worsted weight yarn held together to create a slight gradient effect. Longer loops near the bottom of the rainbow are worked by using an adjustable punch needle in two colors.
FINISHED SIZE
12 × 7 in. (30.5 × 17.8 cm)
TOOLS AND MATERIALS
› 18 in. (45.7 cm) square piece of monk’s cloth (24 threads/inch)
› Oxford Punch Needle in size #10 Regular to achieve a ¼ in. (0.6 cm) pile height
› Adjustable punch needle
› Approximately 50 yd. (45.7 m) each of 4 or 5 various worsted weight yarns
› Scissors
› 12 in. dinner plate
› Graphite pencil
INSTRUCTIONS
- - - - - - - - - - - - - - - - - - - - - - -
Getting Started
1. Lay dinner plate face down on monk’s cloth and trace half to create the half circle shape. Remove plate, draw a straight line, taking care to follow holes in monk’s cloth, from end to end of half circle. Draw 2 evenly spaced lines across the bottom for the longer loops you see in the photo and 4 evenly spaced lines to differentiate colors in rainbow.
2. Stretch cloth over desired frame, taking care to not distort the image. Begin stitching, following photo for color reference. To make the longer loops on the front of the tapestry, use the largest pile setting on the adjustable punch needle tool.
3. Work entire tapestry, changing colors as needed. In the section, as pictured, between the gold and white, use a single strand of white and a single strand of gold to achieve the mottled look.
4. Cut a 20 in. (50.8 cm) length of yarn. Attach to the monk’s cloth at the center of the rainbow near the top.
Finishing
1. When finished punching, remove the cloth from the frame and lay flat with the pile side facing upward. Iron with steam to flatten.
2. Using your scissors, trim the base cloth around the design with a 2 in. (5.1 cm) seam allowance all the way around.
3. Turn the piece over so that the back of the design is now facing you. Fold the seam once to create a 1 in. (2.5 cm) fold, fold again, pin in place, bind cloth to back of piece. Directions for binding can be found on page 26.
Half Square Triangle Rug

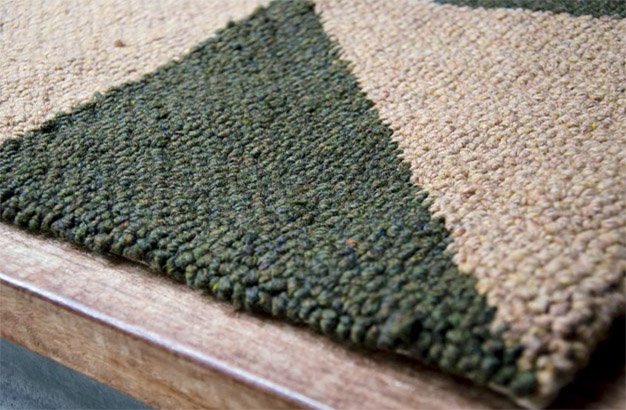
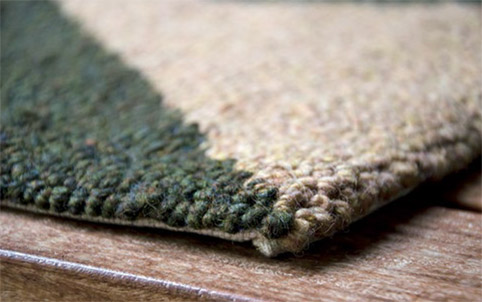
The beauty of punch needle hooking is in the rugs. This full-size welcome mat would be perfect for an entryway or a kitchen. Large blocks of half square triangles in two colors offer a modern and graphic look with a touch of rustic charm. Try punching this rug in colors that will fit your home décor.
FINISHED SIZE
20 × 30 in. (50.8 × 76.2 cm)
TOOLS AND MATERIALS
› 36 in. (91.4 cm) square piece of monk’s cloth (24 threads/inch)
› Oxford Punch Needle in size #8 Fine to achieve a ½ in. (1.3 cm) pile height
› 330 yd. (301.8 m) bulky weight yarn in Color A
› 330 yd. (301.8 m) bulky weight yarn in Color B
› Sewing needle and thread
› Scissors
INSTRUCTIONS
- - - - - - - - - - - - - - - - - - - - - - -
Getting Started
1. This rug does not have a template to trace. Instead, trace an outline on your monk’s cloth, taking care to trace your marking tool over each hole to guarantee a straight line. Create a rectangle to measure 20 × 30 in. (50.8 × 76.2 cm). Draw lines at each 10 in. (25.4 cm) intersection across and down to create six individual 10 in. (25.4 cm) squares. Draw diagonal lines from corner to corner to create triangle units.
2. Plan your punch sequence. Remember, if using a frame smaller than the full size of your rug, this will need to be punched in sections. To do so, lay your frame on top of your rug to get a general idea of how you’ll need to punch. I used a large framethat required moving the rug only 3 times.
3. To begin punching, thread tool and trace the diagonal line through one 10 in. (25.4 cm) square. Punch around the perimeter of the triangle, continuing to center, taking care to stagger your stitches. Maintain your careful 4 spi throughout. It is common to pack tightly as you near the center of the triangle; to prevent this issue, take frequent breaks to check your work on both sides.
4. Continue punching, alternating the colors of each block to create the pattern as shown in the photos. Alternatively, you can reverse the directions of the colors to achieve a unique look.
Finishing
1. When finished, remove the cloth from the frame and lay flat with the pile side facing upward. Iron with steam to flatten.
2. Using your scissors, trim the base cloth around the design with a 2 in. (5.1 cm) seam allowance all the way around.
3. Bind rug following directions on page 26.
Large Tapestry Wall Hanging

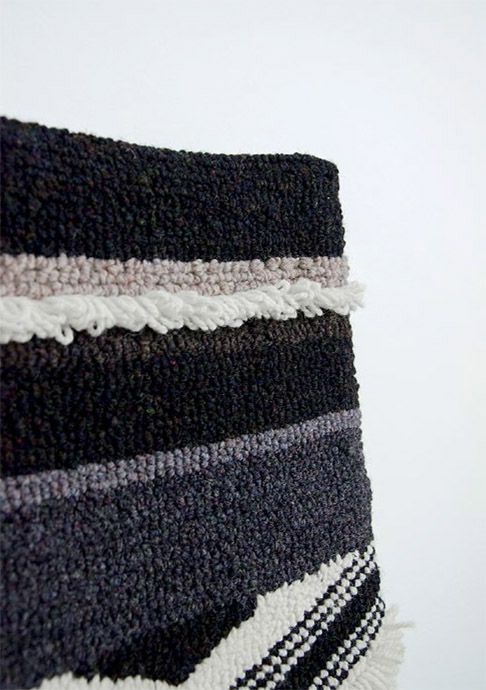
A challenging and large wall hanging, this piece is created using the stacked method throughout and an adjustable punch needle. Longer loops at the bottom are sewn and trimmed afterward to give this piece a modern look and feel. Who says tapestries must be woven? Sometimes they are punched!
FINISHED SIZE
14 × 21 in. (35.6 × 53.3 cm)
TOOLS AND MATERIALS
› 28 in. (71.1 cm) square piece of linen
› Pattern template, page 92
› Oxford Punch Needle in size #10 Regular to achieve a ¼ in. (0.6 cm) pile height
› Adjustable punch needle
› Approximately 1,000 yd. (914.4 m) total of various chunky yarns in grays and blacks
› Scissors
INSTRUCTIONS
- - - - - - - - - - -
A special note: This piece is worked on linen. That’s because monk’s cloth tends to stretch over time. This is a large and heavy tapestry, so using linen will keep the rug in great shape.
- - - - - - - - - - -
Getting Started
1. Transfer the template design to the cloth using preferred method.
2. Stretch cloth over desired frame, taking care to not distort the image. Begin stitching, following photo for color reference. Template will include sections with a single dotted line; this is where you will use the adjustable punch needle to make the longer loops on the front of the tapestry. For this, use the largest pile setting on the adjustable tool.
3. Work entire tapestry, changing colors as needed.
4. Cut a number of 20 in. (50.8 cm) lengths of yarn. Attach to bottom of tapestry by weaving through the holes of linen.
Finishing
1. When finished, remove the cloth from the frame and lay flat with the pile side facing upward. Iron with steam to flatten.
2. Using your scissors, trim the base cloth around the design with a 2 in. (5.1 cm) seam allowance all the way around.
3. Turn the piece over so that the back of the design is now facing you. Fold the seam once to create a 1 in. (2.5 cm) fold, fold again, pin in place, and bind cloth to back of piece. Directions for binding can be found on page 26.
4. Trim ends of fringe at bottom of tapestry evenly across.
Hanging
This piece was affixed to the wall using two small nails placed through the wool and linen in both the upper right and the left corners. If desired, a dowel can be affixed to the back as for the Half Square Rectangle Wall Hanging.
Ocean Waves
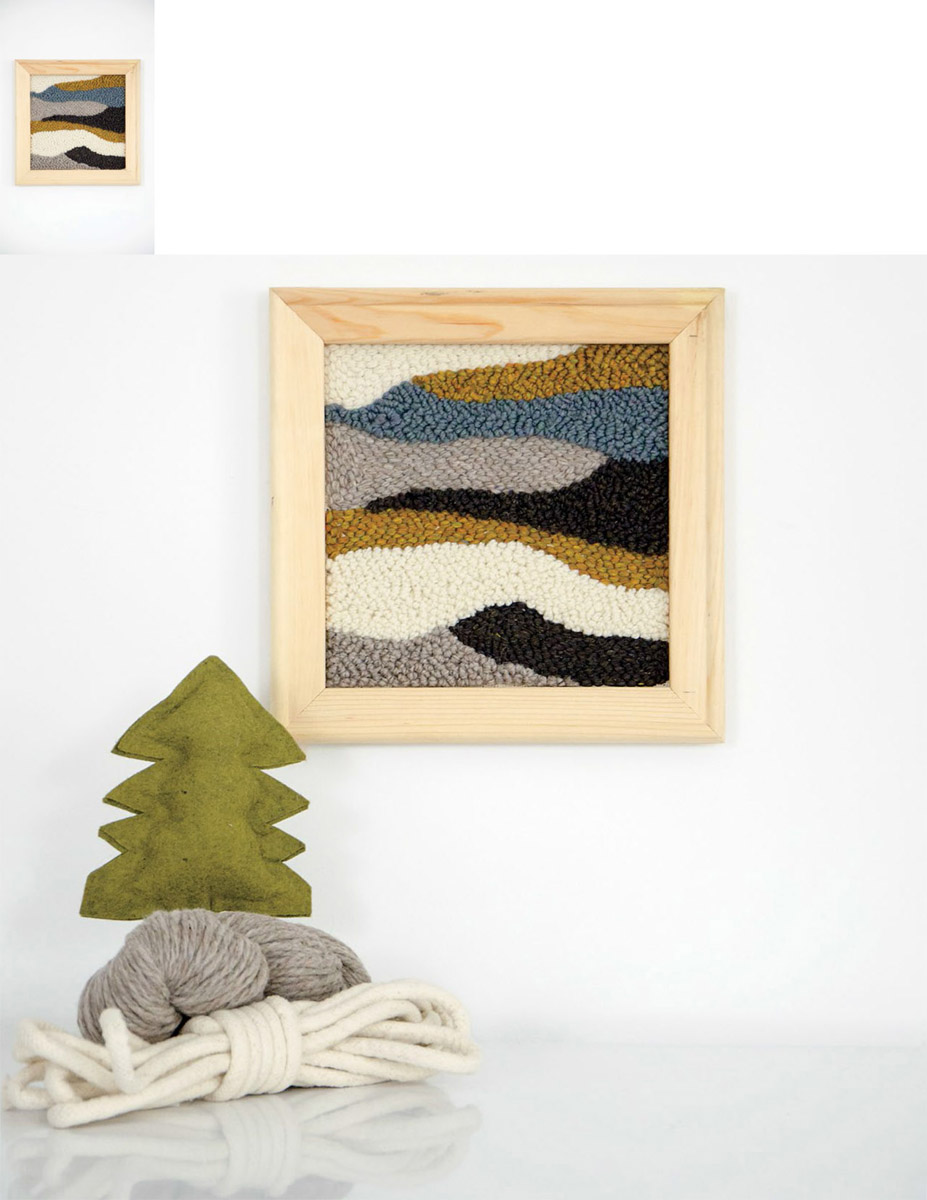
One of my favorite projects in this book, this piece is stitched organically on both sides of the frame to create a unique dimensional piece. Chunky weight yarn is used in my version, but by changing the size punch needle and weight of yarn, you can create a wall hanging perfect for your home or office.
FINISHED SIZE
12 × 12 in. (30.5 × 30.5 cm)
TOOLS AND MATERIALS
› 12 in. (30.5 cm) square piece of monk’s cloth (24 threads/inch)
› Marking pen or pencil
› Adjustable punch needle tool or Oxford Punch Needle #10 Regular to achieve a ¼ in. (0.6 cm) pile height
› Approximately 25 yd. (22.9 m) each of 5 or 6 colors chunky weight yarn
› Scissors
› 12 in. (30.5 cm) stretched canvas
› Staple gun
INSTRUCTIONS
- - - - - - - - - - - - - - - - - - - - - - -
Getting Started
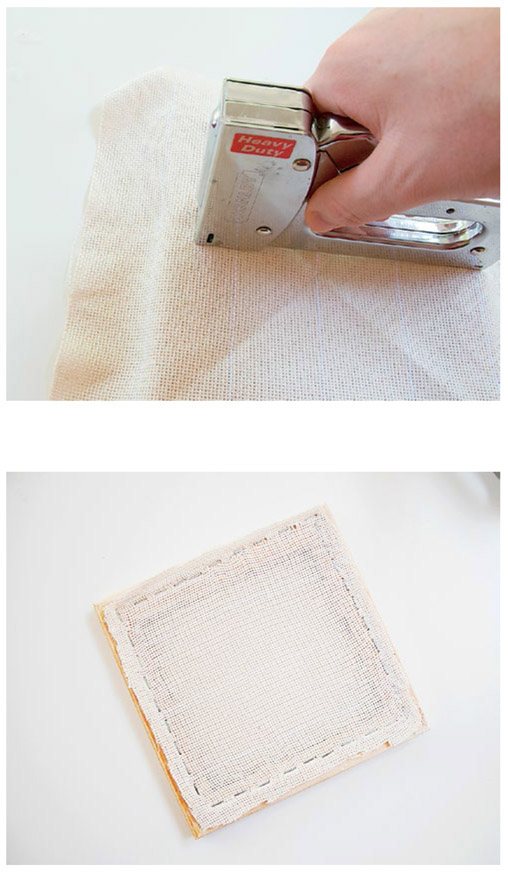
1. Remove stretched canvas from frame by removing staples. Take care to preserve the front of the frame for display purposes.
2. Fold your monk’s cloth in half diagonally, and then in half the opposite way. Finger press the corner to mark the center of the fabric.
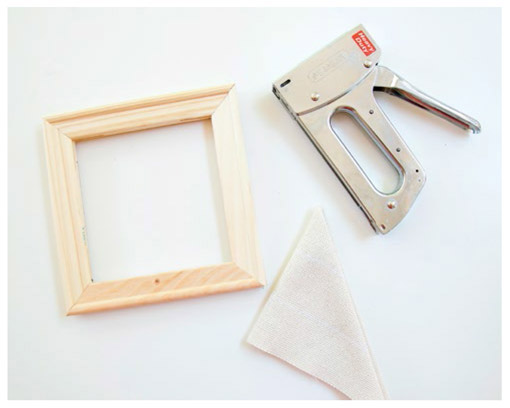
3. Position the frame, right side up, in the center of the monk’s cloth.
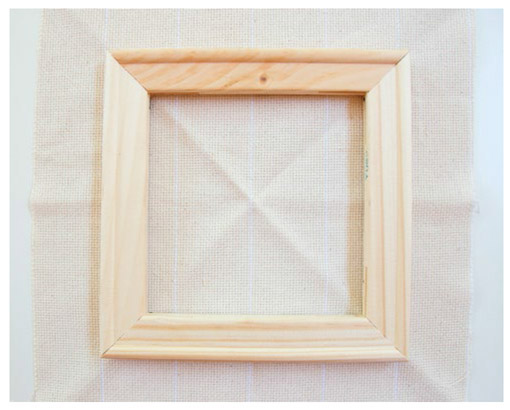
4. Flip this over and place a single staple in the center of one side. Pulling the fabric as taut as possible, place a staple in the opposite side of frame. Remember, the fabric must be drum tight.
5. Repeat step 4 for the remaining 2 sides. You should now have 4 staples on your frame and see the holes in the monk’s cloth opening up.
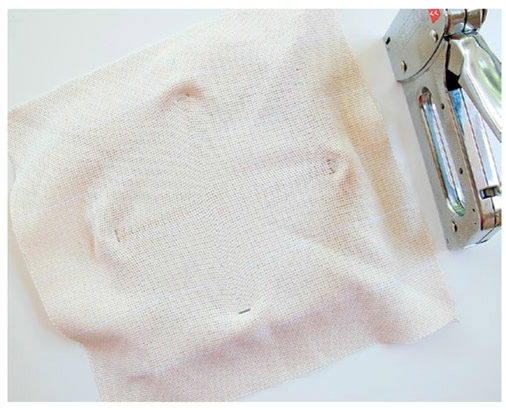
6. Continue around frame in this same manner.
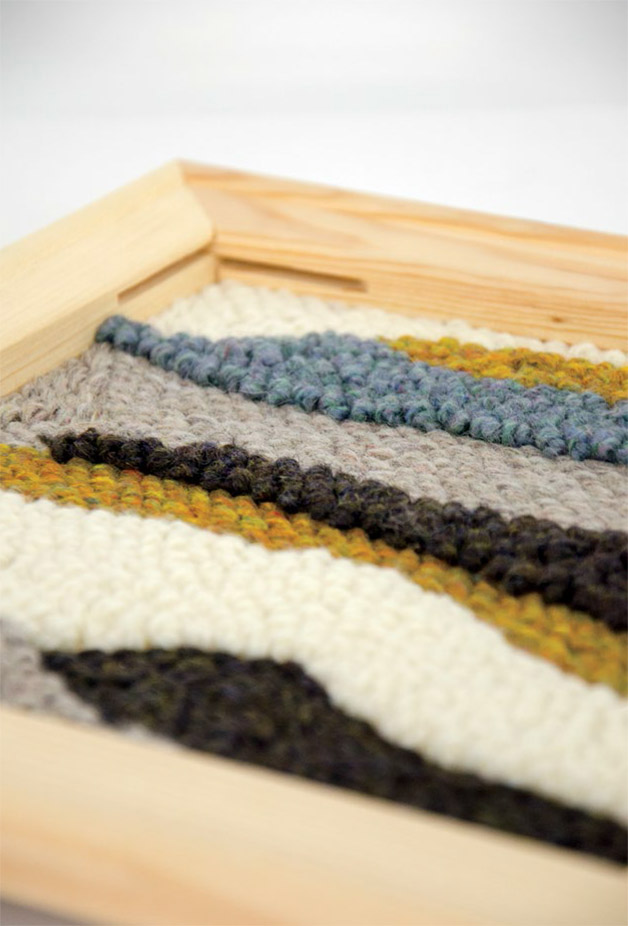
7. On the wrong side of the frame (the side that will face the wall when hung), draw wavy lines beginning on the right and working to the left. Take care that the lines don’t look too planned out. Improvisation is the key to simplicity.
8. Begin punching, filling in different sections until just 2 or 3 sections remain. Try to space these sections out to increase the dimensional effect.
9. Turn the piece over so that the right side is facing you, and punch in the remaining areas. Punching on both sides gives a dimensional look because of the resulting embroidery and pile stitches. Take care to watch your stitches and ensure that they are nice and neat.
Sawtooth Star Rug
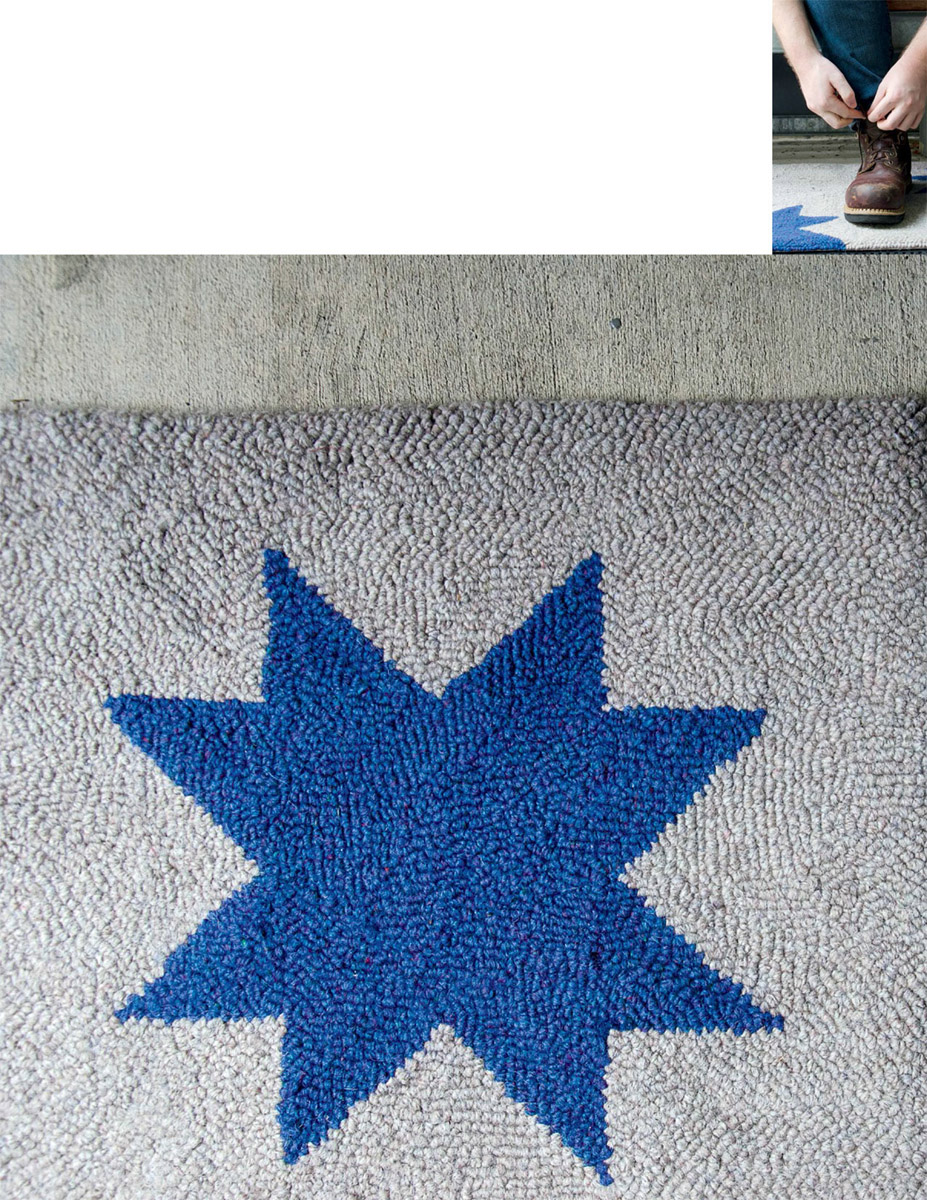
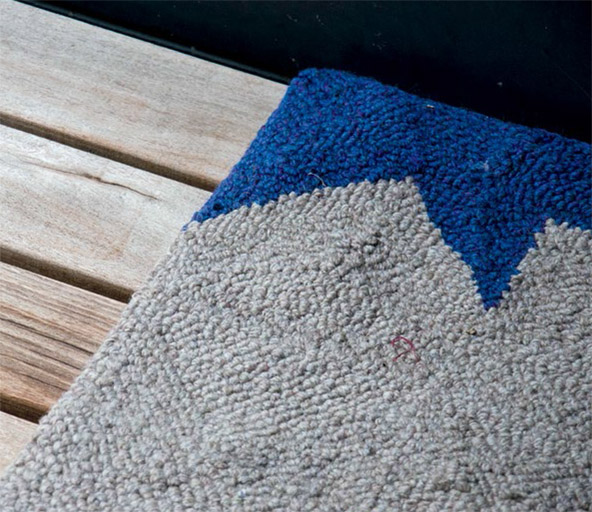
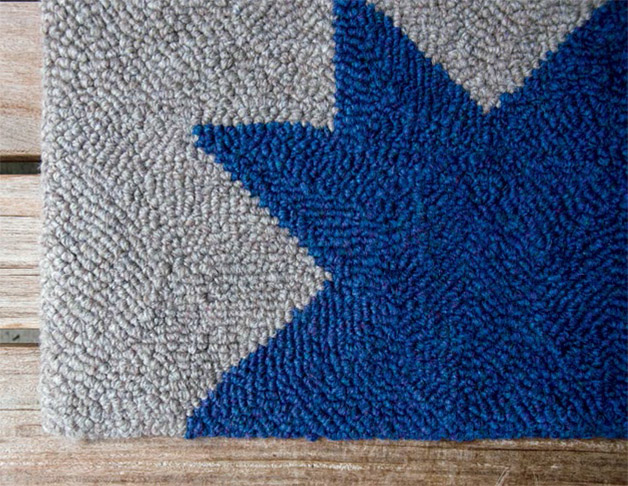
A large and impactful rug, this Sawtooth Star Rug will test all of the skills you’ve acquired up to this point. Its striking blue stars on the serene gray background make for a truly stunning piece that you’ll think twice about putting on the floor. This project uses the full width of the monk’s cloth straight from the bolt and requires a bit of moving on your frame. The overall design is drawn by hand, following a grid, as in the Half Square Triangle Rug. Take care to trace the holes in the monk’s cloth to produce a clean and straight image.
FINISHED SIZE
24 × 36 in. (61.0 × 91.4 cm)
TOOLS AND MATERIALS
› 42 in. (106.7 cm) square piece of monk’s cloth (24 threads/inch)
› Oxford Punch Needle in size #8 Fine to achieve a ½ in. (1.3 cm) pile height
› Approximately 330 yd. (301.8 m) bulky weight yarn in blue
› Approximately 660 yd. (603.5 m) bulky weight yarn in gray
› Sewing needle and thread
› Scissors
INSTRUCTIONS
- - - - - - - - - - - - - - - - - - - - - - -
Getting Started
1. This rug does not have a template to trace. Instead, trace an outline on your monk’s cloth, taking care to trace your marking tool over each hole to guarantee a straight line. Create a rectangle to measure 24 × 36 in. (61.0 × 91.4 cm). Draw lines 3 in. (7.6 cm) apart, across and down, to create 3 in. (7.6 cm) squares. Draw diagonal lines from corner to corner to create triangle units, as shown in the illustration.


2. Plan your punch sequence. Remember, if using a frame smaller than the full size of your rug, this will need to be punched in sections. To do so, lay your frame on top of your rug to get a general idea of how you’ll need to punch. I used a large frame, which required moving the rug only 3 times.

3. To begin punching, thread tool with star color and trace the diagonal line through one 3 in. (7.6 cm) square. Punch around perimeter of triangle, continuing to center, taking care to stagger your stitches. Maintain your careful 4 spi throughout. It is common to pack tightly as you near the center of the triangle; to prevent this issue, take frequent breaks to check your work on both sides.
4. Punch all stars first, and then fill in the background using your preferred method (stacked piles or staggered piles).
Finishing
1. When finished punching, remove the cloth from the frame and lay flat with the pile side facing upward. Iron with steam to flatten.
2. Using your scissors, trim the base cloth around the design with a 2 in. (5.1 cm) seam allowance all the way around.
3. Bind rug following directions on page 26.
Striped Purse

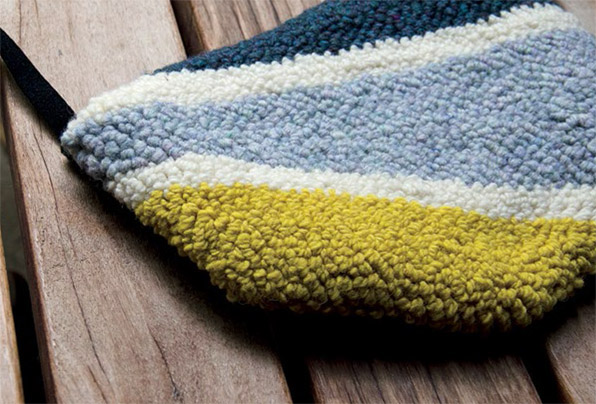
I started my design career with purses, and I was thrilled to design a punch needle version. This purse is worked in an interesting half octagonal shape, with striking graphic lines from side to side. A simple felt backing, easy-to-apply snaps, and leather cording complete this fun-to-stitch project. I highly recommend working with a sewing machine for this one. It’s an extra tool but definitely worth the added effort.
FINISHED SIZE
10.5 × 8 in. (26.7 × 20.3 cm)
TOOLS AND MATERIALS
› 18 in. (45.7 cm) square piece of monk’s cloth (24 threads/inch)
› Pattern template, page 93.
› Oxford Punch Needle in size #10 Regular to achieve a ¼ in. (0.6 cm) pile height
› Approximately 100 yd. (91.4 m) each of 3 or 4 colors worsted weight yarns
› 11 in. (27.9 cm) square black craft felt
› 2 yd. (1.8 m) of ½ in. (1.3 cm) wide leather cord
› Sewing needle and thread
› Scissors
› Dritz Black Size 10 Sew-On Snaps
› Sewing machine (optional)

INSTRUCTIONS
- - - - - - - - - - - - - - - - - - - - - - -
Getting Started
1. Transfer the template design to the cloth using preferred method.
2. Stretch cloth over desired frame, taking care to not distort the image. Begin punching, following photo for color reference.
3. Work entire purse, changing colors as needed.
Finishing
1. When finished, remove the cloth from the frame and lay flat with the pile side facing upward. Iron with steam to flatten.
2. Using your scissors, trim the base cloth around the design with a 2 in. (5.1 cm) seam allowance all the way around.
3. With right side of felt and punched piece facing, and using a zipper foot on your sewing machine, sew a ½ in. (1.3 cm) seam around sides and bottom of purse, leaving top completely open. Trim ¼ in. (0.6 cm) from seam to minimize bulk.
4. Bind just top edge of punched portion of purse. If desired, glue back to prevent snagging. Turn purse right side out.
5. Sew on leather cording at each seam on the left and right. Sew on black snaps approximately 2 inches in from either edge of purse.