Chapter 7
Configuring Internet Information Services
IN THIS CHAPTER
 Configuring a server to use IIS
Working with the default website
Creating your own websites
Internet Information Services (IIS) is the web server that comes with Windows Server. It’s an essential piece of software for hosting public websites, and it’s also a must for any network that includes an intranet with web pages designed to be used by your network users.
In this chapter, you find out how to set up IIS and perform the most common types of maintenance chores, such as creating new websites.
Installing IIS
IIS is a free component of Windows Server, but it’s not installed by default. After you’ve completed the installation of Windows Server, you must add the Web Server Role to enable IIS. The following procedure is for Windows Server 2016, but the procedure for Windows Server 2012 (or 2008, for that matter) is similar:
-
Open the Server Manager; then choose Add Roles and Features.
The Add Roles and Features Wizard comes to life.
-
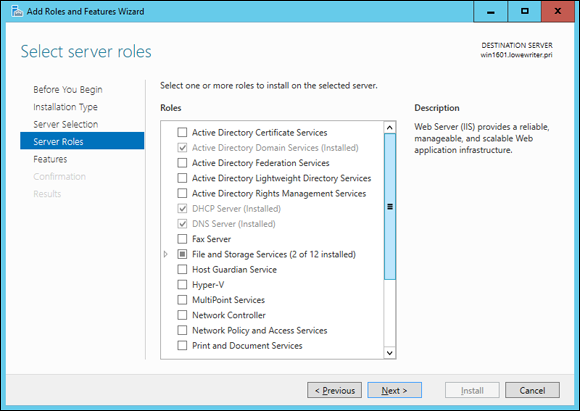
Follow the steps of the Add Roles and Features Wizard up to the Select Server Roles step.
The Select Server Roles page is shown in Figure 7-1.
-
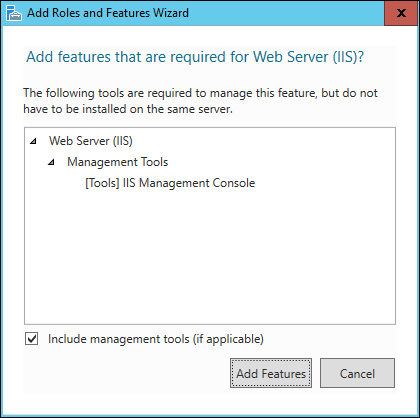
Select the Web Server (IIS) check box and then click Next.
The Add Roles and Features Wizard asks whether you want to install the related IIS Management Console, as shown in Figure 7-2.
-
Click Add Features; then click Next.
The Select Features page appears.
-
Click Next.
The Features page appears.
-
Click Next.
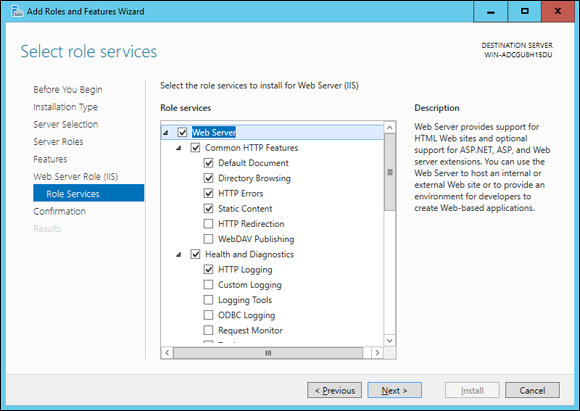
The Web Server Role (IIS) page appears, as shown in Figure 7-3.
-
Click Next.
The Select Role Services page appears, as shown in Figure 7-4. This page lists a variety of optional services that can be configured for IIS.
-
Select the services you want to configure for IIS.
If you want, you can study this list and try to anticipate which features you think you’ll need. Or you can just leave the default options selected.
 You can always return to the Add Roles and Features Wizard to add features you leave out here.
-
Click Next.
A confirmation page appears.
-
Click Install.
The features you selected are installed. This may take a few minutes, so now would be a good time to take a walk.
When the installation finishes, an Installation Results page is displayed to verify that IIS was properly installed.
-
Click Close.
IIS is now installed and ready to use!
Understanding the Default Website
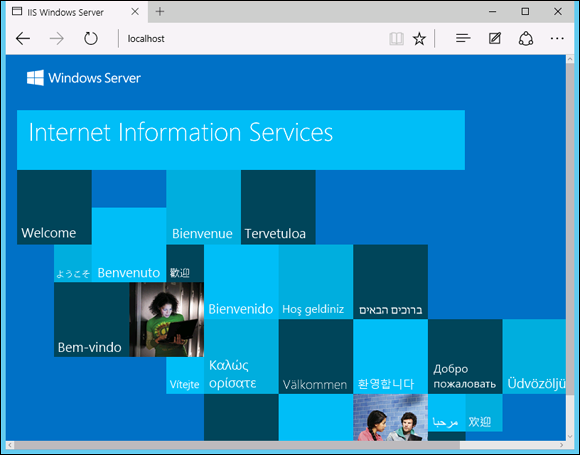
Initially, IIS is configured with a single website, called the default website. You can test that IIS is up and running by logging in as a standard user (not an administrator), opening a browser window on the server and typing http://localhost in the address bar. You can also reach this page by entering your local domain name in the address bar, such as lowewriter.pri. Figure 7-5 shows the standard welcome page that appears when you browse to the default site.
The actual files that make up the default website are stored on the server’s C: drive in a folder named \inetpub\wwwroot. When you browse to the default website without requesting a specific file (simply by localhost in the address bar, for example), IIS looks for the following files, in this order:
default.htmdefault.aspindex.htmindex.htmliisstart.htmdefault.aspx
Initially, c:\inetpub\wwwroot contains just two files: iisstart.htm and welcome.png. The iisstart.htm file is the file that's displayed when you browse to the website; it contains the HTML necessary to display the image contained in the welcome.png file, which is the image you actually see on the page.
You can preempt the standard page for the default website by providing your own file using one of the preceding names. You can follow these steps, for example, to create a simple default.htm file that displays the words Hello World! as the start page for the default website:
- Log in as an administrator, open an Explorer window, and browse to
c:\inetpub\wwwroot.
- Choose File ⇒ New ⇒ Text Document, type default.htm for the filename, and press Enter.
- Right-click the
default.htm file you just created, and choose Open With ⇒ Notepad from the contextual menu.
- Enter the following text in the Notepad window:
<HTML>
<BODY>
<H1>Hello World!</H1>
</BODY>
</HTML>
- Choose File ⇒ Save to save the file and then choose File ⇒ Exit to quit Notepad.
- Log out, log in as a standard user, and open a browser window.
-
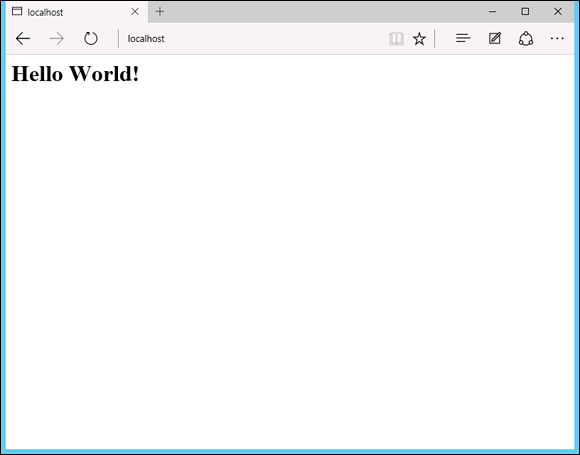
Type http://localhost in the address bar, and press Enter.
The page shown in Figure 7-6 appears.
Creating Websites
IIS has the ability to host multiple websites. This is an extremely useful feature not only for web servers that host public sites, but also for web servers that host internal (intranet) sites. You might create a separate intranet website for Human Resources and assign it the website name hr. Then, assuming that the domain name is lowewriter.pri, users can browse to the website by using the address hr.lowewriter.pri.
Here are the steps:
-
Using Windows Explorer, create a folder in which you will save the files for the new website.
For this example, I created a folder named c:\HR-Web-Site.
-
In Server Manager, choose Tools ⇒ Internet Information Services (IIS) Manager.
The IIS Manager springs to life, as shown in Figure 7-7.
-
In the navigation pane, open the primary domain and Sites node. Then right-click Sites and choose Add Website from the contextual menu.
The Add Website dialog box appears, as shown in Figure 7-8.
-
Enter a name for the website in the Site Name text box.
For this example, I used HR.
-
Click the Browse button (the one with the ellipsis), browse to the folder you created in Step 1, and then click OK.
For this example, I browsed to C:\HR-Web-Site.
-
In the Host Name text box, enter the exact DNS name you want to use for the site.
For this example, I entered hr.lowewriter.pri.
-
Click OK.
The newly created website appears below the Sites node in the IIS Manager, as shown in Figure 7-9.
- Close the IIS Manager.
-
Create a web page to display in the folder you created in Step 1.
For this example, I used Notepad to create a text file named default.htm, with the following text:
<HTML>
<BODY>
<H1>Welcome to the HR Website!</H1>
</BODY>
</HTML>
-
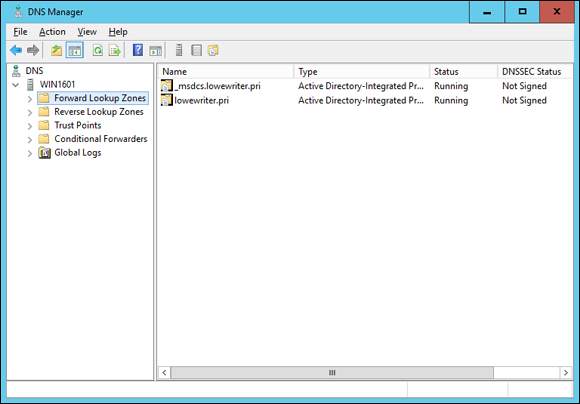
In Server Manager, choose Tools ⇒ DNS.
This brings up the DNS Manager console, as shown in Figure 7-10.
-
In the navigation pane, navigate to the node for your domain.
In this example, I navigated to lowewriter.pri.
-
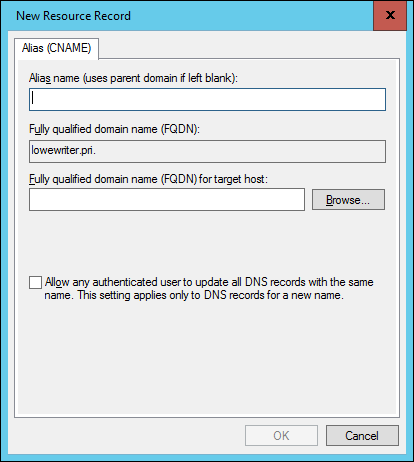
Choose Action ⇒ New Alias (CNAME)
The New Resource Record dialog box appears, as shown in Figure 7-11.
-
Enter the alias name you want to use in the Alias Name text box.
For this example, I entered simply hr.
-
Enter the computer name of your web server in the text box labeled Fully Qualified Domain Name (FQDN) for Target Host.
For this example, I entered lserver01.
-
Click OK.
The DNS alias is created.
- Close the DNS Manager console.
- Open a browser window.
-
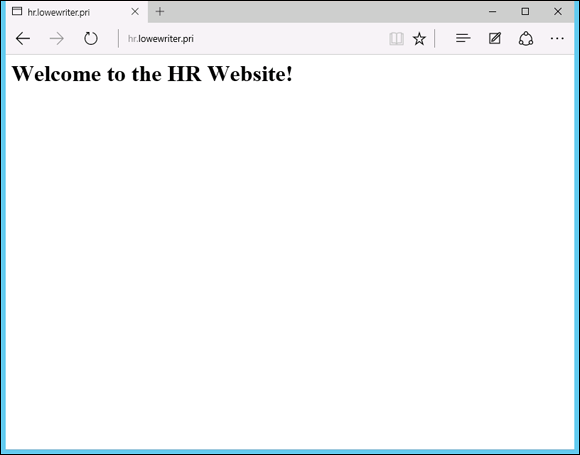
Browse to the alias address you just created.
For this example, I browsed to hr.lowewriter.pri. Figure 7-12 shows the resulting page.