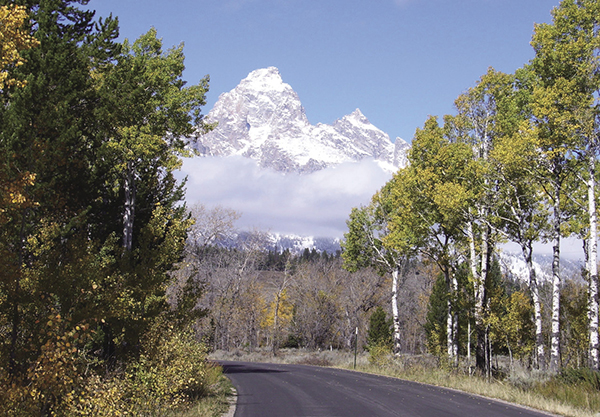
The Moose-Wilson Road runs north of Teton Village into the park. National Park Service
Introduction: Hiking America’s Most Famous Wilderness Skyline
Grand Teton National Park probably has the most famous natural skyline in the country. This prominent horizon shows up every year on millions of postcards, calendars, magazine and book covers, and television ads. But just looking at it is not enough. You need to go there and hike through the deep canyons gouged out by glaciers and over the big divides to feel the true essence of these mountains.
For outstanding mountain scenery, Grand Teton ranks, quite simply, as the best. You would have to really try hard not to have a memorable hike. As you plan your trip, here are a few things you might want to know about hiking in Grand Teton National Park.
Prime season: The best time to hike Grand Teton is August and September. Snow buries the high peaks each winter and it takes until mid-July to melt off, and sometimes until even later on high trails such as Hurricane Pass, Paintbrush Divide, and Moose Basin Divide.
Weather: It can snow any day of the year in Grand Teton, so always be prepared for it. The normal summer weather pattern (if there is such a thing) is clear mornings with thundershowers in the mid-afternoon, followed by clear, coolish evenings. This means early-morning hikers usually enjoy better weather, and they more often get their tents set up before it rains. June can frequently (but not always) be a fairly wet month in Grand Teton.
Sharing: Hikers don’t have the trails of Grand Teton to themselves. They share those trails not only with a growing number of hikers and climbers but also with backcountry horse riders. If you meet a stock party on the trail, yield by moving off the trail on the downhill side and quietly let the stock animals pass.
Moose country: This is definitely moose country. In fact, it’s difficult to go hiking all day in Grand Teton without seeing a moose. Enjoying watching them, but stay out of the way. Moose do not yield to hikers.
Bears: Grand Teton has bears, both the common black bear and its larger, more cantankerous cousin, the grizzly. You probably won’t see a grizzly, but as the bear population in the greater Yellowstone area grows, the number of grizzlies in Grand Teton continues to increase. Grizzlies are, already, more common in the northern and less frequently used sections of the park, but all of Grand Teton should be considered grizzly country. And all bears—black and grizzly—are dangerous, so take all the standard precautions.
The canyons: Many hikes, such as Holly Lake, Cascade Canyon, and others, leave the valley floor and penetrate the Teton Range via deep, glacier-scoured canyons. The canyons serve as pathways into the high peaks. They’re usually steep in the first few miles, then level out, and suddenly, you’re surrounded by steep-walled majesty on your way up a spectacular pass or divide.
Finding solitude: Grand Teton is so heavily used by hikers and climbers that on some trails, they seem to be everywhere. You can find solitude, however, especially in the North Trails area, as well as in a few other areas, but probably not at Lake Solitude, a very popular hiking destination. If you want to be lonely for a change, check through the hike descriptions until you find a lightly used route.
Bugs: Perhaps the two seasons I hiked Grand Teton were off years for the mosquito, but it sure seems like the park has fewer mosquitoes than most places in the Rocky Mountains. In Montana’s Beartooths or in Yellowstone, the mosquitoes can block out the sun on a clear day, but in Grand Teton, I took out the repellent only once (in Glade Creek), which is unusual to say the least.
Large furry things on the road: When hurrying to get to the trailhead in the early-morning hours or when feeling impatient while driving home in the evening, be especially watchful for large wildlife on the roadways. Hitting a moose or antelope will certainly ruin your day, and it’s even harder on the animal.
Hiker friendly: In some national parks it’s easy to feel overregulated. However, Grand Teton National Park has made special efforts to provide freedom of choice and to limit the number of regulations.
Research pays: Plan your trip (and alternatives to it) before you head for Grand Teton. This saves valuable time—and you want to spend that time hiking instead of driving around or waiting in traffic jams, right? You may not be able to get the permit you want, and bear management, forest fires, high water, road construction, and other factors can change things. So, have a backup plan.
You can find more details on many of these topics in the following pages.

The Moose-Wilson Road runs north of Teton Village into the park. National Park Service
Planning Your Trip
It’s amazing how pleasant and stress free your hiking vacation to Grand Teton National Park can be when it’s well planned. The following information should help you plan your trip.
Getting There
Grand Teton National Park is in northwestern Wyoming, just south of Yellowstone National Park. You can drive to the park from Salt Lake City on I-15 north to Logan, Utah, turning on US 89 through Idaho and Wyoming to Jackson, Wyoming, and Grand Teton National Park. You can also take US 26 east from Idaho Falls, Idaho, to Jackson or west from Dubois or Casper, Wyoming. From Montana, you can drive through Yellowstone National Park (slow but scenic) or take US 20 south of West Yellowstone, Montana, and turn off on ID 32/33 over Teton Pass to Jackson, Wyoming.
Since federal highways pass through the park, you can see parts of Grand Teton without paying an entrance fee. Entrance stations are located on Teton Park Road just west of the Moose Visitor Center, at Moran Junction, and on Moose-Wilson Road just south of the Granite Canyon Trailhead. Expect to pay a fee to enter the park at these stations.
The park roads are well maintained but only two lanes wide and often crowded with traffic, including slow-moving vehicles. If you drive during midday, don’t be in a hurry.
You can also fly to a small airport with limited jet service just north of Jackson, Wyoming. The airport is actually within the boundaries of the park.
Getting Backcountry Permits
In Grand Teton National Park, you must have a permit to stay overnight in the backcountry. Get these permits at the visitor centers at Moose and Colter Bay and at the Jenny Lake Ranger Station. To make the permitting process go more smoothly, read the backcountry camping brochure, which you can find on the park’s website, www.nps.gov/grte, or you can request a copy by writing or calling the park.
Backcountry Office
Grand Teton National Park
PO Drawer 170
Moose, WY 83012-0170
(307) 739-3309
(307) 739-3438 (fax)
Grand Teton has a backcountry permit reservation system, but only for one-third of the total sites. Make your reservation between January 1 and May 15. The reservation costs $25 per trip, regardless of the number of people or length of the trip. The National Park Service (NPS) allows up to one-third of the designated sites to be reserved. Permits requested at park visitor centers and ranger stations are free but must be obtained no more than 24 hours before the start of your trip.
You can make your reservations by mail or fax, but most people use the park’s handy online reservation system. Go to the park’s website and click on Backcountry Reservations for details. You can also apply for a reservation in person at the Moose Visitor Center, open daily 8 a.m. to 5 p.m.
In any case, you need the following information: name, address, daytime phone, number of people in your party, preferred campsites, and preferred dates. If possible, include alternate campsites and dates. The park service will send out a written confirmation.
Phone reservations are not accepted, but you can get information by calling (307) 739-3309 or (307) 739-3397. Include a check with the permit request.
Your reservation holds your permit, but you still need to pick it up no later than 10 a.m. the day your trip starts. If you fail to pick it up by 10 a.m., it will become available to others. If you’re running a little late, you can call ahead and the park service will hold your permit.
If you have a reservation but are unable to take the trip, be sure to notify the park service and cancel your reservation so the campsites can be made available to others. The park service does not issue refunds for cancellations.
Backcountry Camping Policy
Some national parks have policies that can hardly be described as “hiker friendly,” and consequently it’s easy to feel overregulated. However, Grand Teton has a hiker-friendly backcountry policy. For example, consider these long-range goals in the park’s backcountry management plan:
To allow more people to enjoy the backcountry, the park limits use for each hiker to no more than two nights in the same campsite and to ten nights per summer. Quotas are set to prevent overuse, and party size is limited to six people for most campsites. If you have a larger party (up to twelve allowed), you must camp at a designated group site.
In 1973 the park service banned all campfires in the park above 7,000 feet elevation. Only designated, low-elevation sites have fire grills where campfires can be built.
Backcountry camping is allowed in camping zones and at designated sites at backcountry lakes like Marion Lake and Holly Lake. Within each camping zone are “indicated” campsites. The sites are usually convenient and well placed. While visiting a camping zone, you aren’t required to stay in an indicated campsite. You can set up a no-impact camp anywhere in a camping zone. In some cases, the park service also allows off-trail camping outside of camping zones.
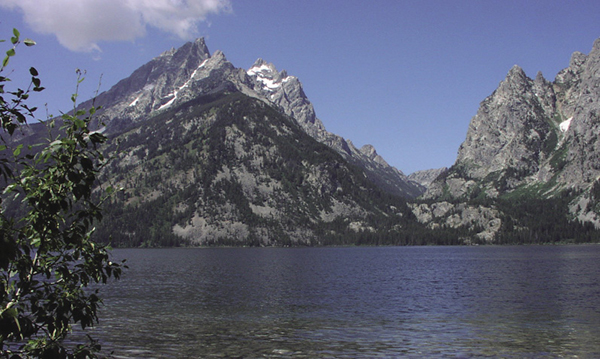
Jenny Lake and Cascade Canyon. National Park Service
Backcountry Use Regulations
Backcountry use regulations aren’t intended to complicate your life. They help preserve the natural landscape and protect park visitors. The following backcountry use regulations are distributed to hikers when they get their permits.
In Grand Teton, you must do the following:
In Grand Teton, don’t:
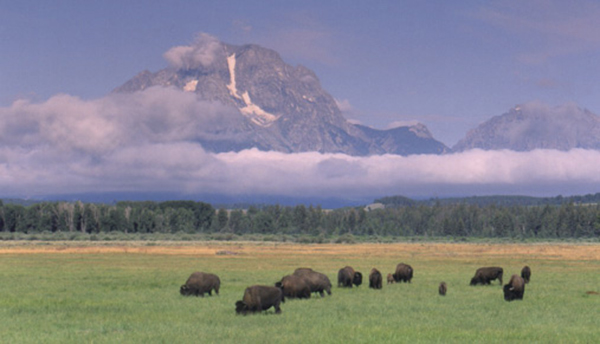
Bison grazing in the shadow of the Teton Range. National Park Service
For More Information
For a great summary of basic facts on visiting Grand Teton, call the main park number and ask for a copy of Teewinot, a free newspaper published by the Grand Teton Association. You can also get a copy at the entrance stations. The paper contains a list of commercial services in and near the park, updates on park road construction, lists of ranger-led activities, events and guided tours, campgrounds, medical and emergency services and facilities, area museums, special exhibits, plus lots more useful information. Teewinot will answer most of your questions about park services. Because of budget cuts, the NPS is sometimes unable to keep up with all visitor inquiries, so please be patient when trying to get your questions answered. There are many books and other publications about Grand Teton that offer a wealth of excellent information, and they often provide a better way to get information than calling the park. Many of these publications are available at park visitor centers.
Contact the park at this address and phone number:
National Park Service
Park Headquarters
PO Drawer 170
Moose, WY 83012-0170
(307) 739-3309
www.nps.gov/grte
Emergency Medical Services
In case of an emergency, call 911. You can also call the park’s main dispatch number (307-739-3300) to report an emergency. Because of its remote location, the park has limited medical facilities. You can find limited care facilities at the Grand Teton Medical Clinic at Jackson Lake Lodge and at St. John’s Hospital in Jackson, Wyoming.
Using This Guide
To help you choose a hike, we preface each entry with some basic information, including type of hike, difficulty ratings, and distance covered. Our basic maps and elevation profiles supplement this information with quick visuals. To use these tools effectively, please note the explanations below.
Types of Hikes
Hikes have been organized into the following categories:
Loop: Starts and finishes at the same trailhead, with no (or very little) retracing of your steps. Sometimes the definition of loop is stretched to include “lollipops” where you retrace the first part of the route and trips that involve a short walk on a road at the end of the hike to get back to your vehicle.
Shuttle: A point-to-point trip that requires two vehicles (one left at each end of the trail) or a prearranged pickup at a designated time and place. One good way to manage the logistical problems of shuttles is to arrange for another party to start at the other end of the trail. The two parties meet at a predetermined point and then trade keys. When finished, they drive each other’s vehicles home.
Out and back: Traveling to a specific destination, then retracing your steps back to the trailhead.
Base camp: Any hike on which you spend several nights at the same campsite, using the extra days for fishing, climbing, relaxing, or day hiking.
Hike Ratings
To help plan your trip, I’ve rated hikes by difficulty. However, ratings serve only as general guides, not the final word. What is difficult to one hiker may be easy to another. Difficulty ratings take into account both how long and how strenuous a route is. Following are general definitions of the ratings.
Easy: Suitable for any hiker, including children or elderly people, without serious elevation gain, hazardous sections, or places where the trail is faint.
Moderate: Suitable for hikers who have some experience and at least an average fitness level. Probably not suitable for children or the elderly unless they have an above-average level of fitness. The hike may have some short sections where the trail is difficult to follow, and it often includes some hills.
Difficult: Suitable for experienced hikers with above-average fitness level, often with sections of the trail that are difficult to follow or even some off-trail sections that could require knowledge of route finding with a topo map and compass, sometimes with serious elevation gain and possibly some hazardous conditions.
Campsite Ratings
In several instances, I refer to campsites as “five-star,” “four-star,” “three-star,” etc. This generally describes my nonscientific evaluation of the campsite but does not relate to any statistical standard. “Five-star” campgrounds, like top hotels and restaurants, rank among the best available, in my opinion.
Distances
Most distances come from NPS signs and brochures, but I’ve had to estimate some trail mileage. Since it’s so difficult and time consuming to precisely measure trails, most distances listed in any guidebook, on trail signs, and in park brochures are usually estimates. In Grand Teton you may find minor inconsistencies between signs, brochures, and this book, but these are rarely significant.
Keep in mind that distance is often less important than difficulty. A 2-mile, rocky, uphill trail can take longer and require more effort than 4 miles on a well-contoured trail on flat terrain. The punch line is, don’t get excited if the distance is slightly off.
Maps
The maps in this guidebook serve as general guides only. They lack adequate detail and don’t cover enough territory to be used on their own in the field. You definitely should take a better map on any hike.
Elevation Profiles
This book uses elevation profiles to provide an idea of the elevation gain and loss you will encounter along each hike. The vertical axis of the profiles shows the distance climbed in feet. Because of variations in scale, some elevation profiles may appear to show gradual hills as steep or steep hills as gradual, so be sure to check the total distance in the hike specs as well as the vertical axis to see the scale of elevation changes. Hikes with little or no elevation gain do not have elevation profiles.

Columbine. National Park Service
Zero Impact
Going into a national park such as Grand Teton is like visiting a famous museum. You obviously do not want to leave your mark on an art treasure in the museum. If everybody going through the museum leaves one little mark, the piece of art will be quickly destroyed—and of what value is a big building full of trashed art? The same goes for a pristine wilderness such as Grand Teton, which is as magnificent as any masterpiece by any artist. If we all leave just one little mark on the landscape, the wilderness will soon be despoiled.
A wilderness can accommodate human use as long as everybody behaves, but a few thoughtless or uninformed visitors can ruin it for everybody who follows. All wilderness users have a responsibility to know and follow the rules of no-trace camping. An important source of these guidelines, including the most updated research, can be found in the FalconGuide, Leave No Trace.
Today most wilderness users want to walk softly, but some aren’t aware that they have poor manners. Often their actions are dictated by the outdated habits of a previous generation of campers who cut green boughs for evening shelters, built campfires with fire rings, and dug trenches around tents. In the 1950s these “camping rules” may have been acceptable, but they leave long-lasting scars, and today such behavior is absolutely unacceptable. The wilderness is shrinking, and the number of users is mushrooming. More and more camping areas show unsightly signs of heavy use.
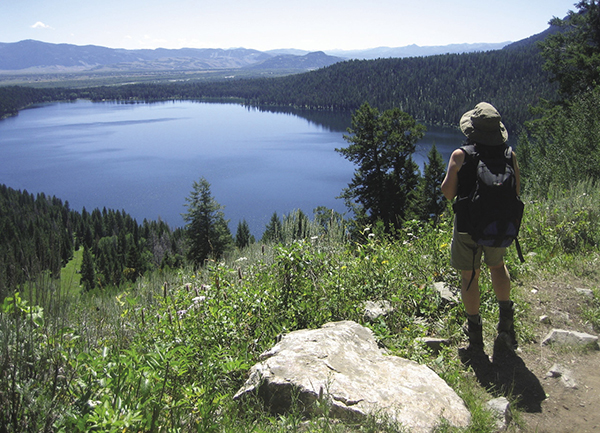
Thousands of hikers enjoy this view of Phelps Lake every year.
Consequently, a new code of ethics is growing out of the necessity of coping with the unending waves of people who want a perfect wilderness experience. Today we all must leave no clues that we have gone before. Canoeists can look behind the canoe and see no trace of their passing. Hikers, mountain bikers, and four-wheelers should have the same goal. Enjoy the wilderness, but leave no trace of your visit.
Three FalconGuide Principles of Zero Impact
Most of us know better than to litter—in or out of the wilderness. Be sure you leave nothing, regardless of how small it is, along the trail or at the campsite. This means you should pack out everything, including orange peels, flip tops, cigarette butts, and gum wrappers. Also, pick up any trash that others leave behind.
Follow the main trail. Avoid cutting switchbacks and walking on vegetation beside the trail.
Don’t pick up “souvenirs,” such as rocks, antlers, or wildflowers. The next person wants to see them, too, and collecting such souvenirs violates park regulations.
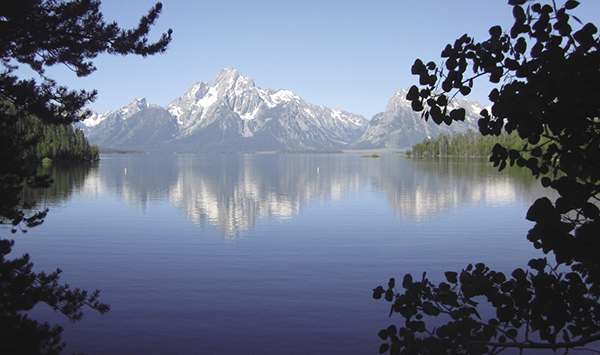
Colter Bay. National Park Service
Avoid making loud noises that may disturb others. Remember, sound travels easily across lakes and open areas. Be courteous.
Carry a lightweight trowel to bury human waste 6 to 8 inches deep, and pack out used toilet paper. Keep human waste at least 200 feet from any water source.
Finally, and perhaps most importantly, strictly follow the pack-in/pack-out rule. If you carry something into the backcountry, consume it or carry it out.
Have zero impact—and put your ear to the ground in the wilderness and listen carefully. Thousands of people coming behind you are thanking you for your courtesy and good sense.
Make It a Safe Trip
The Boy Scouts of America have been guided for decades by what is perhaps the best single piece of safety advice: “Be Prepared!” For starters, this means carrying survival and first-aid materials, proper clothing, compass, and topographic map—and knowing how to use them.
Perhaps the second-best piece of safety advice is to tell somebody where you’re going and when you plan to return. Pilots must file flight plans before every trip, and anybody venturing into a blank spot on the map should do the same. File your “flight plan” with a friend or relative before taking off.
Close behind your flight plan and being prepared with proper equipment is physical conditioning. Being fit not only makes wilderness travel more fun, but it also makes it safer. To whet your appetite for more knowledge of wilderness safety and preparedness, following are a few more tips:
Lightning: You Might Never Know What Hit You
The high-altitude topography of Grand Teton is prone to sudden thunderstorms, especially in July and August, so take the following precautions.
Hypothermia: The Silent Killer
Be aware of the “silent killer,” hypothermia, a condition in which the body’s internal temperature drops below normal. It can lead to mental and physical collapse, followed shortly by death.
Hypothermia is caused by exposure to cold and is aggravated by wetness, wind, dehydration, and exhaustion. The moment you begin to lose heat faster than your body produces it, you’re suffering from exposure. Your body starts involuntary exercise, such as shivering, to stay warm and makes involuntary adjustments to preserve normal temperature in vital organs, restricting blood flow to the extremities. Both responses drain your energy reserves. The only way to stop the drain is to reduce the degree of exposure.
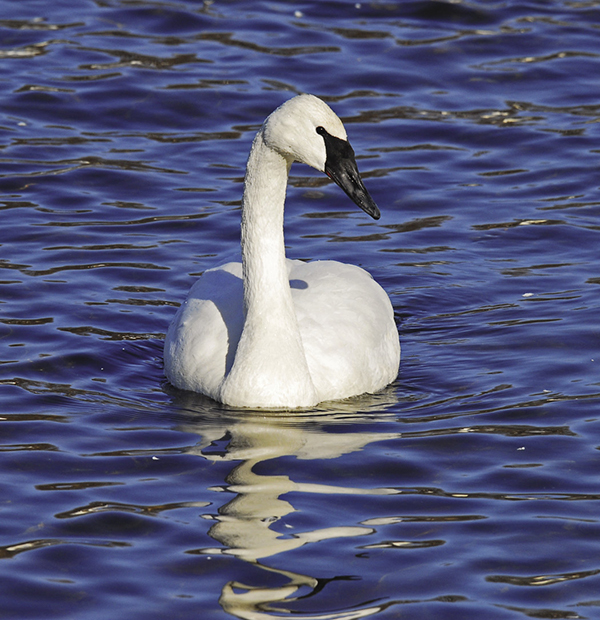
Trumpeter swans can be seen in Grand Teton National Park. Christian Pond is a good place to look for them. Shutterstock
With full-blown hypothermia, as energy reserves are exhausted, cold reaches the brain, depriving you of good judgment and reasoning power. You won’t be aware that this is happening. You lose control of your hands. Your internal temperature slides downward. Without treatment, this slide leads to stupor, collapse, and death.
To defend against hypothermia, stay dry. When clothes get wet, they lose most of their insulating value. Wool loses relatively less heat; cotton, down, and some synthetics lose more. Make sure you have quality rain gear that covers head, neck, body, and legs and provides good protection against wind-driven rain. Most hypothermia cases develop in air temperatures between 30 and 50 degrees F, but hypothermia can develop in warmer temperatures, especially when enhanced by dehydration or exhaustion.
If your party is exposed to wind, cold, and wet, automatically think hypothermia. Watch yourself and others for these symptoms: uncontrollable fits of shivering; vague, slow, slurred speech; memory lapses; incoherence; immobile, fumbling hands; frequent stumbling or a lurching gait; drowsiness (to sleep is to die); apparent exhaustion; and inability to get up after a rest. When a member of your party has hypothermia, he or she may deny any problem. Believe the symptoms, not the victim. Even mild symptoms demand treatment, as follows:
Be Bear Aware
The first step of any hike in bear country is an attitude adjustment. Nothing guarantees total safety. Hiking in bear country such as Grand Teton National Park adds a small additional risk to your trip. That risk can be greatly minimized, however, by adhering to this age-old piece of advice: Be prepared. And being prepared doesn’t only mean having the right equipment. It also means having the right information. Knowledge is your best defense.
You can—and should—thoroughly enjoy your trip to bear country. Don’t let the fear of bears ruin your experience. This fear can accompany you every step of the way. It can be constantly lurking in the back of your mind, preventing you from enjoying the wildest and most beautiful places left on Earth. And even worse, some bear experts think bears might actually be able to sense your fear.
Being prepared and being knowledgeable gives you confidence. It allows you to fight back the fear that can burden you throughout your stay in bear country. You won’t—nor should you—forget about bears and the basic rules of safety, but proper preparation allows you to keep the fear of bears at bay and let enjoyment rule the day.
On top of that, do we really want to be totally safe? If we did, we probably would never go hiking in the wilderness—bears or no bears. We certainly wouldn’t, at much greater risk, drive hundreds of miles to get to the trailhead. Perhaps a tinge of danger adds a desired element to our wilderness trip.
Hiking in Bear Country
Nobody likes surprises, and bears dislike them, too. The majority of bear maulings occur when a hiker surprises a bear. Therefore, it’s vital to do everything possible to avoid these surprise meetings. Perhaps the best way is to know the five-part system. If you follow these five rules, the chance of encountering a bear on the trail sinks to the slimmest possible margin.
No substitute for alertness: As you hike, watch ahead and to the sides. Don’t fall into the all-too-common and particularly nasty habit of fixating on the trail 10 feet ahead. It’s especially easy to do this when dragging a heavy pack up a long hill or when carefully watching your step on a heavily eroded trail.
Using your knowledge of bear habitat and habits, be especially alert in areas most likely to be frequented by bears, such as avalanche chutes, berry patches, along streams, and through stands of whitebark pine.
Watch carefully for bear signs and be especially watchful (and noisy) if you see any. If you see a track or a scat, but it doesn’t look fresh, pretend it’s fresh. The area is obviously frequented by bears.
Watch the wind: The wind can be a friend or foe. The strength and direction of the wind can make a significant difference in your chances of an encounter with a bear. When the wind is blowing at your back, your smell travels ahead of you, alerting any bear that might be on or near the trail ahead. Conversely, when the wind blows in your face, your chances of a surprise meeting with a bear increase, so make more noise and be more alert.
A strong wind can also be noisy and limit a bear’s ability to hear you coming. If a bear can’t smell or hear you coming, the chances of an encounter greatly increase, so watch the wind.
Safety in numbers: There have been very few instances where a large group has had an encounter with a bear. On the other hand, a large percentage of hikers mauled by bears were hiking alone. Large groups naturally make more noise and put out more smell and probably appear more threatening to bears. In addition, if you’re hiking alone and get injured, there is nobody to go for help. For these reasons, rangers in Grand Teton recommend parties of four or more hikers when going into bear country.
When a large party splits up, it becomes two small groups and the advantage is lost, so stay together. If you’re on a family hike, keep the kids from running ahead. If you’re in a large group, keep the stronger members from going ahead or weaker members from lagging behind. The best way to prevent this natural separation is to ask one of the slowest members of the group to lead. This keeps everybody together.
Stay on the trail: Although bears use trails, they don’t often use them during midday when hikers commonly use them. Through generations of associating trails with people, bears probably expect to find hikers on trails, especially during midday.
Contrarily, bears probably don’t expect to find hikers off trails. Bears rarely settle down in a day bed right along a heavily used trail. If you wander around in thickets off the trail, however, you are more likely to stumble into an occupied day bed or cross paths with a traveling bear.
Sleeping late: Bears—and most other wildlife—usually aren’t active during the middle of a day, especially on a hot summer day. Wild animals are most active around dawn and dusk. Therefore, hiking early in the morning or in the late afternoon increases your chances of seeing wildlife, including bears. Likewise, hiking during midday on a hot August day greatly reduces the chance of an encounter.
Sounds: Perhaps the best way to avoid a surprise meeting with a bear is to make sure the bear knows you’re coming, so make lots of noise. Some experts think metallic noise is superior to human voices, which can be muffled by natural conditions, but the important issue is making lots of noise, regardless of what kind of noise.
Running: Many avid runners like to get off paved roads and running tracks and onto backcountry trails. But, because of the added element of surprise, running on trails in bear country can be seriously hazardous to your health.
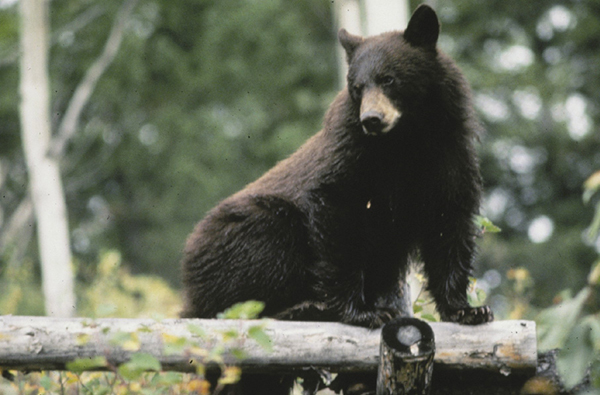
Black bears are more common than grizzlies in the park. National Park Service
Leave the night to the bears: Like running on trails, hiking at night can be very risky. Bears are more active after dark, and you can’t see them until it’s too late. If you get caught at night, be sure to make lots of noise, and remember that bears commonly travel on hiking trails at night.
You can be dead meat, too: If you see or smell a carcass of a dead animal when hiking, immediately vacate the area. Don’t let your curiosity keep you near the carcass a second longer than necessary. Bears commonly hang around a carcass, guarding it and feeding on it for days until it’s completely consumed. Your presence could easily be interpreted as a threat to the bear’s food supply, and a vicious attack could be imminent.
If you see a carcass ahead of you on the trail, don’t go any closer. Instead, abandon your hike and return to the trailhead. If the carcass is between you and the trailhead, take a very long detour around it, upwind from the carcass, making lots of noise along the way. Be sure to report the carcass to the local ranger. This might prompt a temporary trail closure or special warnings to prevent injury to other hikers. Rangers will, in some cases, go in and drag the carcass away from the trail.
Cute, cuddly, and lethal: If you see a bear cub, don’t go one inch closer to it. It might seem abandoned, but it most likely is not. Mother bear is probably very close, and female bears fiercely defend their young.
Bear pepper spray: If you brought a bear pepper spray, which is an excellent idea, don’t bury it in your pack. Keep it as accessible as possible. Most pepper spray comes in a holster or somehow conveniently attaches to your belt or pack. Such protection won’t do you any good if you can’t have it ready to fire in one or two seconds. Before hitting the trail, read the directions carefully and test fire the spray.
But I didn’t see any bears: Now, you know how to be safe. Walk up the trail constantly clanging two metal pans together. It works every time. You won’t see a bear, but you might hate your “wilderness experience.” You left the city to get away from loud noise.
Yes, you can be very safe, but how safe do you want to be and still be able to enjoy your trip? It’s a balancing act. First, be knowledgeable and then decide how far you want to go. Everybody has to make his or her own personal choice.
Here’s another conflict. If you do everything listed here, you most likely will not see any bears—or any deer or moose or wolves or any other wildlife. Again, you make the choice. If you want to be as safe as possible, follow these rules religiously. If you want to see wildlife, including bears, do all of the above in reverse, but then remember, you are increasing your chances of an encounter instead of decreasing them.
Camping in Bear Country
Staying overnight in bear country is not dangerous, but it adds a slight additional risk to your trip. The main difference is the presence of more food, cooking, and garbage. Plus, you’re in bear country at night when bears are usually most active. Once again, however, following a few basic rules greatly minimizes this risk.
Storing food and garbage: Most campsites in Grand Teton have heavy metal, community bear-resistant storage lockers, and you’re required to use them. If you’re in an off-trail or remote location without a community storage box, the park requires that you keep food in a portable bear-resistant food container. If you don’t have your own, the park will rent you one for free with your backcountry permit. Be sure to keep all food and garbage out of reach of bears at all times, day and night.
What to keep in your tent: Do not bring food smells into your tent. Just in case a bear has become accustomed to coming into that campsite looking for food, it’s vital to keep all food smells out of the tent. This often includes your pack, which is hard to keep odor-free. Usually only take valuables (like cameras and binoculars), clothing, and sleeping gear into the tent. If you brought a bear pepper spray, sleep with it. Also, keep a flashlight in the tent. If an animal comes into camp and wakes you up, you need the flashlight to identify it.
The campfire: Regulations prohibit campfires in most campsites in Grand Teton, but if you’re in an area where fires are allowed, treat yourself. Besides adding the nightly entertainment, the fire might make your camp safer from bears.
The campfire provides the best possible way to get rid of food smells. Build a small but hot fire and thoroughly burn everything that smells of food—garbage, leftovers, fish entrails, everything. If you brought food in cans or other incombustible containers, burn them, too. You can even dump extra water from cooking or dishwater on the edge of the fire to erase the smell.
Be sure to completely burn everything. If you leave partially burned food scraps in the fire, you’re setting up a dangerous situation for the next camper to use this site.
Before leaving camp the next morning, dig out the fire pit and pack out anything that has not completely burned, even if you believe it no longer carries food smells. For example, many foods like dried soup or hot chocolate come in foil packages that might seem like they burn, but they really don’t. Pack out the scorched foil and cans (now with very minor food smells). Also, pack out foil and cans left by other campers.
Types of food: Don’t get paranoid about the types of food you bring. All food has some smell, and you can make your trip much less enjoyable by fretting too much over food.
Perhaps the safest option is freeze-dried food. It carries very little smell, and it comes in convenient envelopes that allow you to “cook it” by merely adding boiling water. This means you don’t have cooking pans to wash or store. However, freeze-dried food is very expensive, and many backpackers don’t use it—and still safely enjoy bear country.
Dry, pre-packed meals (often pasta- or rice-based) offer an affordable compromise to freeze-dried foods. Also, take your favorite high-energy snack and don’t worry about it. Avoid fresh fruit and canned meats and fish.
The key point is: What food you have along is much less critical than how you handle it, cook it, and store it. A can of tuna fish might put out a smell, but if you eat all of it in one meal, don’t spill it on the ground or on your clothes, and burn the can later, it can be quite safe.
How to cook: The overriding philosophy of cooking in bear country is to create as little odor as possible. Keep it simple. Use as few pans and dishes as possible. Unless it’s a weather emergency, don’t cook in the tent. If you like winter backpacking, you might cook in the tent, but you should have a different tent for summer backpacking.
If you can have a campfire and decide to cook fish, try cooking in aluminum foil envelopes instead of frying the fish. Then, after removing the cooked fish, quickly and completely burn the fish scraps off the foil. Using foil also means you don’t have to wash the pan you used to cook the fish.
Be careful not to spill on yourself while cooking. If you do, change clothes and store the dirty clothes with the food and garbage. Wash your hands thoroughly before retiring to the tent.
Don’t cook too much food, so you don’t have to deal with leftovers. If you do end up with extra food, however, you have only two choices: Carry it out or burn it. Don’t bury it or throw it in a lake or leave it anywhere in bear country. A bear will most likely find and dig up any food or garbage buried in the backcountry.
Taking out the garbage: In bear country, you have only two choices—burn garbage or carry it out. Prepare for garbage problems before you leave home. Bring along airtight zip-lock bags to store garbage. Be sure to safely store your garbage at night along with your food in metal food lockers. Also, carry in as little garbage as possible by discarding excess packaging while packing.
Washing dishes: This is a sticky problem, but there is one easy solution. If you don’t dirty dishes, you don’t have to wash them. So try to minimize food smell by using as few dishes and pans as possible—and wash the ones you do use as soon as
you finish with them. If you use the principles of no-trace camping, you are probably doing as much as you can to reduce food smell from dishes.
If you brought paper towels, use one to carefully remove food scraps from pans and dishes before washing them. Then, when you wash dishes, you have much less food smell. Burn the dirty towels or store them in zip-lock bags with other garbage. Put pans and dishes in zip-lock bags before putting them back in your pack.
If you end up with lots of food scraps in the dishwater, drain out the scraps and store them in zip-lock bags with other garbage or burn them. You can bring a lightweight screen to filter out food scraps from dishwater, but be sure to store the screen with the food and garbage. If you have a campfire, pour the dishwater around the edge of the fire. If you don’t have a fire, take the dishwater at least 200 feet downwind and downhill from camp and pour it on the ground or in a small hole. Don’t put dishwater or food scraps in a lake or stream.
Although possibly counter to accepted rules of cleanliness for many people, you can skip washing dishes altogether on the last night of your backpacking trip. Instead, simply use the paper towels to clean the dirty dishes as much as possible. You can wash them when you get home. Pack dirty dishes in zip-lock bags before putting them back in your pack.
During your hike, however, don’t put it off. Do dishes immediately after eating, so a minimum of food smell lingers in the area.
Choosing a tent site: Try to keep your tent site at least 100 feet from your cooking area. In Grand Teton, unfortunately, some campsites don’t adequately separate the cooking area from the tent site. Store food at least 100 yards from the tent in a portable canister or community locker. You can store it near the cooking area to further concentrate food smells.
Do somebody a big favor: Report all bear encounters to the ranger after your trip. This might not help you, but it could save another camper’s life. If rangers get enough reports to spot a pattern, they can manage the area to prevent potentially hazardous situations.
Be Aware of Mountain Lions, Too
The most important safety tip for hiking in mountain lion country, like Grand Teton National Park, is simply recognizing the habitat. Mountain lions primarily feed on deer, so when you see a lot of deer, you’re more likely to see a mountain lion, too.
Safety Guidelines for Traveling in Mountain Lion Country
To stay as safe as possible when hiking in mountain lion country, follow this advice.
What to Do if You Encounter a Mountain Lion
The vast majority of mountain lion encounters don’t result in an injury, so try to keep your cool and consider the following:
Recognize threatening mountain lion behavior. If the lion is more than 50 yards away and it directs its attention to you, it may be only curious. This situation represents only a slight risk for adults, but a more serious risk to unaccompanied children. Move away, keeping the animal in your peripheral vision, while looking for rocks, sticks, or something to use as a weapon, just in case.
If a mountain lion is crouched and staring intensely at you less than 50 yards away, it may be assessing the chances of a successful attack. If this behavior continues, an attack may follow. Here is what you should and should not do:

Always be aware of the mountain lion. Shutterstock