It is almost an unwritten rule in portrait photography that working in direct sun is not a great idea for most professional photographs. Harsh, glaring sun often causes a lot more problems than it solves—and it generally results in pictures with hard shadows on the face and the eyes squinting in the bright light. However, can you imagine a condition under which a direct sunlight image might be appropriate? Take, for example, an image of player on the field at an afternoon football game or a driver at an afternoon NASCAR race. Today’s working photographer, who can keep the idea of light quality in mind, can usually avoid the danger of bad pictures while using the appropriate light for the appropriate picture.
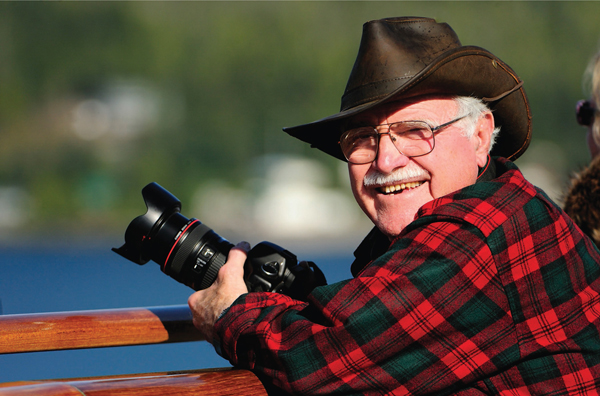
Image 9–1. A direct sunlight portrait is not always a bad thing. For this portrait of acclaimed photographer Ken Whitmire, we were shooting in the direct sun and it seemed like the right lighting choice.
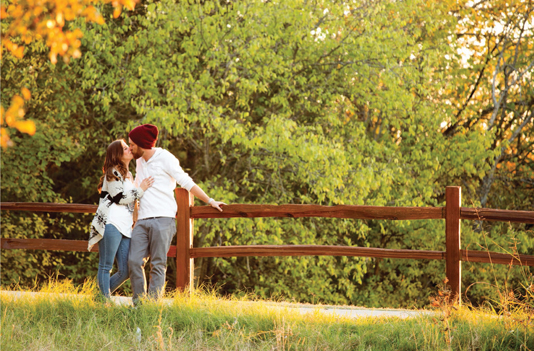
Image 9–2. The engaged couple was photographed entirely in natural light with the sun hitting them slightly from behind and lighting the limb above my camera’s position.

Image 9–3. The warm sunlight and the strong lighting grab the viewer’s attention right away.
If you are stuck and have no other available options, you can certainly turn someone away from the direct sun and take an exposure reading for their face being lit by the open sky to get the proper exposure. This, at least keeps a softer light quality on the face. However, it does introduce other problems such as the intense brightness from the strong backlighting. One of the biggest issues when working with any ambient lighting—and especially in directional lighting—is dealing with the high contrast range from pure white to pure black.
In trying to create options for your clients, you can also consider also shooting in the direct sun very late in the day or early in the morning. While the light at these two times of day is still harsh and undiffused in terms of its quality, the color and warmth of the light is almost more important and will help to yield a beautiful photograph.
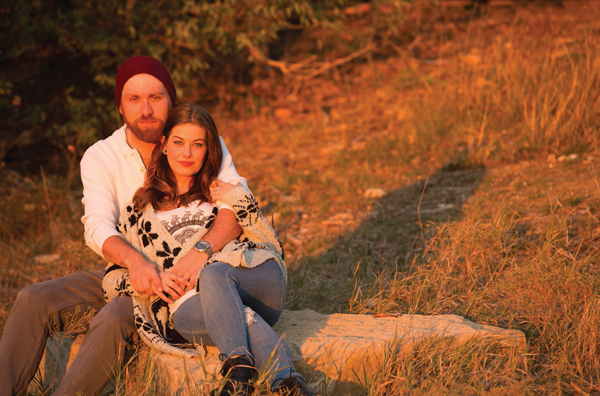
Image 9–4. For this engagement session, shooting late in the day with direct sunlight was a perfect choice to match their style and create a lighthearted mood.

Image 9–5. Here’s another nice example of using sunlight in a late-evening portrait session.
The simplicity of using a window as a light source—coupled with the beautiful, soft, and almost calming effect of the light—makes it one of the most popular ways to work in portrait photography. Plus, other than your camera and possibly a reflector or the occasional background, shooting with window light doesn’t require any fancy equipment.
While the pictures look easy to replicate, however, there is a lot of science taking place and we need to keep in mind all of the physics that we discussed in earlier chapters. First of all, we want to use the right kind of window light—soft, non-directional, non-specular window light. You may have heard of master artists who were known to paint in the light of north-facing windows. They did this to ensure that, regardless of the time of day, there would never be direct sun coming through the window. When the windows face north, you maximize the hours with only soft lighting—but anytime the light through the window is indirect, you can create nice window-light portraits.
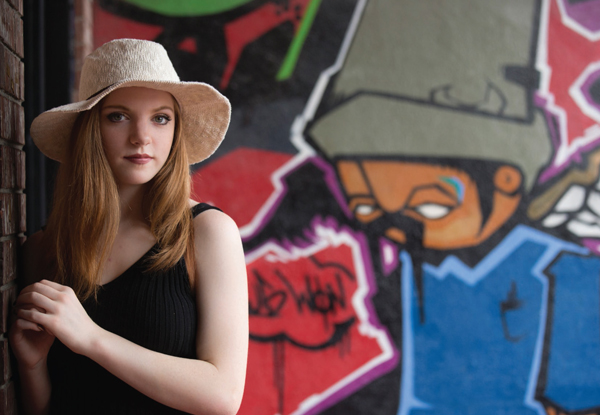
Image 9–6. On this over-cast day, we had soft yet directional light from a large open area to camera right.
Image 9–7. One of my students was standing next to this window during a workshop in Dubai. The light quality was just right.
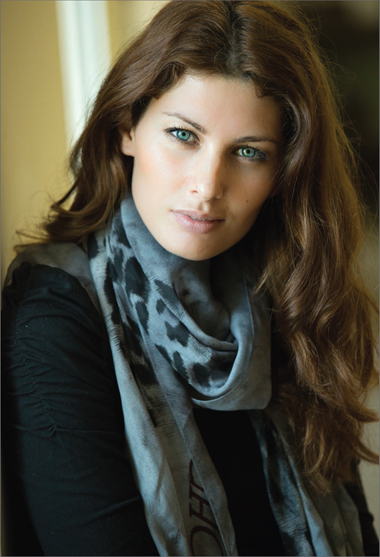
Image 9–8. Here’s the same subject the next day. Once again, the window provided a soft and comfortable light quality as she was placed very near the window’s edge.
The Distance of the Subject to the Window
While you can’t move the window, you can still use all of the controls we discussed in previous chapters—you just do it by moving the subject instead of the light source. If you want the light source to be larger and softer, you move the subject closer to the window. If you need more directional light and shadows that are a little sharper shadows, move your subject away from the window.
Camera, Subject, and Window Angles
With window light portraiture, you’ll soon figure out that great care must be taken in terms of where you stand relative to your subject or model. If you are positioned at about the same distance from the wall as your subject is from the window, you’ll have split lighting on the subject’s face whenever they are looking into the camera. In order to maintain control over the light direction and create more depth, more ratio options, and nice catchlights in both of their eyes, just move the subject very slightly away from the window and move yourself a little closer to the window. Just these subtle adjustments can make a big difference in your ability to shoot more variety in your work—without the fear of having both eyes going too dark.
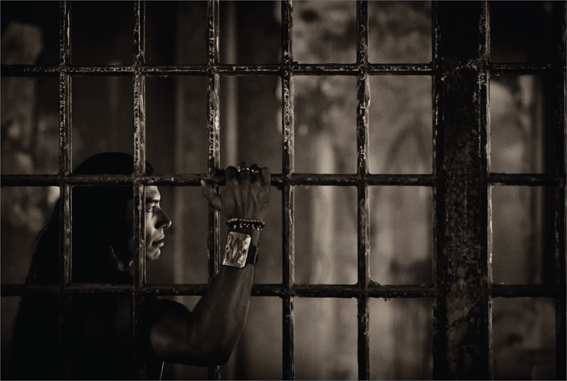
Image 9–9. At a prison in Santa Fe, NM, the light filtering through a small, vertically shaped window gave this terrific accent light on the face of my model, Adam. I titled this portrait Regret.
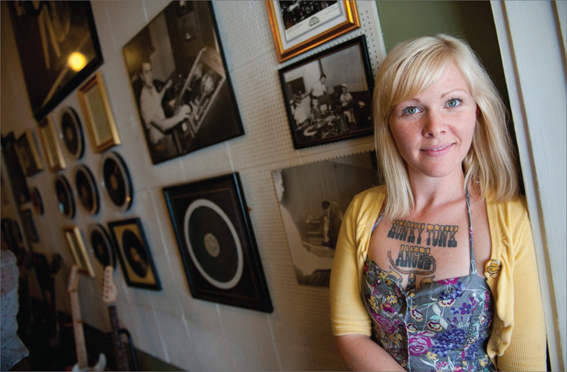
Image 9–10. A large window—at just the perfect early afternoon time of day—illuminated this woman inside the Sun Recording Studios in Memphis, TN.
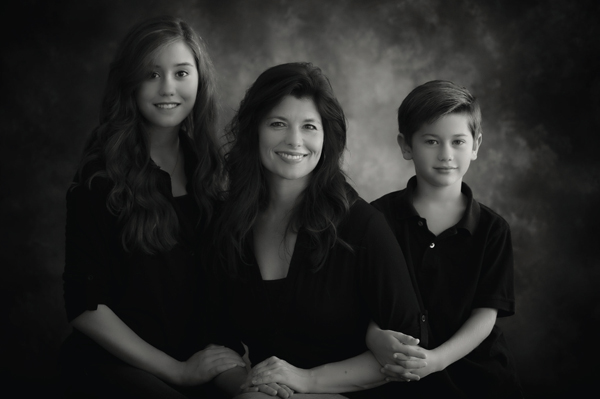
Image 9–11. Photographer Mandy Lynn Lundy’s beautiful family was lit entirely by a large bank of north-facing windows. No other lighting was used.
The background offers a lot of potential in window light portraiture. If you are shooting in someone’s home, there are usually a few different options that will be appealing and help define the location of your portrait. Keep in mind that your lens choice will also dictate what you see in the background—and the time of day will have something to do with the exposure relationship of the background relative to the subject.
If you are working with a portable stand and your own backgrounds, there are some really fun things you can do that you may not have thought of. For one thing, the portable background stand gives you the ability to change the angle of your background relative to the window. In other words, you can turn the background toward the window as approximately a 45 degree angle and get great light on the background with almost perfectly even light with no fall-off. However, if you wish to introduce more of a gradation or wish to have a deeper, even more rich background you can keep it flat at a 90 degree angle to the window. To make it darker and further emphasize the light gradation, or fall-off of light, simply angle the background away from the window.
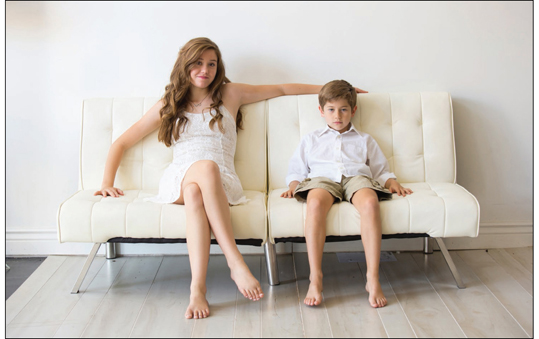
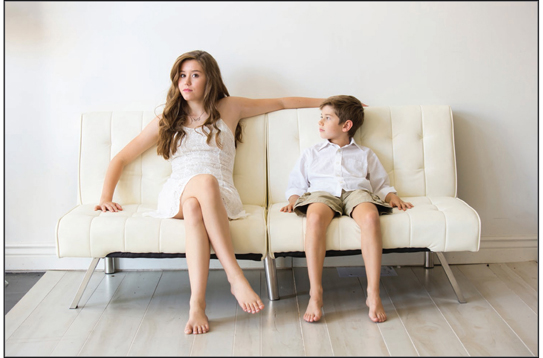
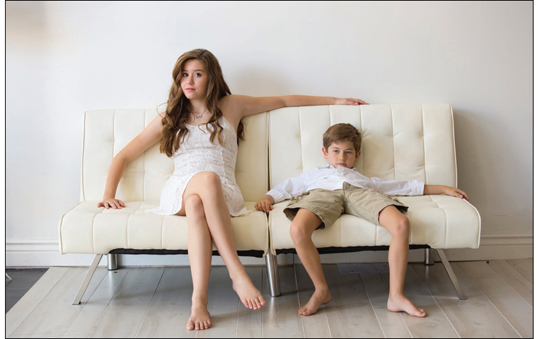
Images 9–12, 9–13, and 9–14. These three images, typical of photographing children after they have had enough, are great illustrations of the light from a large north-facing window. An added benefit of this type of lighting is that it provides consistent exposures for several hours each day.
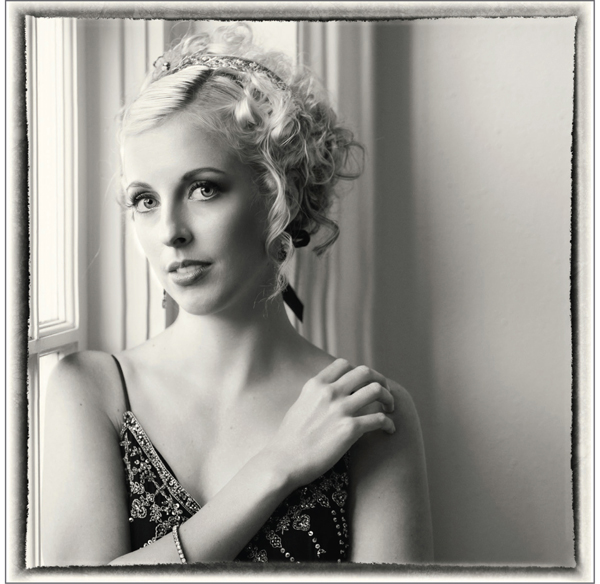
Image 9–15. A classic beauty image created using only window light. (Photo by Rob Hull.)
These extra elements of control are often overlooked. As I have been telling people for many years in my workshops, you need to learn to “think like a photographer.” Don’t always go for the obvious. Try something a little different. Dig a little deeper for a new or unique technique. If you always do what you’ve always done, you’ll always get what you’ve always gotten.
Family Portraits in the Client’s Home
Being invited to create a portrait in someone’s home—in their most intimate family place—is, first and foremost, a great compliment to you. It’s a testament to the type of person you are and an indication of the trust your client has placed in you. For this reason, I have always felt a little more responsibility to do a great job and try just a bit harder to go above and beyond even my normally high standards.
These sessions tend to go long and are a little bit more trouble than simply bringing the subject(s) into your studio situation. There is lighting gear that has to be carried and set up, and you’ll need to spend some time identifying the best places to work on the day of the session. And, unless you had the luxury of being able to scout the location in the days ahead of the shoot, you will have to move quickly.
The first thing you’ll discover when doing family portraits in the home is that you will almost always have to move furniture. This makes it an excellent idea to enlist an assistant with a strong back—and a willingness to help heft a chair from upstairs and bring it down to the living room. While you need to move quickly, it’s important to be careful so that nothing scratches the floor. The bottoms of your lighting cases and your tripod feet both have the potential to make someone really unhappy—especially if a great-looking wood flooring surface gets marred.
There are a few things you can do in advance to assure your success. One of the most important is to conduct a clothing consultation. I am never concerned with whatever color my clients choose to wear—as long as they are all in the same color family. Of course, stripes and patterns are not my favorite (they can be distracting) nor is all white, so I do discourage those choices. Generally speaking, solid medium to darker tones can be relied on to produce nice-looking results.
If your group consists of up to four people, a nice large or medium softbox can make a great primary light source. As the size of the group grows, umbrellas work quite well. There are also a few new tools that are ideal for groups of all sizes. Westcott now makes a 7-foot Parabolic umbrella in three different fabrics: white, translucent diffused, and silver. After having conducted a lot of tests, I have found that I really like the diffused fabric. This is used as a shoot-through light source, whereas with the other two finished are designed to reflect the light bouncing into them. These large sources really do a great job of producing soft, beautiful light and great catchlights in the eyes of your clients.
As umbrellas are great at truly sending light everywhere, they are also good to use in the background areas when working inside someone’s home—especially if there is a deep background with a lots of distance or dimly lit areas that need to be opened up.


Images 9–16, 9–17, and 9–18. A 7-foot Westcott parabolic umbrella (either the reflective or shoot-through variety) is a good choice for larger group portraits made on location.

Image 9–19. Photographed in their home, this great couple looked terrific being lit with two medium softboxes placed next to each other on the right-hand side of the camera.
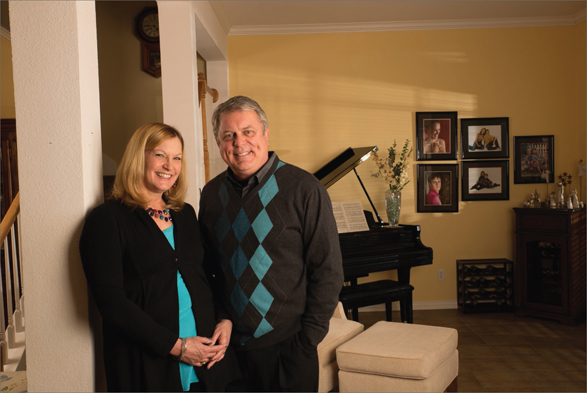
Image 9–20. Here, we added another light source outside, in their front yard, to shine through the window. The produced a greater sense of depth with the shadows of the window panes on the wall.
At times, it becomes important to take a light outside and fire it through the window to help light up a specific area in the room—to send shadows onto the wall, or put highlights on the ceiling. This technique adds a great deal to the overall quality of a location shoot and is one I use as much as I can.

Image 9–21. The couple’s portrait is in a great location, but the light is not quite there to make it a standout image.
Image 9–22. The addition of an off-camera flash makes all of the difference. Now, the colors seem to pop, their features are more clearly defined, and a sense of control is evident. (Photos by Mandy Lynn Lundy)
Working outdoors is also terrific—especially if they have a great porch, barn, or some other place where you can cut any overhead or “top light.” Adding quality light on the faces and other areas is almost never an issue, but cutting ambient light that is in the wrong place can be a challenge with a large group. I know photographers who love it when there is a barn or even a large garage on the property. That gives you a natural subtractor of light (as we discussed in chapter 2), directing great light onto the subjects. The same thing applies to large trees. Natural overhead subtraction is just very, very helpful. And, of course, the addition of flash outdoors to help open up faces and control background brightness (as discussed in chapter 6) is another important aspect to keep in mind.
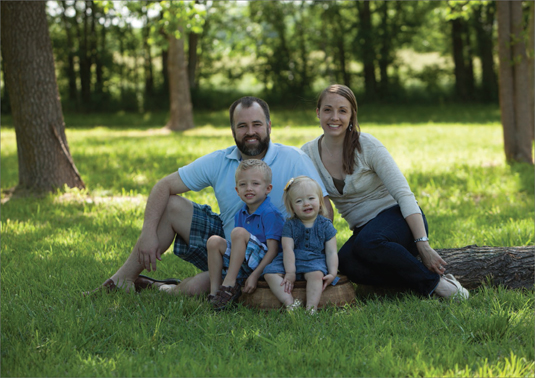
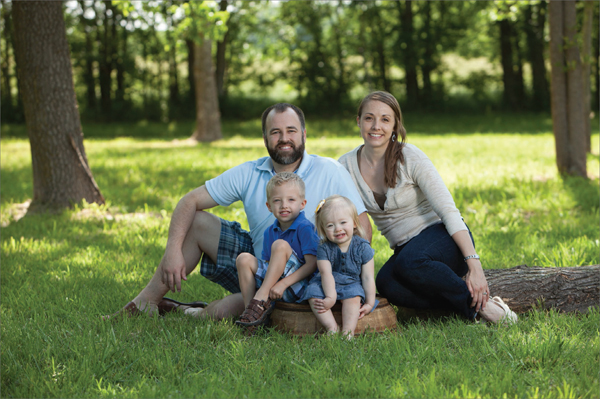
Image 9–23 and 9–24. Rarely do I find a photograph with only natural light (right) that is better than if a subtle amount of flash had been added (below). Just keep in mind that you want to match the feel of the images from one to the next. In other words, if it is a soft overcast day, try to use a soft light quality with your flash. (Photos by Mandy Lynn Lundy)
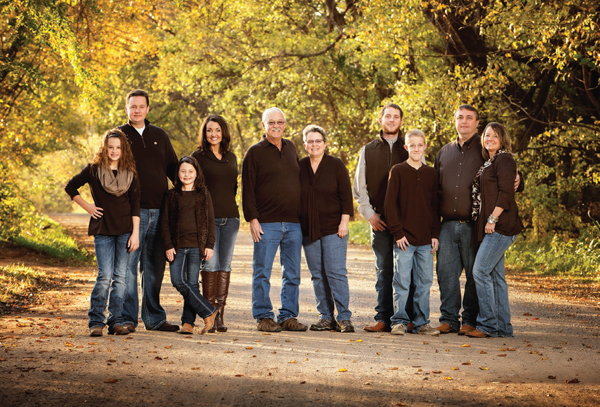
Image 9–26. This is a great location for a portrait of a large family—but it required a little work with flash to fill in the front of the backlit scene. (Photo by Mandy Lynn Lundy)
Here’s a final tip—one that I learned many years ago. When working with just about any size family, in almost any pose or arrangement, pause at the moment just before you press the shutter release, and in an upbeat and smiling way tell them all, “Lean closer together. Closer . . . closer . . .” And then bam, bam, bam—take the pictures! That’s when the magic happens. They are still in their poses and positions, and their head heights are still where you placed them—but the feeling and the expressions tends to come alive when they are all into it. This works wonders for me.