4. Lighting
Lighting can be one of the most important tools for a Makeup Artist. It is always a good idea to know what type of lights are being applied as well as the kind of gels or filters that will be used in front of the lights or the camera lens. Makeup is often adjusted to meet those demands. Most often, if you have designed your makeup with the lighting in mind, your artistry will be enhanced by it. If you ignore the effects that lighting and color have on your makeup application, the mistakes will be obvious for all to see. It all works together and takes years to really learn, but you will get invaluable practical experience with each job. Eventually, you will recognize what colors work with the lighting situations you are in, and the more you know about lighting, filters, and gels, the better the outcome.
Before a shoot starts, ask questions of the director, the cinematographer (also known as the DP, director of photography), or the gaffer (lighting designer). If they are not available, sometimes the first AD (assistant director) can help. Of course in some jobs, you will not get the chance to ask any questions. Be observant, watch the lighting crew and camera, and ask questions when they are not busy. Most people are very happy to explain their job or situation to you. Is it a film, video, HDTV, or stage production? You should know whether you are filming indoors or outside, day or night, and what lights, filters, and gels are planned. There are so many factors, and the more you know, the better off you are. Remember, this is not a perfect world—there will be many, many times that information is not available. So know your stuff, and be ready to work out of your kit and think on your feet.
Joseph N. Tawil, president of GAMPRODUCTS, Inc., is an expert in light and color mixing. He suggests: “Often I recommend that lights be set up in the makeup room in which you can put colored gels to simulate the lighting on stage or for camera.”
This is a perfect working condition, but you cannot count on it. In some productions, this will be accommodated, but it depends on the project, prep time, and—very important—the money. Lighting packages can be expensive, and so are those light bulbs.
Color Description Terms for Light
By Joseph N. Tawil, President, GAMPRODUCTS, Inc.
Hue, value, and chroma are terms from the Munsell system of color notation (published in 1905). It is a system designed for explaining color in ink and paint rather than color in light. However, the three descriptive terms are used to define the color of light, contributing more to the confusion than to the clarity of the subject. The vocabulary of color is a minefield of contradictions and confused meanings. Colorimetry is another system for describing color, and is of particular interest because it relates well to colored light. In colorimetry, the following terms are used to describe the color of light:
Dominant Wavelength (DWL): The apparent color of the light. Similar to the term “hue,” meaning the apparent color (e.g., red).
Brightness: The percentage of transmission of the full spectrum of energy (similar to value). Often described as intensity.
Purity: The purity of color is similar to chroma. It describes the mixture of color of the DWL with white or the color of the source. If there is only color of the DWL, it is 100-percent pure; but if there is very little DWL in the mixture, as in a tint, the color could be as low as, say, 5-percent pure.
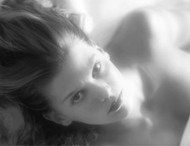
White: The presence of all colors in the light.
Black: Absence of all colors.
Texture: The surface properties of a color, as in shiny or matte, reflective or diffusing.
The Language of Additive and Subtractive Color Mixing
By Joseph N. Tawil, President, GAMPRODUCTS, Inc.
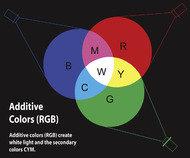
Color mixing with lights is called additive color mixing (Figure 4.1). This tricolor mixing theory was proposed by Sir Thomas Young in the early 1800s, and it is the basis for all film and video color systems today. Young discovered that by mixing red, blue, and green light, he could make most of the colors in the visible spectrum. Young determined that red, green, and blue were the ideal primary colors of light because they allow for the widest variety and create a reasonable white. Red, green, and blue are three colors that are widely separated from each other. Because of this, they will combine to make many other colors, including, in the right circumstances, white.
Combining two primary colors creates a secondary color that is a complement of the third primary (“complement,” as in completes). For example, by combining red and blue, you get magenta and other colors in the violet and pink range. Combining blue and green generates cyan (blue green) colors. Combing red and green creates yellow and other colors in the orange range.
Complementary colors are also called secondary colors. Violets and pinks are complementary to the primary color green because they contain red and blue. Oranges and yellows are complementary to the primary color blue because they contain red and green.
Tricolor mixing is illustrated in Figure 4.1. It is interesting to note that the complementary colors (or secondary colors) created in the additive color-mixing process—cyan, yellow, and magenta—are the primary colors of the subtractive color-mixing system. Obviously, this is not an accident, and the two theories do tie together.
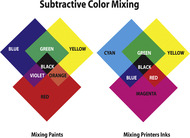
Subtractive Color: Subtractive color filtering (Figure 4.2) is something all of us have experienced in elementary school, where we have mixed paints to make a variety of colors. It's possible to read art books where painters talked about mixing primaries to make different colors. The primaries are often described in these art books as red, yellow, and blue. Filmmakers, however, see the subtractive colormixing primaries described as yellow, cyan, and magenta. Using the same language to describe primary colors in both the subtractive and additive color-mixing processes causes a great deal of confusion. Printers and filmmakers define the subtractive primary colors more accurately as cyan, yellow, and magenta (CYM), separating them from the additive color process. In subtractive color mixing, as we mix the primary colors of paints, inks, or filter emulsion layers, the resulting color gets darker and darker, and eventually black.
Subtractive color mixing is what we do when mixing makeup pigments, as opposed to the lighting department, which will use the additive process for color mixing.
Additive Color: In the additive color-mixing process, we are adding primary colors to come to white light. In the subtractive color-mixing process, we are mixing the primary colors to come to black.
When the artist knows that the word “additive” means mixing light to get a color, and the word “subtractive” is mixing pigments (makeup), all the mystery about a light source is better understood.
Correction Filters: The primary function for correction filters is to balance to a given light source. The two points of balance most often used are 3200K (or tungsten), and daylight (usually 5600K). Most film and television is divided between the two. For example, if you are shooting in an office with sunlight coming through the window, you will want to correct for one or the other. You either warm the sunlight toward tungsten, or you raise the apparent color temperature of the incandescent to daylight. The Makeup Artist needs to understand that the light itself does not affect the makeup, but how the lights are manipulated by additive color mixing with the use of gels and filters in front of the light source does.
Fluorescent Light: This type of light is problematic because of the green spikes attributed to it. Manufacturers make two kinds of fluorescents: warm and cool. The warm leans toward tungsten, and the cool leans toward daylight. Other problems with fluorescents are inconsistent lamp manufacturing, aging lamps that are still being used, and the fact that certain colors are always missing from the spectrum. If you find yourself on a shoot with fluorescents as a light source, and you need to match or create a specific color (let's say lipstick), take a test photo before the shoot begins.
Video Lights: Video often uses softer lights (soft boxes) for indoor interviews. Film and video usually work with HMI (hydrargyrum medium-arc iodide) if shooting outside in the daylight or with incandescent in the studio. Be prepared to make adjustments to the makeup if the actor is being moved from an interior shot to an exterior shot. There is a big difference in the visual perception of colors when incandescent lights are used inside to do your makeup, and then you go outside and shoot in daylight or with HMI lights.
If the actor is going back and forth between interior and exterior shots, and there is no time for adjustments, choose the situation that is the longest on screen, or the most important for dramatic content, for your makeup to be the best. This works for film, television, and stage.
—Gerd Mairandres, Wigmaster, San Francisco Opera
Stage Lighting: Stage lighting uses light for different reasons. There are a wide range of colors used theatrically. When you're working in the theatre, the lighting designer is there during the technical/rehearsal period, and the color design can be discussed then.
The theatre typically uses an incandescent source unless you're looking at a xenon follow spot or HMI follow spot, which is very close to daylight, and much bluer in its energy. The makeup is decided by how bright the light will be, how large is the stage being lit, what color gels or filters are being used to light the actors or objects onstage, and how the light is used around the stage.
Photography
Still photography uses light to create greater dimension, to highlight different areas, and to reduce or magnify details. Natural light or ambient light is often used to create moods. Artificial light is used to control different shoot locations and situations. Tungsten or incandescent lighting is most common.
Whether you are shooting photographs for fashion, beauty, or editorial, the lighting, attention to detail, and understanding concepts will be very important to the final print.
Still Photography Lighting
By J.C. Cerilla
In creating an impressive photograph it is necessary that you collaborate with a great team. Photographers have a keen eye for details and an amazing photo is not created by the photographer alone. It is a group effort among different artists excelling in their own fields. I believe you are only as good as the team you work with, so I look for a makeup artist who has a keen eye for detail, is consistently conscious of the model's makeup, and always sees to it that the desired look is achieved for the photograph. Lights have different effects on makeup, so a makeup artist should always ask for and see a test photo or Polaroid. This lets you see the effect the lighting will have on your makeup and allows for any needed adjustments.
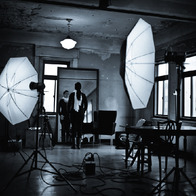
Since a key element in photography is lighting, the proper lighting is essential in achieving a great photograph and images that sell. The lighting should have a sense of balance with shadows and highlights. Facial features or objects might be highlighted to enhance the beauty of the subject or create a mood. Some photographers choose to work with a perfectly exposed image. Another lighting trick is adding reflectors or white boards on the dark side of the subject to add back some details to the shadow. Photographers also work with different types of light modifiers, like a soft box, to change the look and feel of an image (Figures 4.3 and 4.4). The number of light strobes you use does not matter if you know how to do proper lighting. You could use all the lights that you have, but if you do not know how to properly incorporate them in your shots, they are useless.
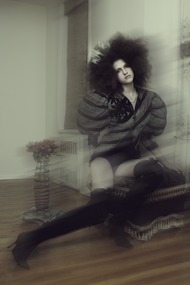
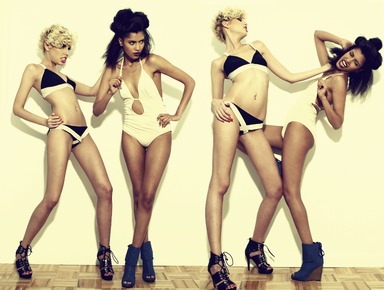
The other key element is attention to detail. Every little detail on your image is very important for the final print. In fashion photography, the focus is mainly on the clothing, accessories, and the “look” of the model—an example would be a fashion advertising campaign (Figure 4.5). Editorial shoots are more for storytelling and are centered more on the mood of the photograph. You highlight certain features both with lighting and details to achieve a successful image.
I love shooting editorials because it gives me more freedom to create (Figure 4.6). Let your imagination run wild and show your capabilities as an artist. Keep in mind that clients love a photographer with a creative vision, and the photographer loves a Makeup Artist who can contribute to that vision as part of the team.
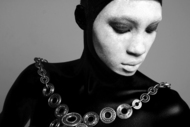
Black-and-white photography is never outdated with its classic feel (Figure 4.7). There should be a distinguishable contrast between the shadows and the highlights in your image. The main light source should be three times the power of your “fill” light: This creates more shadow on your photo, but by having a “fill” light you will still see some details on the dark areas of the image. The makeup would also require the same contrast between shadows and highlights.
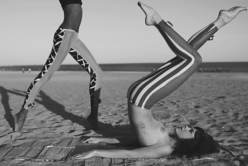
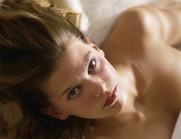
Color photography on the other hand has little contrast and the lighting is more a direct source (Figure 4.8). When shooting in color, you have to know what kind of light is being used. Color temperatures differ from one light source to another. Hot lights create an orange temperature on your subject much like the sun on a clear day. Fluorescent lights tend to cast a cooler temperature like green or blue.
Remember, attitude is as important as your skill and talent! During a shoot, I need my Makeup Artist to be positive and enthusiastic. Models start their day with the Makeup Artist. If you show a bad attitude, this creates a domino effect for the rest of the day and the shoot.
Gel Filters
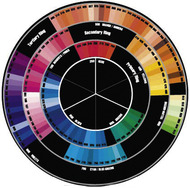
Gel filters (Figure 4.9) are used in front of the light source to change what the light is putting out. Lighting designers use gel filters for many different reasons. Gel filters are made of transparent plastic that is heat resistant, and they come in various translucent colors. They should not absorb heat, and are usually made of polyester or polycarbonate. You usually buy them in sheets or rolls. Film people tend toward rolls, theatre people toward sheets. Why gels and filters are used and what color is chosen can affect your makeup. There are also digital equivalents of lighting gels and filters created by companies such as GAMPRODUCTS, Inc. with Digital Film Tools. The following explains the color of the gels for photo cameras, film cameras, video, theatre, and digital add-ins, and what each color is most often used for, as well as how to adjust your makeup to work under these conditions.
General Breakdown of Colored Gel Filters for Light Sources
No-Color Blue: Top light for theatrical daytime. Top light in theatre tends to pale the skin tone. Areas of the face such as the eyes tend to sink or cast a shadow.
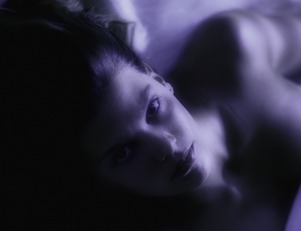
Blue Gels: Used most often to match daylight or to suggest night time. Can be used to make a light source bluer, and also used with other gels to achieve specific color temperature. If used with plus or minus green, will help correct some fluorescent or discharge sources. Used on lights and windows. Blue gels, depending on what is being shot, can have a cooling effect on the skin tone and overall makeup. Reds look like hues of violets and pinks (tints). Blues and blue greens tend to fade. Lipsticks appear darker.
Gray Gels: Used on lights where color temperature and sharp shadow or patterns must be maintained. Works as a neutralizer and will also neutralize your makeup colors.
Orange Gels: If used with appropriate amount of plus or minus green, will help correct some fluorescent or discharge sources, and can also be used to simulate sunlight. Use on light or windows. Makeup colors stay the same, but try not to layer with too many warm tones, which could create an orange face. If the person has a ruddy skin tone, add green to your makeup.
Yellow Gels: Fills for sunlight and to warm a room. Makeup stays the same, but if the person has sallow skin, use violet to add life.
Yellow Gold Gel: Warm tones, enhances skin tones. Makeup stays the same. If you have golden undertones in the skin, all the warm colors will work. If you have cool undertones, blue greens and red violets look nice.
Peach Gel: Can be used to make a light source more orange. Will enhance skin tone. Makeup stays the same. A flattering color for all skin types. Used most often for video or close-up beauty shots.
Red Gels: Used for sunsets, sunrises, fires, and to add contrast. Red fades most of your makeup. Lips appear much lighter. Greens will look darker, and violets will look black. Good to create contrast. Used most often for theatre or specialty film.
Green Gels: Used to match the green spike in fluorescent lights or discharge. Also can be used with other gels for color effect. Used on lights, windows, and to contrast. All green colors will fade. Blushers all but disappear. Lips look dark, so a lighter and brighter lipstick works. The warm tones in red orange, orange, and yellow orange look good. Blues will take on a blue green tone.
Camera Filters
By Paul Wheeler, Digital Cinematography
Camera filters are used to alter the temperature of lights, change an image, or enhance colors (Figure 4.10). The following filters can also be used in digital shooting situations:
Color-Compensating Filters (CC Filters): Come in primary colors and are used in front of the camera lens to correct light.
Color-Correction Filters: Used to correct a daylight scene when shooting with tungsten-balanced film.
Skin-Tone Warmers: Filters that will warm up skin tones that would appear cold otherwise.
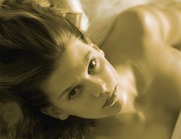
Sepia, Coral, and Others: Filters that lend a variety of tints to a scene.
Graduated Filters: Usually come in colored or neutral density filters. These filters are used to darken or color one area of a scene without affecting the rest of the scene.
Natural-Density Filters: Used to open up the aperture at which you will shoot the scene.
Low-Contrast Filters: Reduce the overall contrast in a scene.
Ultra-Contrast Filters: Like the low-contrast filters, but work with the incident, ambient light. Ultra-contrast filters work beautifully with bringing up shadow details.
Fog Filters: Emulates fog. Images will have less definition and contrast.
Double Fog Filters: Objects near to the camera will appear less affected than those far away.
Pro Mist Filters: Give a glow around intense sources of light. Highlights become “pearlized.”
Net Filters: Nets will affect the scene differently depending on the color used. A white net will diffuse highlights into shadows. Dark nets will often bleed shadows into highlights. A brown net will add richness and overall warmth.
Enhancing Filters: Bring out one color at a time without affecting any of the others. These filters affect the red and orange portions of a scene.
Fluorescent-Light (FL) Correction: The FLB filter corrects fluorescent light to type-B film or tungsten-balanced video camera. The FLD filter corrects fluorescent light to daylight camera.
Polar Screens: Screens that are used to darken the blue portion of a sky in color photography as well as reducing reflections in parts of a scene.
Black-and-White Photography
Black-and-white photography with the use of light registers color in variations of gray. Seen this way, more attention should be given to composition and the levels of tone that a color will be. Tones are used with light in black-and-white photography to portray emotions through the lightness or darkness of shadows. The direction of light is important to the Makeup Artist. Front lighting will reduce the textures and depth of the photo. Backlighting will highlight the image and reduce the detail. If the image is lit from the side, it will have a greater dimension. When shooting outdoors in direct light, shadows will appear darker, with contrasting lights and darks. Cloudy or misty days will soften shadows. But this said, how the sun reacts during a shooting day will greatly influence your decisions. Full sun will create a harder light, with stronger shadows and highlights. Cloudy or partial sun has a softer look. Your makeup could look one way in the morning light, and another way at noon when the sun is strongest. Be aware of this throughout the day.
Artificial lights are used to control the brightness of the image and for different lighting effects. Usually tungsten or incandescent lighting is used. These light sources can also be used in color photography. Digital black-and-white photography works by switching the modes within the camera from a color liquid crystal display (LCD) to grayscale. Pictures are taken with color signals that are recorded by computer-controlled display (CCD), but the image is later processed to remove all color. Filters are also used in all forms of black-and-white photography. Many photographers feel that if you have experience and expert knowledge in black-and-white photography, you will thrive in color photography. That is because of the natural instincts you will develop by working in gray tones. That theory works for the Makeup Artist as well.
Filters Used in Black-and-White Photography
Black-and-white photography uses filters to alter shades of gray. The following filters and their functions will allow the Makeup Artist to adjust makeup according to what filters are used, whether for art's sake or for natural makeup, when adjustments are necessary.
Red Filters: Red filters are used to add dramatic contrast in black-and-white photography. In color photography, red reduces blue and green. Red filters will enhance any red.
Yellow Filters: Will darken blues and lighten green, yellow, orange, and red colors.
Orange Filters: Work the same way as red filters and yellow filters, except with less intensity than red but more intensity than yellow.
Green Filters: Will lighten green colors.
Blue Filters: Will lighten blues and darken yellow, orange, and red. Works well to enhance fog mist or haziness.
Diffusion Filters: Are used for a soft-focus effect (as in softening wrinkles on the face).
Optical Effect Filters: Are multi-image filters such as star filters. These filters can bring a soft, diffused look to the image.
Polarizing Filters: Are used in color and in black-and-white photography. Reflected sunlight is reduced, haze can be penetrated, and overall skies are darkened. Color saturation is increased. Reflections are reduced or eliminated.
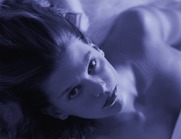
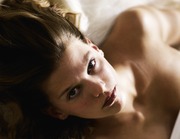
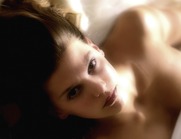
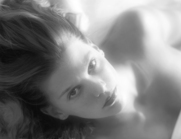
Today, there is, more than ever, a growing field of technology in the world of entertainment. What a production chooses to shoot and edit with can be wide open. This technology has opened the door to new and wonderful tools to work with. One of those tools is being able to edit digitally and create the same effect that gels and filters give when used on a light source. Digital Film Lab is a unique plug-in from Digital Film Tools meant to simulate a variety of color or black-and-white photographic looks, diffusion and color-gradation camera filters, light gels, film stock, and optical lab processes. You would still apply the same principles (filter gels) on what colors to choose for makeup to better fit the digital color process it would go through later. Figure 4.11, Figure 4.12, Figure 4.13, Figure 4.14, Figure 4.15, Figure 4.16 and Figure 4.17 show Digital Film Tools simulated color gels and filters from Digital Film Labs.
Lighting Lessons
Lighting, like color, is complex. A simple lesson in light and gels will remind the Makeup Artist why these things can affect his or her work.
Lesson One: Gel Filters
1. Take a digital camera and hold a colored gel filter up against the lens. Take a close-up picture of an object under a simple light source (for example: a plant, flower, lips, animal, or whole face).
2. Using that same object and same light source, continue to take pictures, one at a time, with the following colored gels: blue, gray, orange, yellow, red, and green.
3. Observe each picture.
4. Write down the differences that the gel filters make to the same object.
This lesson is extreme. You'll rarely have an actor pure blue or pure green because of filters. However, it does show you how your makeup should be adjusted when gel filters are being used.
References
Tawil, J.N., Color Description Terms for Light, www.gamonline.com/catalog/colortheory/language.php.
Tawil, J.N., The Language of Additive and Subtractive Color Mixing, www.gamonline.com/catalog/colortheory/language.php.
Wheeler, P., Digital Cinematography. (2001) Focal Press.
Zolenski, V., Black and White Photography, www.blackboardarts.com (2007).
Internet Resources
Cerilla, J.C., Still Photography, www.jcerilla.com.
Digital Film Tools, www.digitalfilmtools.com.
GAMPRODUCTS, Inc, www.gamonline.com.
Ilford Photo, www.ilfordphoto.com.
Robin Kanta Photographic Supply, www.photofilter.com.
Stanley, L., www.montanaphotographer.com.
