
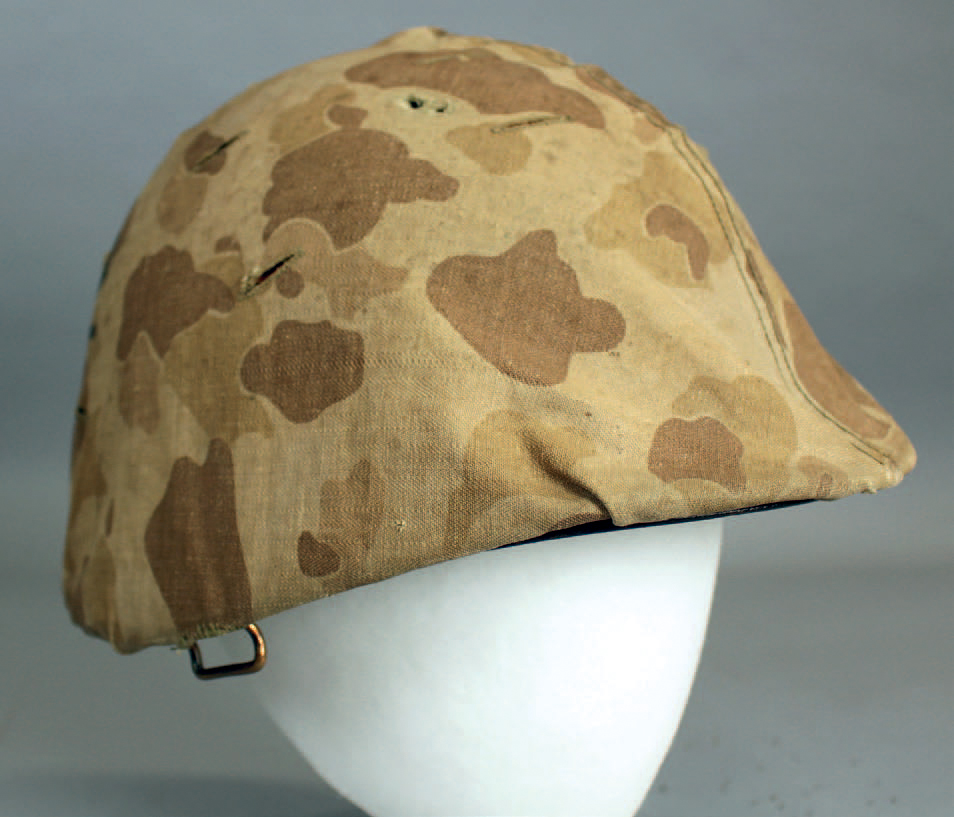
US Marine Corps M1917A1 helmet.
| 2 | The Pacific, 1941–5 |
THIS CHAPTER COVERS THE modelling and painting of some of the units that the USA deployed to fight the war in the Pacific from 7 December 1941 to the Battle of Okinawa, which started on 1 April 1945. Over the years, the Pacific theatre has been a popular subject for Hollywood movies and is often portrayed as a United States Marine Corps (USMC)-only affair. In reality, there was a lot more to it than that, with the Army and Navy also involved. There were three main battles during this time: Wake Island, Tarawa and Okinawa. The US soldiers’ uniform and equipment changed to meet the challenges encountered over this time.
Initially the uniforms worn by both the Army and the Marines looked very similar with both wearing the M1917A1 ‘Kelly’ helmet, which was the M1917 Brodie helmet of WWI.
The A1 helmets had a modernized suspension system and production began in 1940; many WWI helmets were retrofitted to the new style. These were the helmets most likely to have been worn by the troops involved in action at Wake Island, Bataan and Pearl Harbor. The Brodie helmet was subsequently replaced by the well-known M1 helmet, which was used up to 1985.

US Marine Corps M1917A1 helmet.
The Springfield rifle model 1903 was the standard rifle issued to both Army and Marines. It was used by Marine units on Guadalcanal from August 1942 to February 1943 under Operation Watchtower (called by some marines ‘Operation Shoestring’, as they were issued with only enough ammunition for ten days when the operation began). The Springfield was replaced, first by the Army in the mid-1930s and later by the Marine Corps, by the M1 Garand rifle.
The uniforms changed as well. In 1941 they wore a khaki drill shirt and trousers with gaiters and brown boots for use in tropical climates. This then changed to the herringbone twill (‘HBT’) cotton uniform, which was a light serge green colour that faded to a lighter shade after repeated washing.
The Marine Corps adopted the M-1942 ‘Frog Skin’ pattern camouflage uniform, also known as the ‘Duck Hunter’ pattern, which was first issued to Marine Raiders in 1942. After initial use, most Marines found the uniform uncomfortable and impractical to wear in the Pacific climate and preferred their ‘HBT’ uniforms instead. (It had been designed as a one-piece suit, without a back flap, which meant that answering a call of nature was a major undertaking and required taking off all the webbing.) Only the helmet cover continued to be widely used. The infantry units deployed in the Pacific wore a similar uniform to the Marines, but instead of the camouflage clothing they used a mix of USMC-type equipment, as well as Army issue.
For the most part this was an infantry war, but vehicles were used. The Landing Vehicle Tracked (LVT) was used in all amphibious operations and was adapted as time went on to meet the challenges that were faced during these landings. The M4A2 Sherman tank was deployed by the USMC in the Pacific: first at Tarawa in late November 1943, when Company C 1st Marine tank battalion (Medium) was landed on the island to support the landings there.
BATTLE-DAMAGED IWO JIMA M1 HELMET, SERGEANT ROBERT FILKOSKY
The WWII, US Marine Corps M1 helmet seen here was worn by Sgt Robert Filkosky during the Battle of Iwo Jima. He fought in the battle as a member of 3rd Battalion, 24th Marines, 4th MARDIV. During the fighting around the 2nd Airfield, on 23 February 1945, Sgt Filkosky was shot in the head and wounded. Two small calibre rounds penetrated through the front, right side of the helmet and exited the rear. The bullets furrowed the Marine’s head, but did not mortally wound him. As he lay injured awaiting evacuation from the island, Sgt Filkosky witnessed the flag raising on Mt Suribachi. His helmet was recovered by a comrade and eventually placed in his overseas bag and returned to the United States. He has since kept the item as a unique conversation piece. During the 1950s the helmet was at one time displayed in Ripley’s Believe it or Not Museum, St Augustine, Florida. Mr Filkosky later had the steel portion of the helmet bronzed for reunions, where he had fellow Iwo Jima veterans autograph the object in commemoration of their assault on the island. In an interesting adjunct to Mr Filkosky’s history, he was a friend of his fellow ‘I’ Company member, the Academy Award-winning actor Lee Marvin.
A US Marine Corps M1 helmet worn by Sgt Robert Filkosky, who fought in the Battle of Iwo Jima as a member of 3rd Battalion, 24th Marines, 4th MARDIV.
The battle damage is remarkable, with two small entry holes from the rounds in the front of the helmet, amazingly close to one another. The helmet’s camouflage cover is unique in that the ‘I’ Company, 3rd Battalion, 24th Marine Regiment tactical marking is clearly visible on the back of the helmet. There are no known helmets in the National Museum of the Marine Corps (NMMC) collection with WWII tactical markings. While the helmet’s bronzing (hidden underneath the cover) is admittedly unusual, it is still an interesting feature of the helmet, as it contains the names of many Marine veterans who participated in the assault and have since passed away.
Wake Island is a very important part of this story. It is a coral atoll situated 2,400km (1,500 miles) east of Guam, 3,200km (2,000 miles) west of Hawaii and 950km (600 miles) north of the Marshall Islands, which were held by the Japanese. Pan American Airways used Wake as a stopover for Clipper flights, which started in 1935, and so had a base there together with the US Navy. In January 1941 the island’s defences were to be strengthened and civilian contract workers were brought in to do this. Unfortunately the work was not finished by the time of the Japanese attack, which started at noon on 8 December 1941.
The defenders consisted of some 450 officers and men of the 1st Marine Defense Battalion under Major James P.S. Devereux, 68 US Navy personnel and 1,221 civilian workers. Air cover was to be provided by twelve Grumman F4F-3 Wildcat fighters of Marine squadron VMF-211 under the command of Major Paul A. Putnam. In overall command was Commander Winfield S. Cunningham.
This is an important chapter of the story of the war in the Pacific, as it was at Wake Island that the Imperial Japanese Navy lost two surface vessels, the destroyers Hayate and Kisaragi. The Hayate was hit by a 3in shore-mounted naval gun, which penetrated the aft magazine with a shell, destroying the ship. After the garrison on the island had endured three days of Japanese air attacks, by 11 December the Japanese were sure that the defences had been sufficiently weakened to make it safe to start a landing. However, that was not the case. The defenders held their fire until the Japanese were well within range of their 5in and 3in guns and then opened fire on the Kisaragi. The ship was sunk after a 100lb bomb hit the depth charge racks and the explosion blew off the stern. The bomber was a F4F Wildcat piloted by USMC Captain Henry T. Elrod. Wake Island finally fell after a second Japanese assault on 23 December, under circumstances that led to the press describing it as ‘The Alamo of the Pacific’.
This chapter covers painting the Marines and Navy personnel who defended Wake as well the weapons they used, such as the .30 calibre medium machine gun and the .50 anti-aircraft machine gun. The figures and models used are all 1:72 scale metal and resin.
MEDAL OF HONOR, MAJOR HENRY ELROD, WAKE ISLAND
Henry Talmage Elrod was born on 27 September 1905, in Turner County, Georgia. After attending the University of Georgia and Yale University he enlisted into the Marine Corps in December 1927. He was appointed a Marine second lieutenant in February 1931.
Following more than a year at the Marine Corps Basic School in Philadelphia and at the Marine Barracks there as a student aviator, 2nd Lt Elrod was ordered to the Naval Station in Pensacola, Florida. There he served as a company officer and a student aviator. He was promoted to first lieutenant on 29 May 1934.
In February 1935 he earned his wings and, as a Marine Aviator, was transferred to Quantico, Virginia, where he served with a Marine aircraft unit until January 1938. In addition to his other duties, he was squadron school, personnel and welfare officer. He was promoted to captain on 1 September 1937. In July 1938 Capt Elrod went to San Diego for duty at the Naval Air Station and served as squadron material, parachute and personnel officer, until January 1941, when he was detached to the Hawaiian Islands area. He arrived at Wake Island a short time before the hostilities commenced and was one of the twelve pilots who flew the Marine planes onto the island. During the defence of Wake, Capt Elrod repeatedly displayed conspicuous gallantry at the risk of his life, above and beyond the call of duty. On 12 December he single-handedly attacked a flight of twenty-two enemy planes and shot down two. On several flights he executed low altitude bombing and strafing runs on enemy ships, and became the first man to sink a major warship with small calibre bombs delivered from a fighter-type aircraft.

The Medal of Honor presented to Henry Talmage Elrod’s widow for his heroic actions during the last days of the defence of Wake Island.
When his plane was destroyed by hostile fire he organized a unit of ground troops into a beach defence. Capt Elrod was killed in action defending Wake Island on 23 December 1941, repulsing repeated Japanese attacks until he fell mortally wounded.
Elrod was posthumously promoted to major in January 1942. On 8 November 1946 his widow was presented with the Medal of Honor, posthumously awarded to her husband for his heroic actions during the last bitter days of the defence of Wake. He was initially buried on Wake Island, but was reinterred in Arlington National Cemetery, Arlington, Virginia, in October 1947.
Preparation
The first thing when painting any figure – metal, plastic or otherwise – is to take time to inspect it for mould lines and any flash left over from the moulding process. These can be removed using a small file and sharp knife. Then mount the figure onto either a temporary base, such as a piece of card or a bottle top, or straight onto its final base. Most wargamers use single bases for gaming WWII that are suitable for infantry figures. It is best to use temporary bases for weapons crews as this will help during the painting stages.
For this example, a 20mm figure is used, wearing the Brodie helmet, shirt, trousers, boots and light equipment as used on Wake Island.
Painting
Step 1. First the figure is painted with black, grey or white primer. In this case, a black primer was applied.
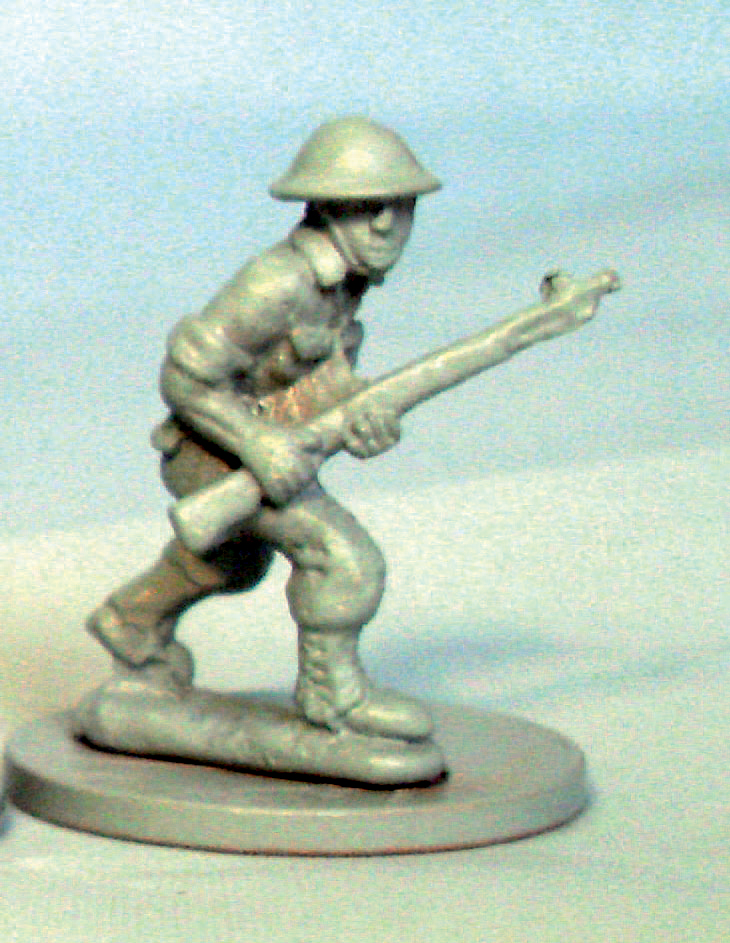
A 20mm metal model of a WWII US Marine.
When the priming coat is fully dry, a thin, but even, coat of Vallejo 921 ‘English Uniform’ is applied over the entire figure. This provides a good base colour for the uniform. Do not worry about painting over details such as the face at this stage, as these will be painted next.

The figure has been primed and is ready to be painted.
Step 2. The flesh areas are painted next. Start by selecting the flesh colour, in this case Vallejo ‘Shadow Flesh’, and use this as the base colour. Then take Vallejo ‘Flat Flesh’ and mix the two colours together in a ratio of 2:1. Use this to highlight the raised areas, nose, cheeks, lips, arms and hands, but take care to leave enough areas to act as shadow. Take more ‘Flat Flesh’, mixed in a ratio of 2:2 this time, and repeat the highlights. When properly dry, wash the flesh areas with sepia ink wash. When this is properly dry, highlight with undiluted ‘Flat Flesh’, taking care not to overdo this.

The main base colour has been applied and the areas of flesh have been painted.
Step 3. Paint all the webbing and rifles next. Gunmetal is best achieved by first painting the metal parts of the rifle with black, then taking some Vallejo 865 ‘Oily Steel’ mixed in a ratio of 2:1. Then highlight the raised areas. When fully dry, lightly paint the raised areas with undiluted ‘Oily Steel’ and finally wash with diluted black ink when dry. Paint in the wooden parts with a dark brown acrylic paint, and then highlight with Vallejo ‘New Wood’. For the webbing, use AK3076 ‘Canvas Tone’, from the AK Interactive set of US Army colours, and mix with Vallejo 819 ‘Iraqi Sand’ at a ratio of 3:1. When dry, use a 2:1 mix for highlights.
Step 4. It is now time to paint the uniform. Start with AK3072 ‘Green Ochre’, taking care to leave some of the base coat exposed in places that would naturally appear in shadow. Then mix some of the ‘Green Ochre’ with ‘Iraqi Sand’ at a ratio of 3:1 and use this for the first highlight. Repeat when dry, but this time use a mix with a ratio of 2:1.

The uniform now stands out: leaving the darkest colours in the creases and areas such as around the seams of the pockets make the details show more clearly.

Highlighting is the addition of lighter tones of paint to the raised areas of the model, leaving darker tones in the areas that would naturally be in shadow.
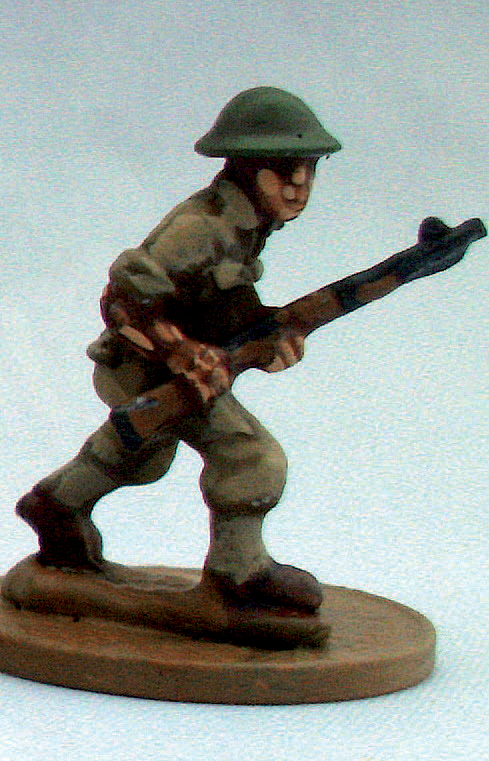
The completed figure: all that needs to be done is to finish the base.
Step 5. Once the uniform is painted, it is the turn of the smaller details such as helmet and rifle slings.
Vallejo 264 ‘Brown Violet’ is recommended for use as the base when painting the helmets, highlighted with Vallejo ‘Camouflage Green’, mixed 2:1 and applied over dark green as a highlight. Paint the helmet bowl and rim, but leave a little area unpainted around the helmet where the bowl meets the rim.
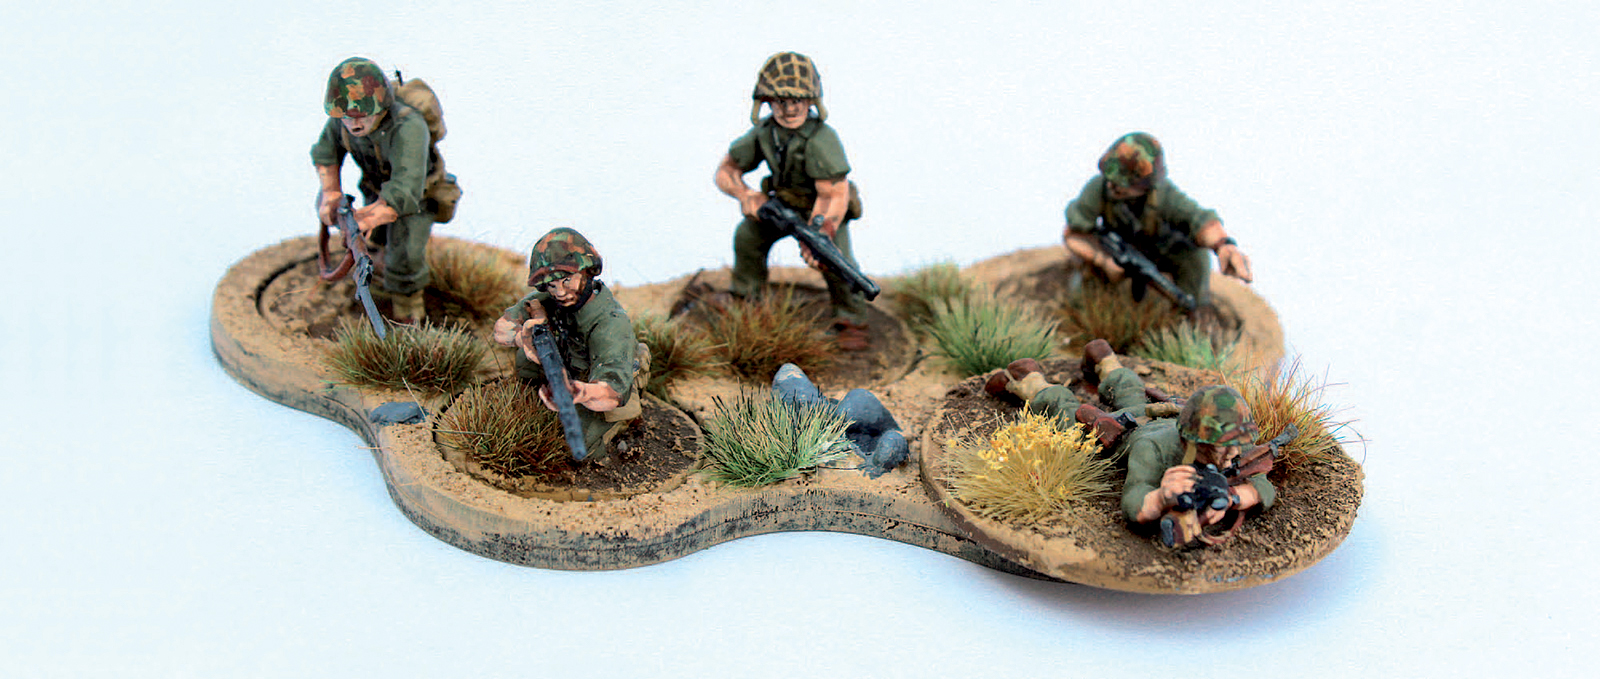
Examples of 28mm Warlord Games USMC figures, painted using the same steps described in this chapter for the 20mm figures, have been included in the illustrations here for the very good reason that Okinawa was a joint Army and Marine operation.
The garrison of Wake Island consisted of Marines, naval personnel who manned the coastal guns, and also pilots, who flew the USMC aircraft. Here are the steps to paint a 1:35 scale figure to depict one of those pilots.
Step 1. Start with a resin figure, which comes in kit form. These are simple to assemble using cyanoacrylate glue. Remember to clean away any mould lines before assembly.

The USMC pilot kit.
Step 2. Paint the uniform using Vallejo 921 ‘English Uniform’. Next, paint the face and boots with Vallejo 818 ‘Red Leather’.

Base coats have been applied to the face, boots and uniform.

These uniforms require less highlighting, but a little will improve the appearance.
Step 3. Cover the raised areas of the uniform using AK3082 ‘Dark Sand’, taking care to leave some of the original base colour ‘English Uniform’ showing.
Next, paint the parachute harness with Vallejo 344 ‘German Winter Tank Crew White’. Using an ochre base coat, paint the pilot’s lifejacket. These were actually yellow, so ochre is a good base colour.
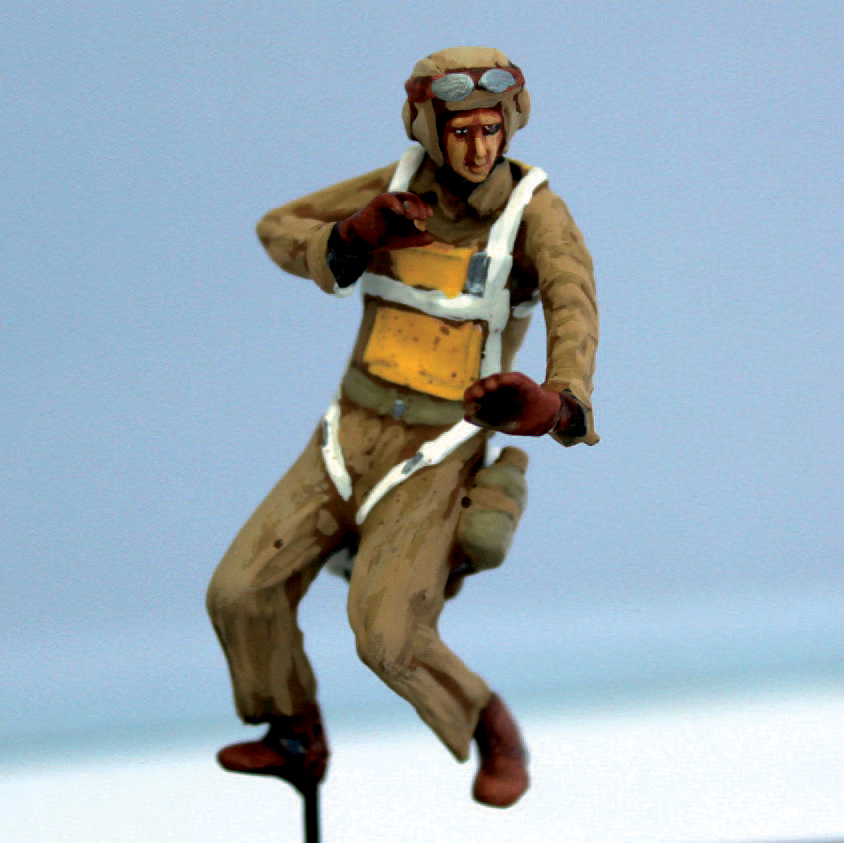
Details are added to the face.
Step 4. Paint the raised areas of the face, such as the forehead, cheekbones and nose, with Vallejo 860 ‘Medium Flesh Tone’. Take care to leave the base colour exposed in areas that would naturally be in shadow. For a realistic effect when adding the eyes, paint a small strip for each eye and then, using an off-white paint, add a small dot to the edge of each eye. Dark grey and off-white are used because black and white create a very stark effect that does not look realistic. When this is dry, finish the face by adding a tiny amount of white paint to the ‘Medium Flesh Tone’ and use this to highlight the forehead, cheekbones, chin and bridge of the nose.
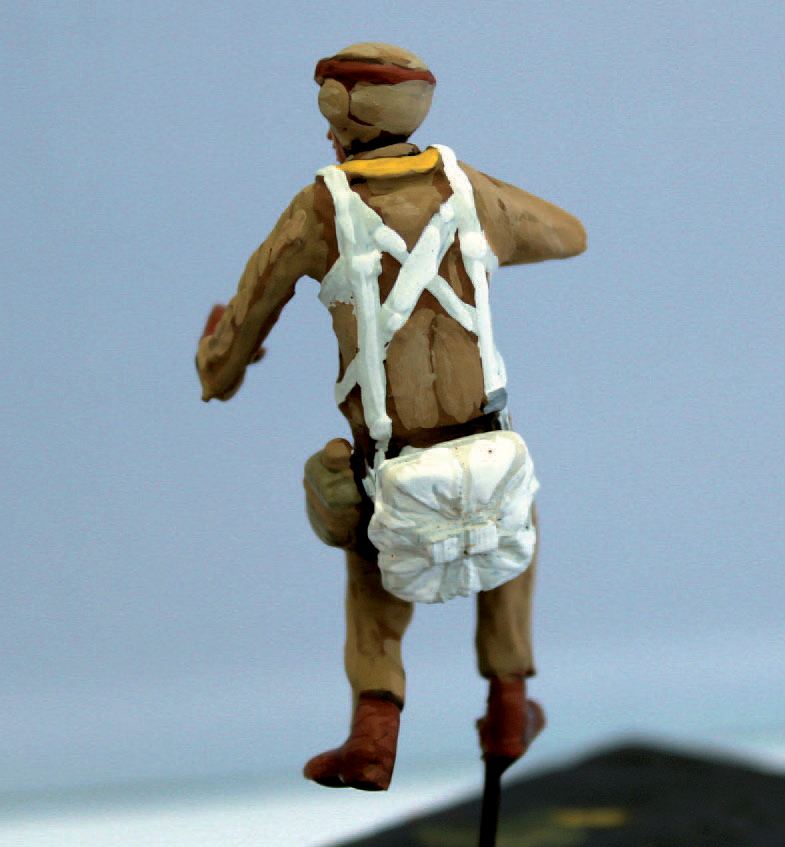
Details are added to the helmet.
Step 5. When the model is dry, paint the flying helmet: these were canvas and so were almost the same colour as the uniform. Paint the helmet with AK3082 ‘Dark Sand’, taking care not to paint over the goggles, which should be left brown. Next add a small amount of white paint to this colour and use the mix to highlight the uniform. Add a little more white paint to this mix and use it to highlight the helmet.
Next, paint the parachute harness with white paint. The lifejacket is painted Vallejo 915 ‘Deep Yellow’ and the belt is painted with Vallejo 988 ‘Khaki’, highlighted with the same colour to which a little white has been added. Paint the gloves with ‘Red Leather’ and, when dry, highlight the gloves, boots and goggles with this colour, but with the addition of a small amount of white.
Step 6. Wash the boots, gloves and goggles with brown ink. When dry, paint the glass of the goggles, as well as any metal such as the belt buckle and parachute harness buckles, in Vallejo 720 ‘Gunmetal Grey’.
HANDY TIP FOR PAINTING EQUIPMENT AND CREW
Even if the intention is to arrange your weapon and crew on a large base, it is best to base the models, even if only temporarily, on individual bases, such as bottle caps or paint tin lids. This will make the painting process much easier by allowing access to areas that could otherwise be difficult to see or reach.
Both the Browning M1917 heavy machine gun and the Browning .50 calibre anti-aircraft machine gun were used by the troops defending Wake Island.
Step 1. Prepare the models by removing any mould lines and then construct them according to the instructions. Paint the guns using Vallejo 950 ‘Flat Black’, as this will form a great base for a true gunmetal effect.

The guns have been base-coated with black.
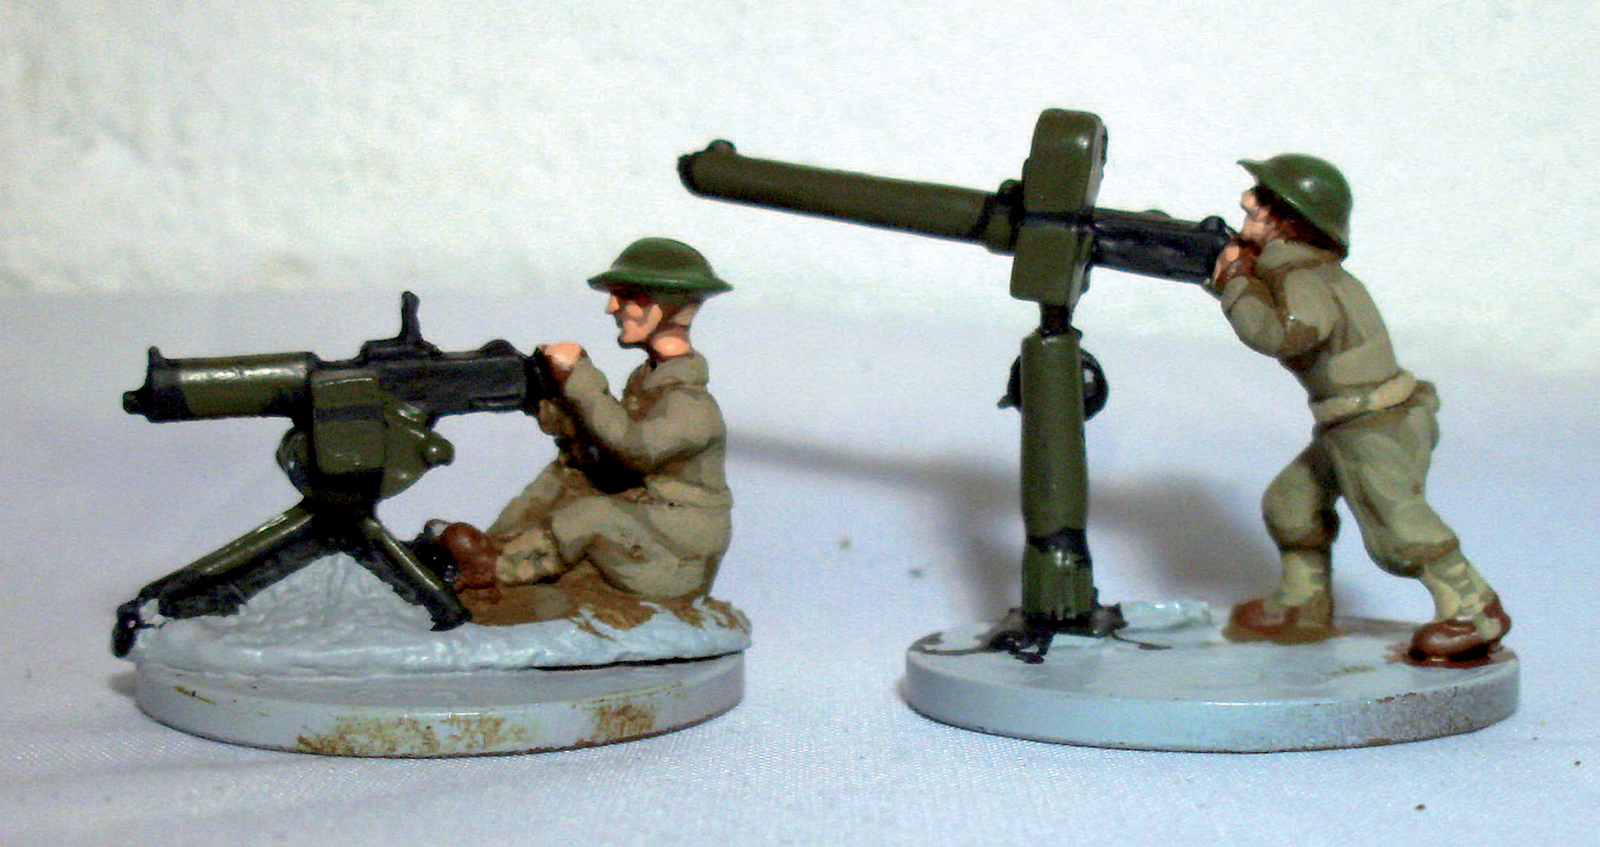
The weapons are now fully painted and matt coated.
Step 2. Once the base coat is dry, use Vallejo 264 ‘Brown Violet’ and paint the weapons. Take care to leave black the areas that will be bare metal in the finished model. Also leave a little black exposed in the crevices of the machinery as this will give a more realistic effect. Next, create a mixture of ‘Brown Violet’ with Vallejo ‘German Camouflage’, using the ratio 1:2, and use this to highlight the areas already painted with ‘Brown Violet’.
Step 3. Add Vallejo 865 ‘Oily Steel’ to matt black paint at a ratio of 2:1 and use this to paint all the metal parts. Next, using undiluted ’Oily Steel’, highlight the same areas and allow to dry. When properly dry, wash the metal parts with thinned black ink. Finally apply a matt varnish once dry.
Step 4. Paint any other details, such as ammunition belts. Two types of ammunition belt were supplied: disintegrating link and single belt. Disintegrating link belts were metal and mostly black in colour. The belt in this model is a disintegrating link and so the bullets should be painted first with gold paint, then a black band should be painted down the centre of the belt lengthways. Finally, that black strip should be highlighted with dark grey. Single belts are painted in the same way except they are khaki-coloured, not black.
By November 1943 Marines were equipped with the new HBT uniform. The M1942 ‘Frog Skin’ pattern camouflage, first issued to Marine Raiders in 1942, was by now in widespread use by the USMC, though only really in use as helmet covers as the rest of the uniform was deemed inappropriate for the climate in the Pacific.
Tarawa was the first battle in the Pacific where LVTs were used to carry out an amphibious assault. The 2nd Marine Division had sufficient LVTs for the first three waves of troops at Tarawa, but then had to rely on the Higgins boat (LCVP) to land the following support waves. The LVT allowed troops to land directly on the beach as its tracks enabled it to lift out of the water. The Higgins boat, on the other hand, needed four feet of water in order to deliver troops onto a beach, which was to prove difficult at Tarawa.
The M4A2 Sherman tank saw action in the Pacific for the first time at Tarawa, with the tanks belonging to C Company 1st Corps Tank Battalion (Medium) proving themselves invaluable.
Tarawa, an atoll that is part of the Gilbert Island group, situated some 3,800km (2,400 miles) south-west of Pearl Harbor, was one of the bloodiest battles of WWII. The largest of its islets, Betio, is 4.8km (3 miles) long and 800m (0.5 mile) wide.
The attack on Tarawa was part of Operation Galvanic, an offensive that took place in the Central Pacific in order to secure a stepping stone to the Mariana Islands. Tarawa was an important target because it had an airfield and was of strategic importance to the outcome of US operations in the Central Pacific in 1943. It was defended by some 4,500 Japanese marines and troops from the 3rd Special Base Defence Force as well as the elite 7th Sasebo Special Naval Landing Force commanded by Rear Admiral Keiji Shibazaki. The island was extremely well defended with 100 pillboxes housing machine guns, as well as concrete positions housing guns of all sizes up to Vickers 8in. So confident was Rear Admiral Shibazaki of his preparations that he said ‘it would take one million men one hundred years’ to conquer Tarawa.
The 2nd Marine Division was assembled to attack the island, reinforced to some 18,000 men commanded by Major General Julian C. Smith as part of the V amphibious assault corps. Also part of this corps was the 27th Infantry Division, which was assigned to take Makin Atoll.
The assault on Tarawa began on 20 November at 05.05, when the US fleet opened fire on Betio (although commonly called the Battle of Tarawa, it was Betio that was attacked). The Marines got into their assault craft and waited until the three-hour barrage was completed. The landing craft then assembled for the run towards the beaches. Such was the intensity of the opening bombardment that the Marines wondered how anyone could survive such an ordeal, but the Japanese defences were well prepared. They soon started to return fire at the oncoming landing craft, resulting in many casualties. The first three waves landed on the beach with the aid of the LVTs. The following waves were in Higgins boats, but due to the tide they could not get over the coral reef and so the Marines had to wade some 500 yards to shore while under heavy fire. Once ashore, it was difficult to move inland, so heavy was the Japanese defensive fire that any movement from cover meant almost certain death. Some groups of Marines, showing extreme heroism, did manage to move inland assisted by the Sherman tanks, which had landed subsequently. The tanks took out Japanese-held positions with flame-throwers, grenades and satchel-charges. Even though they had established a foothold, the fighting continued until 23 November in the same savage manner as before. By the end of the battle the Japanese had lost some 4,690 soldiers with 17 captured, the Americans had lost more than 3,000 killed and wounded.
This brief account of the fighting on Tarawa indicates that without the LVTs and Sherman tanks the outcome would have been so much bleaker for the Americans.
US MARINE CORPS CAMOUFLAGE UTILITY COAT
This uniform coat was worn by US Marine Staff Sergeant Edward J. Driscoll Jr, who served with Company D (Scout), Second Light Tank Battalion during the Battle of Tarawa in 1942. This action marked the first widespread use of the new uniform by Marines in the Pacific War.

‘Frog Skin’ camouflage jacket worn by US Marine Staff Sergeant Edward J. Driscoll Jr.
These examples use 20mm figures.
Step 1. As with all metal figures, first check for any mould lines and flash that can be left behind after the casting process. These can be easily removed with the aid of a small file and sharp craft knife.
Next, mount the figures on to bases for painting. Superglue is a good adhesive to use for this as it forms a good bond and only a small drop is needed. Then prime the figures with a suitable colour: grey or black are better primers for WWII uniforms as any subsequent colours applied appear darker than they would do if a white primer is used. A black primer will make subsequent colours look darker than a grey primer would.
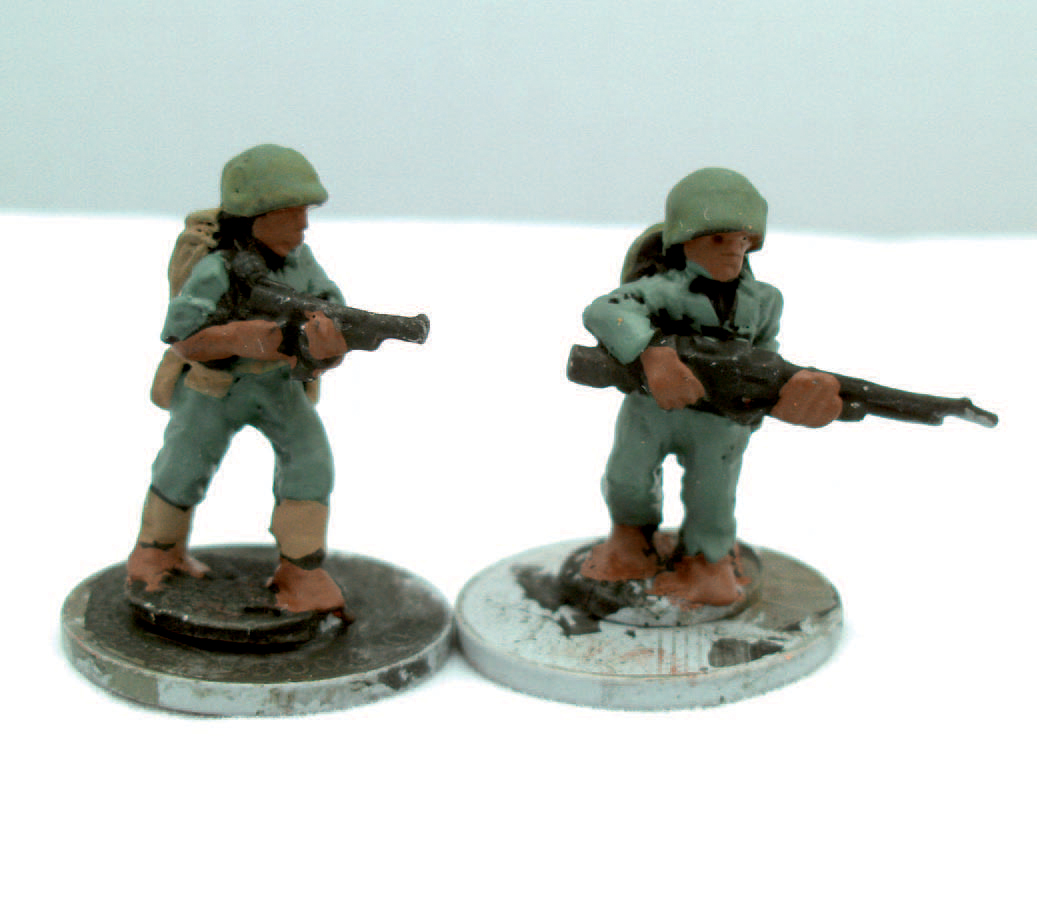
The two Marine figures have been blocked in and are ready for the next stage.
Step 2. Once the priming coat has dried, block paint in the main uniform colours. Remember to leave a little of the darker primer showing to create shadows in appropriate places, for example where the arms are next to the body and between the face and collar of the jacket. In this example Vallejo 920 ‘German Uniform’ was used. Next, the belt equipment and haversack are painted with AK3076 ‘Canvas Tone’ from the set of AK paints designed for WWII US uniforms. The hands and face are then painted with Vallejo ‘Red Leather’.
The face and hands are painted first, following the steps described above.
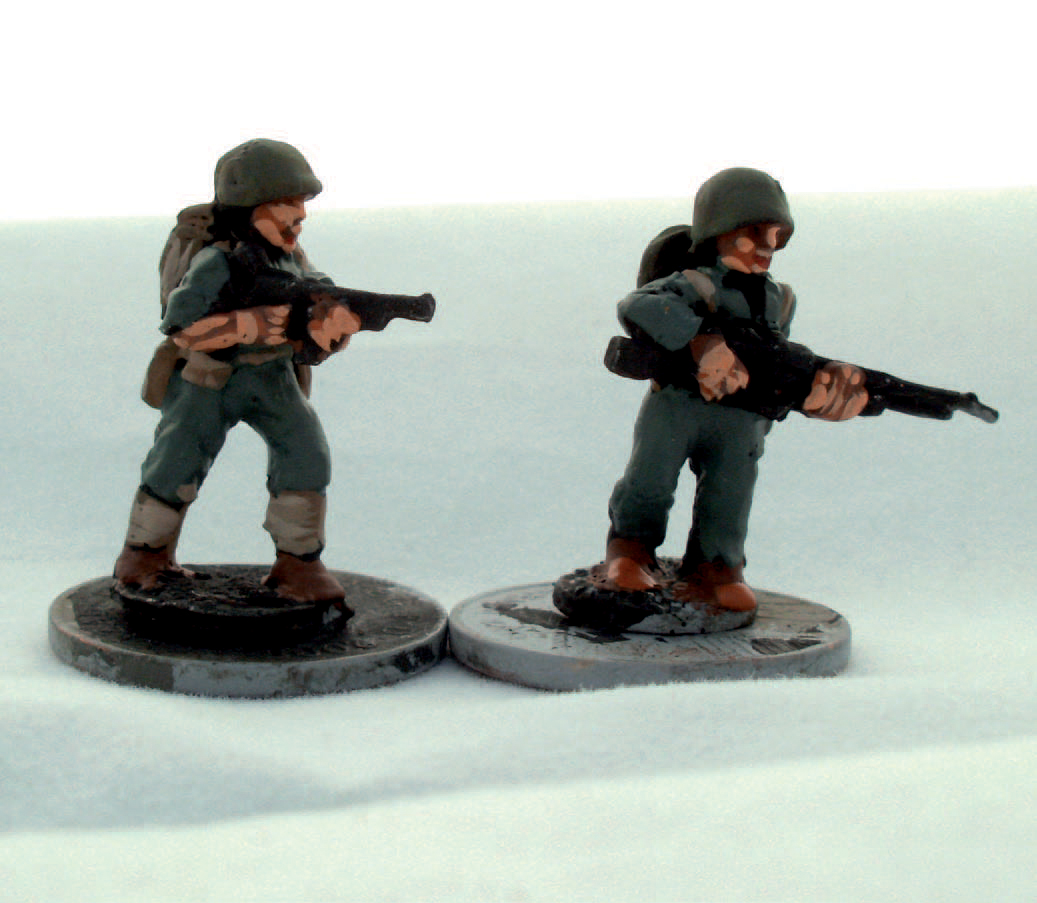
The flesh areas of the two figures are now complete.
Step 3. The uniform to be seen in this model is of HBT type. Vallejo ‘German Uniform’ is a good base colour and should be applied to the entire uniform. Once dry, create a lighter tone of paint by mixing ‘German Uniform’ with some Vallejo matt white in a ratio of 3:1. Use this to highlight specific areas. Next, create a paler tone by mixing the paints equally and apply this to raised areas. Finally, mix the paints in a ratio of 2:3 and apply to only the most prominent areas. This should give your figure both depth and definition.
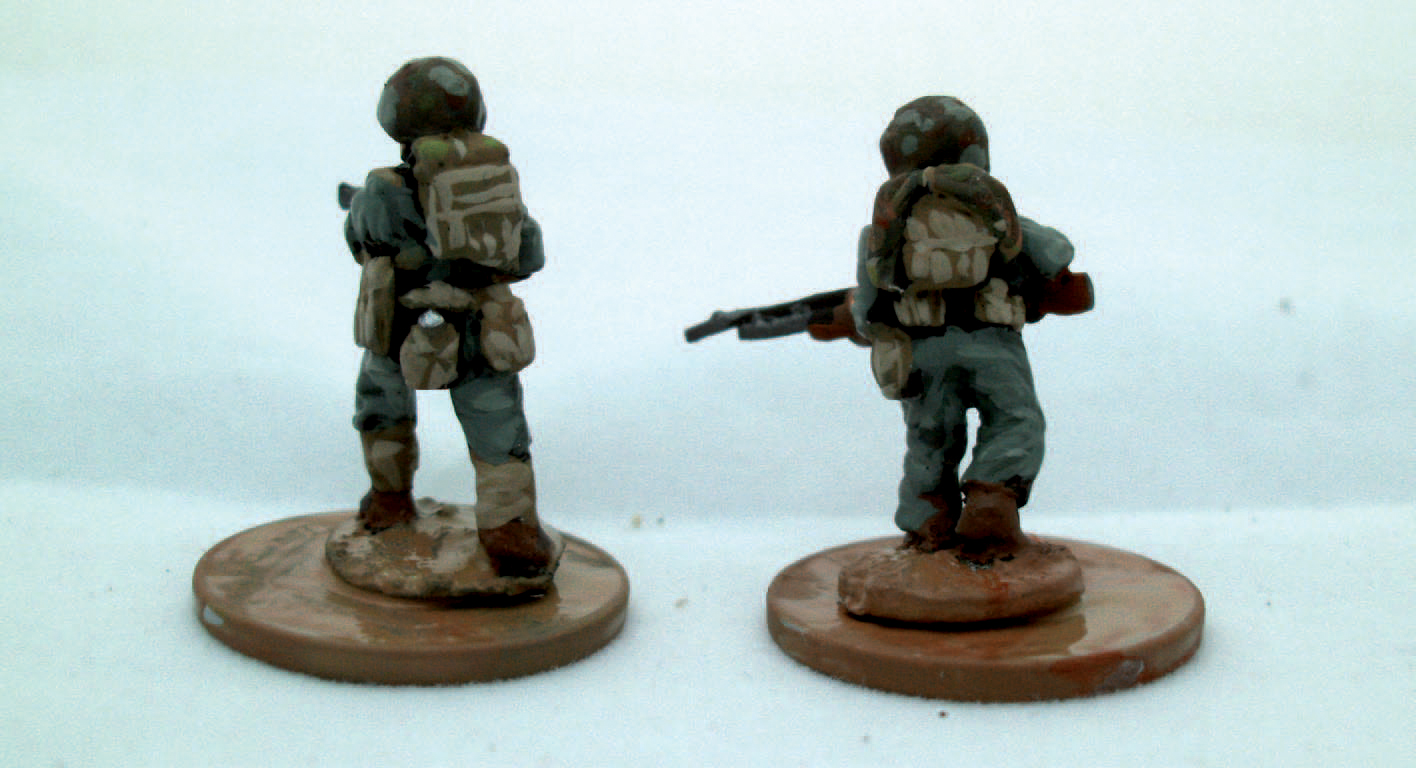
Rear view showing the backpack and other parts of the webbing equipment.
Step 4. Next move on to painting the weapons and webbing. Webbing colours did not change over this period so use the same process as outlined above for the Wake Island Marine. Be careful not to paint over the whole uniform when highlighting and leave enough of the darker base colour showing through to help create an illusion of depth. Use AK3076 ‘Canvas Tone’ for painting the webbing and backpack.
The weapons are painted using the same methods described above for the Wake Island Marine’s weapons.

Front view of the same figures, showing the uniforms and webbing as well as the weapons, which have now been completed.
Step 5. The next step is to create the camouflage effect. Most marines preferred not to wear the full camouflage suit, only the helmet cover, so this is what is covered here. These instructions, however, could be followed to paint the full camouflage suit.

The completed figures and ground work on the bases.
First apply a base coat with Vallejo ‘Luftwaffe Green’. Then highlight with a mixture of ‘Luftwaffe Green’ and Vallejo ‘Green Grey’ added 2:2. When dry, use Vallejo 924 ‘Russian Uniform’ to paint small random blotches all over the area.
When these are dry, paint more blotches – taking care not to overpaint the previous work – of Vallejo ‘Luftwaffe Green’ with Vallejo ‘German Camouflage Green’ added at a ratio 2:1. When dry, repeat with blotches of Vallejo ‘Light Brown’.
Next, apply some blotches of Vallejo 871 ‘Leather Brown’. When dry, wash over the area with sepia ink diluted with water at a ratio of 2:1 for a worn effect.
PAINTING TIPS
To give a model both depth and definition, start by applying a dark primer. Take care not to paint over the dark primer in areas that would naturally be cast in shadow, such as under the chin, around the armpits and pockets. Then work from these areas to areas that would naturally catch the most light and paint them with the lightest shade. Keep the paint fluid and not too thick. It is better to use two thin coats rather than one thicker coat when painting figures.
This example is a 1:76 scale resin kit available from Milicast Models.
Tarawa was the first time these versatile vehicles had been used in a purely combat role. Before the assault on Betio (on Tarawa atoll) they were only used for logistics. They proved their worth at Tarawa as without them many more Marines would have been killed or wounded.
Step 1. Prepare the work area and equipment. The preparation of this model requires the use of a Dremel hand-held power tool with a fast and slow speed. This is invaluable for cleaning up resin models before painting. A facemask should also be worn when sanding or cutting resin. Carefully inspect the parts of the model and remove any excess flash with either a sharp craft knife or the Dremel. When finished, wash the kit in warm soapy water as this helps to remove any residue left over from the moulding process.

Carefully identify and lay out the parts.
Leave to dry at normal room temperature. Do not place on a radiator or use a hairdryer to speed up the drying process as excess heat can warp resin parts.
Step 2. Once the model has been cleaned and is ready to be assembled, place all the parts on a clear surface and refer to the instructions. This is also where a good reference source is invaluable.
Step 3. Once assembled, let the model dry for twenty-four hours, to ensure that the glue is properly cured. Next, inspect for any gaps or other defects that may require filling. The best filler to use for resin models is a two-part epoxy putty. Once the filler is dry, remove any excess filler/putty with very fine sandpaper.

The constructed LVT before being primed.
Step 4. Prime the model using an appropriate primer and leave it to dry overnight. The AK Interactive paint set in US Army & USMC Camouflage colours (4220) provides a good range of colours for this model. The LVTs used at Tarawa were a blue/grey colour and AK4225 ‘Ocean Grey’ is a very good match. Apply to the model using the airbrush. The best effect is achieved by spraying the paint on in several thin coats and, most importantly, allowing the paint to dry between coats to prevent runs in the paint. This part of the process will take some time to complete successfully and should not be rushed.

This set of paints provides a good range of the colours required for vehicles.
Step 5. The next step involves pin washing, which is a process that helps to reveal details more clearly. Dilute matt enamel dark brown paint with enamel thinner at a ratio of 1:9. Then using a fine brush apply the wash to only the finer details of the model, for example allowing it to flow into joints and around wheels, taking care not to let any go onto any flat surface. Take your time to do this as pin washing well done can really enhance the finish of a model. Leave the wash to dry for at least twelve hours.

Take care when applying paint. Use several thin coats rather than trying to use a single thicker coat of paint.
Step 6. Take the original base colour and add a little white paint at a ratio of 4:1. Then dip a large dry soft brush into this lightened paint. Wipe most of the paint off the brush using a paper towel or piece of card, so that only a hint of colour is left on the bristles. To test if you have the correct amount of paint left on the bristles, brush them across your hand and you should just see the raised areas lightly coloured. Once you are sure this is correct, proceed to brush the model lightly with the strokes all going in one direction only. This is called ‘dry brushing’ and gives the model a slightly faded look, while making the pin-washed areas stand out. Be careful not to overdo the dry brushing as too much will ruin the overall effect. Once completed, leave it to dry for a couple of hours.
Step 7. A filter is basically a translucent commercially produced ready-to-use colour that is applied to the whole model and has the effect of blending together all the previous work as well as adding a depth of colour that is essential to create a realistic finish. For a predominantly grey model, it would be best to use a blue filter. When using a ready-to-use filter ensure that it is mixed thoroughly before starting. It is also possible to dilute a small amount of the filter with enamel thinners to give more control over the final colour and so achieve the desired effect. Apply the filter sparingly using a large flat brush. The idea is to create a subtle effect, so do not flood the model with filter.
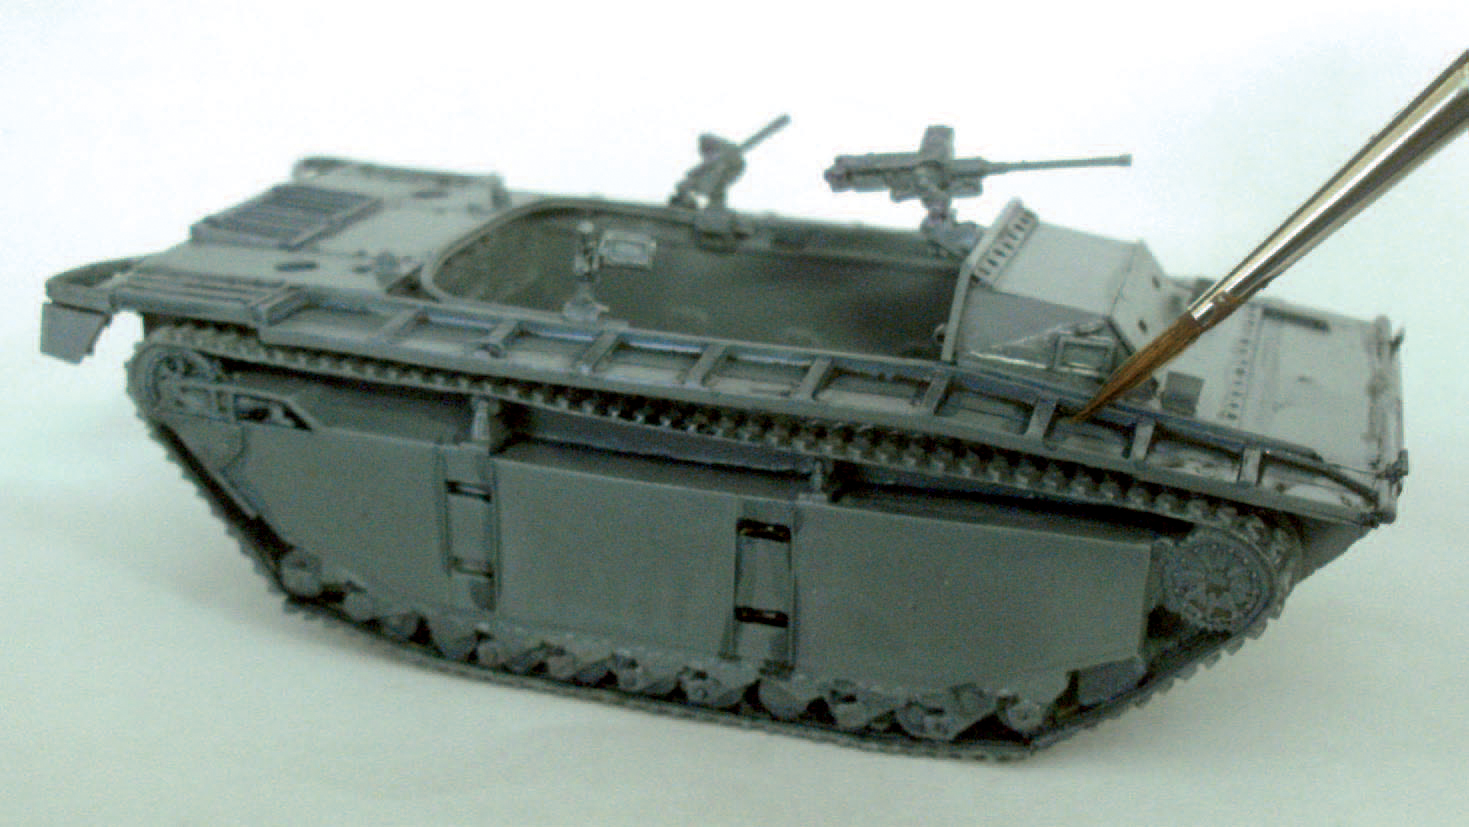
A steady hand is required here, so take your time when working on a model during this stage.
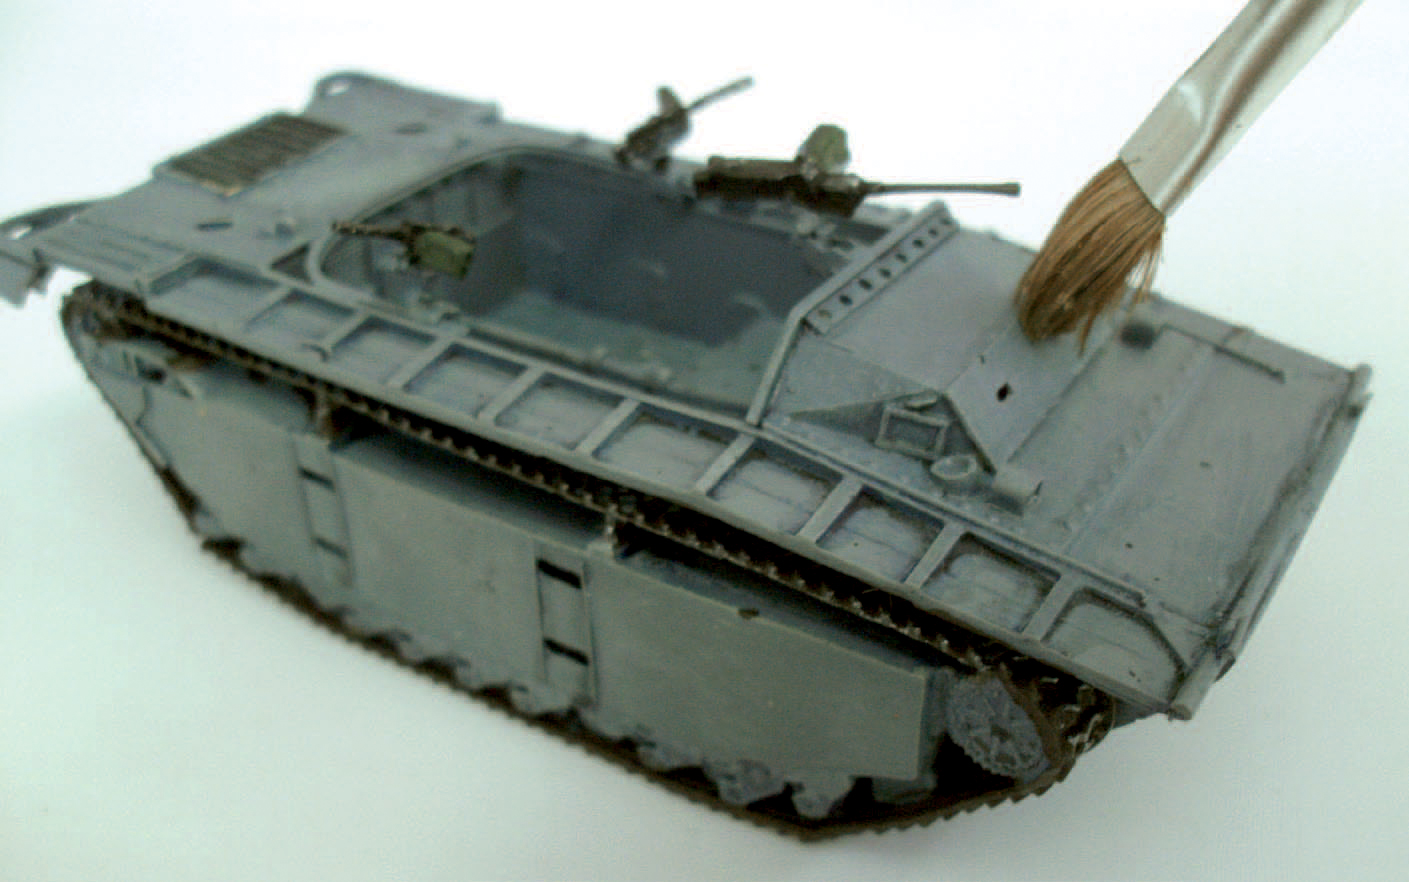
Less is more when it comes to applying a filter: don’t overfill the brush, using just enough to cover an area to achieve the desired effect.
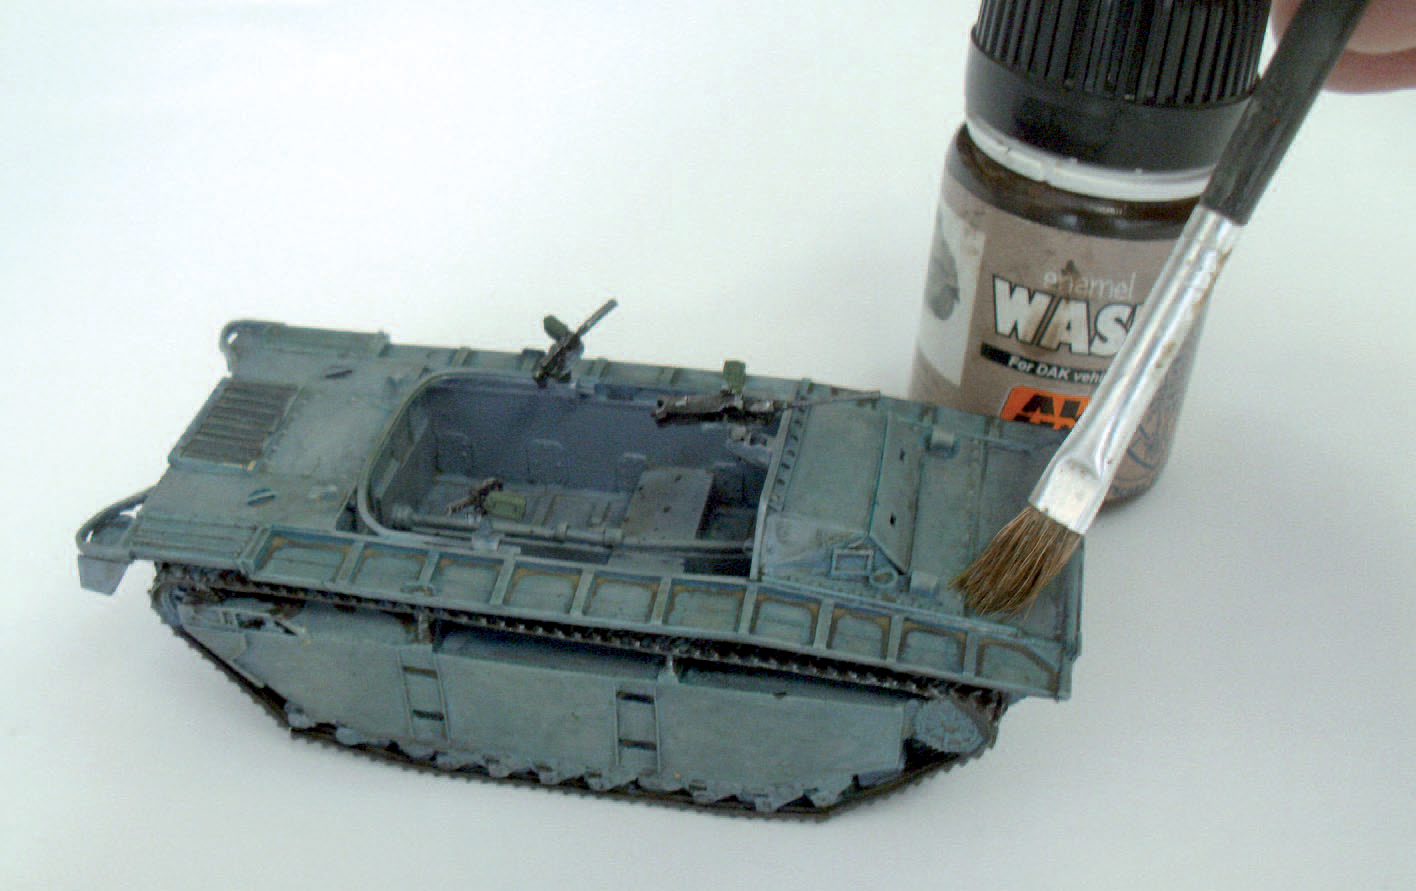
Applying the filter to the model.
Step 8. Once the filter is dry, paint the tracks with a very dark brown acrylic paint, such as Vallejo ‘Black Brown’. Take your time to do this and when complete allow the paint to dry thoroughly. Then apply a thin coat of gloss varnish for two reasons: this will help when applying decals, and a thin coat of gloss will help any subsequent washes to flow smoothly without pooling on the model.
Step 9. Next apply any decals required. In the case of this LVT, which is based on an actual vehicle, there was only a white star present on the sides of the vehicle. Applying water slide decals is straightforward if the instructions that come with them are followed. Once dry, a coat of matt varnish should be applied and left to dry, usually overnight. Varnish will help protect the paint during weathering.
Applying decals is covered in more detail in Chapter 6 in relation to applying decals to the M4A3E2 Jumbo.
Once dry, a second filter should now be applied, this time to any areas of shadow or where there are recesses. Use the same filter as before. When dry, paint in details such as tools, machine guns or lights.

This view shows the troop compartment and the weathering that was added to achieve a worn effect.

This side view shows the LVT with the stars applied. Note the weathering effect.
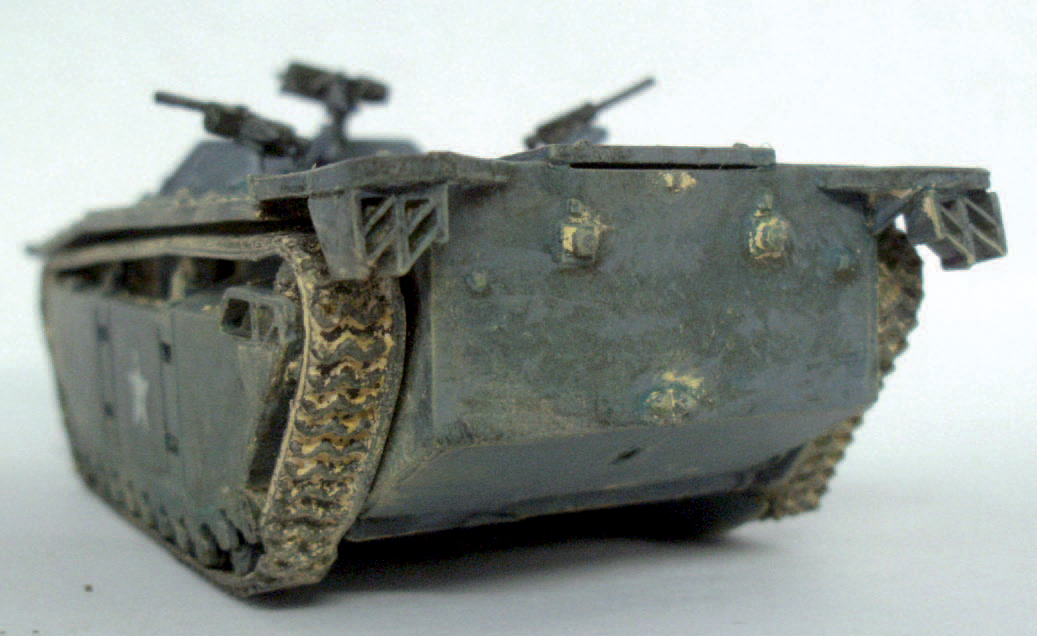
Rear view of the completed model.
Step 10. Chipping is a technique that, while very useful, should really be kept to a minimum. If done too much the chips will be out of scale, yet if done to scale they would be too small to be seen. The model under consideration has not undergone chipping because these vehicles would have been fairly new at the time the battle took place, and so would not have shown much evidence of wear.
Step 11. These LVTs, however, would have shown some signs of wear from the troops they carried when walking on or inside the vehicle. Carefully go over these areas with a wash of dark brown enamel paint thinned down to the consistency of milk. Once this is done, apply a couple of coats of matt varnish with an airbrush. This will protect the work as well as eliminating any shine from the gloss varnish. For some models, it would now be appropriate to add a lighter dry brush or airbrush the whole model with a lighter colour. However, because the base colour of the example model is rather light to begin with, it is not really necessary to do any more than the pin wash, filter and weathering to achieve the effect desired.
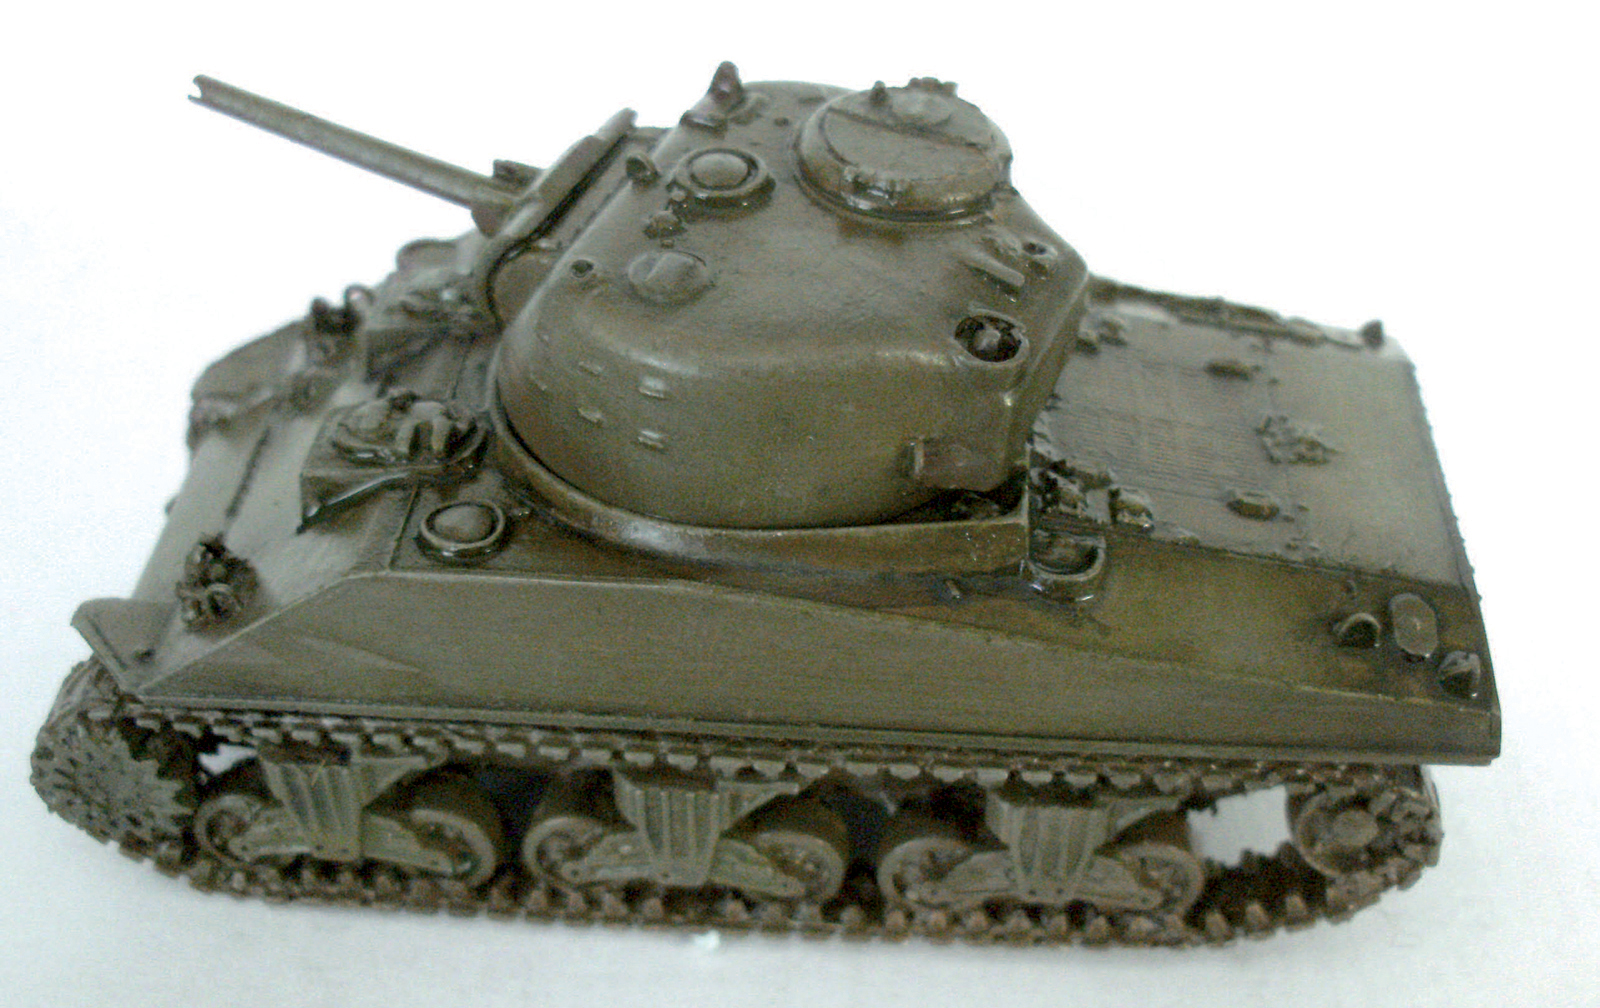
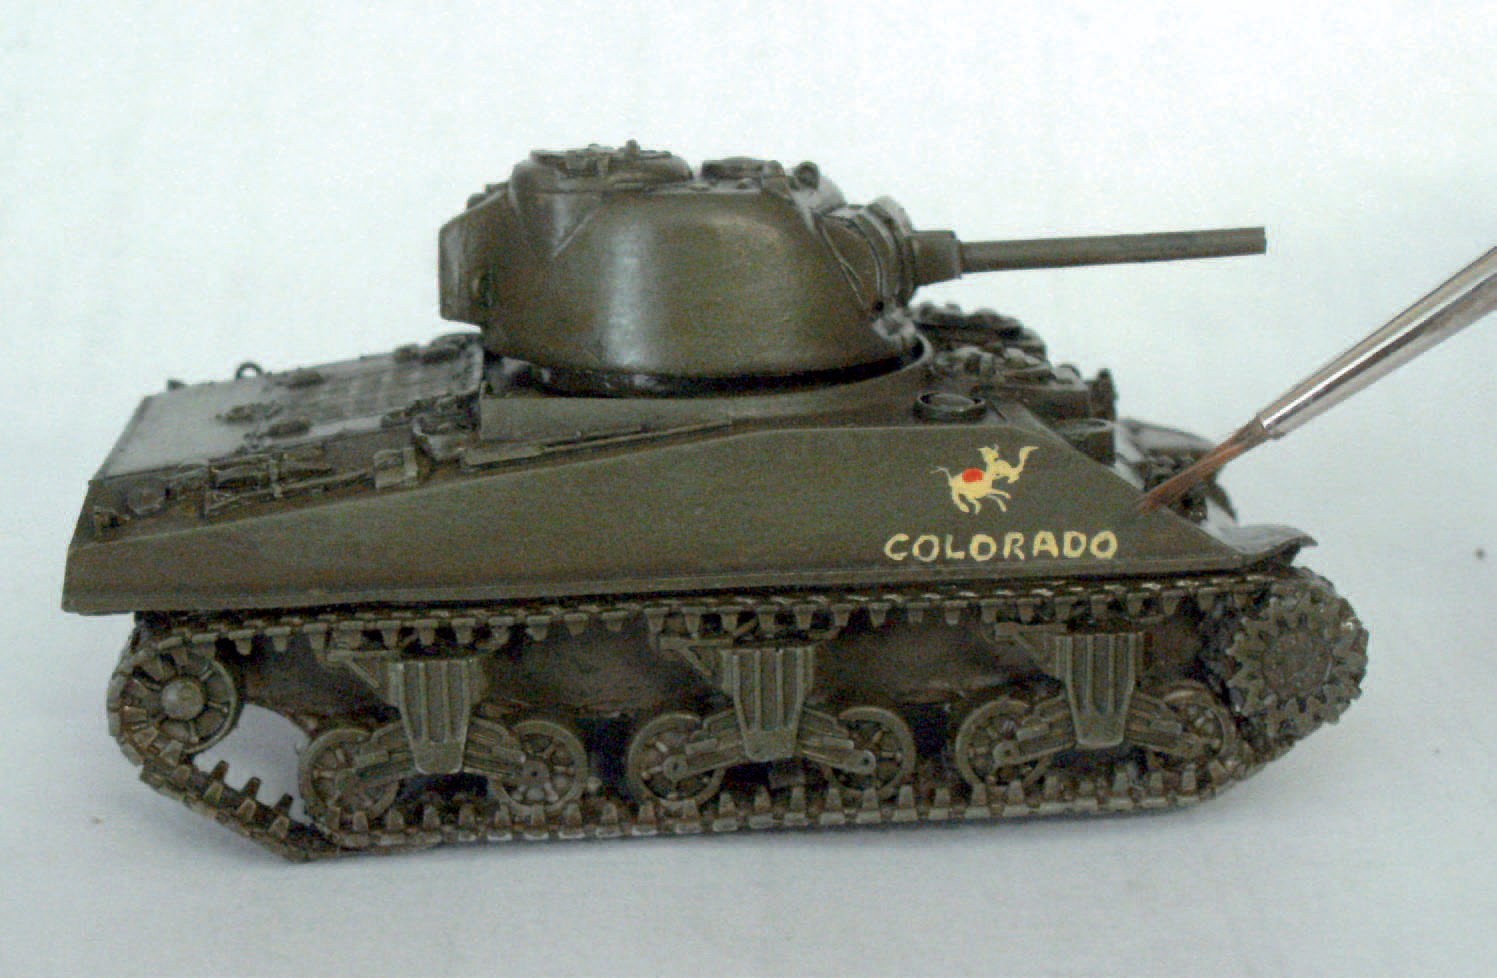
This M4A2 Sherman tank, the type used on Tarawa, is a 1:76 scale resin kit manufactured and sold by Milicast Models. It is going to be based on an actual vehicle: ‘Colorado’, a Sherman belonging to ‘C’ Company. The colour used in real life on these tanks was known as Olive Drab; Vallejo 264 ‘Brown Violet’ provides a very good match.
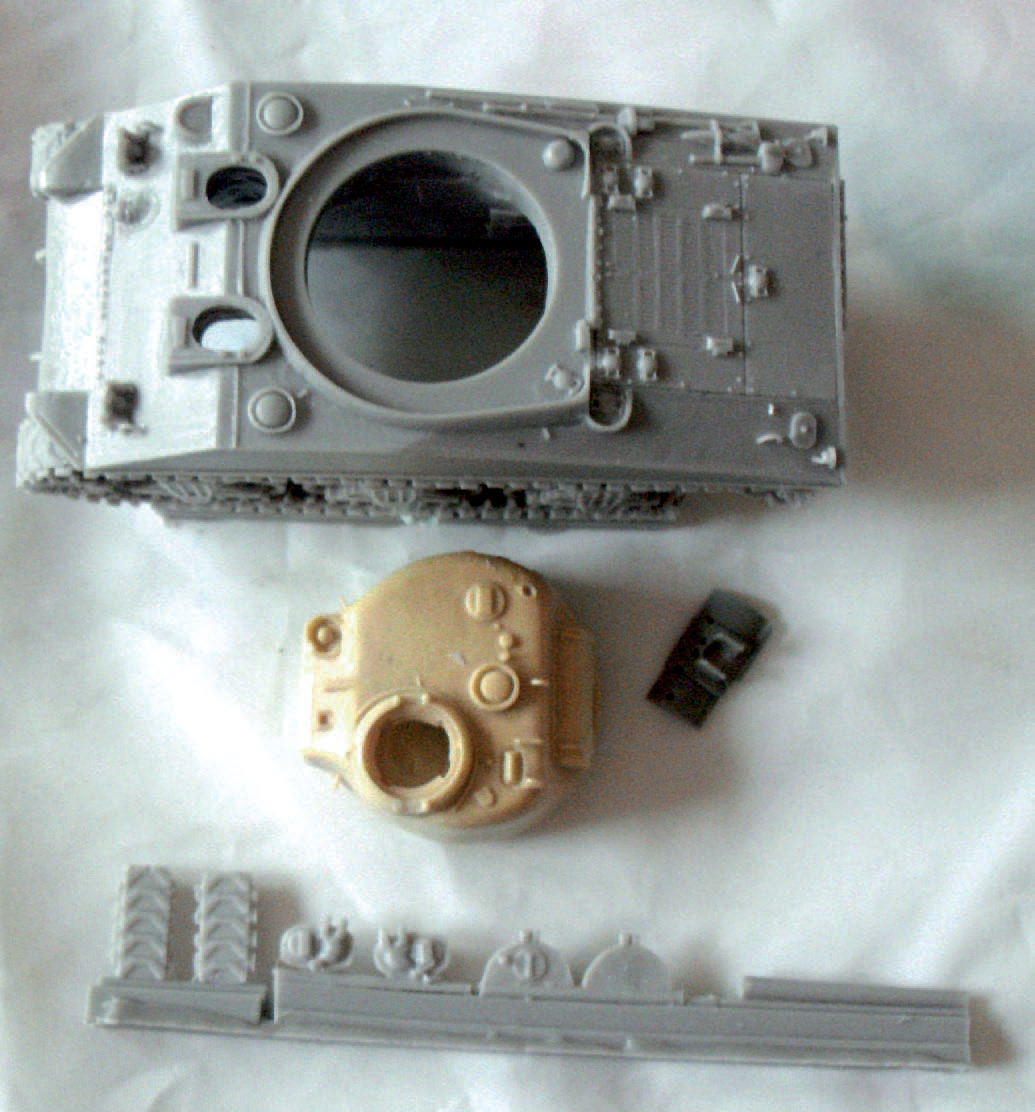
The parts are laid out to check they are all present.
Step 1. The first thing that needs to be done before construction and painting can start, and this goes for all resin kits, is to wash it first using mild detergent. Washing-up liquid is perfect when added to warm water. Then rinse and leave to dry.
Step 2. Once dry, check that all of the parts are present: with this kit there are only ten parts in total. Milicast make kits designed with the wargamer in mind, and wargamers like to get a model on the table quickly with the least amount of assembly required. Now start to put the kit together using cyanoacrylate glue with the assistance of some good reference sources.
Step 3. Next, prime the model. Grey primer is a good colour for priming models and gives a great key for paint. Leave the primer to dry for at least twenty-four hours.
Step 4. Then apply three thinned coats of Vallejo ‘Brown Violet’ paint with a brush. The paint will take a couple of hours to dry. Then pin wash the recessed details, for example around hatch covers, grilles and running gear.
Step 5. When the pin wash is dry, take some of the original colour, add a little white and dry brush the vehicle. This gives the finer details greater definition as well as creating a faded look. It also helps with the next step, which is chipping. Using a sponge and some dark brown paint, dab the sponge lightly into the paint and then dab off most of the paint onto a piece of scrap paper, until only a trace is left. Go over areas of the model that will see wear, such as the areas where paint was likely to be damaged by hits from the likes of shrapnel and bullets, and the engine deck where the crew stood. Be careful not to overdo this, as less really is more and the intention is to achieve a subtle effect.
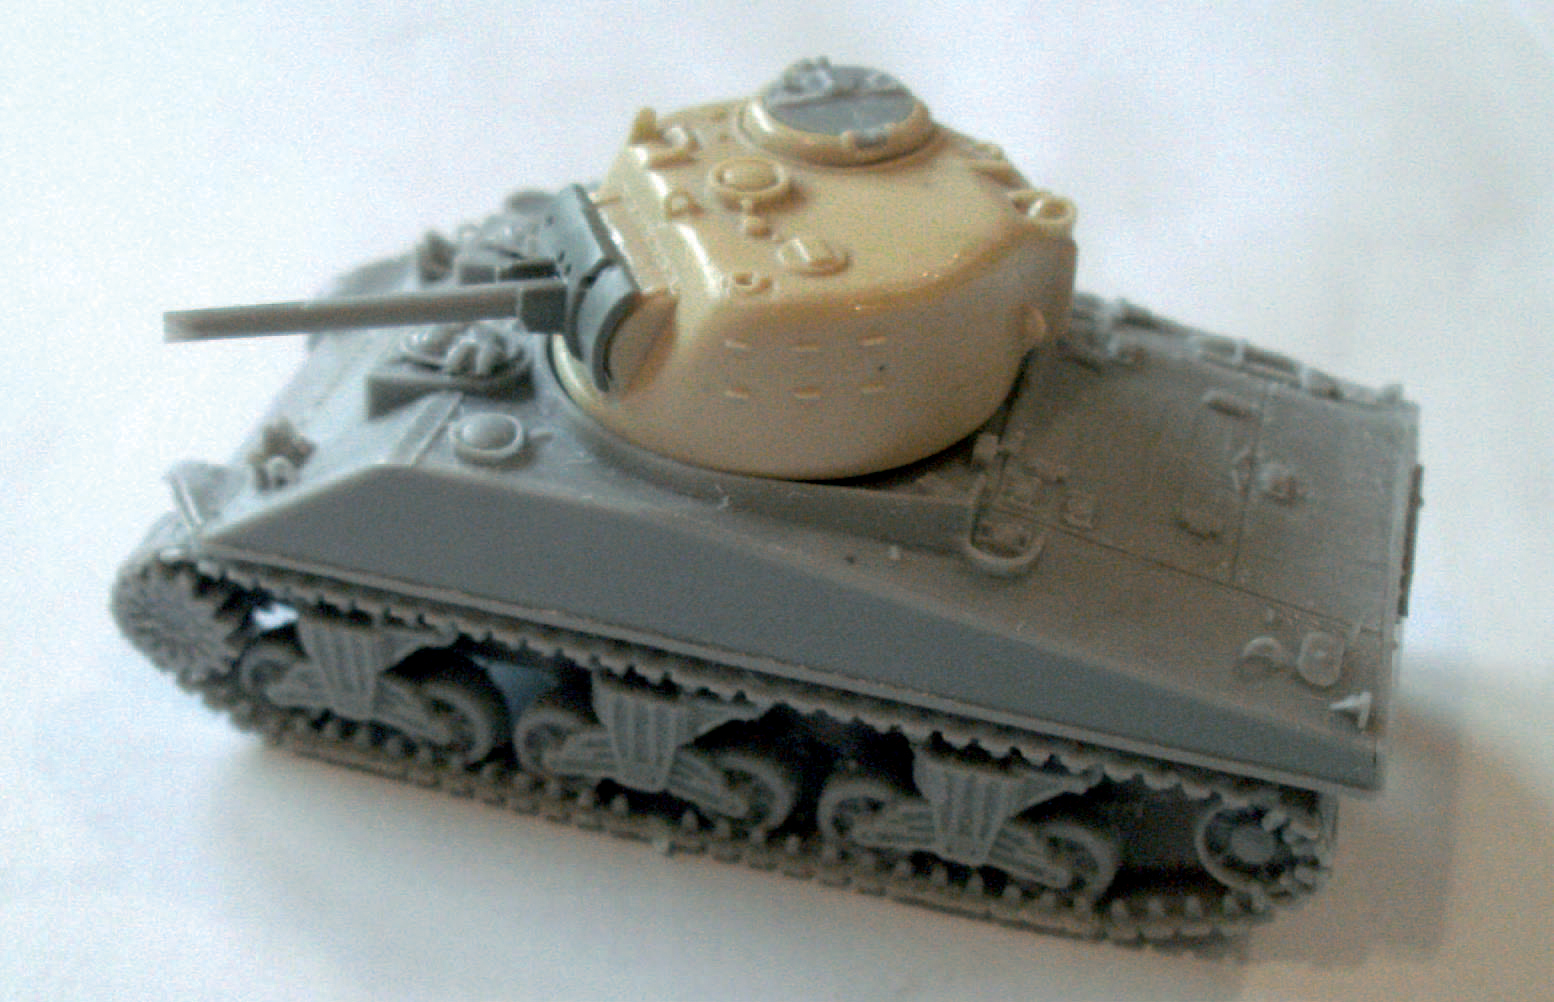
The model has been built: note the difference in colour between the turret and hull, which is normal with some resin kits.

The model with the base colour applied.

The pin wash should be done very sparingly, and should look subtle when completed. Any raised detail is then picked out with the dry brush for a worn paint effect.
Step 6. Next apply a dark green filter, sparingly, over the entire model. Take care not to flood the model as only a light effect is required. A filter helps to create depth and bring out the base colour of the model.
Step 7. Once the filter is dry, paint in the details: use dark brown for the track and dark grey for the rubber on the wheels and tools. Lastly, any required markings are applied: in the case of this model, the name ‘Colorado’ together with a circus elephant, the insignia of the unit, were hand painted on. This is where pictures of the actual vehicle help, as not all the tanks of C Company were the same: some had names, others did not, but they all had the circus elephant, but painted in slightly different ways.
The green filter will adjust the colour of the paint.
A steady hand is needed here.

The effect of a light brush over the tracks with gunmetal will bring out the detail.
Step 8. Going over the track teeth with gunmetal paint helps to create the look of wear on these parts of the model. This can be a time-consuming task, so do not rush this.
Step 9. Now comes the fun part, weathering, although in this case it is a fairly simple task. Look at the model and really think about where the dirt, dust and mud would have collected. Using contemporary photographs and accounts will help with this. Tarawa was a very hot and dusty environment, only 130km from the Equator, with no mud. Pigment fixer is a clear liquid that fixes pigment to the model. Apply this to the running gear and tracks, in joins and joints, and any places where dust would collect. Be careful not to overdo it as you will ruin the effect. Take some MIG pigment powder and apply it with a large brush to the tracks and running gear first. This can be a messy job, so do it over a sheet of paper so that unused pigment can be collected for re-use. Then move on to the upper areas and repeat the procedure. The intention is to achieve the effect of gradation: the tracks and running gear are closer to the ground, so they would get more wear and more dust. The upper parts would, of course, be cleaner as they received less wear, but they would still be dusty.

The pigment has been added to the model.

The completed model.
Step 10. After the model has been allowed to dry for a couple of hours, take a large soft brush and go over the whole model to remove any loose pigment. The model is now finished.

An M4A2 Sherman tank supporting Marines in 1944.
The Battle of Okinawa lasted three months and saw some of the most bitter fighting of WWII: it was the largest concentration of Japanese artillery faced by American forces during the Pacific War. Operation Iceberg was the assault on the Ryukyu Islands, the largest of which was Okinawa, only some 550km (340 miles) from Japan. The taking of the island would give the Allies a base from which to launch the invasion of Japan itself.
To take Okinawa the Tenth Army was created: this was what is termed a ‘cross army’, consisting of the 7th, 27th, 77th and 96th infantry divisions of the US Army with both the 1st and 6th Marine divisions. The fighting on and around the island was very fierce and included mass kamikaze attacks on the Allied fleet. The Japanese fought desperately to stop the invasion of Okinawa as they knew if it fell it would bring the Allies just a stone’s throw from their homeland. The fighting went on for eighty-two terrible days and resulted in 14,009 Allied deaths, the loss of 110,000 Japanese soldiers and a staggering 149,000 civilian deaths. The next operation would have been landings on the Japanese mainland, but this was not to happen as on 6 and 9 August 1945 Boeing B-29 Superfortresses of the 509th Composite Group, flying from Tinian in the Marshall Islands, dropped two atomic bombs, first on the city of Hiroshima and then on Nagasaki. WWII ended nine days later on 15 August following Japan’s surrender to the Allies.
This is a hard plastic model of a soldier of the 7th Infantry Division in 1:32 scale using an Airfix multi-pose figure. The set consists of six figures in a variety of action poses, which gives the modeller a good variety of choice in choosing a subject.
The infantry was also used in many of the battles in the Pacific from 1941 to 1945. The basic uniform was similar to that used by the USMC, except that the infantry did not use camouflage. The uniforms worn by the figures in the Airfix set are pretty close to those of infantry units in 1945 in the Pacific.

The sprue laid out: the glue to be used was supplied with the set.
Step 1. As these are plastic multi-part kit figures they will first need to be assembled.
Before assembly, clean off any sprues and mould lines using a sharp scalpel and a fine file. Assemble the figure using liquid polystyrene cement for the adhesive. Each figure comes with its own base, which is handy. The best way to assemble a figure is from the ground up in the following order: legs, then torso, arms, then head. Add the equipment next, starting with the belt, then the rucksack, followed by the helmet. No chinstrap or rifle sling is provided with the kit, but these are easily built from scratch using paper cut to size and then glued in place with superglue. Next, with care, add the rifle, taking time to ensure that the figure holds the weapon in a realistic manner. Once completed, prime the figure.

The flesh areas have now been completed.
Step 2. Before painting, be aware that, although this is a much larger scale figure than previous examples in this book, it will be more difficult to paint and achieve a realistic end result. On larger models, the colours need to be considered carefully: although the colours are the same as those used on the 20mm figure, they do need to be blended more to create a subtle effect.
Start by painting the face and hands with at least four shades of paint, going from dark to light to achieve the effect of depth. When dry, take some sepia ink, diluted with a little water, and wash this over these areas. This helps to create an extra layer of depth as well as blending the colours for a uniform look. When dry, add the eyes using a fine brush (such as 000) by painting two dark brown lines where the eye sockets are. Create the pupil by adding a white dot on either side of that line. Avoid using black as it is too harsh and makes the figure look as if it is staring.
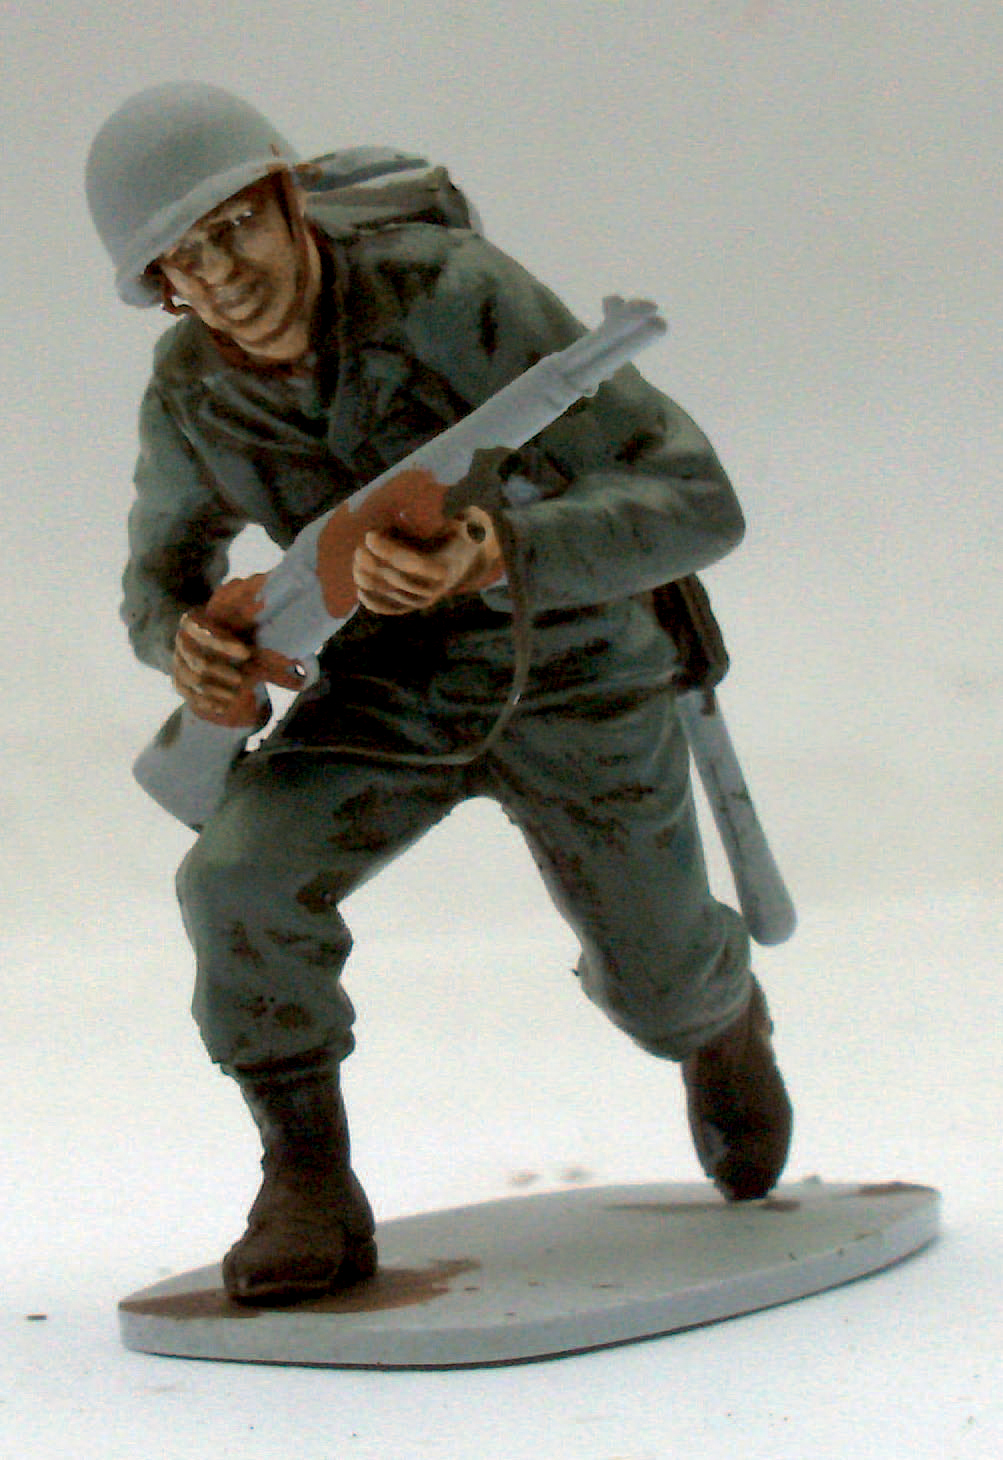
The uniform has been painted.
Step 3. Once the flesh areas are completed, paint the uniform using Humbrol 155 ‘Olive Drab Matt’ enamel. When this is dry, use ‘Olive Drab Matt’ mixed with a little Vallejo 819 ‘Iraqi Sand’ in a 4:1 ratio to add highlights. HBT uniforms used by both the USMC and infantry had a blue hue, so to achieve the same colour add a very small amount of medium blue to the highlight colour. It just needs to be a hint of blue but no more than that. Once dry, lightly wash the uniform with diluted brown ink. Then highlight with the highlight mix again on the raised areas only.
Then paint in the belts and equipment as described above for the 20mm figures. Use the same colours, washed with diluted brown ink, which again creates depth. When dry, use the highlight mixture on the raised parts of the model’s uniform only. When dry, finish the uniform by painting the buttons and helmet. Use Vallejo 264 ‘Brown Violet’ for the helmet and add a little white to this colour to add highlights.
Step 4. Now paint the rifle, as described with the earlier figures, but wash the metal parts with a little black ink and the wooden parts with sepia ink for extra depth. Paint the insignia of the 7th Infantry Division on the left shoulder. The model is now almost finished. Give the figure several coats of good quality matt varnish, which seals the paint and protects the finished model. Once dry a base can be added to the figure.
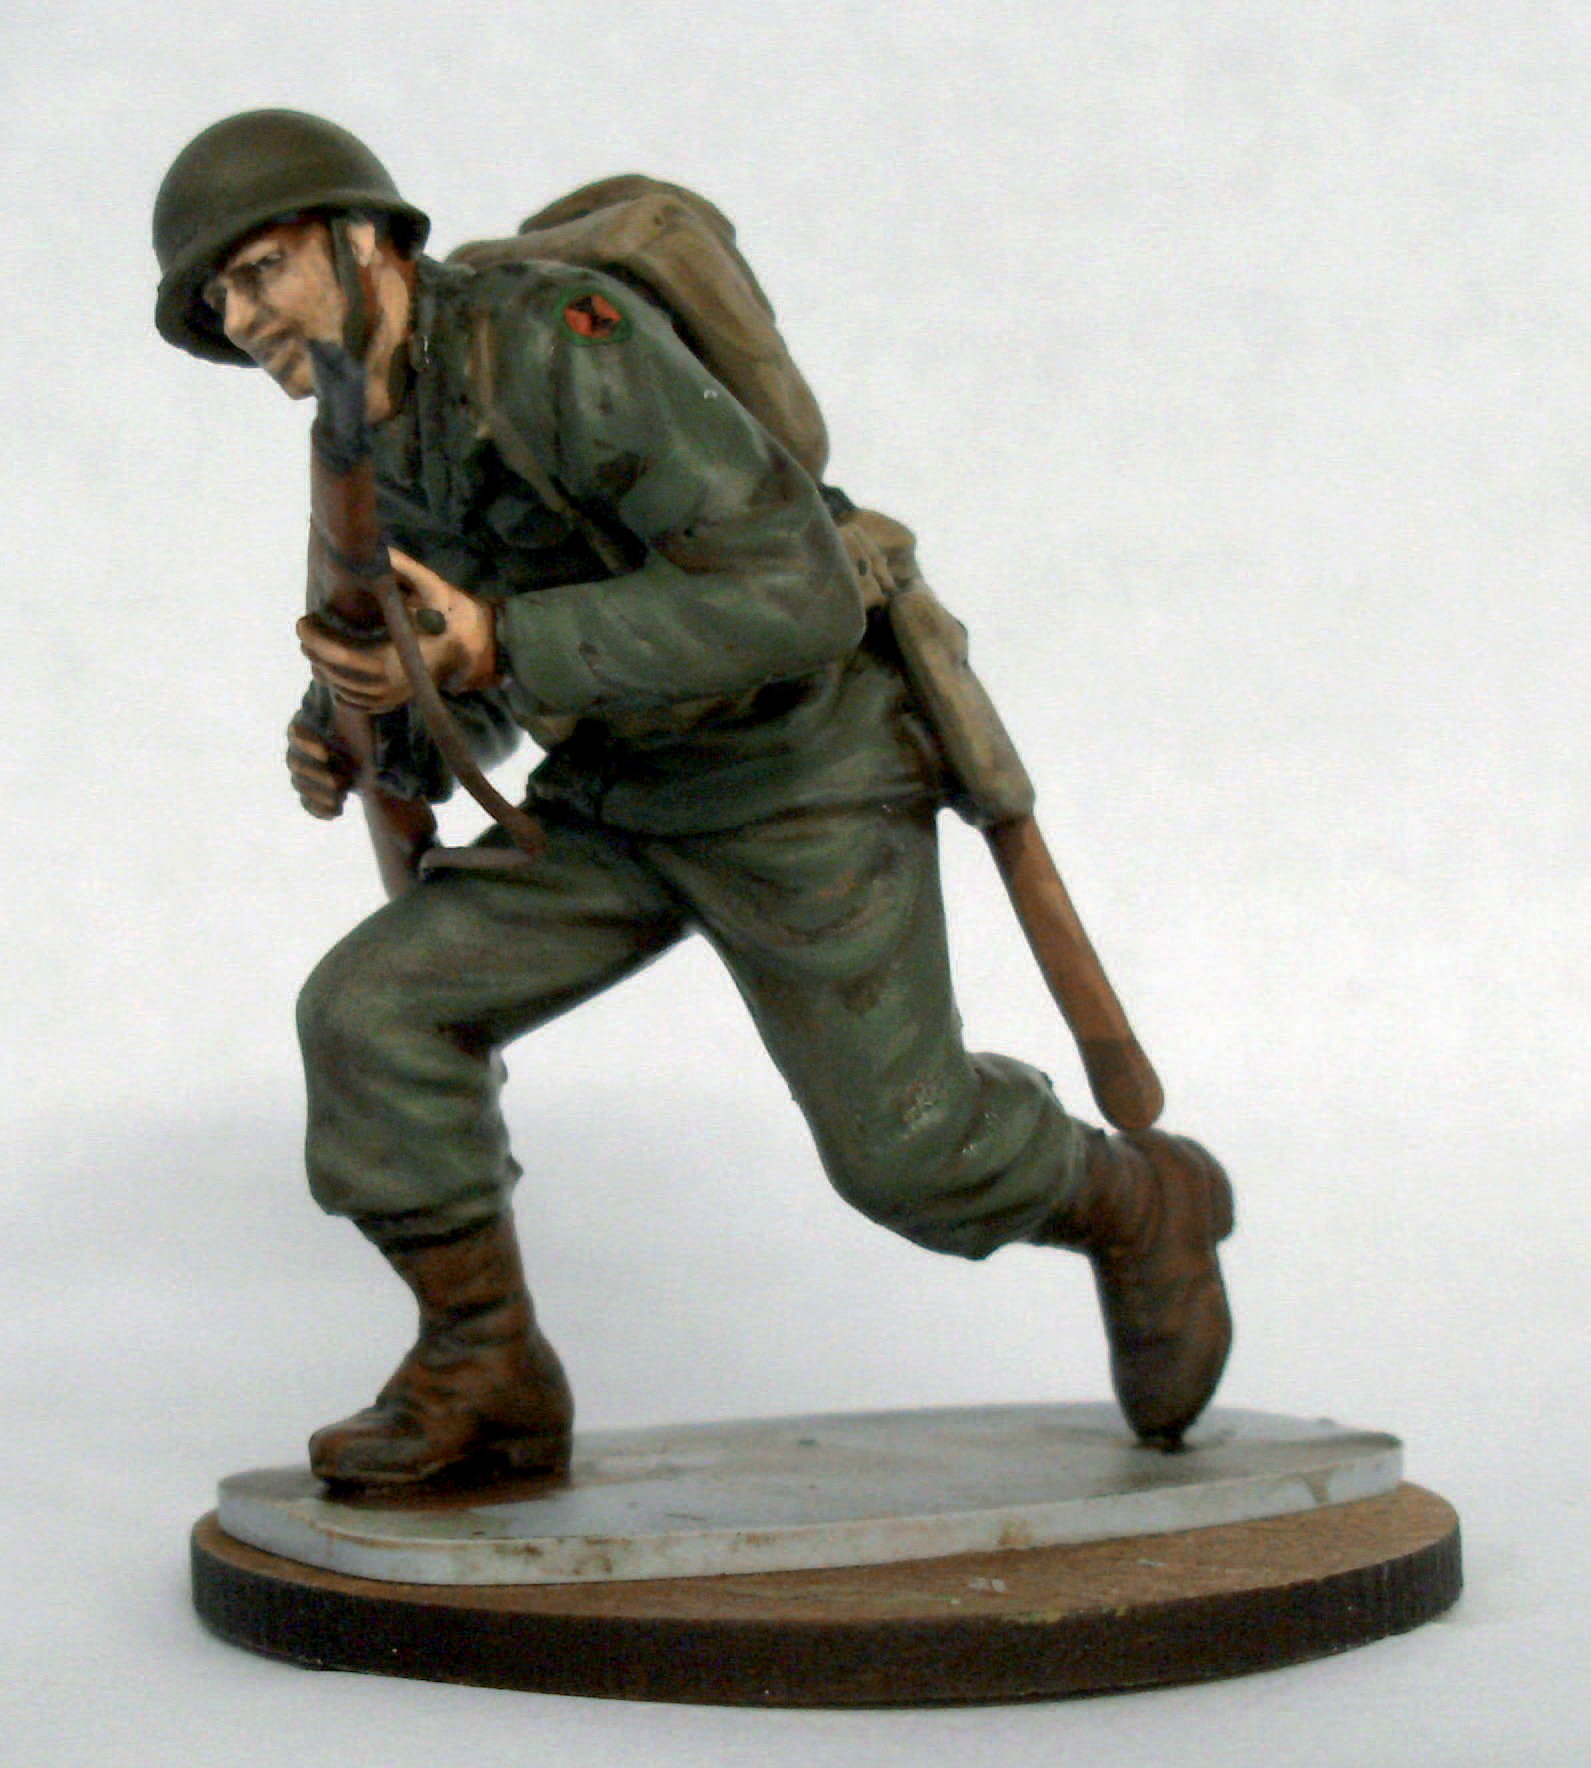
The MDF base on which the finished figure is to be displayed is 40mm across.
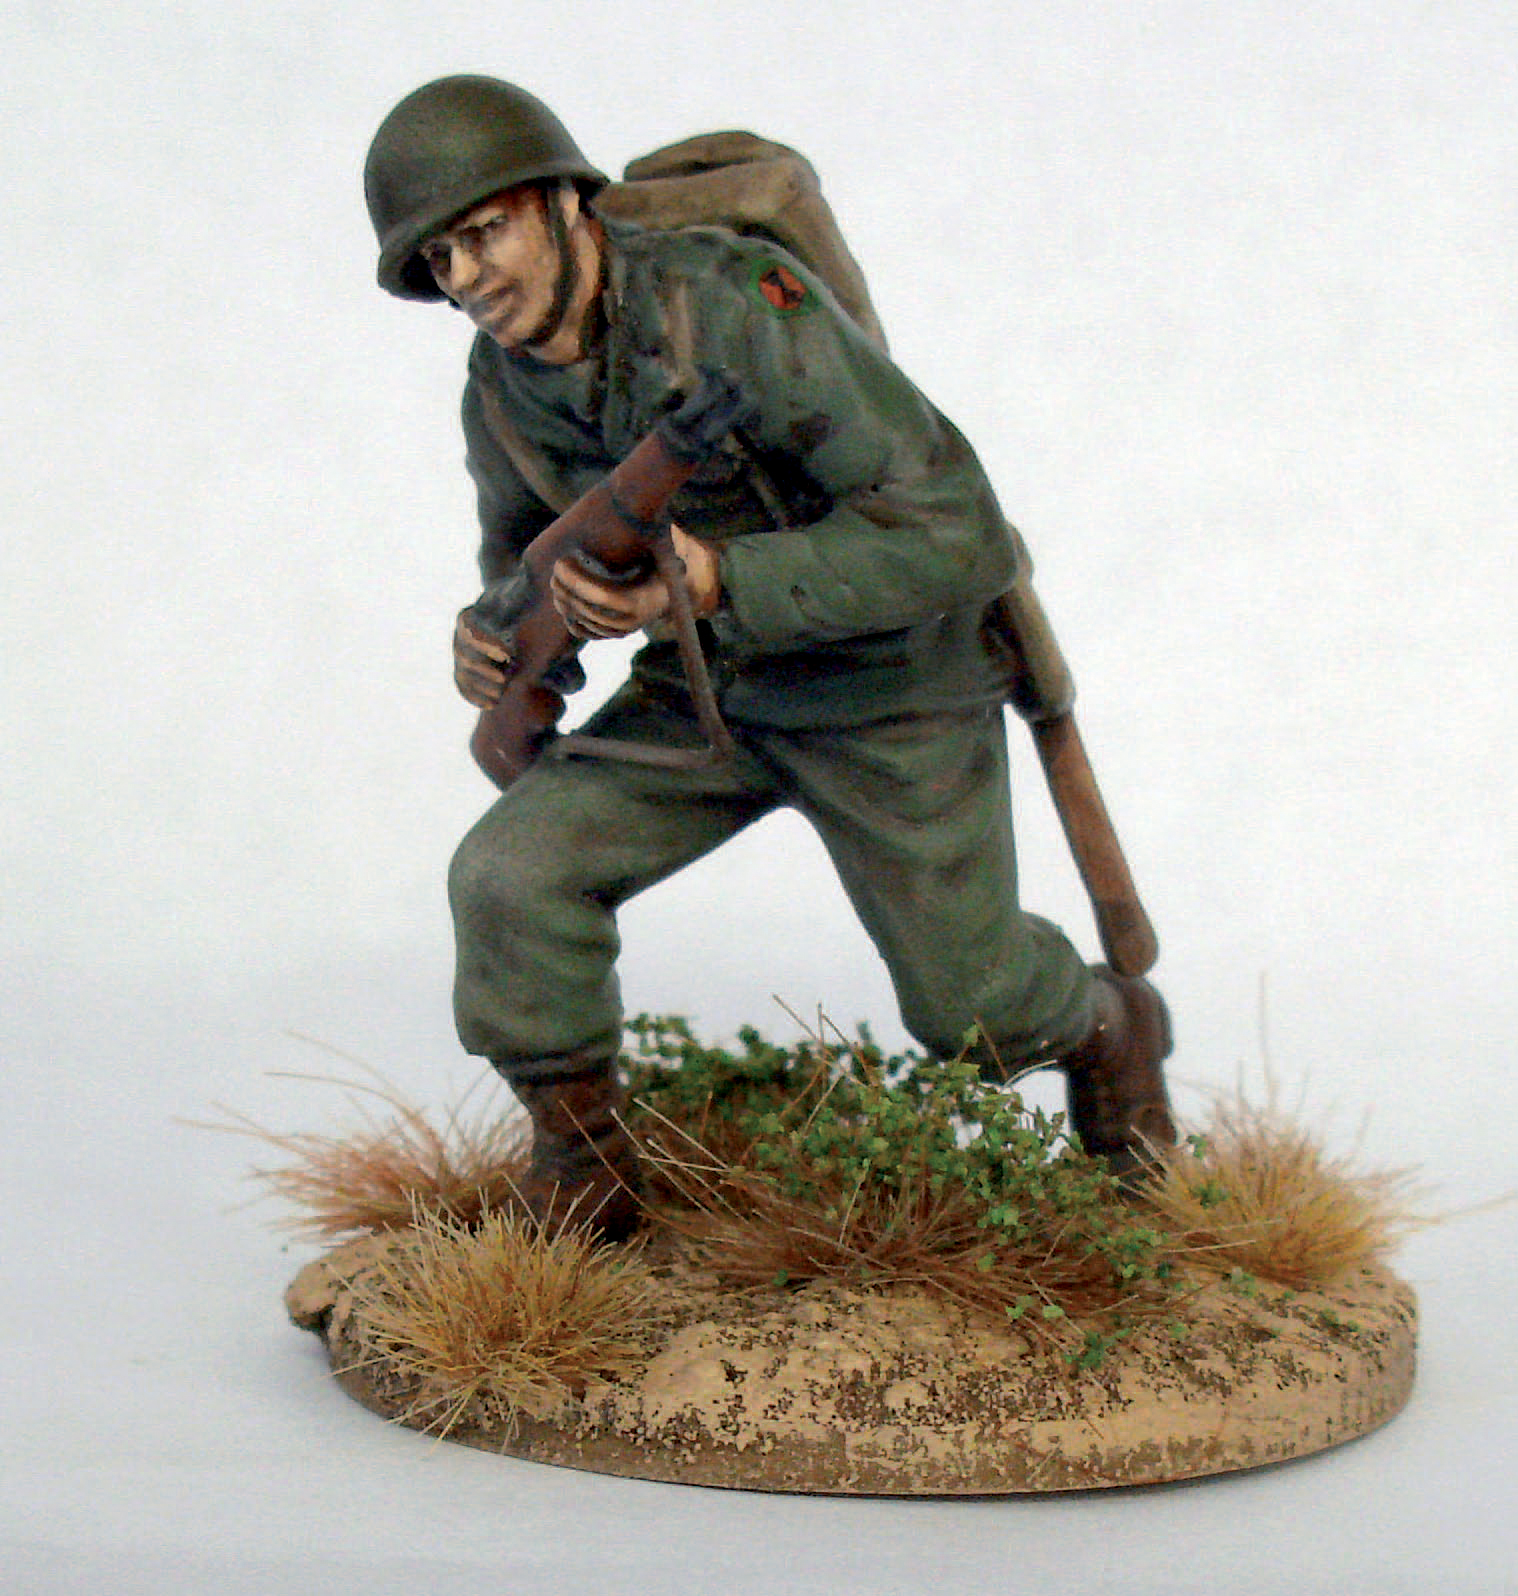
The completed matt-coated figure is ready to be based.