
Silicone rubber mould created using ‘Plas-ti-shim’ system.
Silicone rubber mould created using ‘Plas-ti-shim’ system.
CHAPTER TWO
PLAS-TI-SHIM™
Developed by Andrew Sinclair in 2004 and marketed in 2008, Plas-ti-shim™ is a prefabricated plastic shim system of silicone production mouldmaking. The system has some distinct advantages over traditional silicone mouldmaking methods, namely the single application of silicone rubber in multiple-piece mould production. As Sinclair explains in his technical information leaflet on Plas-ti-shim, ‘The main motivation behind it was the obvious disadvantages and shortcomings of clay walls which to me as a commercial moulder were so frustrating especially on large or complicated moulds.’
Technical Description and Specifications
The Plas-ti-shim system comprises a set of prefabricated thin plastic shim walls with vacuum-formed registration bubbles set at regular intervals along them and a set of prefabricated plaster registration buttons (Little Buddie™).
The Plasti-shim walls, available in various sizes, are used to create mould division walls traditionally created with clay walls or beds. However, unlike traditional methods of multiple-piece mouldmaking the application of silicone rubber is performed in one operation and the separation of the pieces is carried out at the last stage of production. This system clearly has advantages, particularly with dramatic time savings on production.
The ‘Little Buddies’ are pre-made plaster buttons that are used to produce registration pockets for the case material. The Plas-ti-shim walls and Little Buddies can be used over and over again, with obvious cost-cutting advantages over clay wall systems.
The first stage of production is an application of a single coat of catalyzed silicone rubber over the entire original or pattern to be moulded. This coat is allowed to set and captures all original detail in one operation. Mould divisions are then determined and set out using a piped raised bead of very thixotropic silicone on top of the first coat. The piping process is carried out using a bag in the same way as for cake decorating. While the bead is still unset, Plas-ti-shim walls are set into it to form the mould divisions. The rest of the mould is then produced on either side of the shims as usual, using thixotropic silicone layers and backed up with a rigid case. On demoulding of the silicone the Plas-ti-shims are removed and the silicone is cut to separate the individual mould pieces.

The first stages of a Plas-ti-shim moulding a figure (H: 800mm).
PROJECT
Specification
A two-piece silicone rubber and polyester resin and fibreglass case mould. Taken from a plaster copy of the Kouros of Anaphe (510–50BC). Size: 1010mm (H) and 390mm (W).
Time Required
Allowing for setting times this project can be carried out over approximately two and a half days.
Materials
■ Plas-ti-shim (large);
■ Little Buddies;
■ magic tape;
■ Silastic™ 3495 condensation cure silicone rubber (supplied by Notcutt Ltd);
■ polyester resin gelcoat;
■ general-purpose polyester resin;
■ fibreglass mat (supplied by Alec Tiranti Ltd);
■ Fillite®;
■ spray wax release agent;
■ acetone;
■ white spirit;
■ reinforcing bars; and
■ M6 × 30mm roofing bolts with wing nuts.
Tools
■ Mixing beakers;
■ digital scales;
■ brushes;
■ a palette knife;
■ scissors;
■ a craft knife;
■ a drill; and
■ disposable gloves.
Method
SET-UP AND PREPARATION
As with any project, careful preparation before the start of the job is crucial. Knowing the material quantities and tools needed, undertaking repairs to the original and setting-up the working area will all help to complete the job accurately and efficiently. (Tip: make sure you have enough materials to complete the job before you start. Running out of material halfway through the job is at least a waste of time and, at worst, a loss of previously executed work.)
1. Ensure the original is set on a secure work surface and any surface repairs are done. In this case some minor cracks and missing pieces are filled and remodelled in clay as a temporary repair before making the mould.
2. Ensure any gap between the base of the original and the work surface is filled with clay.
3. Apply spray wax release agent all over the original and out by approximately 100mm around the base onto the work surface.
THE FIRST COAT OF SILICONE
This first coat is crucial as it is the ‘capture’ layer of all the original detail. With the Plas-ti-shim system this can be done in one operation from the outset of mouldmaking.
1. Mix batches of silicone and catalyst to their specifications.
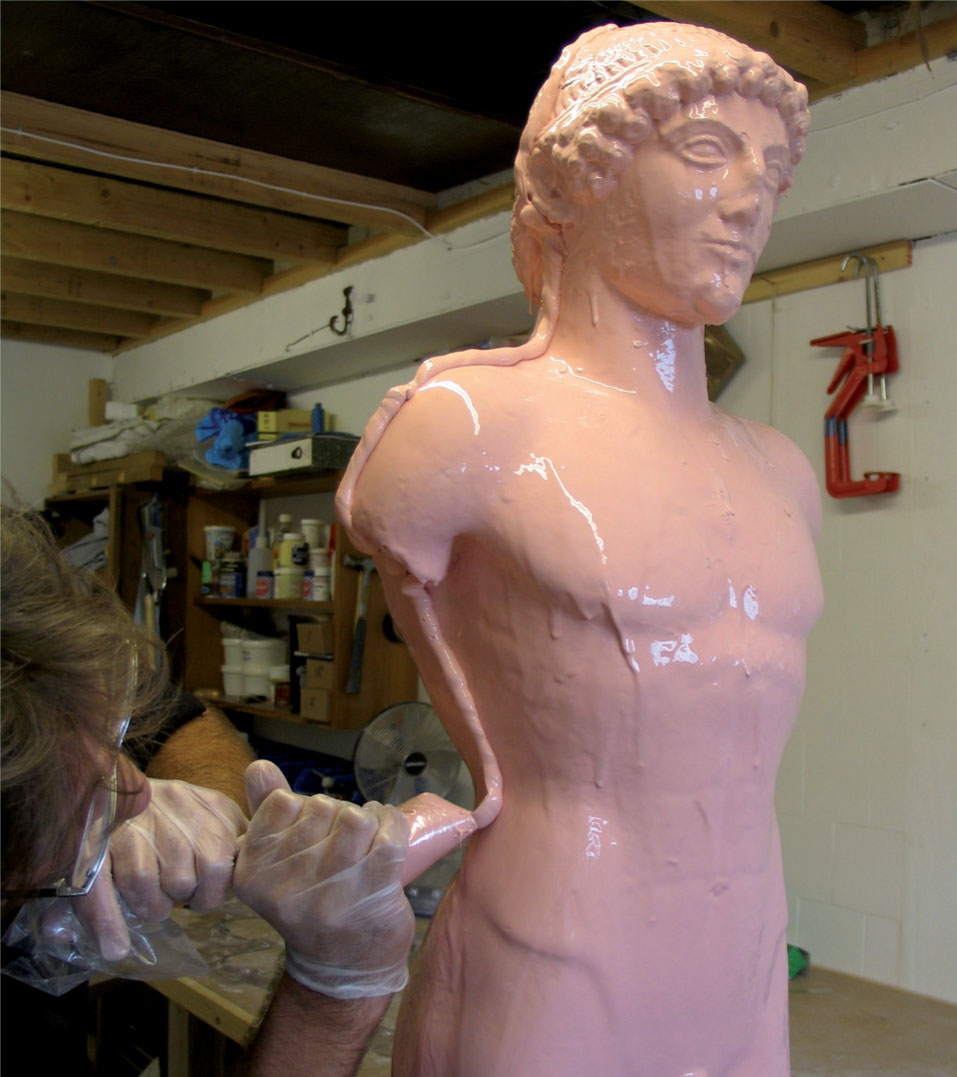
2. Apply with a soft brush methodically and evenly over the whole surface of the original. Start at the bottom and work up to avoid drips. This coat will be very runny as it does not contain thixotropic additive. This allows the silicone to pick up all the detail of the original. It will probably only be about 1mm thick.
3. The coat should be allowed to set thoroughly. Use of an extra fast catalyst will allow you to proceed to the next step more quickly.
THE APPLICATION OF DIVISION LINES
1. Create a piping bag using a strong but flexible plastic bag. The plastic bag should be about A4 size and without a folded seam.
2. Cut off a corner of the bag with scissors, creating a hole approx 8mm in diameter. This will determine the size of the bead of silicone delivered, so on a smaller mould it may need to be smaller.
3. Determine where the seam lines of the mould are to run. (This is a matter of mouldmaking principles as explained in the precursor to this book, Mouldmaking and Casting.) The lines can either be drawn onto the set silicone first coat with a water-based marker for guidance or committed to memory.
4. Mix a batch of silicone with catalyst and a very high percentage of thixotropic additive. The silicone bead needs to support the Plas-ti-shim wall so it needs to be very thixotropic.
5. Half fill the bag and twist up the top to work the silicone down into the corner of it and out of the hole.
6. Keeping pressure on the bag by squeezing it evenly, deliver a regular bead of silicone along all the seam division lines.

The original is cleaned and surface repairs done, ready for moulding.
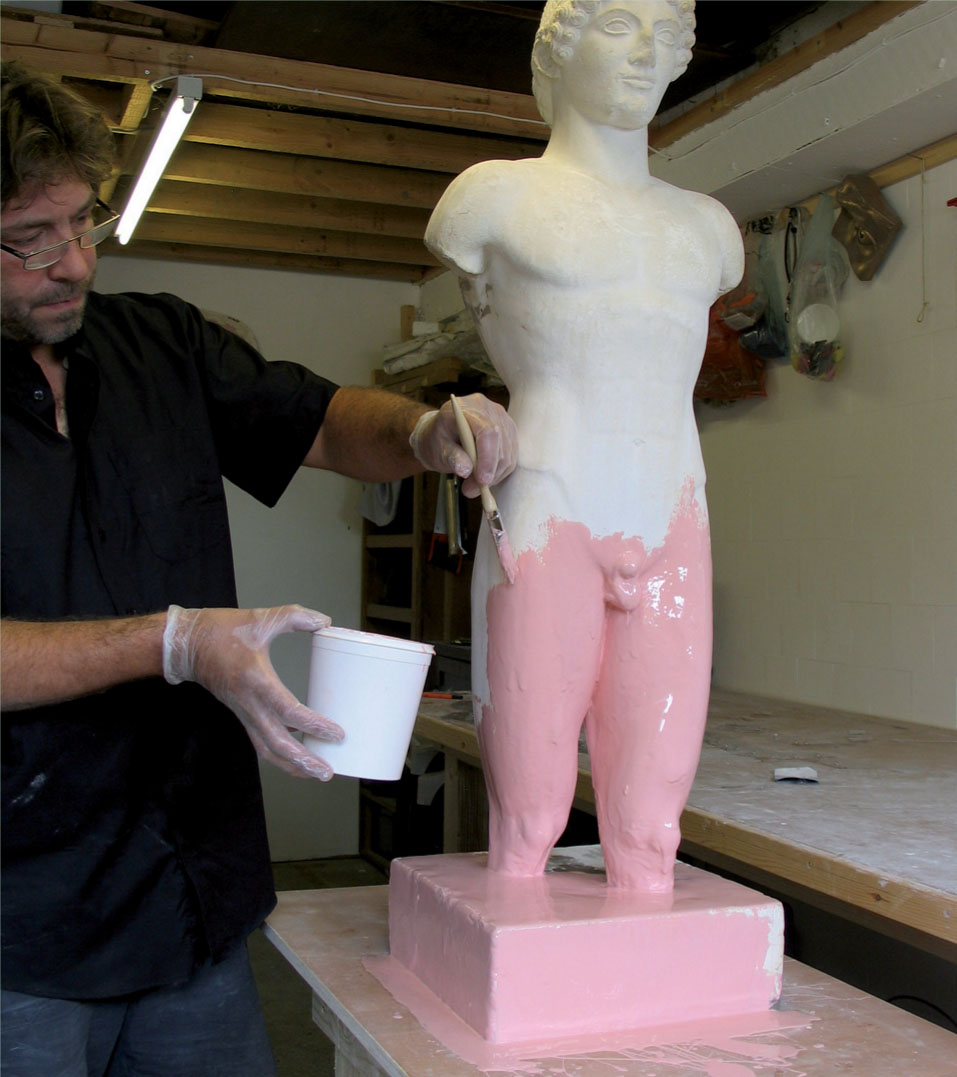
The first layer of silicone is applied, bottom to top.
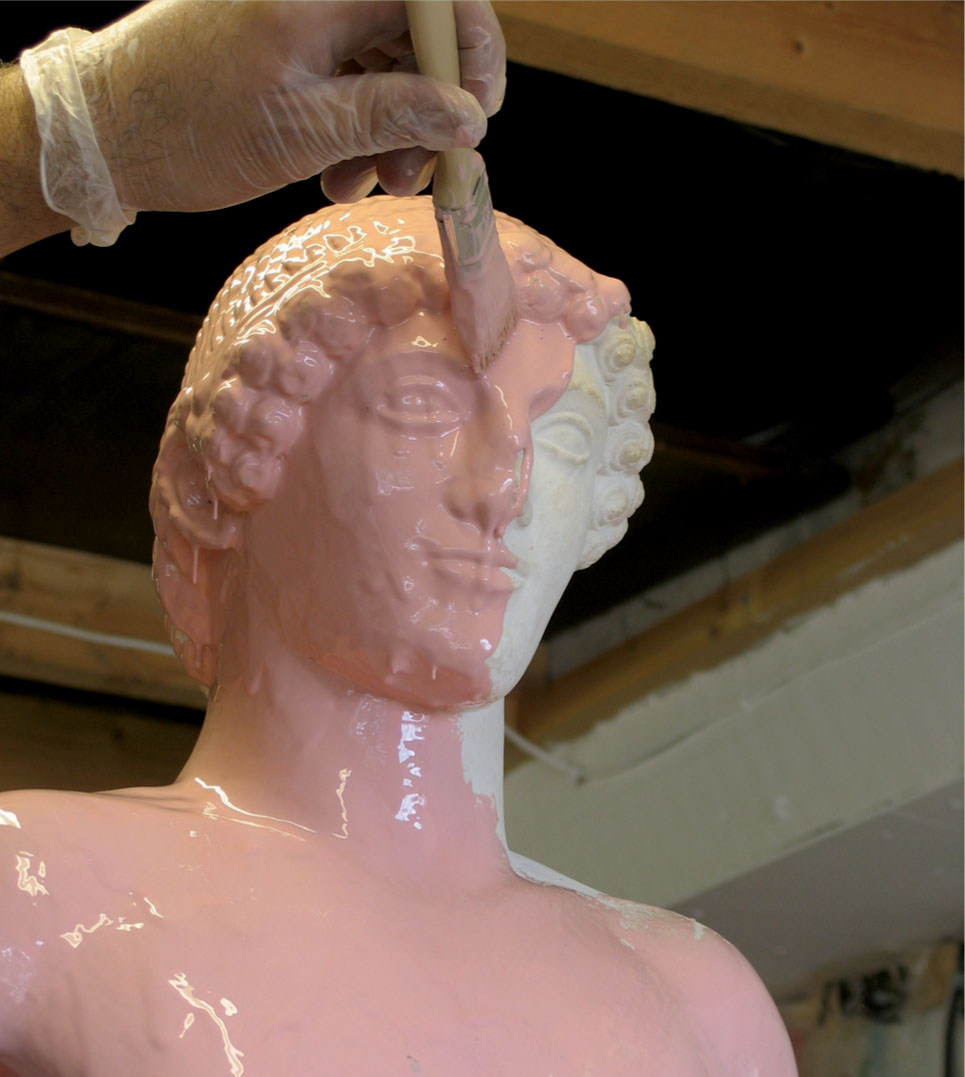
The first coat will necessarily be thin and capture the detail of the original.
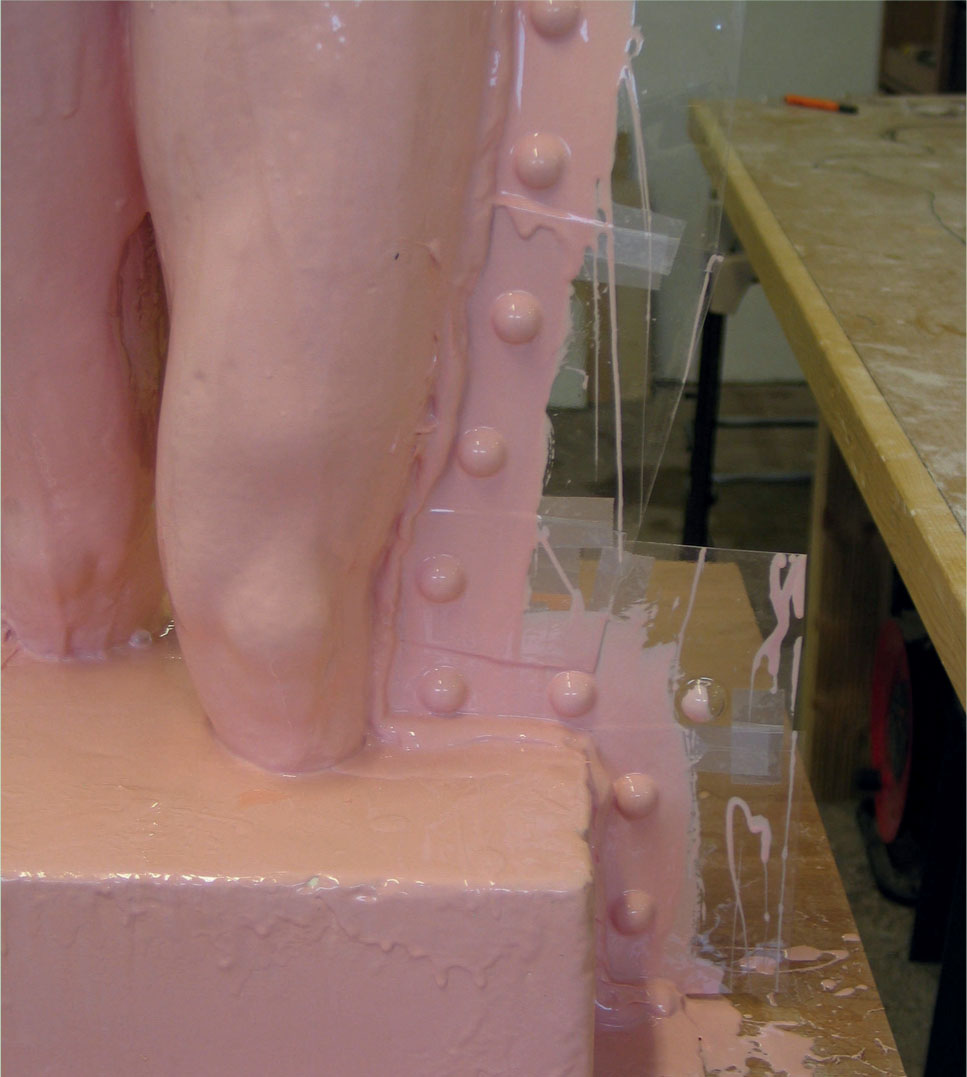
A thixotropic bead of silicone is piped along the division line of the mould.

Plas-ti-shim is set into the bead of silicone while still unset. Tape is used to join overlapping pieces.

The Plas-ti-shim wall is complete.
A layer of silicone is applied over the shim and bead.
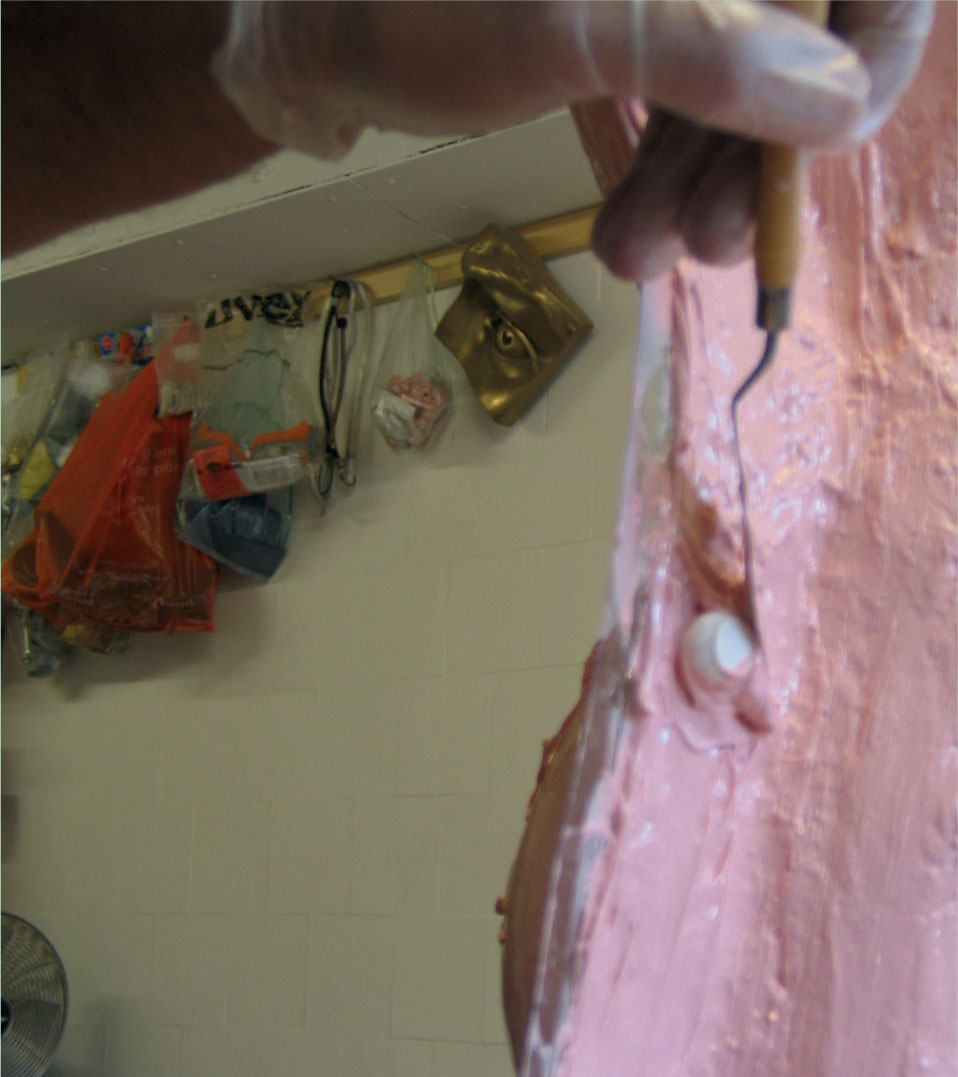
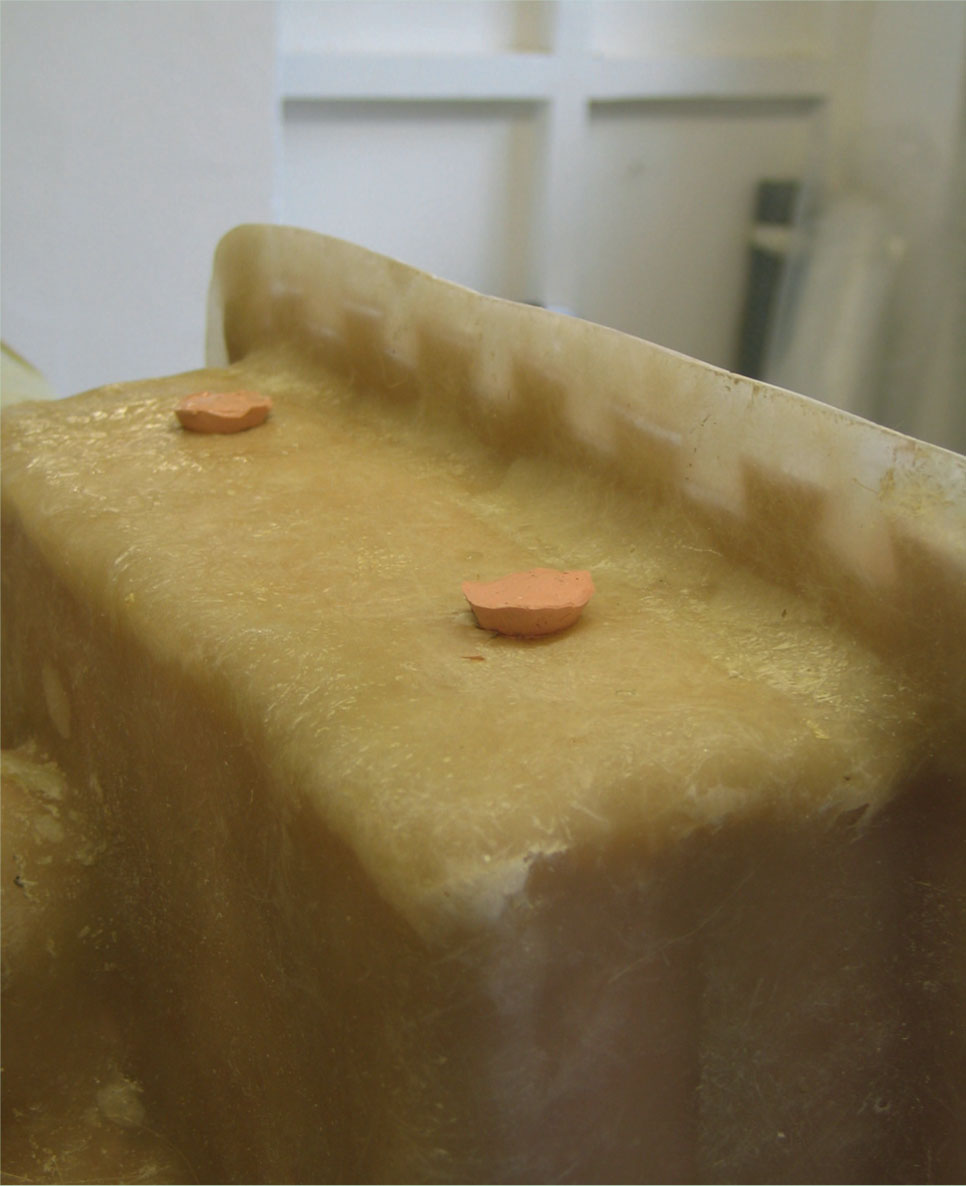
Thixotropic silicone is applied around the set Little Buddy.
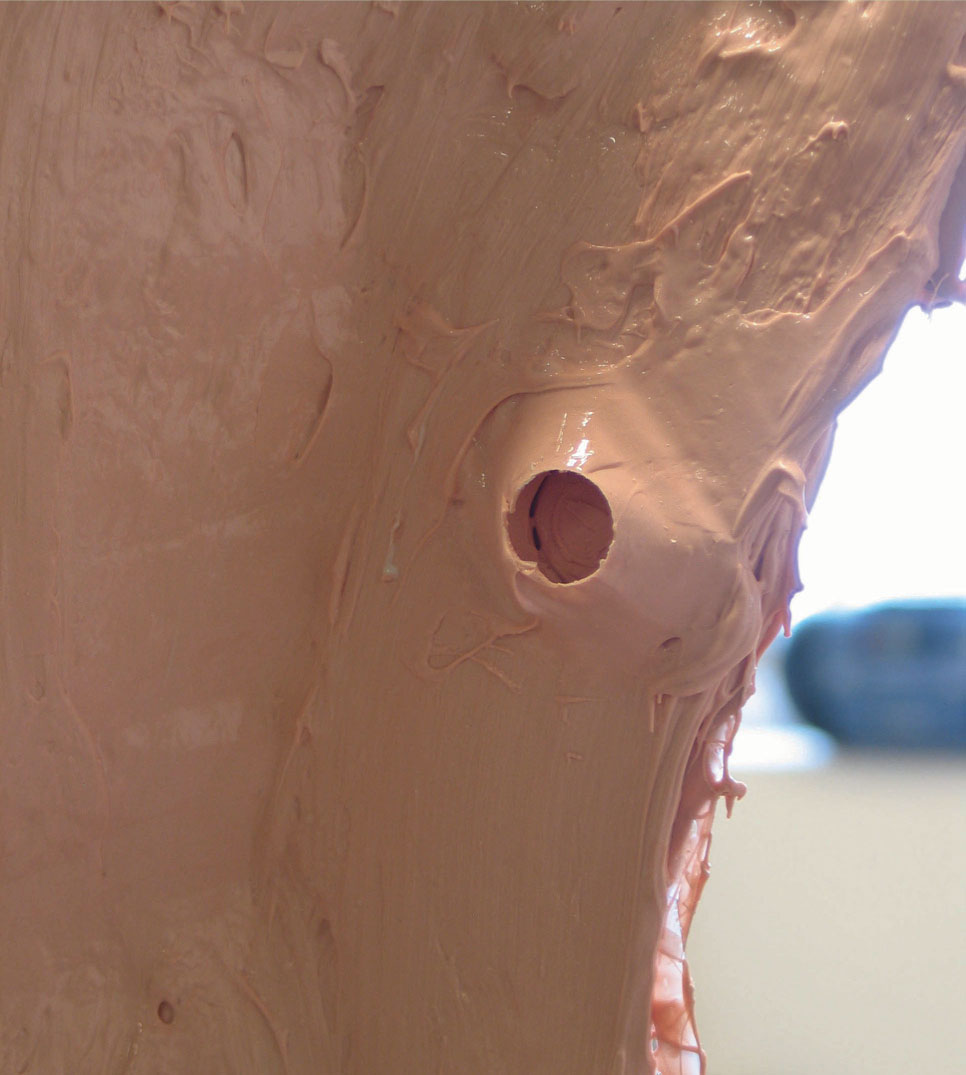
Little Buddies are removed to produce registration holes into which the mould case can locate.
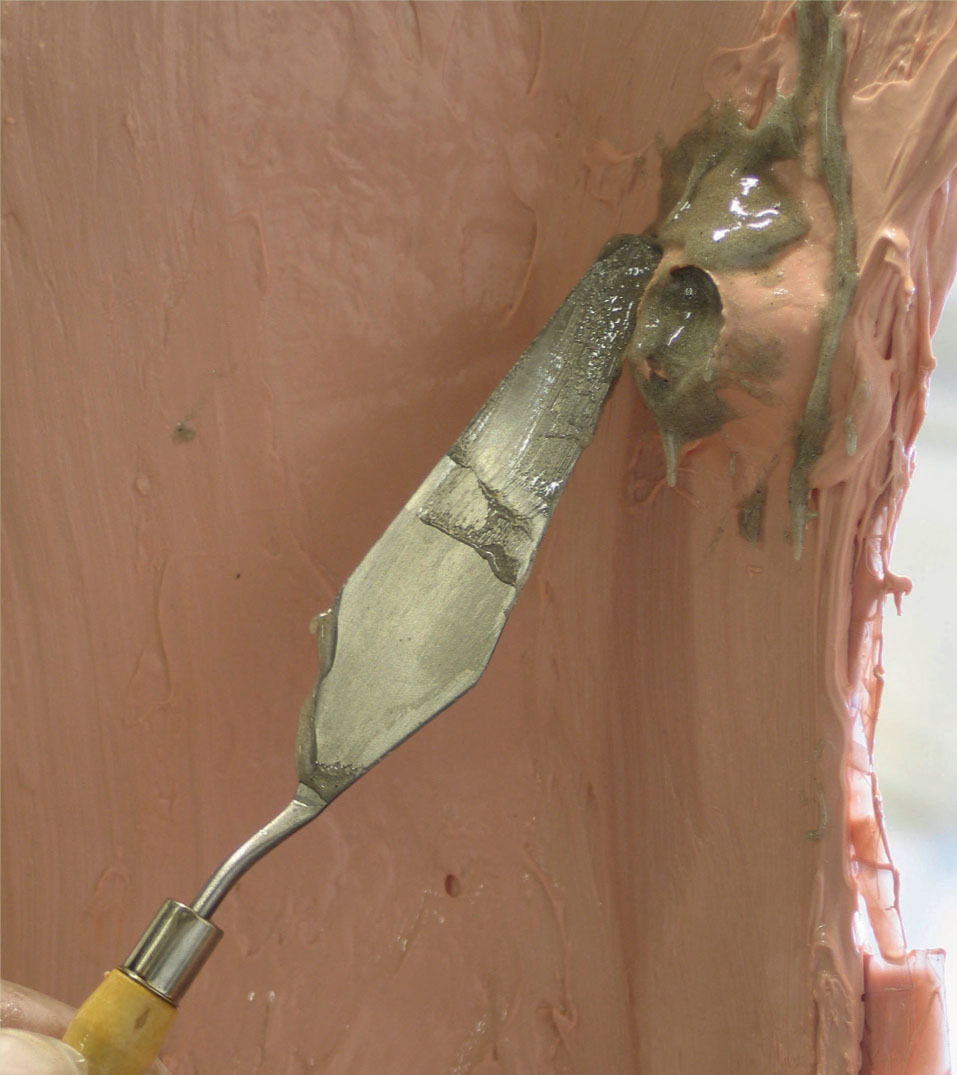
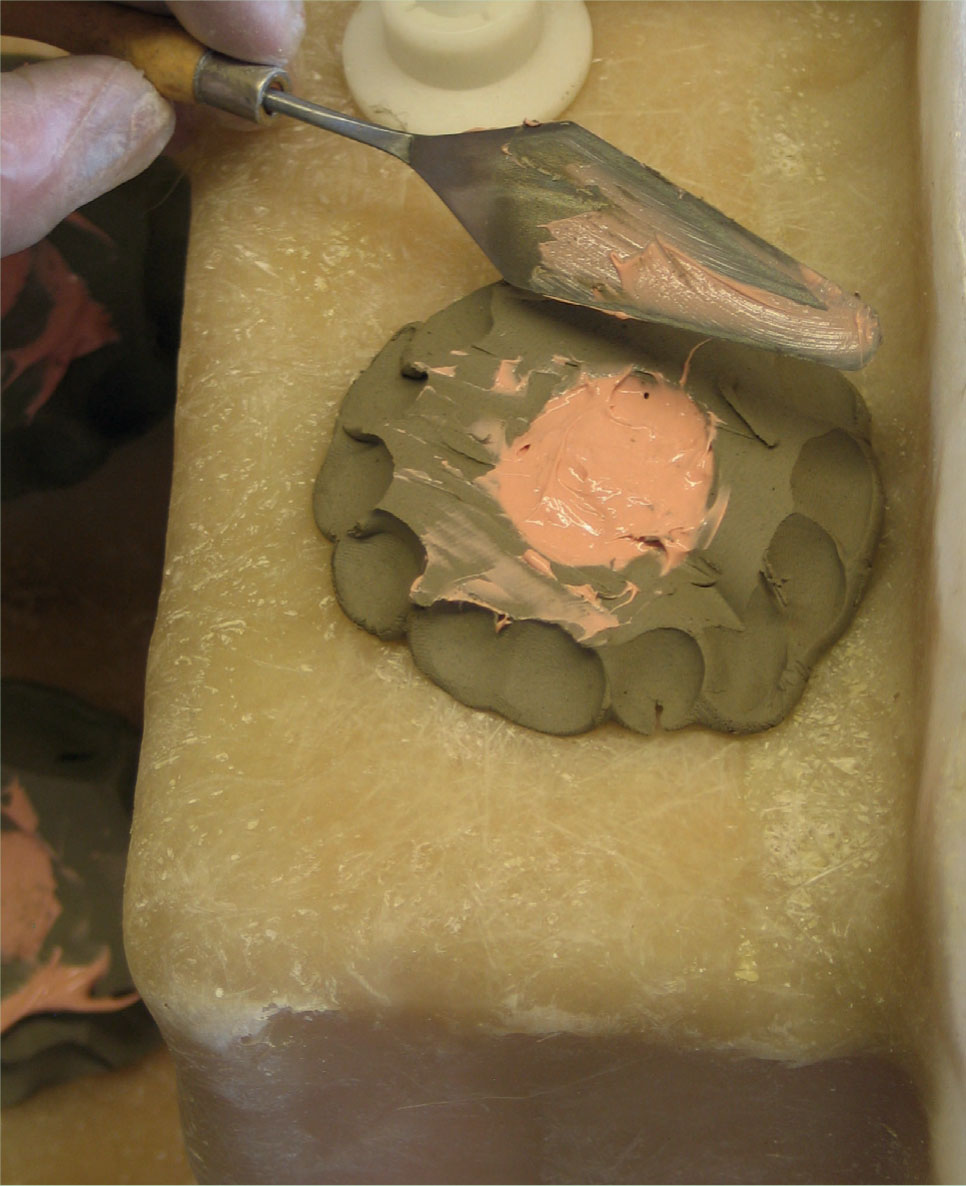
The Little Buddy holes are filled with thixotropic polyester resin.
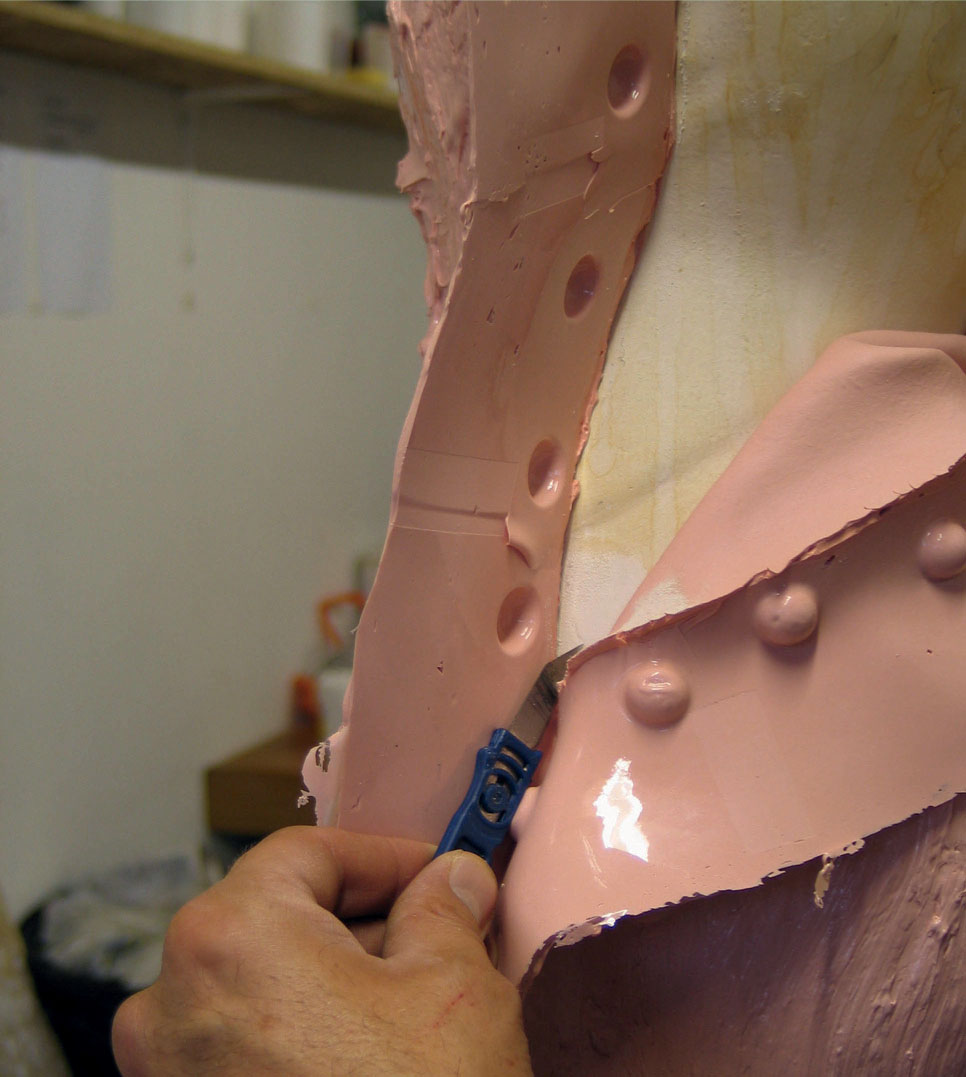
The last millimetre of silicone between the two silicone flanges is cut to separate the two mould pieces.

Reinforcing metal splints for added strength are built into the case.
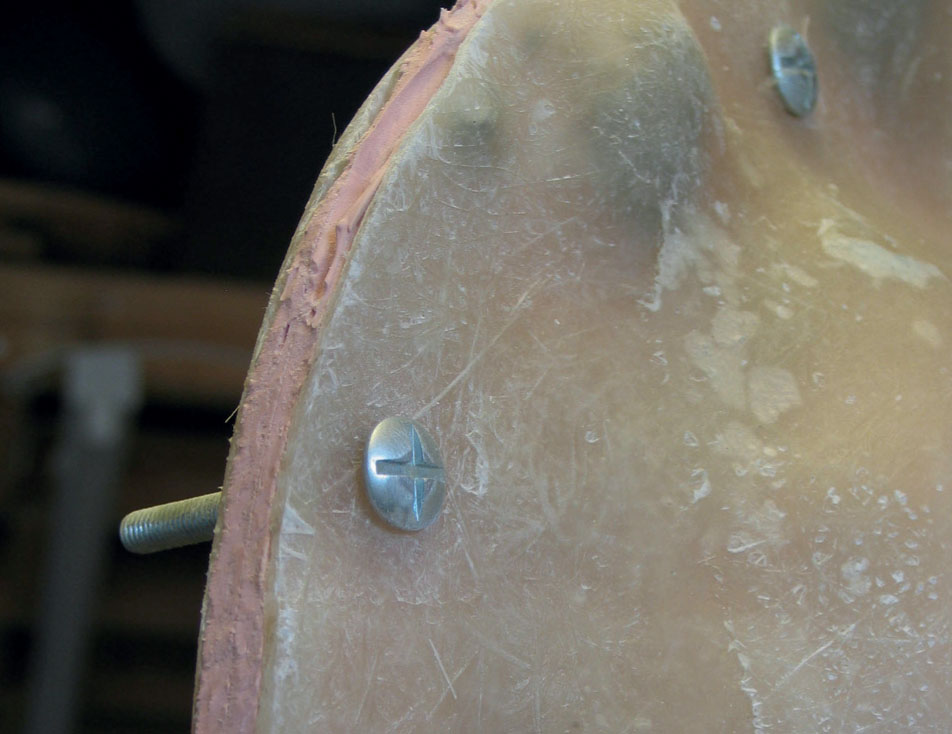
The mould is trimmed, sanded and nuts and bolts are set to secure the mould pieces together.
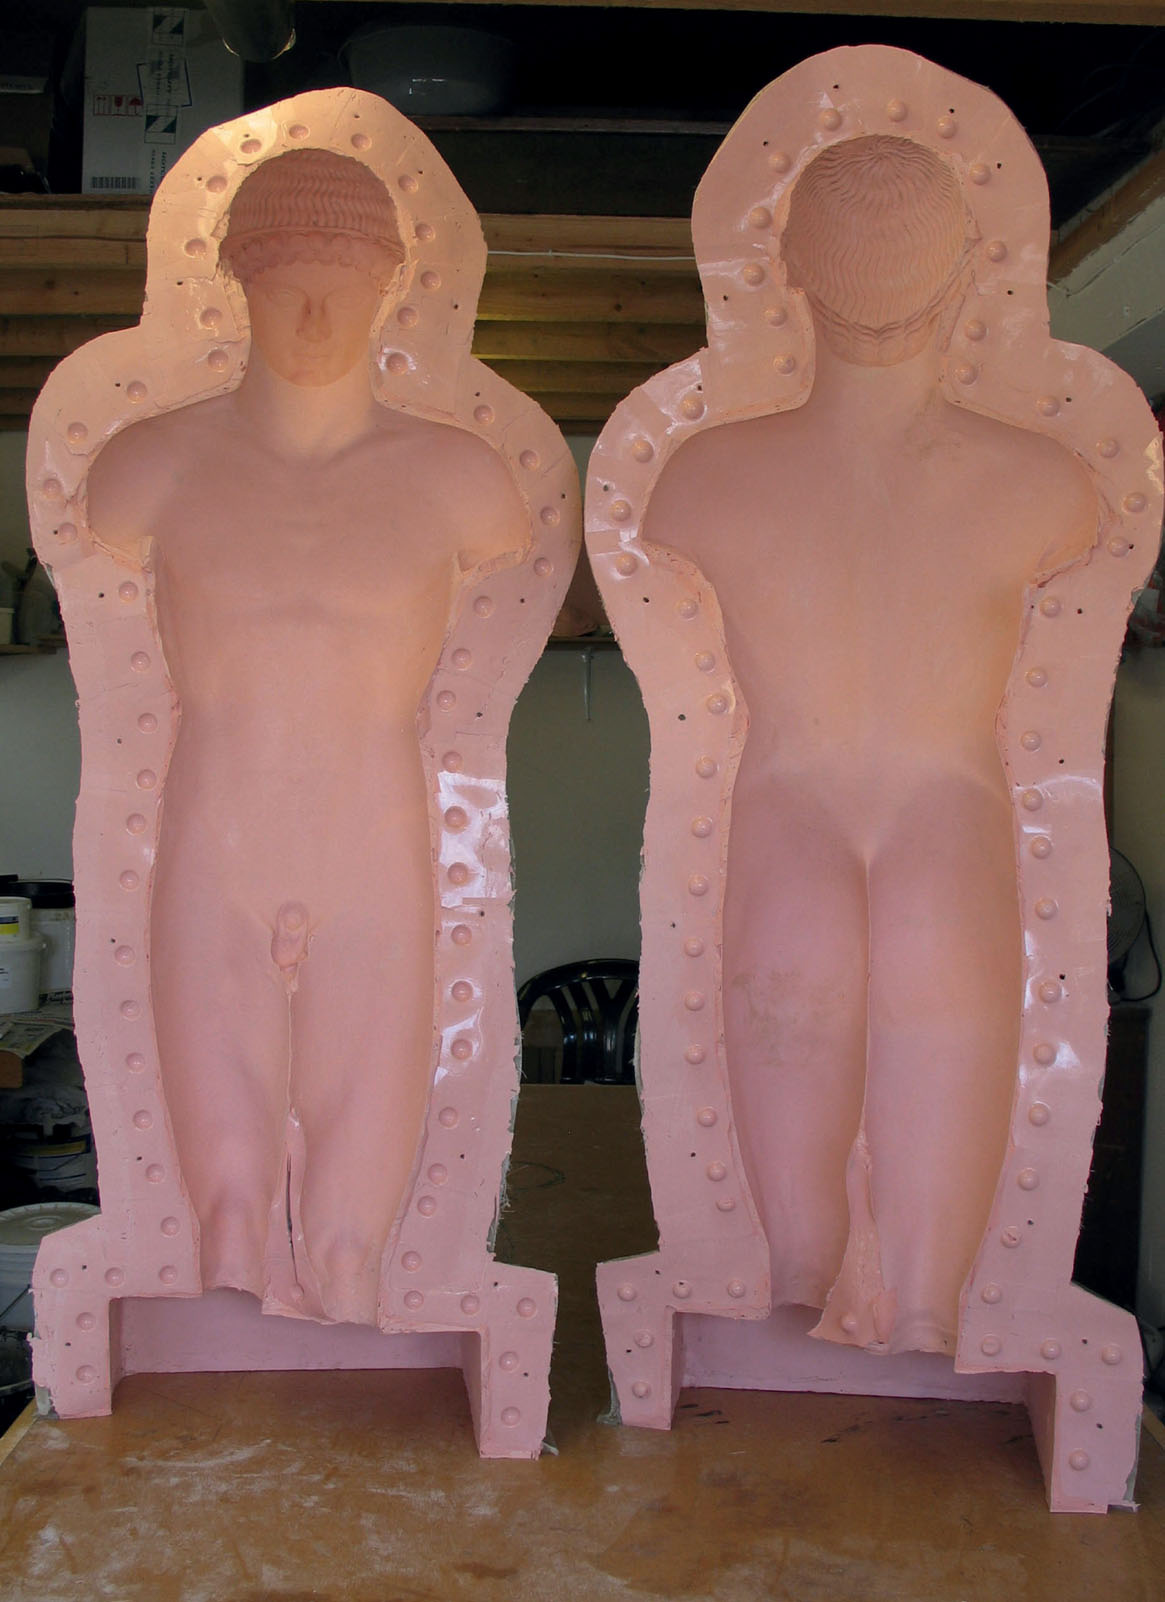
The two-piece silicone rubber and fibreglass case mould.
APPLICATION OF THE PLAS-TI-SHIM WALLS
Once the division beads have been created the Plas-ti-shim walls need to be applied while the silicone is still wet.
1. Cut the Plas-ti-shim wall with scissors approximately to fit the profiled contours of the division lines. Long flat sections of Plas-ti-shim can be cut in one piece. Tight curves can be made up of small overlapped sections. The Plas-ti-shim can be bent along curves of division lines.
2. Push the shim into the bead of silicone as far as it will go, working along the lines and overlapping adjoining pieces by approximately 20mm.
3. Magic tape should be applied neatly to join sections. When cutting the shim enough room should be left between the registration bubbles to allow for the tape.
4. Tape one side as you go and then tape the other side when complete.
5. Allow the silicone bead with the embedded Plas-ti-shim wall to set thoroughly.
FLANGES
Once the bead has set it will hold the Plas-ti-shim wall in place but it needs to be reinforced to secure it thoroughly before the rest of the mould can be built up with thixotropic silicone. This will create the flanges around all the mould pieces.
1. Mix a batch of silicone and catalyst and coat evenly over both sides of the Plas-ti-shim wall and silicone bead to create the mould flange.
2. Allow to set thoroughly.
THE THIXOTROPIC COAT
This layer will build up the silicone to the full thickness required.
1. Apply thixotropic addition silicone on top of the existing silicone over the surface of the mould, up to approx 5–8mm thick.
2. Cover both sides of the shim walls as well.
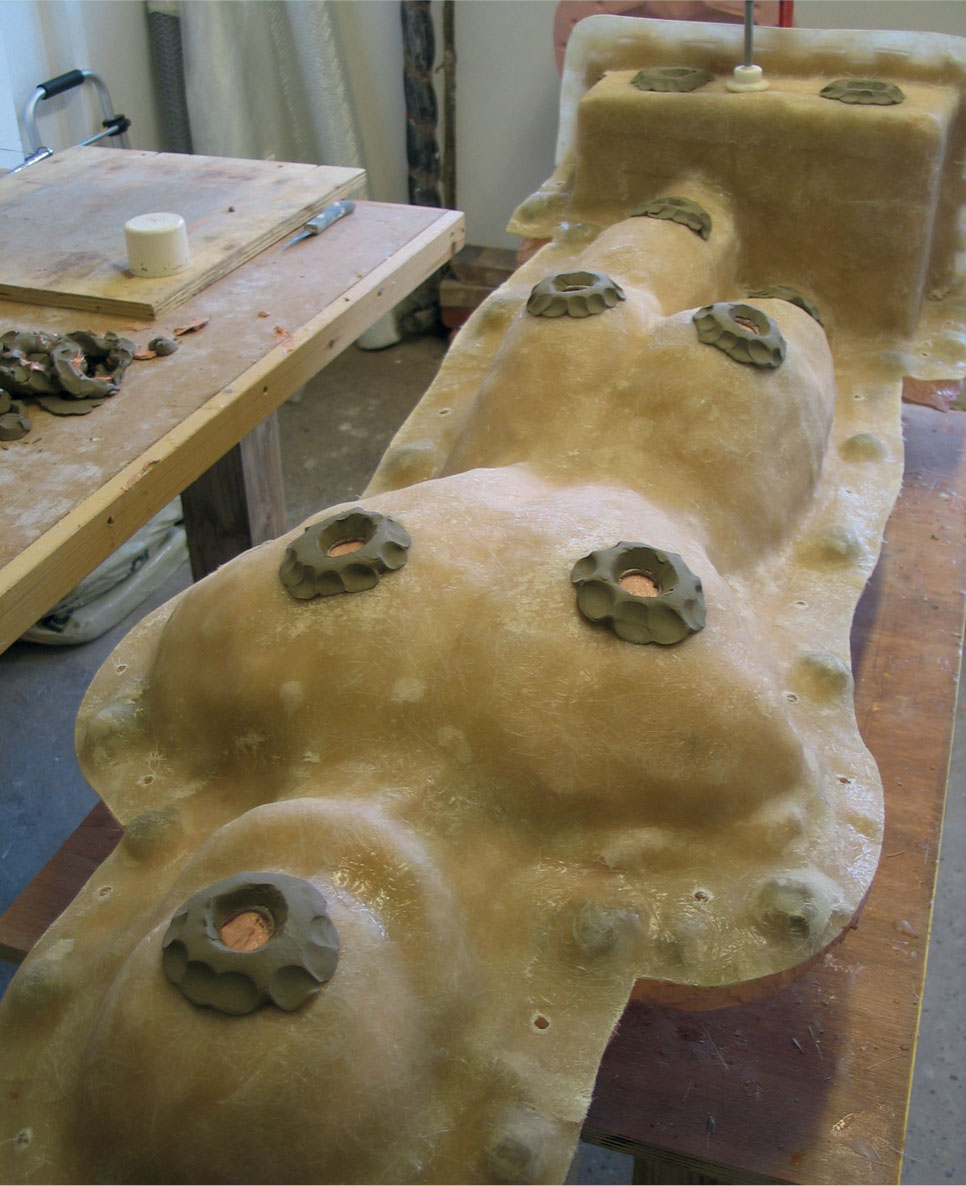
SET LITTLE BUDDIES
The Little Buddies provide a method of registering and securing the silicone into the case of the mould.
1. While the thixotropic coat is still wet, gently place Little Buddies at 100mm intervals just above the registration bubbles along the flange, and push them a little way into the silicone.
2. With another batch of thixotropic silicone completely cover the Little Buddies, building up a thick collar around them and a thin layer over the top.
3. Pre-made blocks of set silicone can be placed over the body of the silicone to register into the mould case. Case registration ‘buttons’ can be made at a later stage if necessary when the mould is complete (see end of chapter).
4. Allow the silicone to set thoroughly.
REMOVE LITTLE BUDDIES
1. With a craft knife carefully trim off the thin skin of silicone covering the Little Buddies.
2. Remove the Little Buddies.
3. Make up a thixotropic mix of the case-making material (plaster, polyester resin or Jesmonite) and pack out the void left by the Little Buddies. This will create a registration ‘button’ that will locate and hold the silicone mould pieces into the case.
CASE MAKING
A rigid case needs to be created to support the silicone rubber. Case pieces should extend out to the edges of the mould wall flanges on either side, sandwiching the silicone between them.
1. Complete the case making in your chosen material as normal, covering all areas with silicone right out to the edge of the mould flanges.
2. Allow to set thoroughly.
MOULD TRIMMING
Before removing the mould from the original it needs to be trimmed for ease of handling when in use.
1. Trim all the mould flange edges by approximately 10mm until it is back to a good edge.
2. Sand the case body to make it safe to handle.
3. Drill 6.5mm holes at 100mm intervals around the mould flanges, approximately 40mm out from the original inside. These will accommodate nuts and bolts to secure the mould pieces together; M6 roofing bolts and wing nuts are good for this. It is important to drill the holes before removing the mould from the original to ensure the accurate relocation of the mould pieces.
SEPARATING SILICONE MOULD PIECES
1. Remove all case pieces. It may be necessary to introduce a strong-bladed knife between the case and the silicone flanges to ease the case pieces away.
2. Carefully fold open both parts of the silicone flange and cut through the last millimetre of silicone with a craft knife. It is important to do this as neatly as possible in one even cut rather than with a sawing action to ensure as tight a seam as possible.
3. With all the mould and case pieces separated, wash, dry and reassemble them ready for use.
Note: Nuts and bolts should be secured finger-firm for storage and tightened in opposite pairs a little at a time until tight for casting.
CREATING CASE REGISTRATION BUTTONS AFTER MOULD PRODUCTION
If the silicone rubber of a mould needs more registration into the case it is possible to make registration buttons after mould production. Sometimes this is necessary if the silicone rubber is not holding firmly into the case. The following explains how to create silicone buttons to anchor the mould.
1. Drill 20mm holes at the points on the case where buttons are required.
2. Sand inside the edges of the holes.
3. Register the silicone rubber back onto the original.
4. Register the case back onto the silicone.
5. Create a collar of clay, 20mm high, around the holes. The collar should be slightly narrower at the base than the top.
6. Clean any release agent off the exposed surface of the silicone within the collar.
7. Pour silicone into the collar to the top.
8. Allow to set.
9. Remove clay collar.

A hole is drilled through the case and the clay collar fitted around it
There are several strategic button points across the case surface.
The clay collar is filled with silicone.
The collars are removed, revealing the set buttons that anchor the silicone into the case.